By: Dattatrey Sindol | Comments (7) | Related: > Microsoft Excel Integration
Problem
I have been hearing about a new tool from Microsoft called Data Explorer. I would like to know what this tool is all about, how to install it, and how to get started with it.
Solution
Data Explorer is an add-in for Microsoft Excel and is used for data access and data discovery by Business Intelligence (BI) Professionals and Information workers, and improves the overall experience of these users/professionals.
Data Explorer allows users to do the following:
- Identify and extract the data from various different sources like Relational Databases, Files, OData Feeds (Open Data Protocol), Web Pages, Facebook, Windows Azure Marketplace, Hadoop Distributed File System (HDFS), SharePoint List, and Active Directory etc.
- Combine data from multiple data sources and prepare it for further analysis and reporting.
- Import the data into Excel and work with it using tools like Excel, PowerPivot, and Power View etc.
In this tip, we will cover the following:
- Installing the Data Explorer Add-in
- Different Data Sources Supported by Data Explorer
- Extracting data from Facebook
- Applying basic transformations
- Creating a Simple Report
Installing Data Explorer Add-in
Let's first install the Data Explorer Add-in for Excel 2010. This add-in is currently in Preview, so we will be installing the Preview Version which is available for the general public. Preview is available for Excel 2010 and Excel 2013.
For this demonstration, we will install the Excel 2010 add-in. Follow the below steps to install the Data Explorer Add-in.
- Go to Download "Data Explorer" and take a look at the pre-requisites.
- Go to Microsoft "Data Explorer" Preview for Excel and click on the appropriate download links depending upon the version of Office/Excel installed on your computer (32-bit/64-bit) and save the executable file on your computer. Make sure to also take a look at the Release Notes to know more about the features, limitations, known issues, and other details pertaining to this release of Data Explorer.
- Close all the open instances of Excel on your computer (make sure to save your work before closing).
- Double-click on the executable (.msi) file, click on Run, and install the add-in.
- Click Next on the welcome dialog
- Read through the license agreement and accept it and click Next
- Select the Installation Directory/Location and click Next
- Click on Install on the Ready to Install Microsoft "Data Explorer" Preview for Excel dialog
- Click Finish on the Completing the Installation Wizard dialog
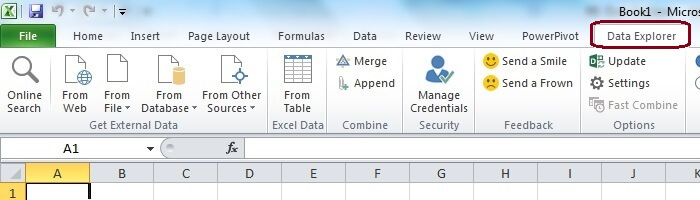
- Now open Microsoft Excel and notice that there is a new "Data Explorer" tab added to the Excel Ribbon as shown below.
Different Data Sources Supported by Data Explorer
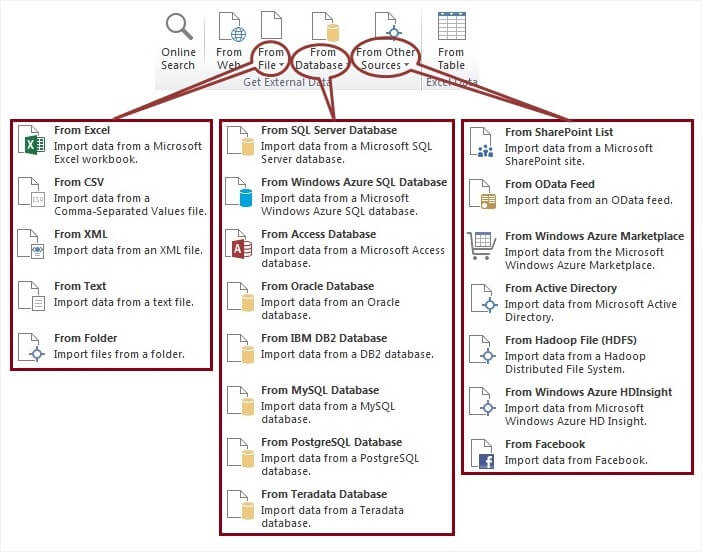
Below is a snapshot of various sources supported by Data Explorer.
Extracting Data from Facebook
Let's extract data from Facebook. For this demonstration, let's extract the posts by MSSQLTips on its Facebook Page.
- Go to MSSQLTips Facebook Page.
- Copy the serial number at the end, which in this case is "155636491141708". For pages where this has been modified, we need to take the last word like for Datta's Ramblings Facebook Page, we need to take the last word, which is "DattasRamblings".
- Open Microsoft Excel, go to "Data Explorer" tab, click on "From Other Sources" button, and select "From Facebook".
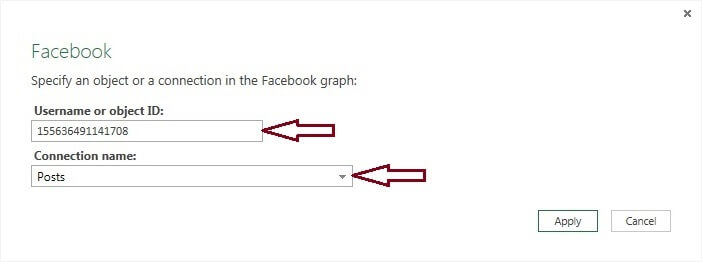
- In the Facebook dialog box, enter Serial Number copied previously ("155636491141708") into the "Username or object ID" text box and select "Posts" from the "Connection name" drop down, and click Apply.
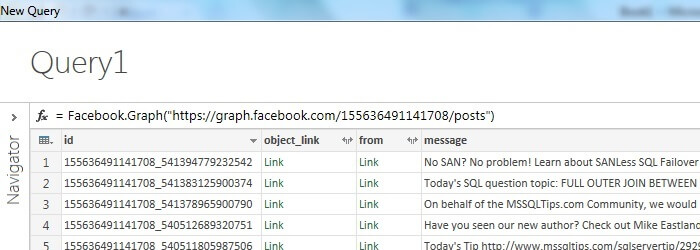
- This will open up a "New Query" window with data from Facebook loaded into the window.
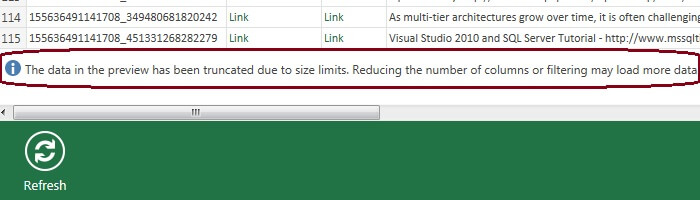
- Notice that, due to limitations of the preview version of the Data Explorer, we get a message at the bottom of the "New Query" window, which reads "The data in the preview has been truncated due to size limits. Reducing the number of columns or filtering may load more data." as shown below.
Applying Basic Transformations
Next let's apply some basic transformations, similar to Substring in T-SQL or Derived Columns in SSIS. For the sake of this demonstration, let's derive the Post Year and Post Month columns from the Posted Date column ("created_time" column in the extract").
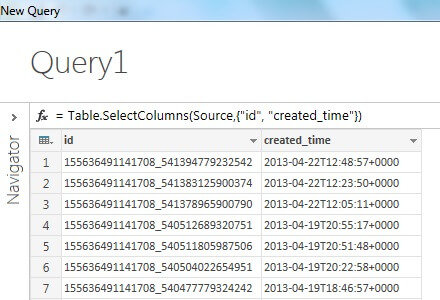
- At the end of previous section, we can see that, we get the message, description etc. columns as part of the extract. Click on "id", holding the control key, click on "created_time". Right click with this selection and select "Hide Other Columns" from the context menu. This will remove/hide all the other columns except "Id" and the "created_time" from the Data Explorer Query Window. At the end of this step, our "New Query" window should look as shown below.
- After the above step, when we scroll down, we can see that we have more records loaded into the window, which is due to the fact that we have less columns in our query/window as suggested by the message in the previous section.
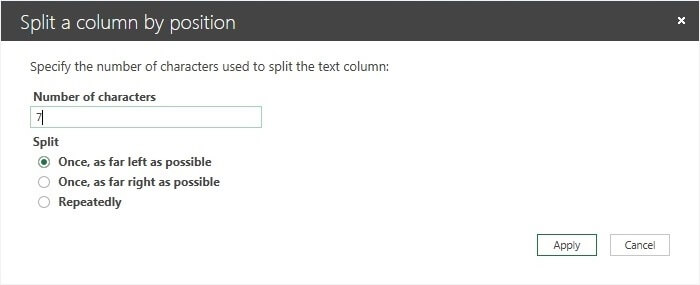
- Right click on the "created_time" column, select "Split Column" followed by "By Number of Characters..." from the context menu.
- In the "Split a column by position" dialog, enter "7" in the "Number of characters" textbox and choose the "Once, as far left as possible" radio button under the "Split" section, and click on Apply.
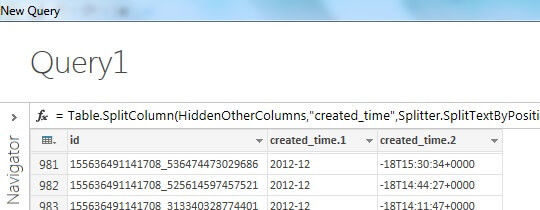
- After the previous step, the "created_time" column is split into two columns "created_time.1" and "created_time.2".
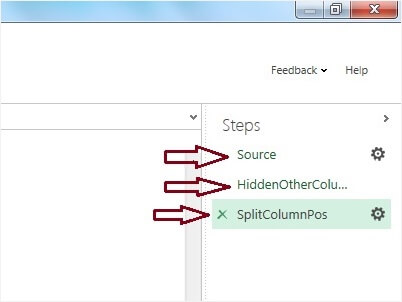
- Also notice that, each of our actions adds a step in the right side Steps pane as shown below. If we want to revert a particular step, we can use this pane.
- Similarly, notice that, as we perform changes to the columns, the formula in the formula bar (Represented by "fx" like in Excel) keeps on getting updated.
- Now, remove the "created_time.2" column from the query. Right-clicking on "created_time.2" column and select Hide from context menu.
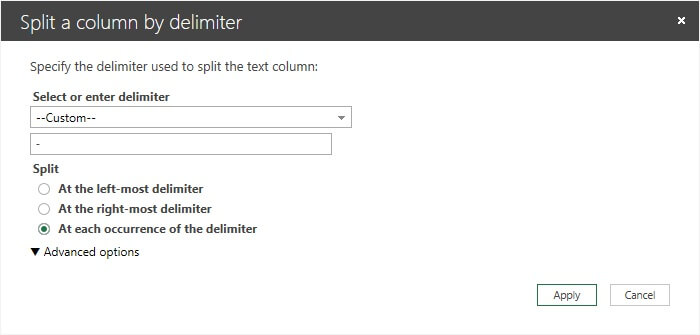
- Next let's split "created_time.1" column and separate Year and Month parts. Right-click on "created_time.1" column and select "Split Column" followed by "By Delimiter..." from the context menu. In the "Split a column by delimiter" dialog, set the "Select or enter a delimiter" drop-down to "Custom", enter "-" (Hyphen) in the next textbox, and choose "At each occurrence of the delimiter" under Split section.
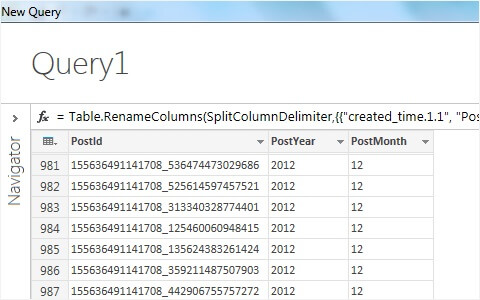
- After the previous step, "created_time.1" column is split into "created_time.1.1" and "created_time.1.2" containing Year and Month respectively. Right-click on the columns and rename "id" to "PostId", "created_time.1.1" to "PostYear", and "created_time.1.2" to "PostMonth". At the end of this step, our query window will look as shown below.
Creating a Simple Report
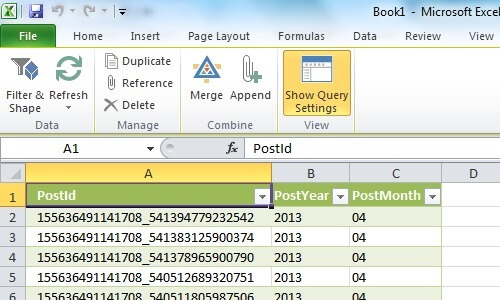
In this last section of the tip, let's create a simple chart/report in Excel. In the query window, click on "Done" at the end of last step of previous section, and that will load the data into an Excel Sheet as shown below.
Now go to Insert tab in Excel ribbon and insert a Pivot Chart. After the Pivot Table and Chart are added to Excel, plot Count of PostId against PostYear and PostMonth by dropping the appropriate fields into the appropriate areas. The completed chart looks as shown below.

As we can see, the data from social media sites like Facebook can be extracted, transformed, and loaded into Excel for Reporting Purposes. This extraction can be done within a matter minutes with a few simple steps as demonstrated above. From this demonstration, we can clearly see that this tool greatly helps in accessing and preparing the data for further analysis and reporting.
Note: This demonstration is based on the preview version of Data Explorer for Excel. Features in the final release might vary from what has been demonstrated above.
Next Steps
- Install Data Explorer Add-In for Excel and explore the options demonstrated in this tip.
- Check out other tips on Microsoft Excel Integration.
- Check out my previous tips


About the author
 Dattatrey Sindol has 8+ years of experience working with SQL Server BI, Power BI, Microsoft Azure, Azure HDInsight and more.
This author pledges the content of this article is based on professional experience and not AI generated.
View all my tips
