By: Daniel Farina | Comments (2) | Related: More > Integration Services Development
Problem
In the previous tips of this series (Tip 1 and Tip 2) we have learned how to deal with mainframe data using a Script Component Transformation of SQL Server Integration Services. But that method could be tedious if you have to deal with many files or files with too many columns. In this tip I will show you what could be a life saver.
Solution
In the previous tips of this series (Tip 1 and Tip 2) about importing mainframe data I showed you how to deal with mainframe files by using a Script Component Transformation, but there is another way to deal with mainframe sources if you can afford the license costs: Microsoft Host Integration Server. For those of you who didn’t know, Mainframe computers are also referred as Hosts. This product allows direct access to mainframes using SNA or TCP/IP protocols. Amongst its features is a .NET data provider that can be used as a host file source, but its usage is a bit trickier. In this tip, I will explain how to take advantage of this feature.
Setting up the Test Environment
First we are going to create a sample database to load a host file.
USE [master]
GO

CREATE DATABASE [SampleDB]
 CONTAINMENT = NONE
 ON PRIMARY
( NAME = N'SampleDB_file1',
   FILENAME = N'E:\MSSQL\SampleDB_1.mdf',
   SIZE = 128MB ,
   MAXSIZE = UNLIMITED,
   FILEGROWTH = 64MB)
 LOG ON
( NAME = N'SampleDB_log_file1',
    FILENAME = N'E:\MSSQL\SampleDB_1.ldf',
    SIZE = 64MB,
    MAXSIZE = 2048GB,
    FILEGROWTH = 32MB)
GO
The next COBOL Copybook defines a Customer Record. You should copy its content into a text file because we will need this in the next steps. Also you can download this file and the sample text file from this link.
      **----------------------------------------------
      **--  CUSTOMERS DATA
      **----------------------------------------------
       01  CUSTOMER-RECORD.
           05 CUSTOMERNAME                      PIC X(50).
           05 CUSTOMERADDRESS                   PIC X(50).
           05 CUSTOMERCATEGORY                  PIC 9 COMP-3.
           05 CUSTOMERBALANCE                   PIC 9(8)V99 COMP-3.
This is a script that will create a table to load the file.
USE SampleDB
GO

IF OBJECT_ID('Customers','U') IS NOT NULL
BEGIN
 DROP TABLE Customers
END
GO

CREATE TABLE Customers
(
   CustomerID   INT IDENTITY (1, 1) NOT NULL,
   CustomerName   VARCHAR (50) NOT NULL,
   CustomerAddress  VARCHAR (50) NOT NULL,
   CustomerCategory  TINYINT  NOT NULL,
   CustomerBalance  DECIMAL(10,2) NOT NULL
   PRIMARY KEY CLUSTERED (CustomerID)
)
The .Net Host File Project
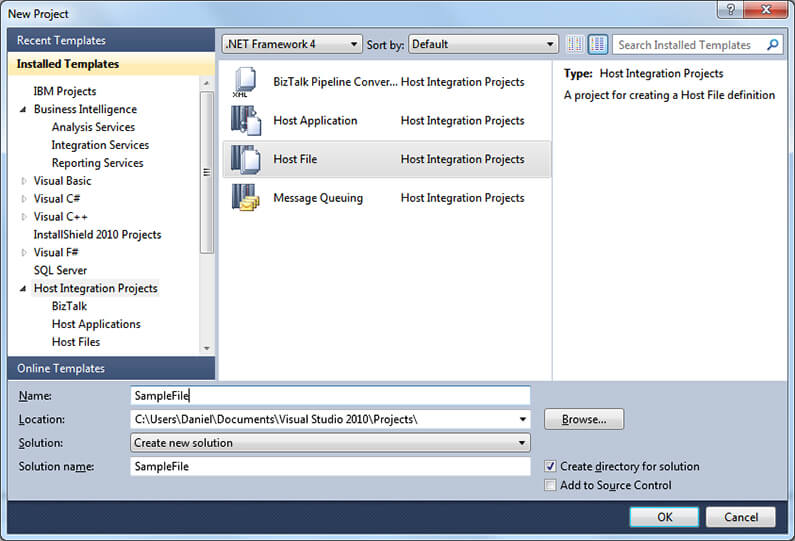
In order to use the .NET Host File Provider we need to create a Host File Project. This will convert the COBOL Copybook into a Host Integration Definition XML file (*.hidx) that will serve as the metadata for the .NET Host File Provider. To do so, create a Visual Studio project like on the next image.
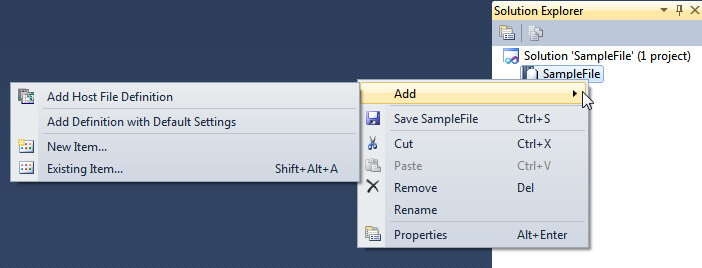
Next, on the Solution Explorer window right click on the solution’s file and select Add Host File Definition from the Contextual Menu.
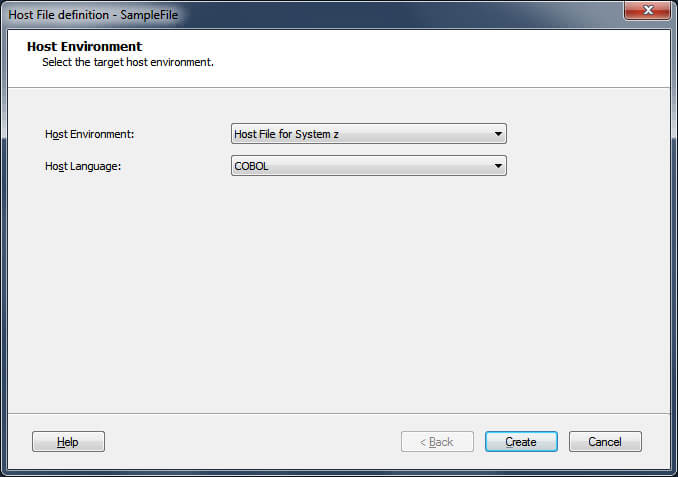
When the Host File Definition Wizard opens, you have to select System Z as the Host Environment and COBOL for Language and hit the Create button.
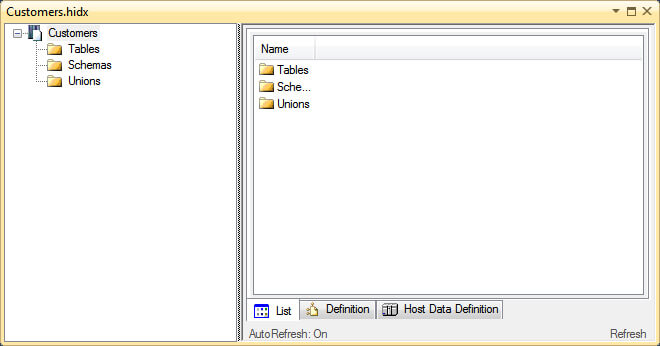
Finally we have the Host Integration Definition XML file (*.hidx) to import our COBOL Copybook. You will see an embedded window like the one on the next image showing a tree with three folders named Tables, Schemas and Unions respectively.
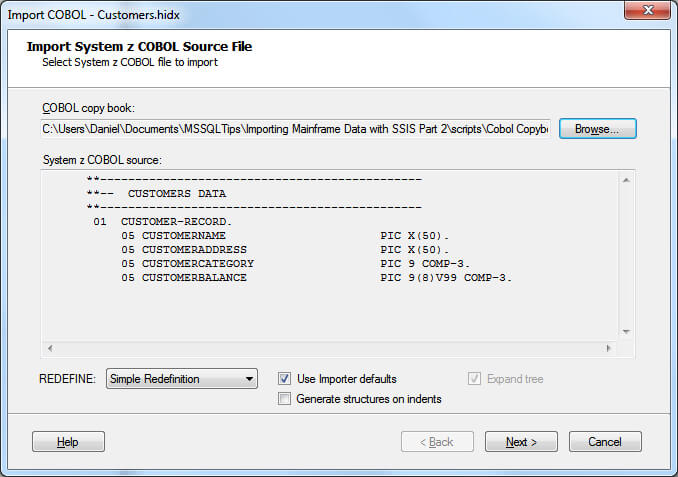
The next step is to right click into the root node and select Import Host Definition from the contextual menu.
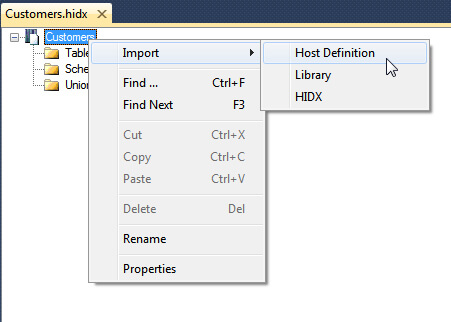
When the Import COBOL wizard opens it’s just a matter of clicking the Browse button to load our COBOL Copybook. For the purpose of this tip we are going to select Simple Redefinition from the REDEFINE combo box and check the Use Importer Defaults checkbox. When dealing with a real Mainframe file you need to clear the redefinitions and sets in order to use the .NET Host File Provider.
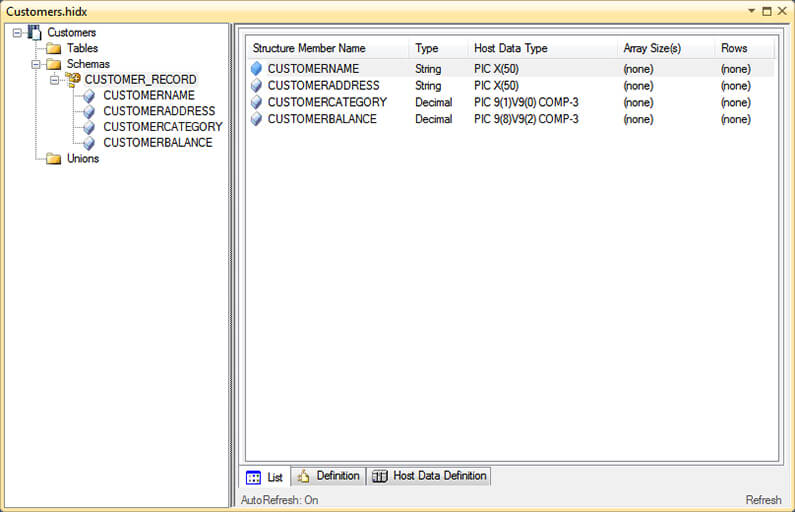
After successfully importing the COBOL copybook you will see that the Schemas folder has been loaded with the record information contained in the copybook.
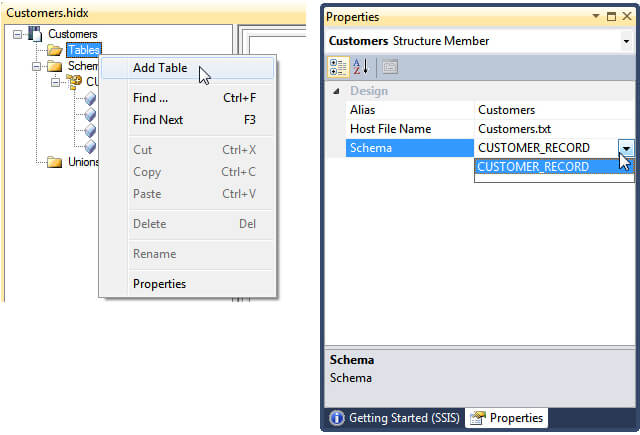
Now we are one step away to complete this Host Project that will allow us to use the .NET Host File Adapter. The remaining step is to add a table to the project. To do so, right click on the Tables folder and select Add Table from the contextual menu. Then go to the Properties window and setup the properties. The Alias Property will be the name of the table we will see when we configure the .NET Host File Adapter. On the Host File Name Property we need to specify the name of the file we are going to import. This is something to note, since we won’t be able to change this file name on the Integration Services project. For the Schema Property, it is only possible to select one of the available options on the dropdown list, in this case is CUSTOMER_RECORD.
The Integration Services Project for working with Host File Adapter
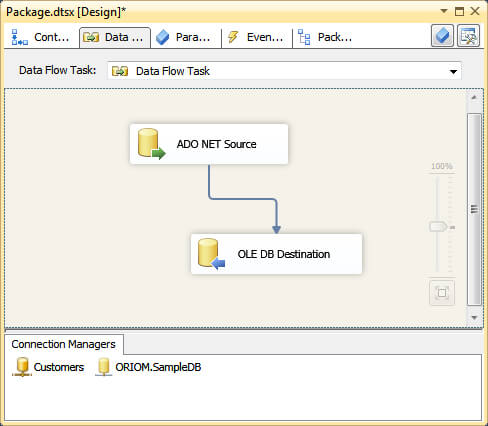
This is the part that we are more comfortable with. Compared with the SSIS projects of my previous tips in this series in terms of complexity, this is the simplest SSIS package. The only components that we will use are a Data Flow Task with an ADO.NET Source and any destination you want, in my case I choose to use an OLEDB Destination.
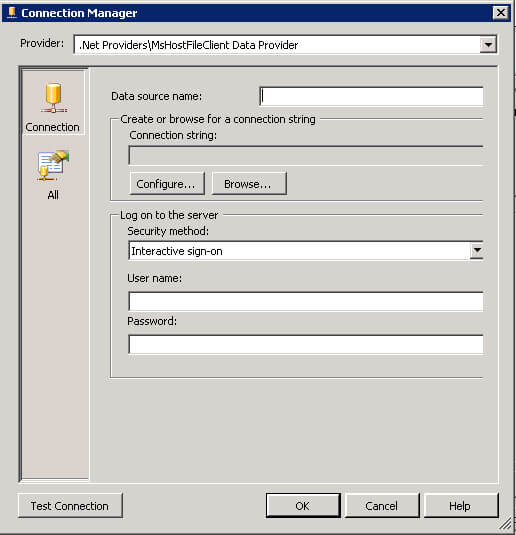
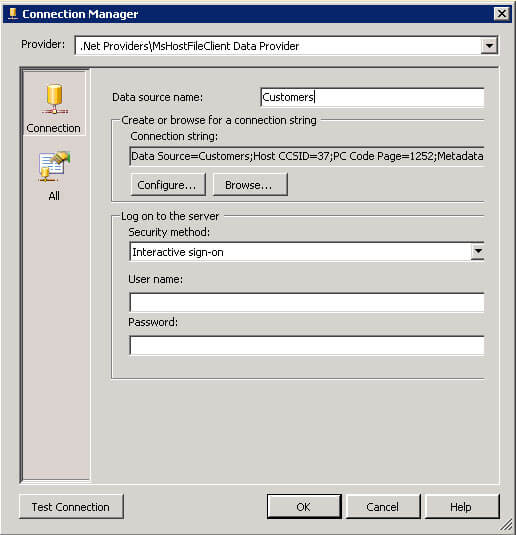
In order to setup the ADO.NET connection, select MsHostFileClient Data Provider from the Provider combo box and then click on the Configure button. Don’t try to assign a name to the connection now, if you do so you won’t be able to select a source platform on the Data Source Wizard other than an SNA connection.
If you followed the previous steps you will see the Data Source Wizard that prompts us for a source platform: Mainframe File System, AS/400 File System and Local File. We are going to select the last option and click next.

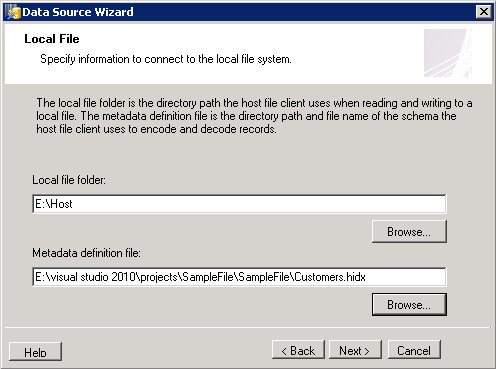
The next wizard window asks us about a local folder that contains the text file to be imported. Also asks for a Metadata Definition File, here is when we have to specify the Host Integration Definition XML file (*.HIDX) we created on the Host File Project.
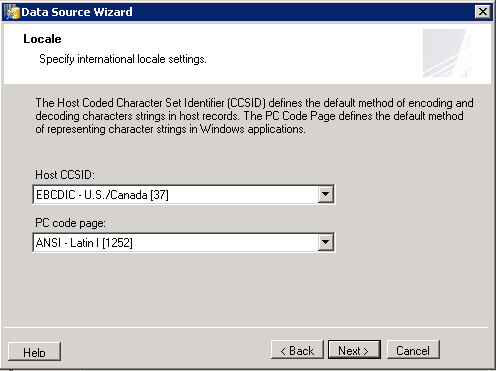
The last screen of the wizard contains two combo boxes to setup the host file encoding and the PC code page.
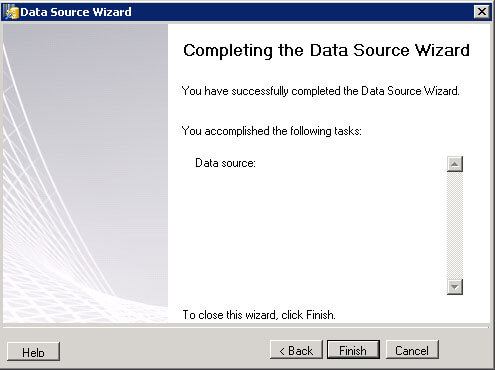
After those steps the wizard will show us the completion screen informing us that we have successfully configured the data source.
Now assign a name to this connection, for example "Customers" and hit the OK button.
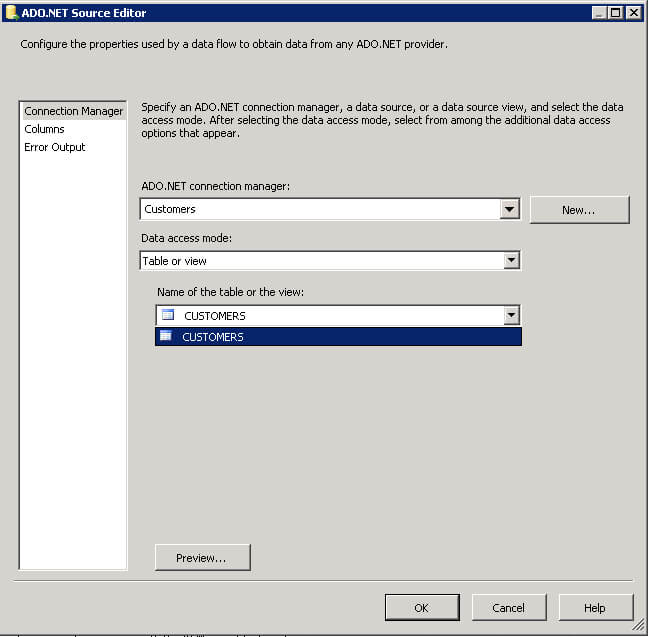
We are now ready to configure the ADO.NET source by selecting the connection manager we recently configured. As you can see on the next image we can access the file as a table, just like we do with any ADO.NET source.
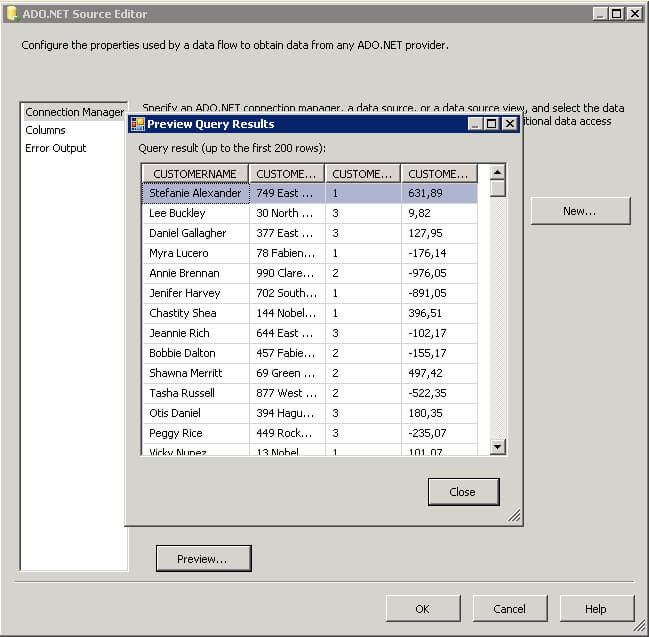
Even more amazing is the fact that we can click the preview button and get a view of the file’s content.
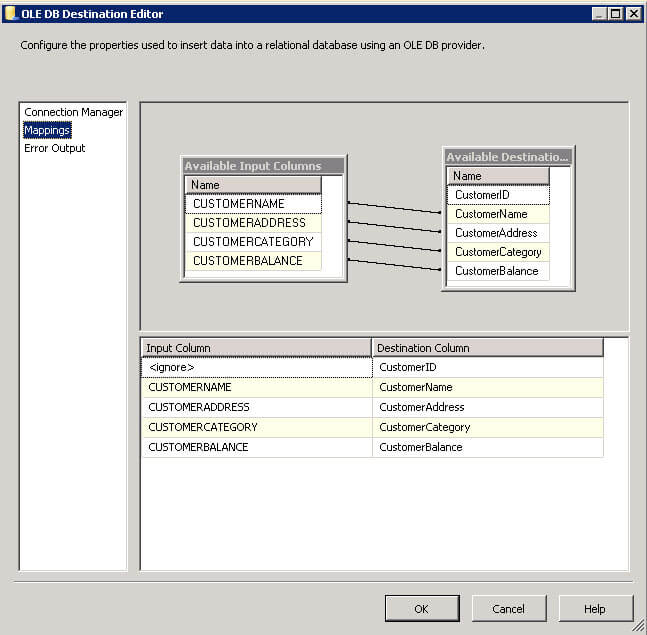
The last step is to map the source columns with the ones of the destination table.
Next Steps
- Download the evaluation version of Host Integration Server 2013 here.
- You can download the SSIS package and the sample text file used for this tip here.
- Read my previous tip about Importing Mainframe Data with SQL Server Integration Services and Importing Mainframe Data including Packed Numbers with SQL Server Integration Services.
- Browse Integration Services Data Flow Transformations Tips Category for more tips about Data Flow Transformations.
- If you want to enrich your SSIS packages and make them look more professional, take a look at Integration Services Best Practices Tips Category.
- Also check out SQL Server Business Intelligence Tips and Tricks.


About the author
 Daniel Farina was born in Buenos Aires, Argentina. Self-educated, since childhood he showed a passion for learning.
This author pledges the content of this article is based on professional experience and not AI generated.
View all my tips
