By: Edwin Sarmiento | Comments | Related: > Reporting Services Installation
Problem
In a previous tip on Configure Reporting Services to Run in SharePoint Integrated Mode, we've seen how we can integrate Reporting Services with SharePoint. However, a lot has changed between SQL Server 2008 and SQL Server 2012 with SP1 and even SQL Server 2014 as far as SharePoint integration is concerned. How can we install and configure Reporting Services 2012 SP1/2014 in SharePoint-Integrated Mode?
Solution
To continue this series on Installing and Configuring Reporting Services 2012 SP1/2014 in SharePoint-Integrated Mode, we will look at registering and starting the Reporting Services SharePoint service and creating a Reporting Services service application. In the previous tip in this series, we've installed Reporting Services in SharePoint-integrated mode, making all the necessary binaries available. Keep in mind that should you add more web and application servers in the existing farm for both high availability and load balancing, the add-in and the Reporting Services binaries need to be installed accordingly.
Registering and Starting the Reporting Services SharePoint Service
This section is necessary if the Reporting Services installation was performed prior to the creation of the SharePoint 2013 farm. This typically occurs when the database team installed the Reporting Services instance separate from the team responsible for SharePoint. As described in the previous tip, the application servers should have been joined to the SharePoint 2013 farm prior to installation of Reporting Services. If the application servers have already been joined to the SharePoint farm prior to installing Reporting Services, you can skip this section.
To register and start the Reporting Services SharePoint service
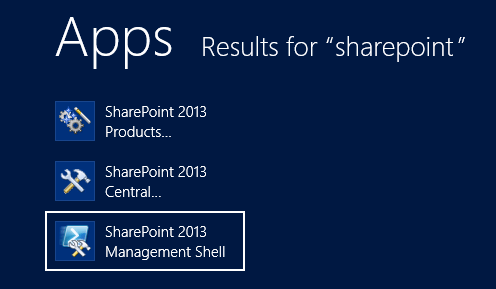
- Login to any of the SharePoint web or application servers. Open the SharePoint 2013 Management Shell. Be sure to run the command shell using the Run as Administrator option
- Run the following PowerShell command to install the Reporting Services SharePoint service. When the command completes successfully, no message will be returned.
- Run the following PowerShell command to install the Reporting Services SharePoint service proxy. When the command completes successfully, no message will be returned.
- Run the following PowerShell command to start the Reporting Services SharePoint service. Note that this will start the Reporting Services SharePoint service on all of your application servers. If you want to limit starting the Reporting Services SharePoint service to specific application servers, you can use the -Server parameter of the Get-SPServiceInstance PowerShell cmdlet instead of the -All parameter.
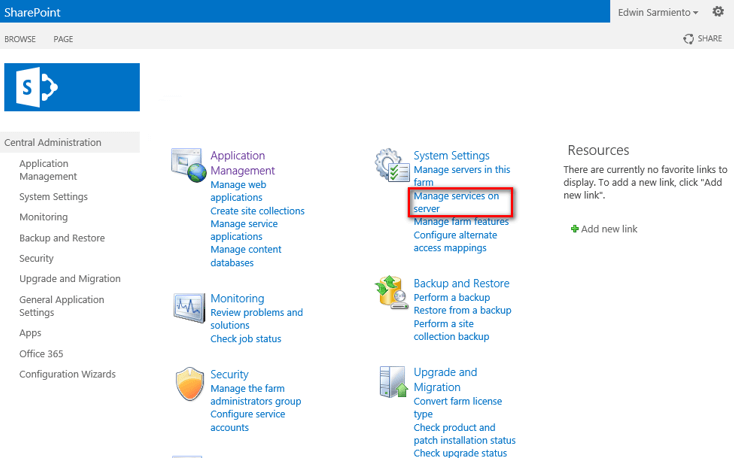
- On the SharePoint Central Administration web site, in the System Settings section, click Manage services on server.
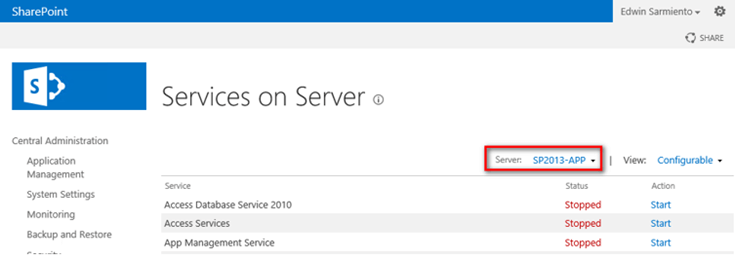
- In the Server drop-down list, make sure that the application server where you installed the Reporting Services instance is selected.
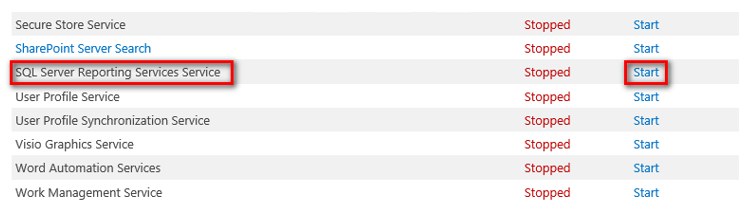
- Locate the SQL Server Reporting Services Service in the list and click Start under the Action column. The status of the Reporting Services service will change from Stopped to Started.
Install-SPRSService
Install-SPRSServiceProxy
Get-SPServiceInstance -All | Where {$_.TypeName -like "SQL Server Reporting*"} | Start-SPServiceInstance
Alternatively, you can use the SharePoint Central Administration web site to start the Reporting Services SharePoint service.
NOTE: Regardless of whether or not Reporting Services was installed before or after the application servers have been joined to the SharePoint farm, it is important to verify that the Reporting Services SharePoint service is started on the appropriate application servers for load balancing, especially in a multi-server farm. Use the PowerShell command below to verify if the appropriate application servers are running the Reporting Services SharePoint service.
Get-SPServiceInstance -All | Where {$_.TypeName -like "SQL Server Reporting*"} | Select TypeName, Status, Server
Creating a Reporting Services Service Application
Creation of a Reporting Services service application can be done via SharePoint Central Administration. To create the Reporting Services service application, follow these steps:
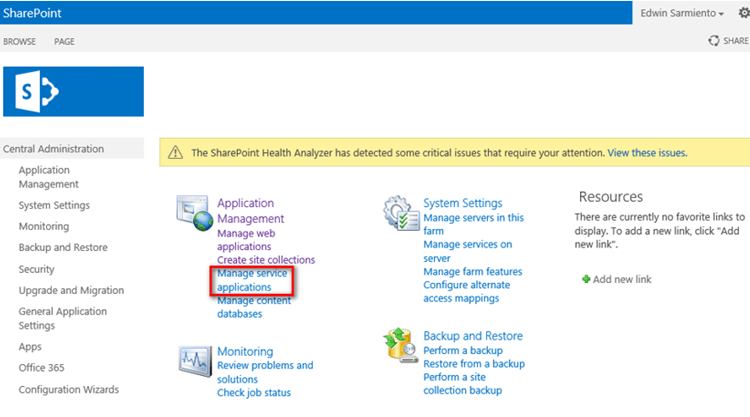
- On the SharePoint Central Administration web site, in the Application Management section, click the Manage service applications link.
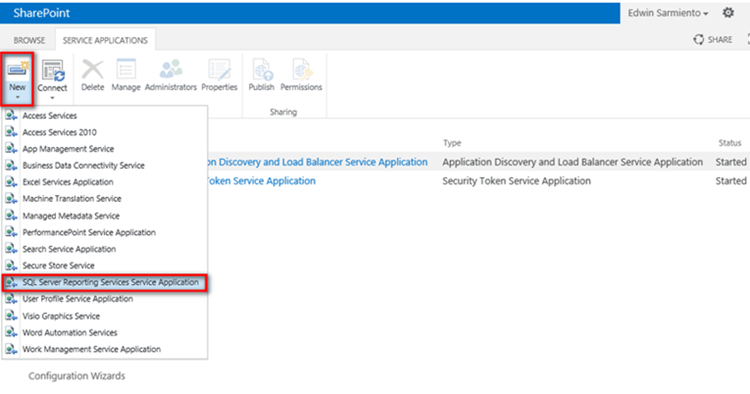
- In the Manage Service Applications page, on the SharePoint ribbon, click the New button. In the New menu, click SQL Server Reporting Services Service Application.
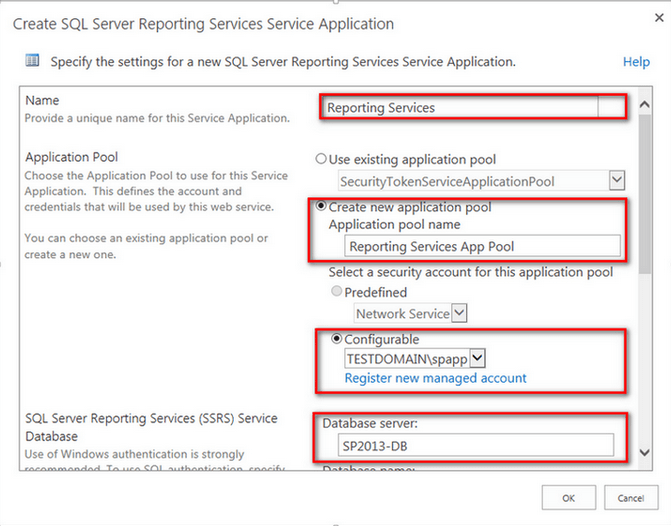
- In the Create SQL Server Reporting Services Service Application page follow these steps:
- Enter a name for the application. Provide a descriptive name if you are creating multiple Reporting Services service applications.
- In the Application Pool section, select Create a new application pool and provide an application pool name.
- In the Select a security account for this application pool section, select the domain account that you want to use for the Reporting Services service application pool account. If the one that you want to use has not been added, click the Register a new managed account link to add it to SharePoint. Make sure that the domain account has been assigned the db_creator and securityadmin server roles on the database server where the Report Server databases will be created.
- In the Database Server section, you can use the current server. If you want to create the Report Server databases on a different database server other than the one SharePoint is currently using, choose a different SQL Server instance.
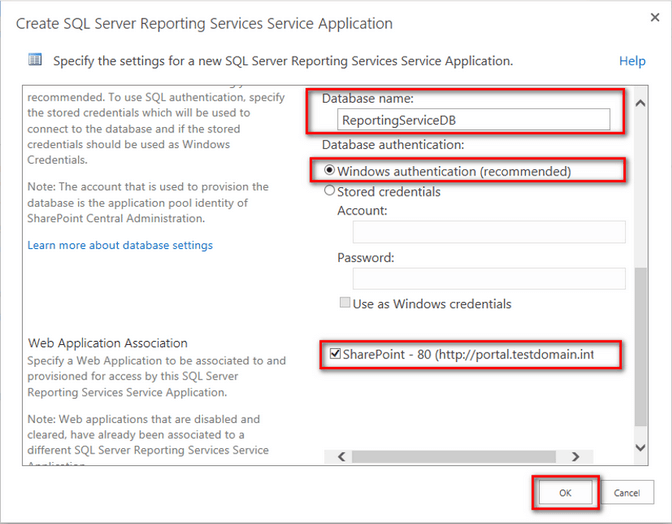
- In the Database name section, provide a descriptive name especially if you will be creating multiple Reporting Services service applications.
- In the Database Authentication section, accept the default value – Windows authentication (recommended).
- In the Web Application Association section, select the Web Application that will use this Reporting Services service application. Only one web application can be associated with a Reporting Services service application. However, you can have multiple site collections within the same web application, so use the same Reporting Services service application.
- Click OK. This will create the Reporting Services service application.
This will create the Reporting Services databases and the Reporting Services service application. This will also associate the Reporting Services service application with the selected Sharepoint web application. If you want to associate this Reporting Services service application with multiple SharePoint web applications, you will have to perform that task after the fact using SharePoint Central Administration.
In the next tip in this series, we will use Windows PowerShell to automate the process of creating the Reporting Services service application. We will also grant the Reporting Services service application pool account permissions to the content databases used by the site collections in the associated SharePoint web application.
Next Steps
Check out the following items:- Reporting Services Report Server (SharePoint Mode)
- Install SQL Server BI Features with SharePoint 2013 (SQL Server 2012 SP1) to explore all the other BI features available for SharePoint.
- Jaime Tarquino's MSDN blog post on SQL Server 2012 Reporting Services SharePoint integrated mode
- Check out all of the SharePoint Tips
- Check out all of the Reporting Services Tips


About the author
 Edwin M Sarmiento is a Microsoft SQL Server MVP and Microsoft Certified Master from Ottawa, Canada specializing in high availability, disaster recovery and system infrastructures.
This author pledges the content of this article is based on professional experience and not AI generated.
View all my tips
