By: Ray Barley
Overview
This is our fourth step in creating a simple SSIS package from scratch. In this section we will take a look at the Data Flow designer which contains the various tasks that will be performed by a Data Flow task specified in the Control Flow.
Explanation
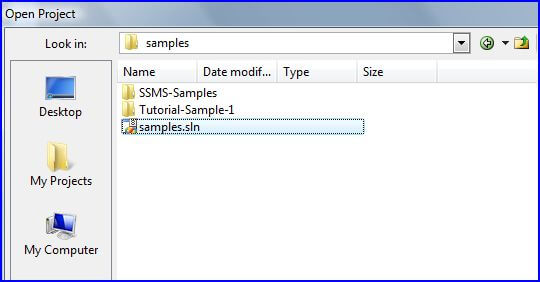
To begin launch BIDS by selecting SQL Server Business Intelligence Development Studio from the Microsoft SQL Server program group. Click File, Open, Project / Solution on the top level menu to display the Open Project dialog. Navigate to the location of the solution as shown below then click Open:
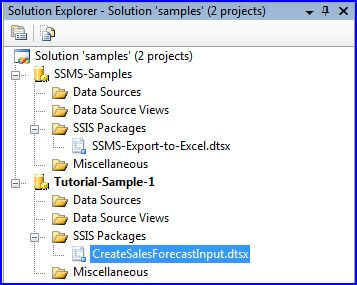
Expand the SSIS Packages node under the Tutorial-Sample-1 project in Solution Explorer and you will see the following:
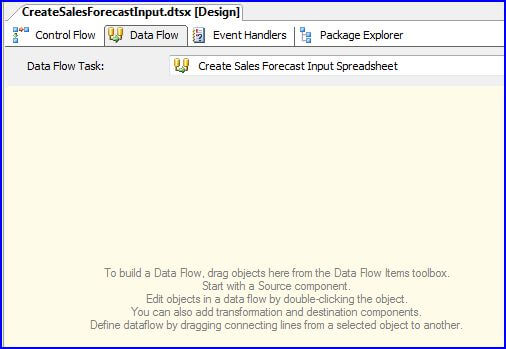
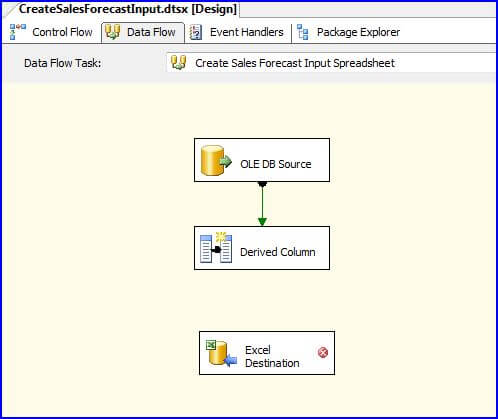
Double click on the SSIS package CreateSalesForecastInput.dtsx to open the package. Click on the Data Flow tab in the designer and you should see the empty Data Flow designer as shown below:
The Toolbox will now display the tasks that are available in the Data Flow as shown below:

As you can see there are quite a few built-in tasks available. For our current package we want to retrieve some data from the AdventureWorksDW database and output it to an Excel spreadsheet. To do this we need an OLE DB Source and an Excel Destination. In addition we need to add a column to the Data Flow; this column will be the numeric column in the spreadsheet where the user enters the forecast amount. Drag and drop an OLE DB Source, Derived Column, and Excel Destination from the Toolbox onto the Data Flow designer. After doing so the Data Flow designer should look like this:
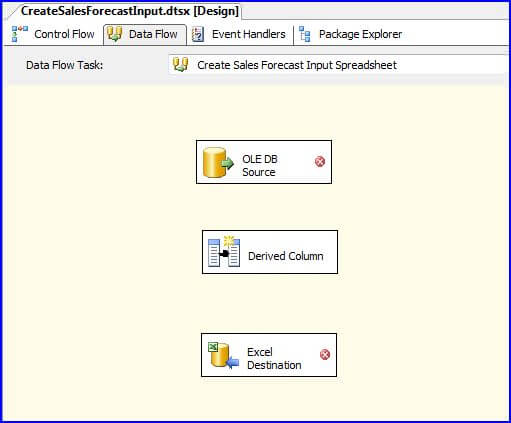
The red icons inside of the tasks are an indicator that there is some configuration required. Right click on the OLE DB Source then select Edit from the popup menu. This will open the OLE DB Source Editor on the Connection Manager page. Fill in the dialog as shown below:

We setup the OLD DB connection manager in the Connection Managers step earlier. The SQL command text contains a simple query to retrieve the list of cities and states in the United States.
Click on Columns to display the column mappings as shown below:
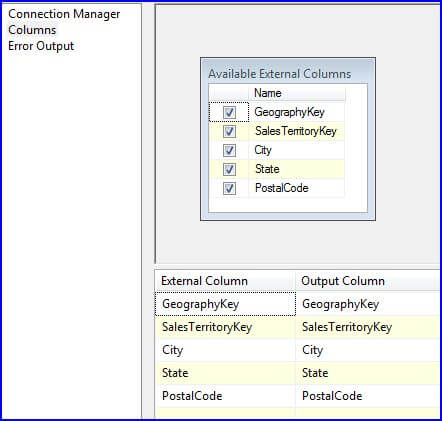
By default all columns returned from the query are selected and the Output Column names are the same. The Output Column names can be edited; we will leave them as is. Click OK to complete the OLE DB Source Editor. You will now see a green and a red line dangling from the OLE DB Source task on the Data Flow designer. The green line is the normal data flow; the red line is the error flow. Drag the green line and connect it to the Derived Column task as shown below:
Notice that the red icon is now gone from the OLE DB Source task and it is now properly configured.
The Derived Column task allows us to add a column to the Data Flow. Right click on it, select Edit, then fill in the Derived Column transformation Editor as shown below:
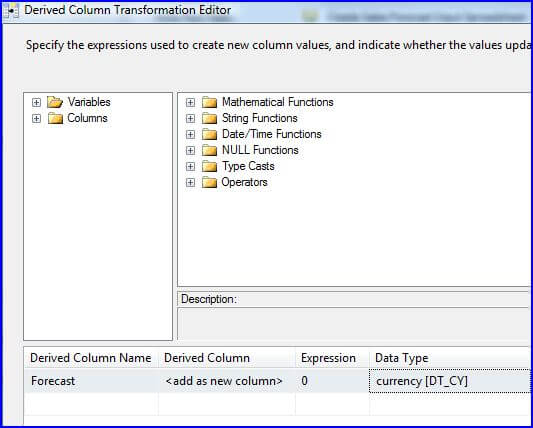
We have now added a new currency column to the data flow with a name of Forecast, and a value of 0. Click on the Derived Column task and drag the green arrow to connect to the Excel Destination task.
Right click the Excel Destination task and select Edit from the popup menu. The Excel Destination Editor dialog will be displayed. Click the New button next to the Name of the Excel Sheet to display the Create Table dialog as shown below:
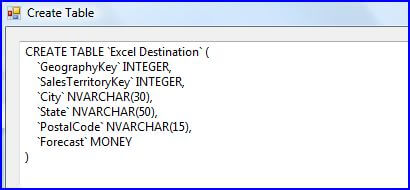
The Create Table dialog allows us to create a new table in the Excel spreadsheet. The columns and their types are determined by the data flow. We configured an OLE DB Source task that executes a query and a Derived Column task that added the Forecast column to the data flow. You can edit the CREATE TABLE script if you like. Click OK on the Create Table dialog and the Excel Destination Editor Connection Manager page will look like this:
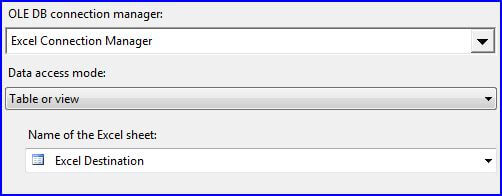
We configured the Excel Connection Manager in step two of this tutorial. Click on Mappings to display the Mappings page as shown below:
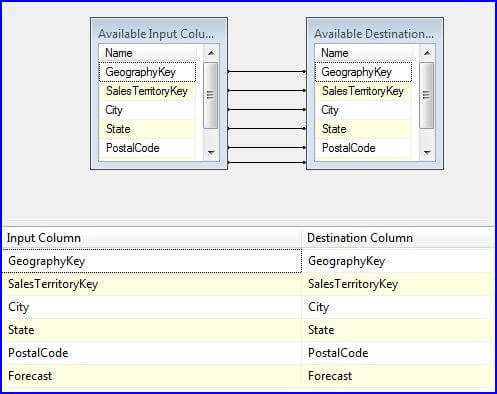
The above dialog sets the Destination Column names to the Input Column names by default.
At this point we have completed the Data Flow. Note that there are no longer any red icons in the task rectangles. We will proceed to the final step in this section of the tutorial and execute the package.
