By: Edwin Sarmiento | Comments | Related: 1 | 2 | 3 | > SQL Server Configurations
Problem
Windows Server Core has been around since Windows Server 2008. I have been wanting to install SQL Server 2008 on Windows Server Core, but could not do so because it wasn't officially supported. However, SQL Server 2012 now is. How do I install SQL Server 2012 on Windows Server Core?
Solution
To continue this series on Installing SQL Server 2012 on Windows Server Core, we will look at configuring Windows Server Core using Windows PowerShell. In the previous tip, you have seen how to configure Windows Server Core using the native MS-DOS commands. In this tip, we will use Windows PowerShell to perform the same tasks so you can compare between the two approaches and see which one you prefer. I'll go thru the same process as I've done in the previous tip and do a compare-and-contrast between the approaches.
NOTE: If you do not have any experience with Windows PowerShell, it is recommended to go thru the series of tips on Introduction to Windows PowerShell for the SQL Server DBA prior to working thru the tip. As Windows PowerShell has become a common engineering criteria for Microsoft servers, learning it would be an invaluable skill.
In order for you to perform these tasks, make sure that you have added the .NET Frameworks 2.0 and 3.5 as well as enabled Windows PowerShell from within Windows Server Core as defined in the previous tip. Once you've done so, you also need to make sure that you are executing these commands from within the PowerShell console. You don't want to end up like me scratching your head thinking why you can't execute the commands.
Change the Time Zone Settings (PowerShell)
Unfortunately, changing the time zone in Windows Server Core using Windows PowerShell is not as easy and intuitive as it is using the native MS-DOS command tsutil.exe. There is a PowerShell script available from the Microsoft TechNet Script Gallery written by Ben Baird that performs this task. However, I prefer to keep things simple so I'd stick to using the tzutil.exe native MS-DOS command.
Configure Network Settings (PowerShell)
Before we can even join the server to the domain, we need to configure the network settings - specify static IP address, subnet mask, gateway and DNS servers. For this server, I will use the following network configuration.
- IP Address: 172.16.0.53
- Subnet Mask: 255.255.0.0
- Default Gateway: 172.16.0.5
- Preferred DNS server: 172.16.0.100
- Alternate DNS server: 192.168.0.100
For standardization purposes, I will first rename my network adapter. This will be helpful especially when you have multiple network adapters, as in the case of a Failover Cluster. We need to display the name and properties of the network interface that we need to configure. However, similar to the time zone challenge, there is no simple way to rename your network adapter using Windows PowerShell v2.0. We have to wait until Windows PowerShell version 3 is released to perform this task as simple as we possibly can. Your simplest option is to use netsh.exe as we did in the previous tip.
Next, we will change the IP address, subnet mask and default gateway values. This can be done by using the Get-WmiObject cmdlet calling the Win32_NetworkAdapterConfiguration WMI class. We first need to know the current properties of the network adapter so we can modify them accordingly. To display the relevant network adapter properties that I need,
Note that I used these properties of the Win32_NetworkAdapterConfiguration WMI class: Index, IPEnabled and Description. Since we do not know the name of the network adapter, we need a way to access it using other property values. In this case, I used the Index property. Network adapters will have an index value in ascending order, depending on how they were added to the server. The challenge here is to identify which network adapter you are trying to modify especially if you have multiple network adapters, as is the case for a Windows Failover Cluster configuration. Here's an example of the list of network adapters on my Hyper-V server.

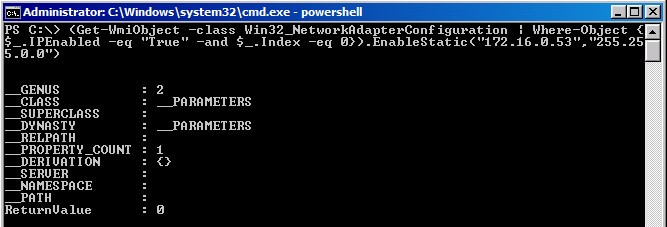
What I usually do is add and configure the network adapters one at a time and use the Index property value to assign the IP address and the subnet mask. To assign an IP address and a subnet mask on a network adapter with Index property value of zero, I will use the EnableStatic() method of the Win32_NetworkAdapterConfiguration WMI class.
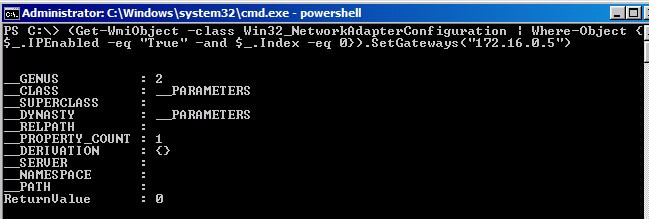
I will use the same approach to assign the default gateway value for the network adapter, using the SetGateways() method of the Win32_NetworkAdapterConfiguration WMI class.
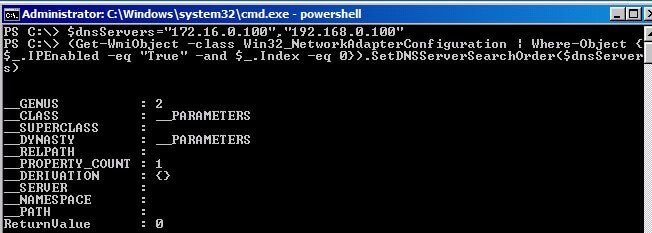
Finally, we will assign the primary and alternate DNS servers. I will use the SetDNSServerSearchOrder() method of the Win32_NetworkAdapterConfiguration WMI class. Since I will configure my network adapter to use a primary and an alternate DNS server, I will assign the values of their IP addresses to a variable and pass that parameter to the method.
PS C:\> (Get-WmiObject -class Win32_NetworkAdapterConfiguration | Where-Object {$_.IPEnabled -eq "True" -and $_.Index -eq 0}).SetDNSServerSearchOrder($dnsServers)
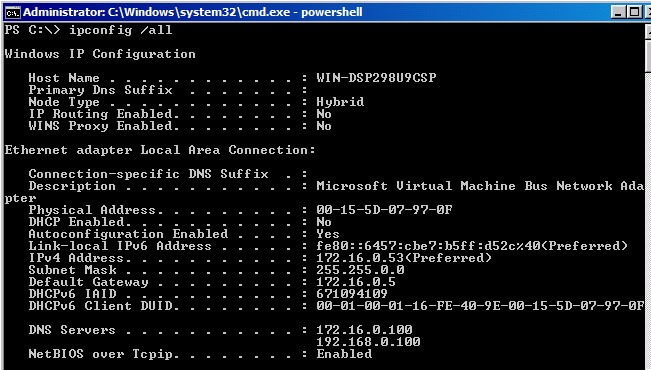
We can then verify that all the network adapter settings have been applied.
Should you decide to wrap everything in a script for simpler execution, your script will look something like this.
$dnsServers = "172.16.0.100","192.168.0.100"
$NIC.EnableStatic("172.16.0.53","255.255.0.0")
$NIC.SetGateways("172.16.0.5")
$NIC.SetDNSServerSearchOrder($dnsServers)
Rename the Server and Join it to the Domain (PowerShell)
We need to rename the server and provide a meaningful name to the machine prior to joining it to the domain. Unlike using the netdom.exe command where I need to pass the current server hostname to change it to a new value, we don't need to do that when using Windows PowerShell. I will be using the Rename() method of the Win32_ComputerSystem WMI class to perform this task, renaming the server to SQL2012CORE2.
PS C:\> (Get-WmiObject Win32_ComputerSystem).Rename("SQL2012CORE2")
Unlike the netdom.exe command where we get prompted to reboot the machine, we won't be seeing that here. However, for the hostname change to take effect, we need to reboot the machine. Windows PowerShell has a dedicated cmdlet for this task - Restart-Computer. Unlike using the shutdown.exe command where you can accidentally make mistakes when using the different switches, this PowerShell cmdlet is very explicit in what you want to accomplish, eliminating the potential risk of shutting down the machine using an incorrect switch. I, myself, have been a bit paranoid when using the shutdown.exe command, especially when I'm connected to the server via Remote Desktop and I don't have access to the remote access console. Plus, I can perform this task simultaneously on remote machines by passing their hostnames.
PS C:\> Restart-Computer

After rebooting the machine, we are now ready to join it to the domain. We will use the Add-Computer cmdlet to accomplish this task. Again, make sure that you are in the Windows PowerShell console when you execute these commands. Remember that the native MS-DOS console is what gets invoked when you log in to a Windows Server Core machine so you have to explicitly switch to the PowerShell console.
PS C:\> Add-Computer -Credential TESTDOMAIN\administrator -DomainName TESTDOMAIN.local

You will get prompted for the password of the credential you have provided to join the machine to the domain. This time, you will be prompted to reboot the machine. Use the Restart-Computer to reboot the machine.

Enable Remote Administration
While we can log in directly to the Windows Server Core machine, we probably won't do so since most of our servers are in the data center. We need to enable the server to allow remote management via Remote Desktop, Windows Remote Shell or MMC.
- To enable Remote Desktop access on the machine, we will use the SetAllowTsConnections() method of the Win32_TerminalServiceSetting WMI class.
PS C:\> (Get-WmiObject -Class "Win32_TerminalServiceSetting" -Namespace root\cimv2\terminalservices).SetAllowTsConnections(1)
You can verify this by connecting to your Windows Server Core machine from another workstation using Remote Desktop.
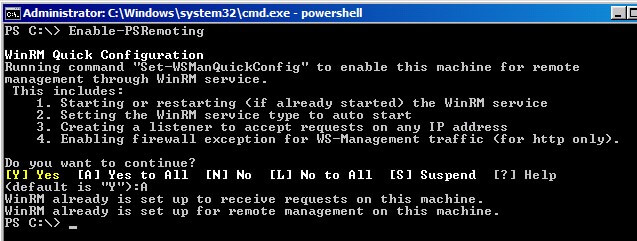
- To allow Remote Administration from the Windows Firewall, we can use the Enable-PSRemoting cmdlet. This configures the machine to accept remote Windows PowerShell commands and creating Windows Firewall exceptions for those commands. If you need to perform this task across multiple machines across your Active Directory domain, a group policy object will be more appropriate than running this cmdlet. In addition, this also enables the Windows Remote Shell.
C:\> Enable-PSRemoting
- OPTIONAL: Enable PowerShell script execution. You can allow PowerShell script execution by running the Set-ExecutionPolicy cmdlet as defined in this tip. This gives you the flexibility of running PowerShell scripts on this machine either locally or remotely. Similar to enabling PowerShell Remoting, if you need to perform this task across multiple machines in your Active Directory domain, a group policy object will be a more efficient way to perform this task.
C:\> Set-ExecutionPolicy RemoteSigned

In this tip, we've prepared a Windows Server Core machine for the SQL Server 2012 installation using Windows PowerShell. You have seen the difference between using native MS-DOS commands in the previous tip and Windows PowerShell and had a feel of which one will work for you. In the next tip in this series, we will look at installing and configuring SQL Server 2012 on a Windows Server Core machine.
Next Steps
- Install and configure a Windows Server 2008 R2 Server Core using Windows PowerShell commands
- Review the prerequisites for installing SQL Server 2012 on Windows Server Core


About the author
 Edwin M Sarmiento is a Microsoft SQL Server MVP and Microsoft Certified Master from Ottawa, Canada specializing in high availability, disaster recovery and system infrastructures.
This author pledges the content of this article is based on professional experience and not AI generated.
View all my tips
