By: Dattatrey Sindol | Comments | Related: More > Big Data
Problem
I have read the previous tips in the Getting Started with HDInsight series and I am eager to jump into the action and learn more about HDInsight. I would like to know what the prerequisites for creating a cluster are, how you create a cluster and the other aspects related to creating a HDInsight cluster.
Solution
In this tip we will take a look at the creation of HDInsight cluster and other related aspects.
We will take a look at two different ways of creating an HDInsight Cluster:
- Creating an HDInsight Cluster through Azure Management Portal
- Creating an HDInsight Cluster through Windows Azure PowerShell
To be able to create an Azure HDInsight Cluster, we need an active Windows Azure Subscription. If you do not have one, you can sign up for a free trial here: Windows Azure - Free one-month trial.
For the purpose of this tip, we will create a cluster in its simplest form without any custom configurations. Let's get started.
Creating an HDInsight Cluster with the Azure Management Portal
Before we can create an HDInsight cluster, we need a Storage Account in place which can be used by the HDInsight cluster that we want to create. The cluster needs a Storage Account on which it can store its system files and user data files (default) in the default container.
Creating a Storage Account in Azure Management Portal
Let us create a Storage Account by following the below steps.
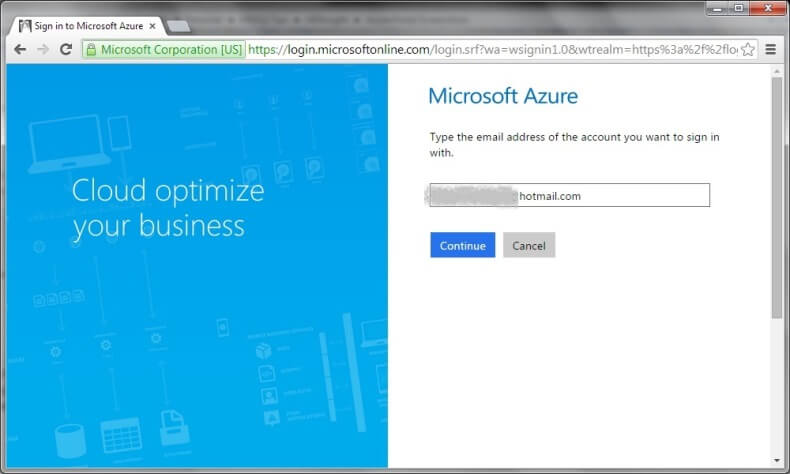
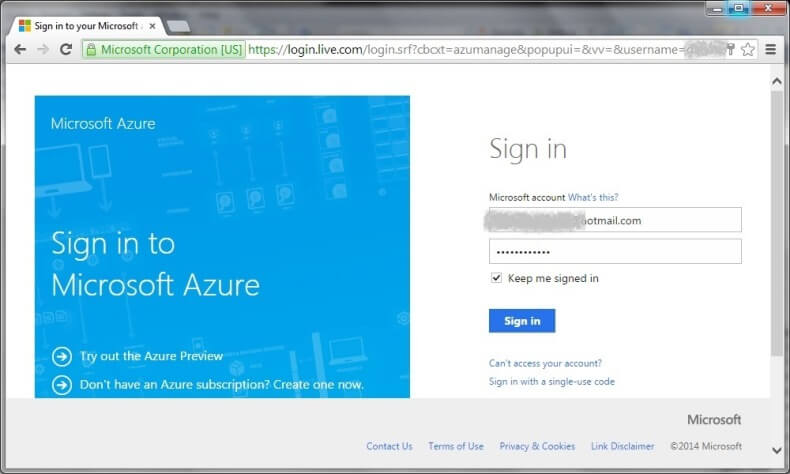
- Go to https://manage.windowsazure.com
- Type in the Email Address associated with the Azure Subscription, enter the credentials, and login.
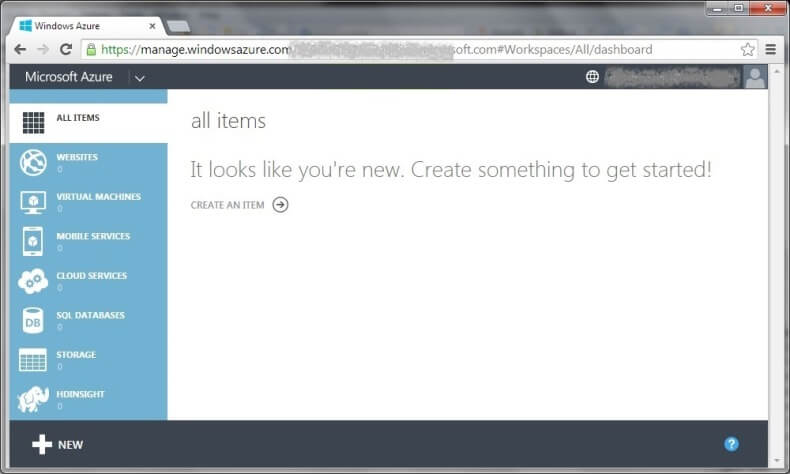
- After logging into the Portal, we can see an empty environment as we have not created any services as shown below.
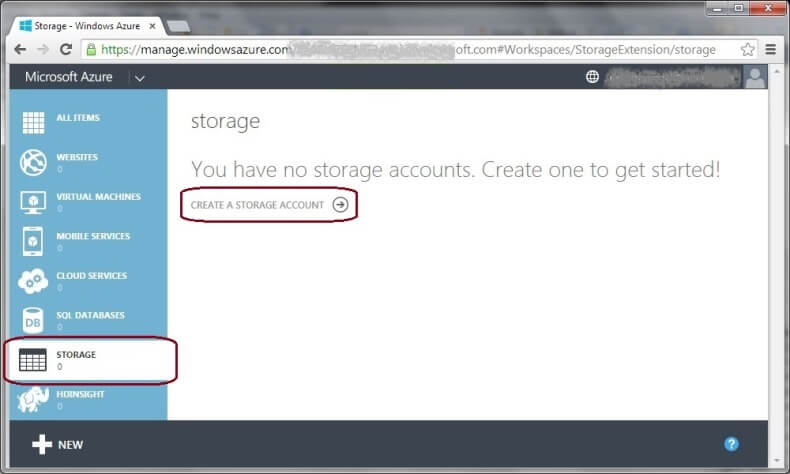
- Click on Storage in the Left Navigation Pane which lists all the available services.
- Click on Create a Storage Account and it will open up the Quick Create option from the bottom service provisioning pane as shown below. Enter the following information in the respective fields.
- This is the name of the Storage Account to be created. This name should be globally unique. Choose this name carefully so that there is no probability of conflict.
- We only need to specify the name of the Storage Account. No need to specify the entire URL.
- Fully qualified URL "hdidemosa.*.core.windows.net" is built by Azure.
- Only lower case letters are allowed here.
- This is the location where you want the Storage Account to be created / located.
- Storage Account and the HDInsight Cluster should be located in the same location / data center. Hence choose this location carefully.
- This setting determines how the data in the Storage Account is replicated. For mission critical applications / data, it is recommended to replicate the data across different geographical locations so that the data is available all the time. More information about Azure Storage Replication: Azure Storage Redundancy Options.
- For the purpose of this tip, let us leave the default as "Geo-Redundant".
- Click on Create Storage Account.
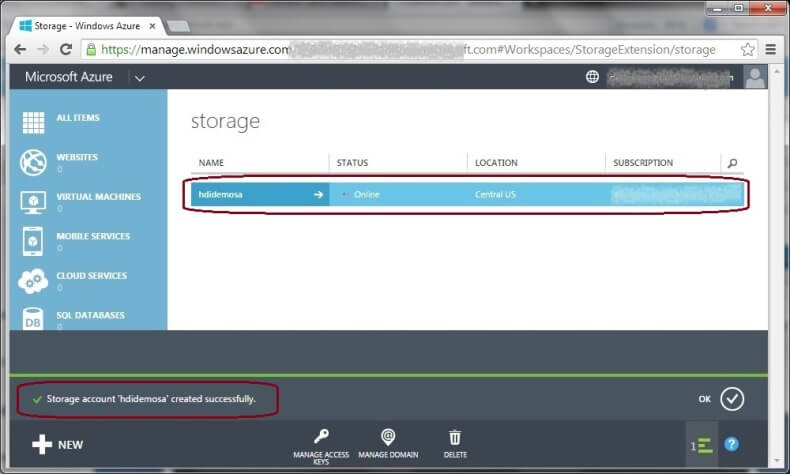
- It will take few minutes to provision a Storage Account. Once the Storage Account is provisioned, a success message is displayed and we can see the Storage Account listed in the list of items as shown below.
| Property | Value | Description / Additional Information |
|---|---|---|
| URL | hdidemosa |
|
| LOCATION/AFFINITY GROUP | Central US |
|
| REPLICATION | GEO-REDUDANT |
|

Creating an HDInsight Cluster in Azure Management Portal
Now let us create an HDInsight cluster by following the below listed steps.
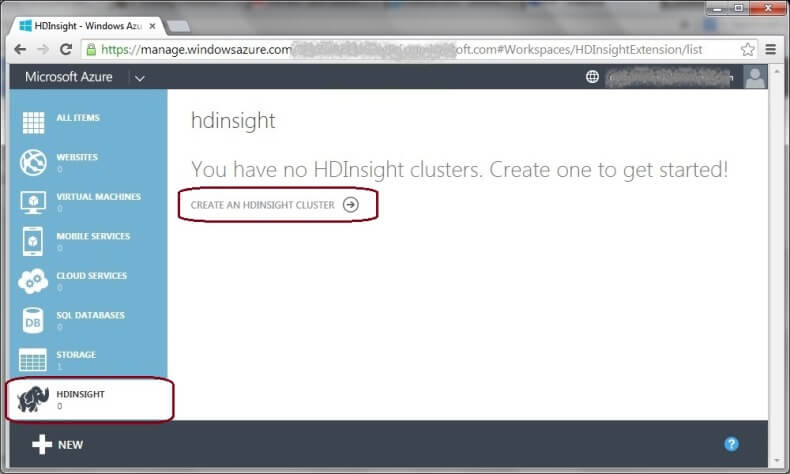
- Click on HDInsight in the Left Navigation Pane which lists all the available services.
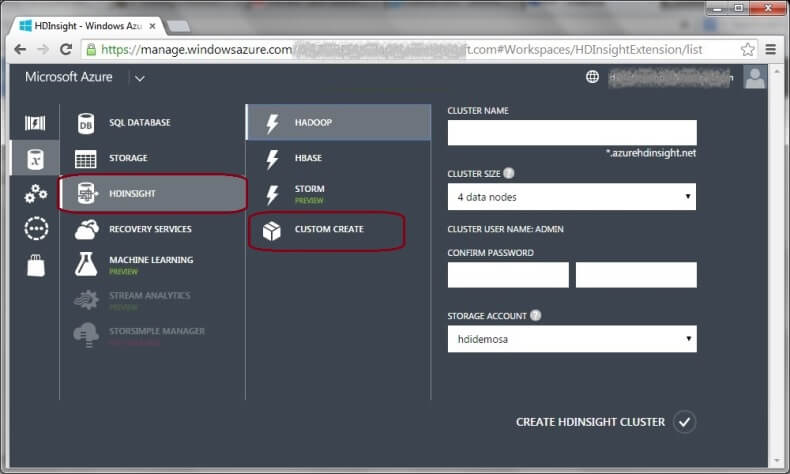
- Click on Create an HDInsight Cluster and it will open up the Quick Create option from the bottom service provisioning pane as shown below. This option is used to quickly create an HDInsight cluster with limited customization.
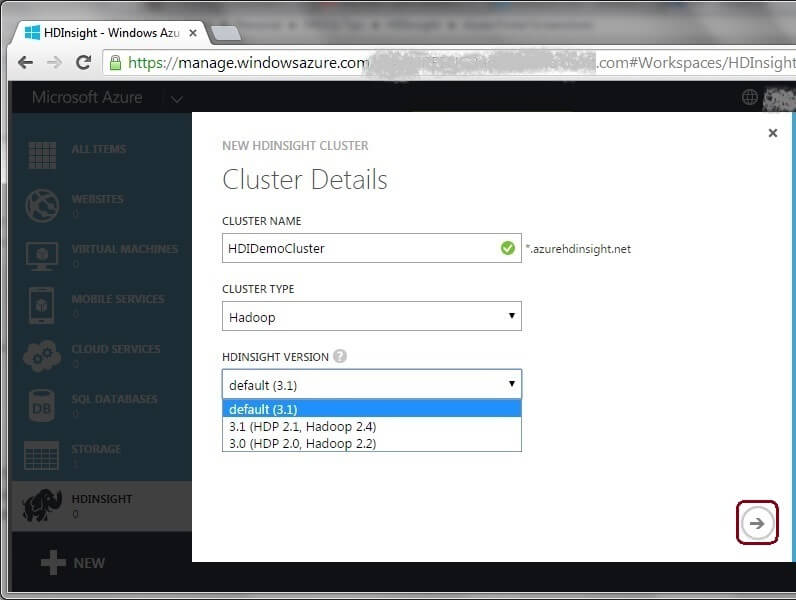
- Click on "CUSTOM CREATE" and it will launch the "New HDInsight Cluster" wizard. Enter the details from the below table in to the respective fields on the 1st screen ("Cluster Details" screen) of the wizard as shown below.
- This is the name of the HDInsight Cluster to be created.
- This name is globally unique. Choose this name carefully and make it unique by adopting some standards and incorporating your project / organization specific keyword(s) in it. Only use keywords which are not sensitive or confidential.
- This setting determines the type of cluster we want to create. At the time of writing this tip, Windows Azure offers 3 different types of clusters - Hadoop, HBase, and Storm.
- This setting determines the Version of the cluster we want to create. It is always recommended to use the latest version as it would include latest and more advanced features.
- As HDInsight is based on Hortonworks Data Platform (HDP), each release / version of HDInsight maps to a particular release / version of HDP, which in turn maps to a particular release / version of Apache Hadoop.
- More information on what features are included in each version of HDInsight: HDInsight versions
- Click on the Right Arrow and enter the details from the below table into the respective fields on the 2nd screen ("Configure Cluster" screen) of the wizard as shown below.
- This determines the number of data nodes that we want in our cluster. There should be at least one data node in the cluster.
- There is a maximum limit on how many nodes we can have in the cluster and this limit varies based on subscription. One can get this limit enhanced by contacting Microsoft Support.
- Apart from these data nodes, two head nodes are included in the cluster to ensure high availability, irrespective of how many data nodes we have in the cluster.
- More information on pricing here: HDInsight Pricing Details
- This setting determines the region / location where the Cluster is to be created.
- Ensure that the location chosen here is same as the location where the Storage Account has been created.
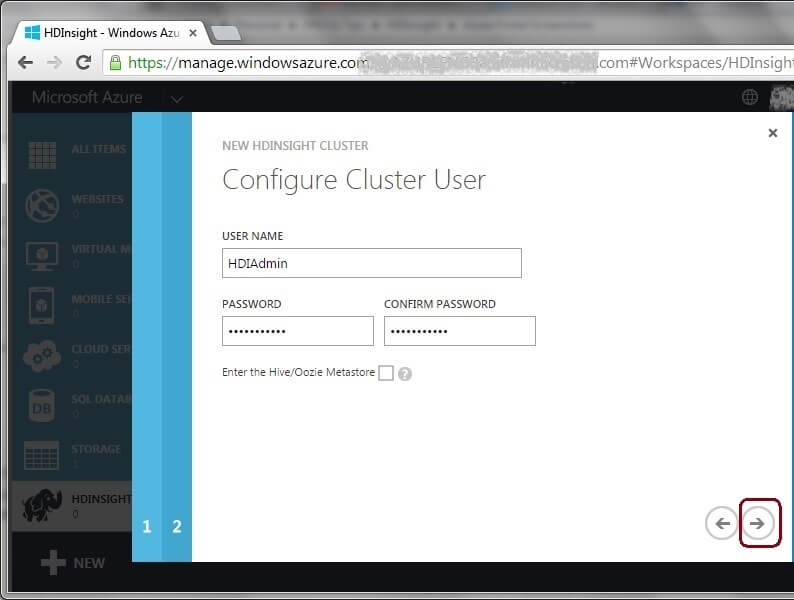
- Click on the Right Arrow and enter the details from the below table into the respective fields on the 3rd screen ("Configure Cluster User" screen) of the wizard as shown below.
- This is the account to be used for accessing the HDInsight cluster.
- This is the account password. Choose a strong password.
- This setting enables us to use an Azure SQL database as a metastore for Hive/Oozie. For the purpose of this demonstration, keeping things simple, leave this unchecked.
- By using an Azure SQL Database as a Hive/Oozie metastore, we can retain the necessary metadata / configurations even after deleting the cluster.
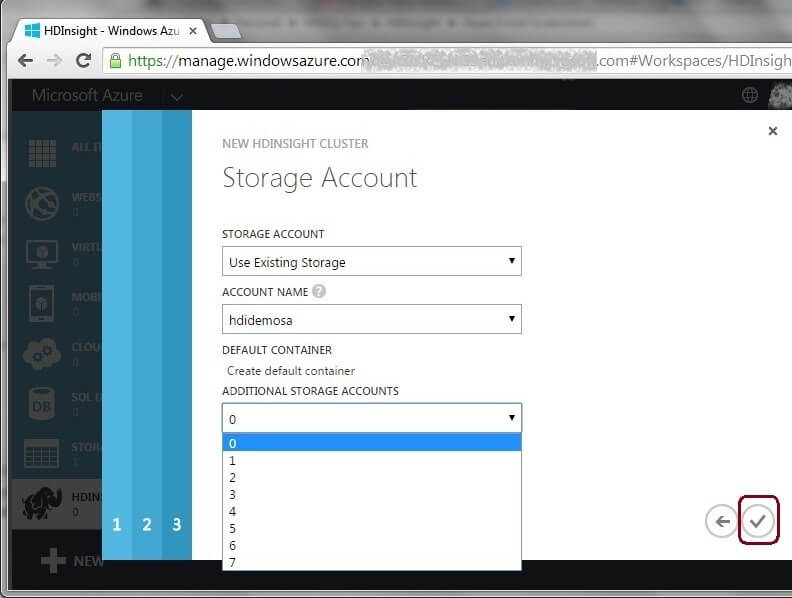
- Click on the Right Arrow and enter the details from the below table in to the respective fields on the 4th screen ("Storage Account" screen) of the wizard as shown below.
- This is the Storage Account to be used by HDInsight cluster for storing its installation / system files / data along with user data (default).
- We can either have the wizard created a new Storage Account for us or we can choose an existing Storage Account. Since have already created a Storage Account, choose the option as "Use Existing Storage".
- This is the Storage Account to be used by HDInsight cluster. Choose the Storage Account which we created earlier during this demonstration.
- Since we have not created any containers, it defaults to "Create Default Container". If we had other containers in the selected storage account, then it would show us a drop down to either choose a default container from available list of containers or allow us to create a new container to be used as the default container.
- For the purpose of this demonstration, let's allow the wizard to create the default storage container for us.
- This setting allows us to associate one or more other Storage Accounts to be used with the cluster apart from the Storage Account selected above.
- This can be handy in scenarios like the data to be processed is located on a different Storage Account or when the processed data needs to be pushed to a particular Storage Account for other users / applications to consume and various other scenarios.
- Click on the "Right" symbol to start provisioning the HDInsight cluster.
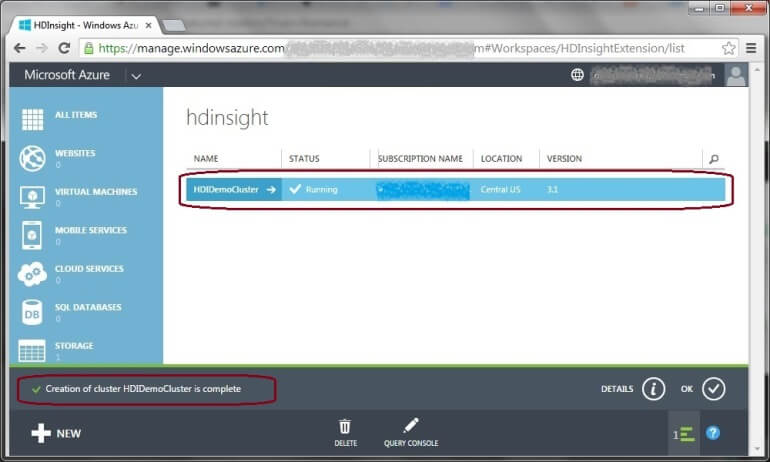
- It takes few minutes to provision a cluster. Once the cluster is provisioned, Azure notifies us with a notification message at the bottom and we can also see the cluster in the list of available clusters as shown below.
| Property | Value | Description / Additional Information |
|---|---|---|
| CLUSTER NAME | HDIDemoCluster |
|
| CLUSTER TYPE | Hadoop |
|
| HDINSIGHT VERSION | default (3.1) |
|
| Property | Value | Description / Additional Information |
|---|---|---|
| DATA NODES | 2 |
|
| REGION/VIRTUAL NETWORK | Central US |
|

| Property | Value | Description / Additional Information |
|---|---|---|
| USER NAME | HDIAdmin |
|
| PASSWORD | MSSQLTips@2014 |
|
| Enter the Hive/Oozie Metastore | Leave Unchecked |
|
| Property | Value | Description / Additional Information |
|---|---|---|
| STORAGE ACCOUNT | Use Existing Storage |
|
| ACCOUNT NAME | hdidemosa |
|
| DEFAULT CONTAINER | Leave it as "Create Default Container" |
|
| ADDITIONAL STORAGE ACCOUNTS | 0 |
|
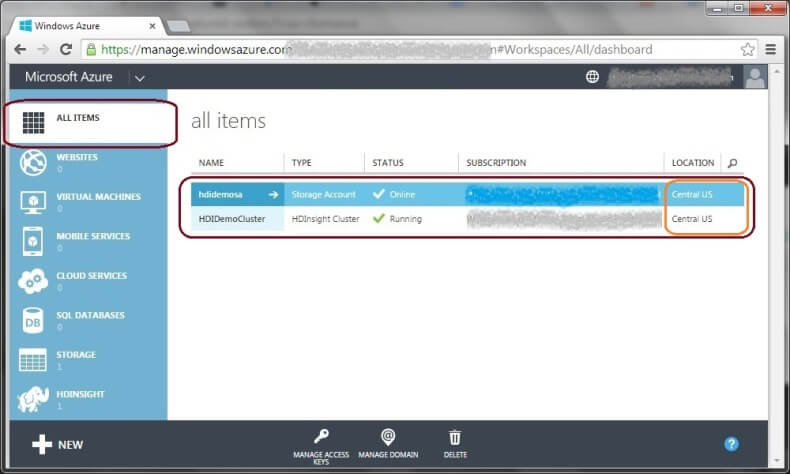
Clicking on "ALL ITEMS" in the left navigation pane shows us the list of all the services created by us as shown below.
Next let us go ahead and create the Storage Account and Cluster using Windows Azure PowerShell.
Creating an HDInsight Cluster with Windows Azure PowerShell
Before proceeding with the creation of Storage Account and Cluster, make sure that you have Windows Azure PowerShell Cmdlets installed and the Windows PowerShell environment configured for your subscription as described in Getting Started with HDInsight - Part 2 - Introduction to Azure HDInsight PowerShell.
For the purpose of this tip, we will create the Storage Account and Cluster with the simplest configuration without any customizations. Let's get started.
Creating a Storage Account via Windows Azure PowerShell
To start with, let us create a Storage Account. For the purpose of our demonstration, let us create this Storage Account in the "East US" location.
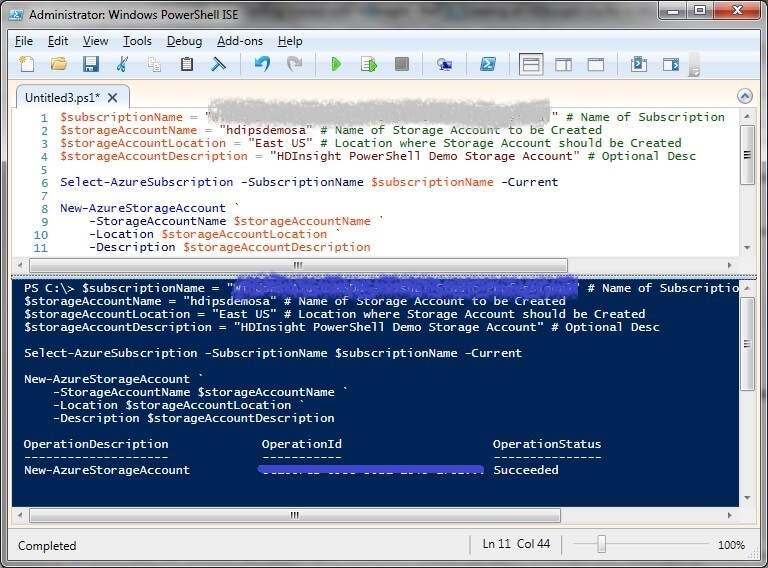
Launch Windows Azure PowerShell ISE and copy-paste the below script. Replace the Subscription Name in the below code with the name of your Subscription and execute the script.
$subscriptionName = "Microsoft Azure HDInsight - Trial Subscription" # Name of Subscription
$storageAccountName = "hdipsdemosa" # Name of Storage Account to be Created
$storageAccountLocation = "East US" # Location where Storage Account should be Created
$storageAccountDescription = "HDInsight PowerShell Demo Storage Account" # Optional Description

Select-AzureSubscription -SubscriptionName $subscriptionName -Current

New-AzureStorageAccount `
    -StorageAccountName $storageAccountName `
    -Location $storageAccountLocation `
    -Description $storageAccountDescription
It takes few minutes to create the Storage Account. Once the script execution is completed, an output message with the status of the execution is displayed as shown below.
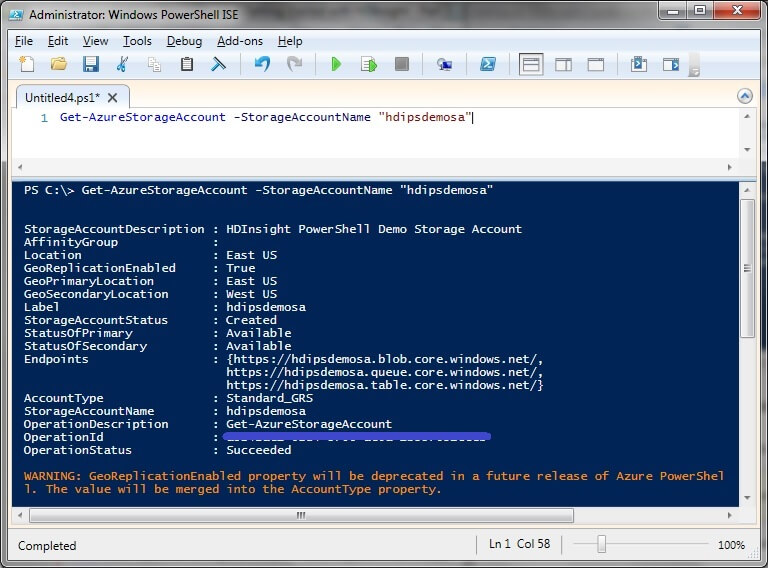
Run the below script and verify the details in the output to ensure that the Storage Account was created successfully.
Get-AzureStorageAccount -StorageAccountName "hdipsdemosa"
The output of the above command looks as shown below.
Now that we have created the Storage Account, let's go ahead with the creation of cluster.
Creating an HDInsight Cluster via Windows Azure PowerShell
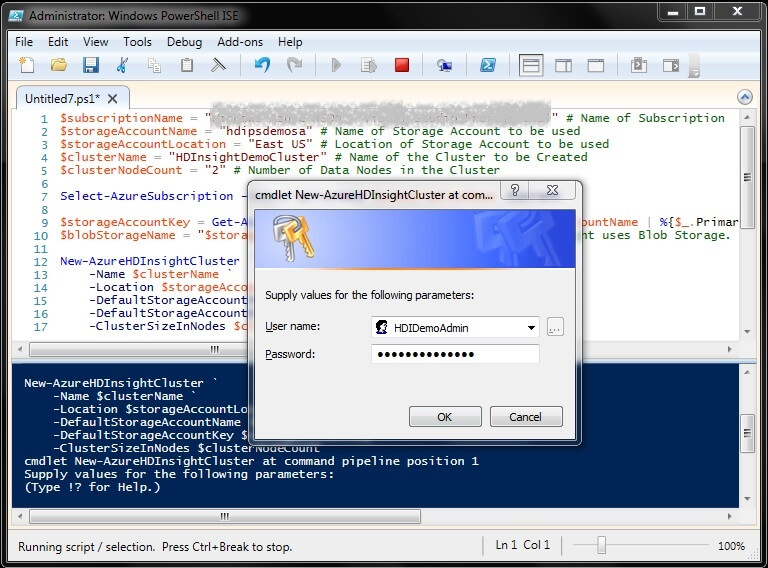
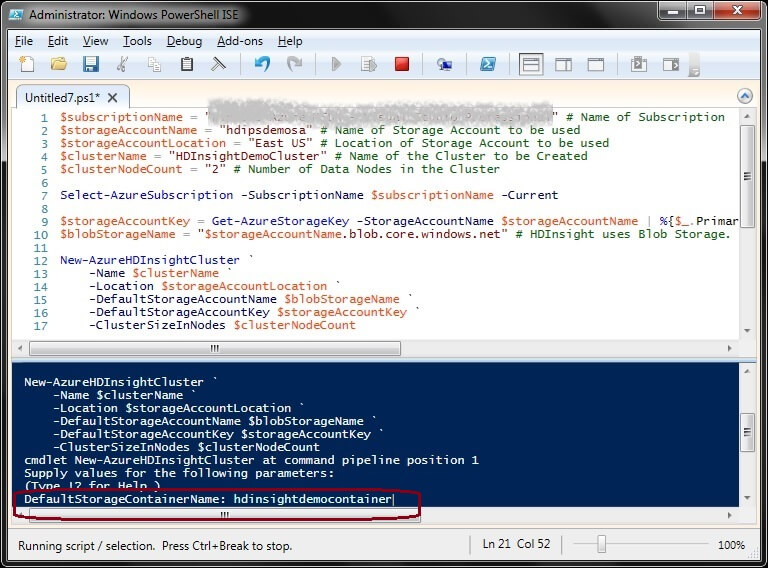
Now, let us create an HDInsight Cluster. Since we have created the Storage Account in "East US" location, we need to create our HDInsight Cluster also in this location to be able to associate this storage account with our cluster.
Copy-paste the below script into Windows Azure PowerShell ISE. Replace the Subscription Name, Cluster Name, and Cluster Node Count in the below code with appropriate values and execute the script.
$subscriptionName = "Microsoft Azure HDInsight - Trial Subscription" # Name of Subscription
$storageAccountName = "hdipsdemosa" # Name of Storage Account to be used
$storageAccountLocation = "East US" # Location of Storage Account to be used
$clusterName = "HDInsightDemoCluster" # Name of the Cluster to be Created
$clusterNodeCount = "2" # Number of Data Nodes in the Cluster

Select-AzureSubscription -SubscriptionName $subscriptionName -Current

$storageAccountKey = Get-AzureStorageKey -StorageAccountName $storageAccountName | %{$_.Primary}
$blobStorageName = "$storageAccountName.blob.core.windows.net" # HDInsight uses Blob Storage. Construct Fully Qualified Blob Storage Account Name.

New-AzureHDInsightCluster `
    -Name $clusterName `
    -Location $storageAccountLocation `
    -DefaultStorageAccountName $blobStorageName `
    -DefaultStorageAccountKey $storageAccountKey `
    -ClusterSizeInNodes $clusterNodeCount
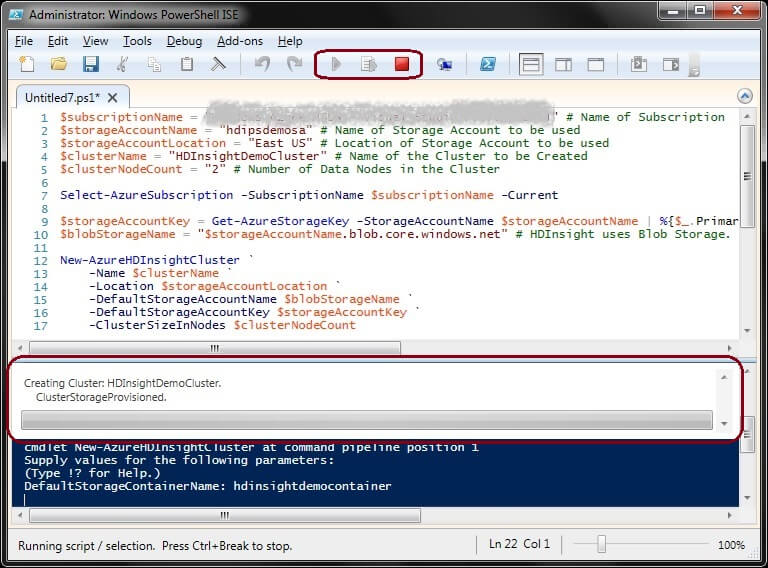
Once the above script is executed, you will be prompted to enter the missing information, which in our case are credentials and the name of the Cluster Root Container. Firstly, you are prompted for credentials. Enter the credentials as shown below.
Next, enter the name of the Cluster Root Container to be created and press enter.
It takes some time to provision the cluster. While the cluster is being provisioned, the status is reported to the user in the PowerShell window as shown below.
Once the cluster is provisioned, the status is returned to the user as shown below.
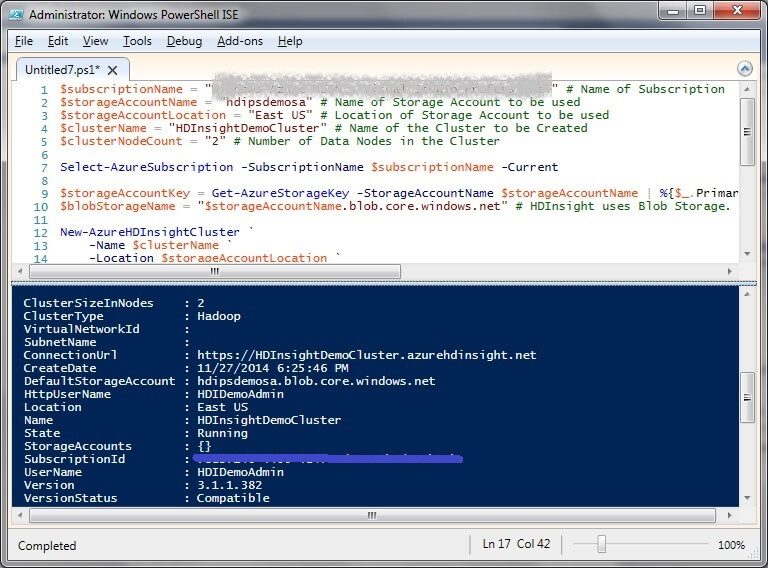
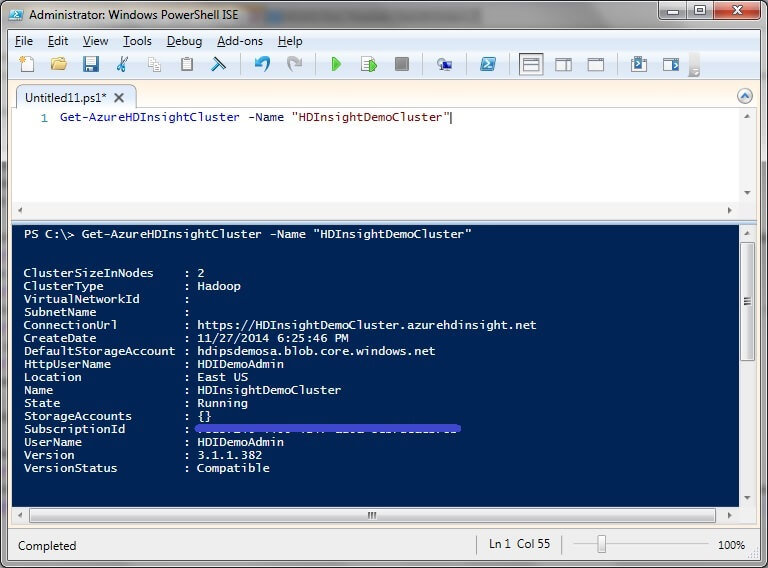
Now run the below command and verify the output to ensure that the cluster has been provisioned successfully.
Get-AzureHDInsightCluster -Name "HDInsightDemoCluster"
The output of the above command looks as shown below.
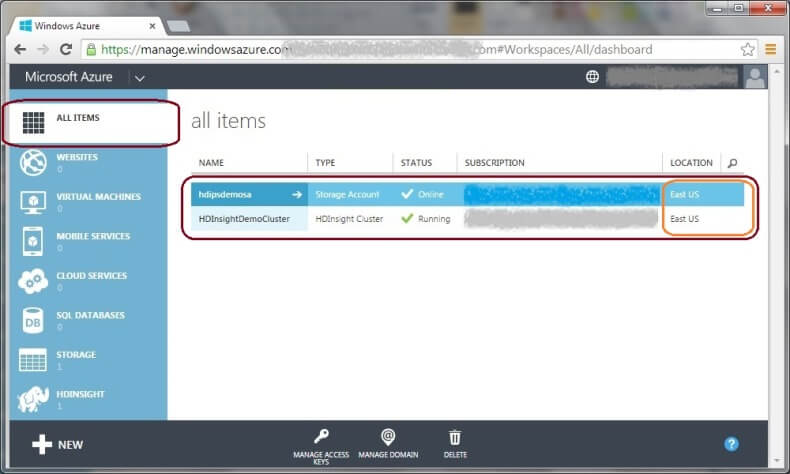
We can also verify that the Storage Account and Cluster are created by logging into the Azure Management Portal and checking the list of active services as shown below.
That's it. It's as simple as this to create the Storage Account and Cluster through Windows Azure PowerShell. PowerShell is a very powerful tool and is used extensively for automation of deployment, administration, management, data processing and various other activities on Azure / HDInsight.
Now that we have created the HDInsight Cluster, we can start exploring more about HDInsight. We will explore more about HDInsight in future tips. So, stay tuned!
Next Steps
- Explore more about the above demonstrated approaches and see how you can customize the creation of a Storage Account and HDInsight Cluster.
- Check out the tips on Microsoft Azure
- Check out the tips on Windows PowerShell
- Check out my previous tips
- Stay tuned for the next tip in this series!


About the author
 Dattatrey Sindol has 8+ years of experience working with SQL Server BI, Power BI, Microsoft Azure, Azure HDInsight and more.
This author pledges the content of this article is based on professional experience and not AI generated.
View all my tips
