By: John Miner | Comments (2) | Related: > Azure Data Studio
Problem
Data Platform developers have been looking for a cross-platform editor that can be used with any version of SQL Server regardless of where the database engine resides. Azure Data Studio is a relatively new tool. It shares the same graphical user interface, look and feel, with Visual Studio Code. Adoption of this tool is gaining momentum in the developer community. What features make this tool attractive to coders?
The editor offers intellisense for code completion of known database keywords or database objects. The addition of code snippets allows for re-use of common code blocks by the developer. Of course, source control integration is required by developers for controlling a software development life cycle (SDLC). To round out the features, an integrated terminal allows for the execution of PowerShell or Bash commands when needed.
The features that differentiate the tool from SQL Server Management Studio (SSMS) or Visual Studio Database Projects (SSDT) are built in charting of query result sets and customizable dashboards. Also, the editor can be enhanced with additional functionality by installing published extensions from Microsoft or third-party providers.
How can we deploy a T-SQL script to both an on-premises and in-cloud database?
Solution
Azure Data Studio can be used to deploy an existing T-SQL script to a local database without making changes. The database server can be hosted on physical hardware, a virtual machine either on premise or in the cloud, or a managed instance. All three choices allow you to easily switch database context using the USE statement.
For an Azure SQL database, the code that creates the user database must be executed on the master database and the schema specific code can be executed on the user database. Splitting the T-SQL script into two pieces (files) with a modification to the CREATE DATABASE statement for service tier makes perfect sense. I leave this task up to you. Of course, the execution order of the scripts is important.
Business Problem
Today, our boss asked us to take a look at the Azure Data Studio editor for the developers on staff. He wants us to review the main functionality of the tool. A very simple BANKING database schema will be used to test deployments to both SQL Server 2019 which resides on-premises and Azure SQL database which exists in the cloud.
Installing the editor
There are three install programs that you should download before proceeding. First, the command line version of the Git source control software can be found at the following web address. Second, I do not like using the command line version of Git since I am not familiar with the syntax. Therefore, the graphical user interface for Git from Tortoise is a must have utility that can be found here. Third, obtain the Azure Data Studio installation program using the following link.
The image below shows the three install programs saved in the temp directory.
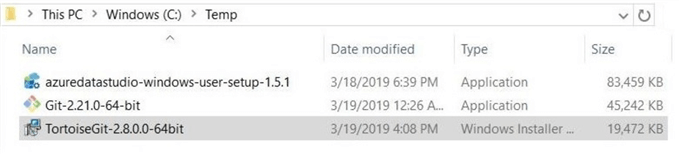
Please install the programs in the following order: Git, Tortoise Git and Azure Data Studio. I am just going to review the dialog boxes that you will see when installing the Microsoft product. Please see production specific documentation if you have questions on the other software.
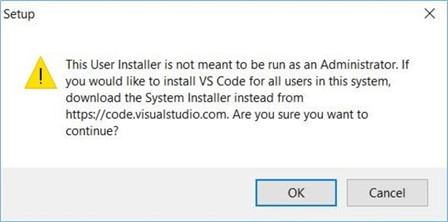
The following dialog box might come up if you are logged in as an Administrator during the installation. You can log in as a regular user to avoid this warning message.
The install program suggests that you close any currently executing programs before proceeding. Clicking the next button continues the process.
Every Microsoft product has license information. Who has taken the time to read thru all clauses of such an agreement? In short, you must accept the terms if you want to install the software. Clicking the next button continues the process.
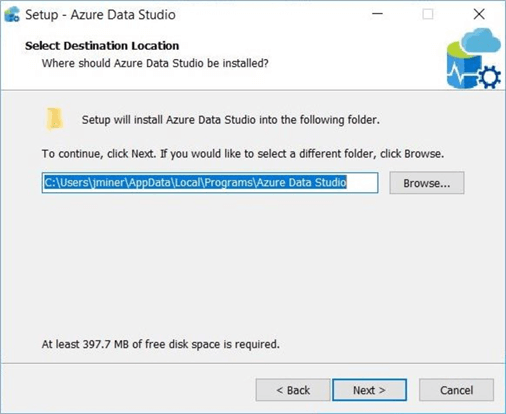
The default installation directory is located under the local user’s profile. The location of this directory can be changed if you choose. Also, you will need about 400 MB of free space to complete the install. I am taking the default choice and clicking next button to continue.
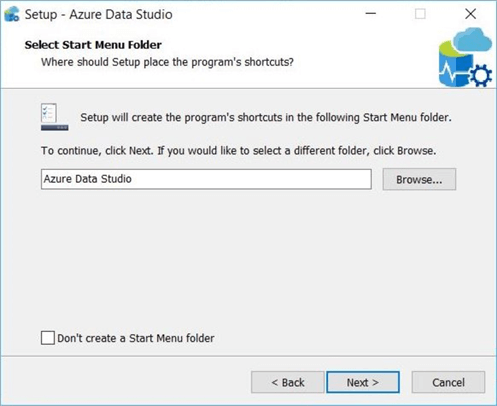
The following start menu folder will be created unless you check the check box. Again, I am choosing to select a default installation. Click the next button to proceed.
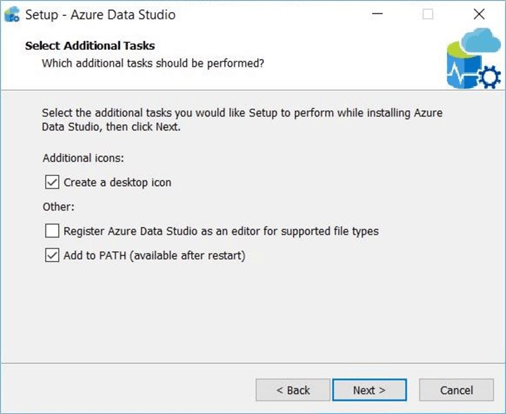
Adding a shortcut to the desktop and adding the path to the environment are the default choices. You can also associate this editor with supported files types. Click the next button continues the process.
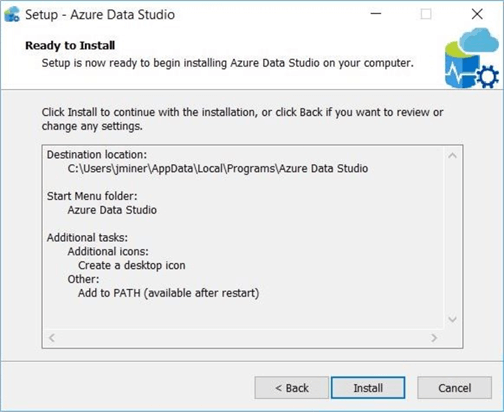
Last but not least, the options selected during the previous menus are presented to the end user before the install starts. The cancel button can be used to exit the install. I am choosing the install button to start the installation.
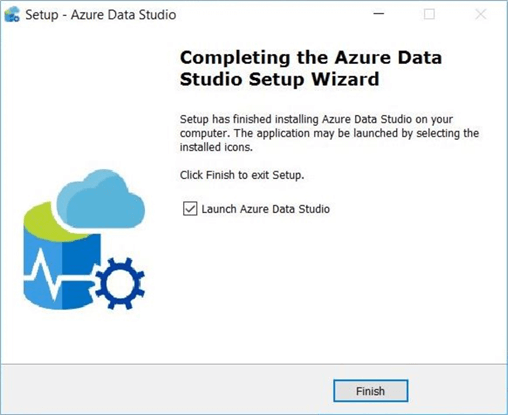
The following dialog box notifies the end user that the editor has been install correctly. Click the finish button to launch the application.
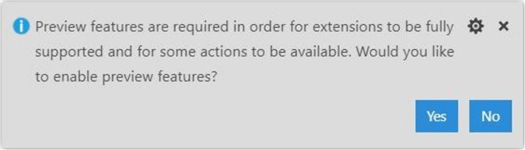
The Azure Data Studio product is currently under construction. Therefore, preview features should be enabled so that full functionality can be reviewed. Choose the YES button to enable these features.
The installation of Azure Data Studio is a very simple process. Remember to install both Git and Tortoise Git first so that the editor recognizes the fact that version control software is being used. The March release of the product now has installs for Windows, Mac OS and Linux.
Product Overview
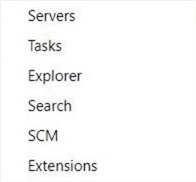
There are seven menu actions (icons) on the left-hand tool bar of the editor. These shortcuts allow quick access to the main functionality of the editor. The main menu at the top of the application has a sub menu named view. The following snippet from a drop of this menu shows the names of the seven actions. We will be investigating each action for our complete analysis of the tool.
Servers Menu
The Azure Data Studio editor can currently connect to Azure SQL Database, SQL Server 201X and PostgreSQL as well as the new SQL Server 2019 Big Data Cluster. Given the different platforms this tool can connect to, it is import to be able to organize connections into groups. This organization can be performed within the SERVERS menu. The April release of this tool has renamed this menu to Connections. Check out the team blog to keep up with the monthly changes.
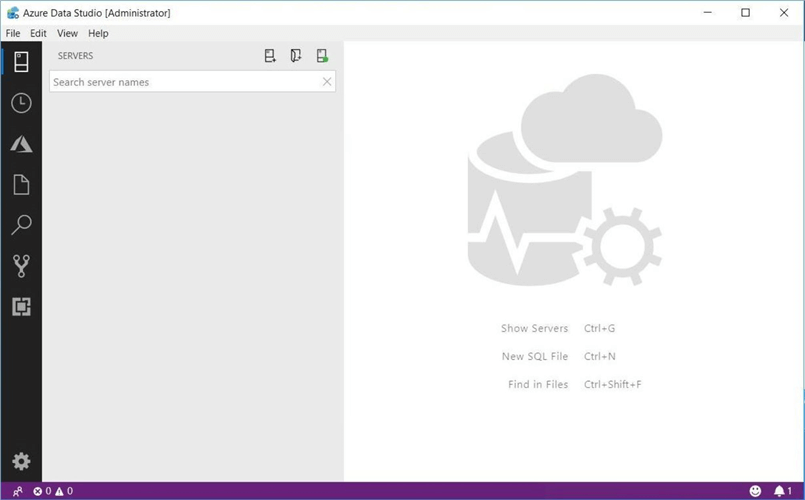
The image below reflects a new ADS install with no pre-existing servers defined. The three icons to the right of the word SERVERS are shortcuts to actions the user can perform. First, we can define a new connection to associated with group. Second, we can define a new server group to organize our connections. Third, we can show action connections. Let us define a new server group right now.
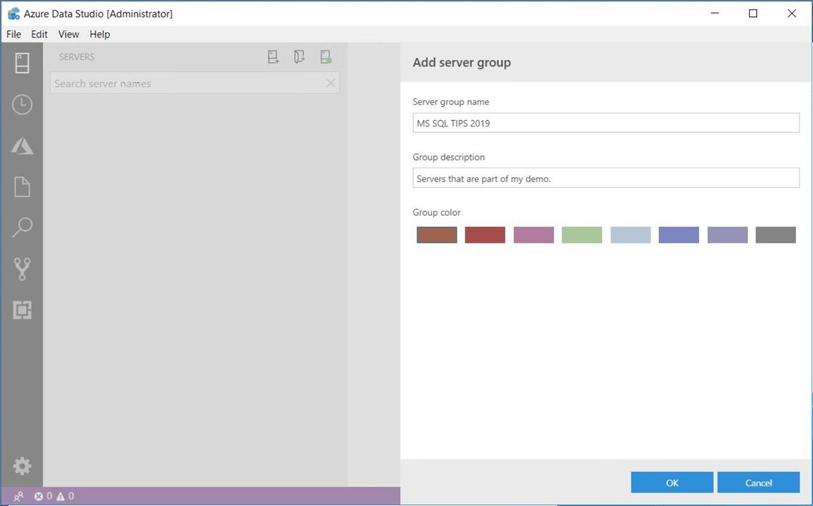
I am going to name the server group "MS SQL TIPS 2019", add a description for the group and pick the red color for identifying my group. The image below shows an add server group dialog box. Make sure to save the new server group.
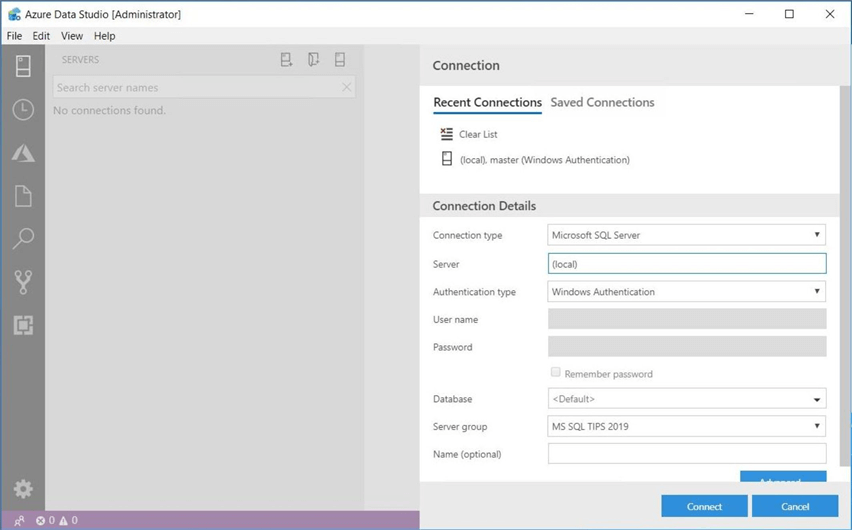
The ADS editor is smart enough to understand I have not connections. I can add a connection at this time. I have a local install for SQL Server 2019 on my Virtual Machine named vm4sqlsvr19. I have decided to use Windows Authentication to connect to my server. The screen shot below shows a typical connection dialog box. Make sure to save the connection.
Many of the actions that can be perform within the ADS editor are accessed by right clicking the right object. We need to have an active connection before querying the database. Either double click the server or right click and choose connect. A right click of the connection allows you to launch a new query window. By default, we are in the master database since I did not set this option in the connection dialog box.
One way to test our access to the server is execute a query that returns the current date and time. The snapshot of the tools shows the result returned by the editor. There are some interesting things that you can do in the results pane. Saving the returned data to a CSV, EXCEL, JSON or XML format is a simple click of the icons to the right.
As a SQL developer, I might have to profile the tables at the start of a new project since I am not familiar with the data distribution. This profiling can easily be done with the new charting icon. There are many chart types and options that you can use to display your data.

To recap, server groups can be used to organize many connections in meaningful ways. Many of the actions of the editor can be performed by right clicking the appropriate object. The results tab of the query editor allows the developer to quickly save and chart result sets. I just covered a small set of the actions that can be performed on the database, objects and query result sets.
Task History Menu
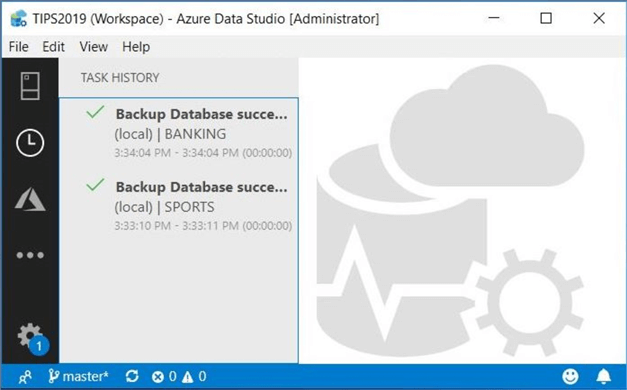
The Azure Data Studio editor allows for the backup and restore of local databases. The TASK HISTORY menu displays the actions performed by the tool. I created two test databases on my local SQL Server 2019 machine. The databases are called SPORTS and BANKING. After backing up the databases, I can look at this menu to see the when the actions occurred. A right click of the entry can generate a TSQL of the executed action.
Since I do most of my client development in Azure using the PAAS service, I really have no need for this menu option. Other professionals using local installs of the database products might find this menu useful.
Azure Menu
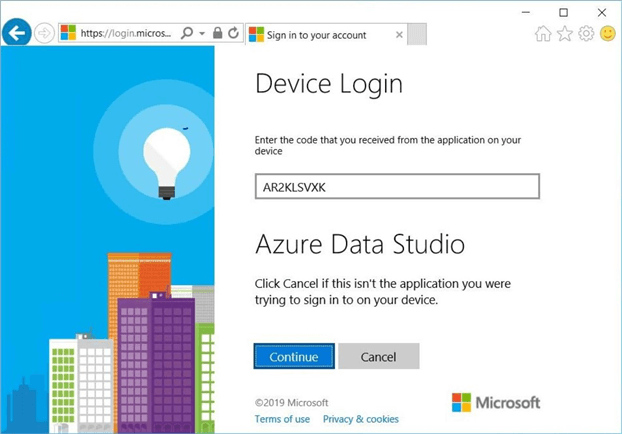
The Azure menu allows the ADS editor scan for Azure SQL Servers and Azure SQL Databases. The first step in the process is authenticate your computer using the device login URL and a user code. The image below shows the details of this requested action.

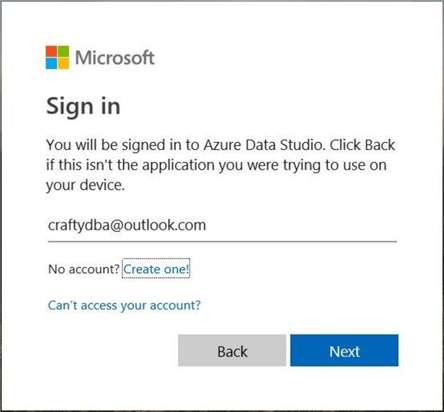
After successfully entering the user code, your computer is now recognized by Azure. The next step is to perform a standard Azure login.
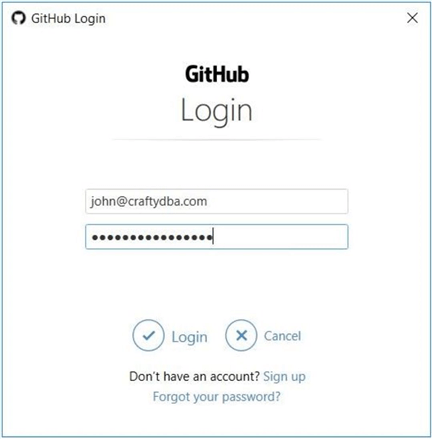
I am using the [email protected] account that is assigned to my Azure Subscription.
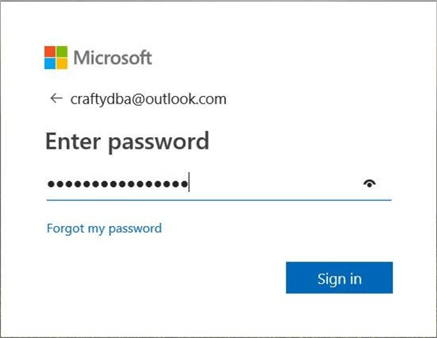
Of course, we need to supply a valid password to complete the action.
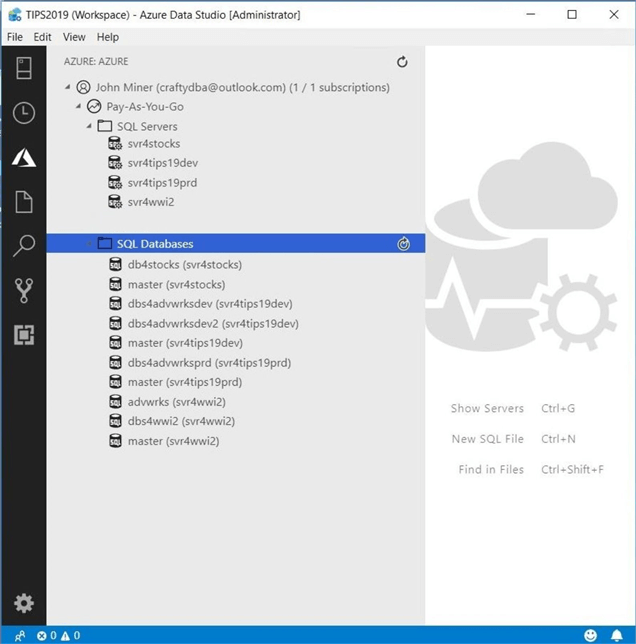
The image below shows four Azure SQL Servers and six Azure SQL Databases. The tool is smart enough to know that the master database exists for each logical server. At this point, we can’t work with the databases since we have not setup a connection.
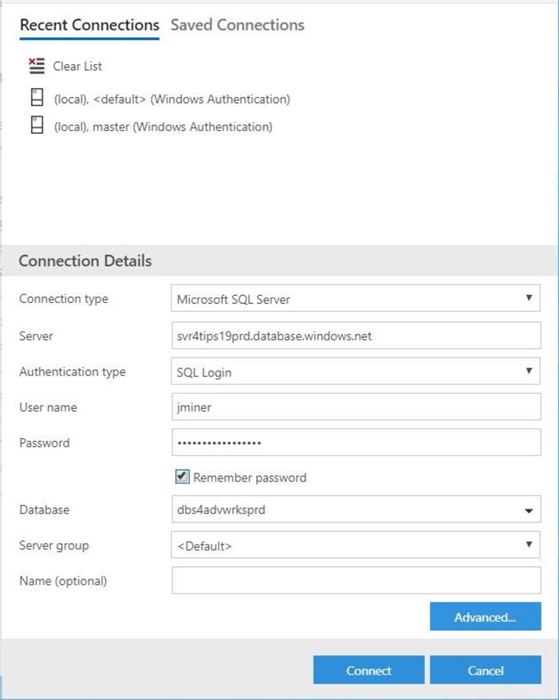
Setting up a connection is very easy. Click the name of the database that you want. An electric plug icon that represents a connection will appear. Click this icon to bring up the recent connections dialog box. I am using standard security to connect to the database. I will ask the editor to remember my password. The CONNECT button creates a connection to the database in the SERVERS menu.
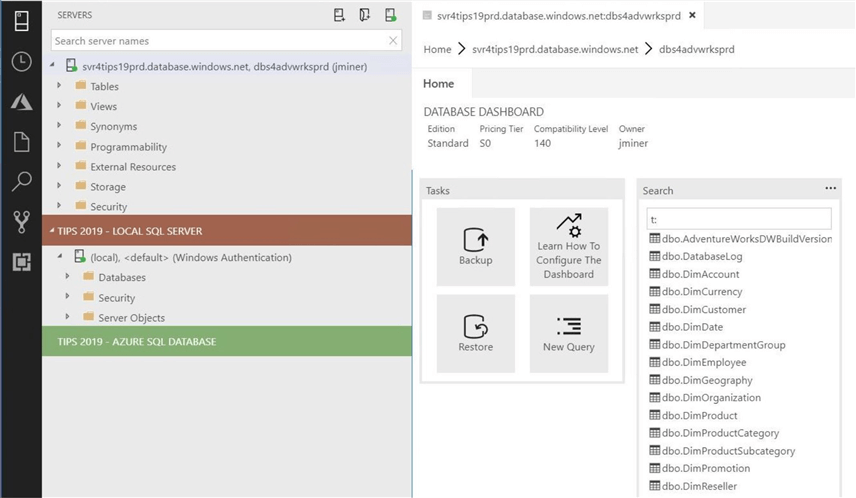
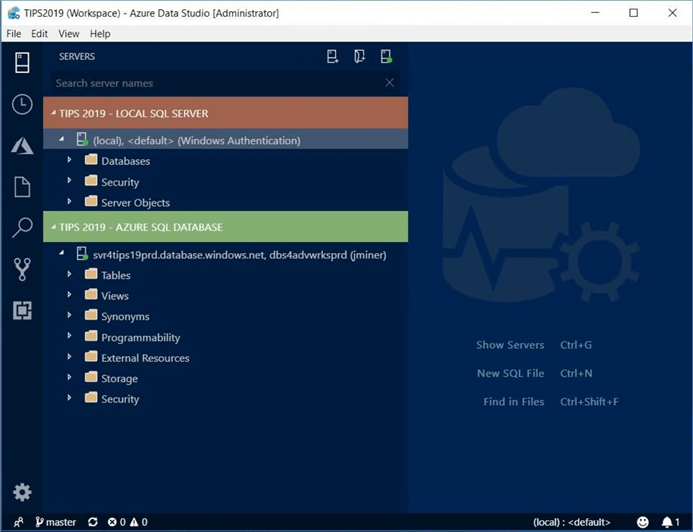
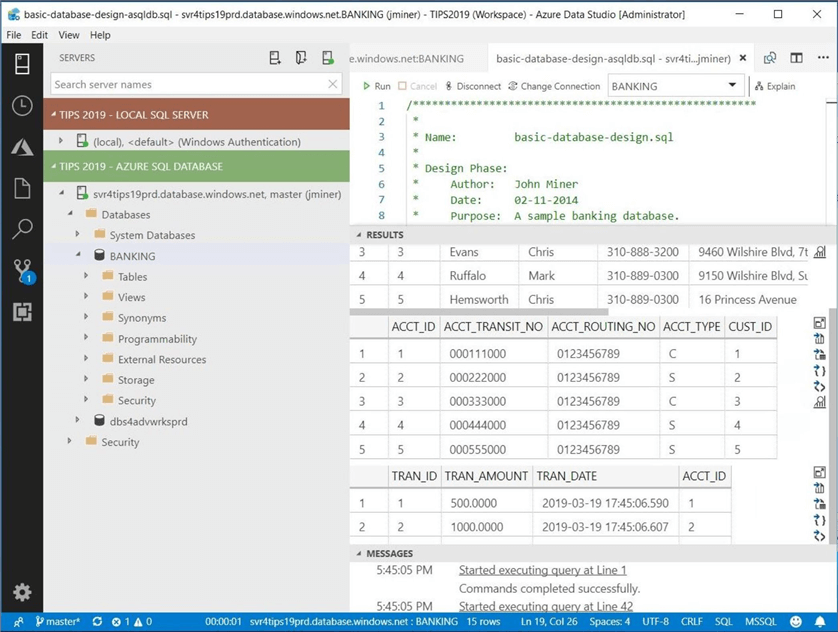
I want to segregate my LOCAL SQL SERVER and AZURE SQL DATABASE connections. Therefore, I created a new group in green for this new connection. Dragging the active connection to the new group saves the connection in the right place. The open window below shows the options that are available when managing a Azure SQL Database.
Please note, this tool is in active development. In fact, I know this is an Azure SQL database with a S0 capacity tier. Such an offering does not allow for a standard backup and restore process. However, the image below shows two invalid options. I have to say this bug has been fixed in the March release.
One interesting thing to note is that all database objects are show in the manage database windows. These objects can be filtered by searching by the correct acronym. The "t:" pattern tells the editor to only list tables. Right clicking the table allows for the selection of the first 1000 rows, the editing of the top 200 rows or scripting the table out into a new query window. In short, there are many short cut actions that I leave for you to explore.
In a nutshell, the Azure menu allows Azure Data Studio to connect and scan for valid Azure Servers and Databases. Opening a connection to a given Azure database allows for the addition of an entry to a favorite server group for quick recall.
Explorer Menu
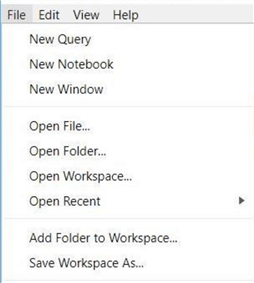
The explorer menu allows for the addition of folders to the existing workspace. The file submenu can be used to manage workspaces, folders and files. I suggest you create a workspace for the current project you are working on. In my case, I am going to create a project directory called "C:\ADS".
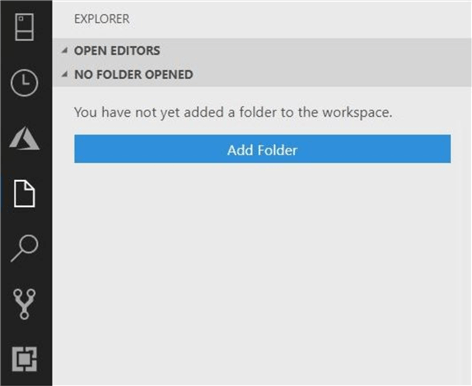
The first step is to add the folder to our unnamed workspace. Click the button below to start the process.
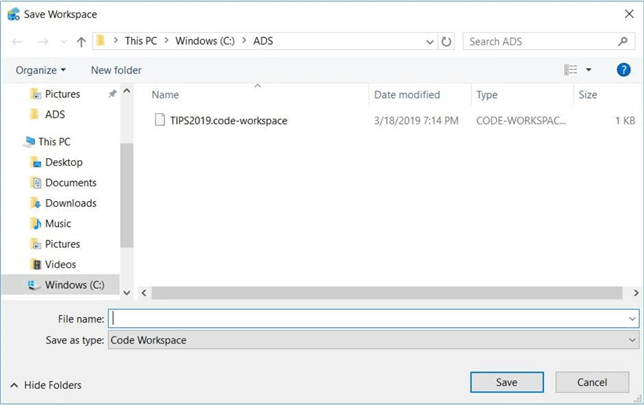
I am going to save my code workspace with the name of TIPS2019 in the project directory.
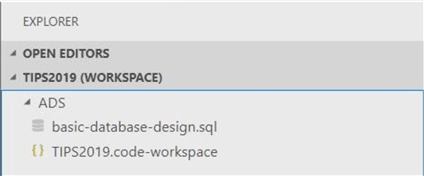
If you successfully executed the above steps, you should have two files in WORKSPACE. One file is the workspace settings and the other file is a script to create a local sample BANKING database. Please see below image for output.
The table below contains sample scripts to create the BANKING database on a local SQL Server or an Azure SQL Server.
| Script | Description | Comments |
|---|---|---|
| basic-database-design-local-sqlsvr | On-premises version of sample BANKING database. | Must change database file locations. |
| basic-database-design-azure-sqldb | Cloud version of sample BANKING database. | Must connect to both master and user database. |
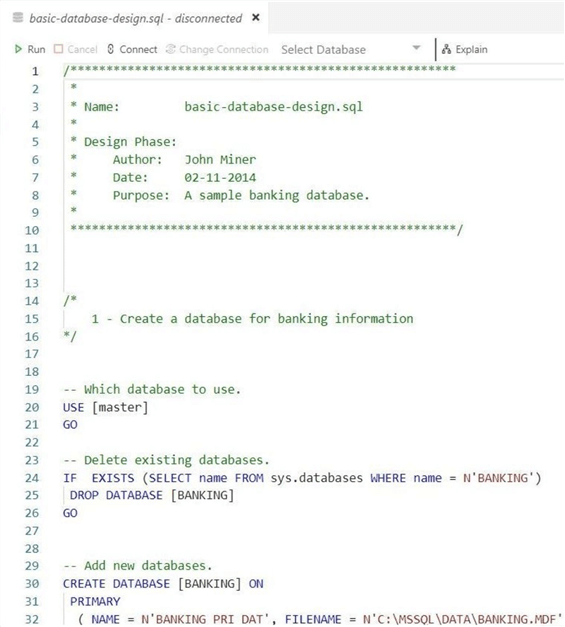
We can double click the file to open and start editing the T-SQL code. If we try to run the script at this point, it will fail to execute. That is because we are not connected to any database.
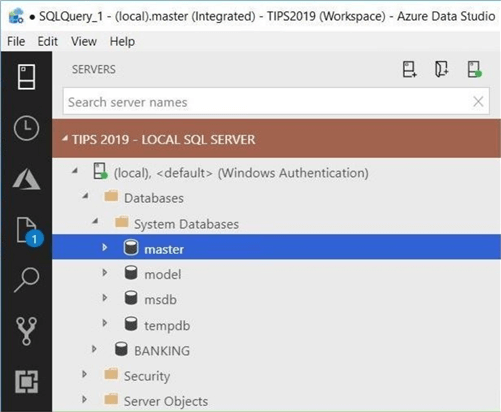
If we connect to the local database and successful execute the script, we will see a new sample user database named "BANKING".
The explorer window allows you to create a 1-to-1 relationship between a given workspace and a work folder. Additional folders can only be created under the main directory.
Our boss has asked us to create a sample BANKING database for a local and cloud server. The creation of the local database is now complete. I leave the creation of a cloud database as a task for you, the reader to complete.
Search Menu
The search menu in Azure Data Studio can be used to look for key words in both active windows and the project folder. Since this feature is straight forward and not interesting, I am going to show one example of how to search for key words.
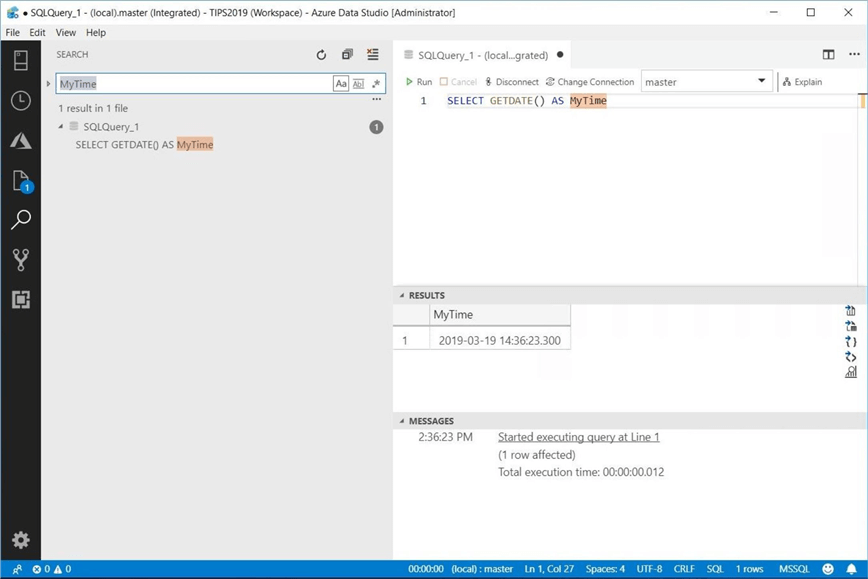
Create a new query that is not connected to a database. In the example below, I am returning the date and time on the server as a field named MyTime. The Azure Data Studio editor creates the temporary file in the working directory. The search result in the left pane shows one match for the key word. The right pane highlights the matching word in the opened file.
To recap, the Azure Data Studio supports searching for key words in both active windows and files in the project folder.
Source Control Menu
In today’s agile development environments, it is extremely import to install and configure source control software. The popularity of the GitHub did not go unnoticed by the Microsoft. The software giant purchased the company in June of 2018.
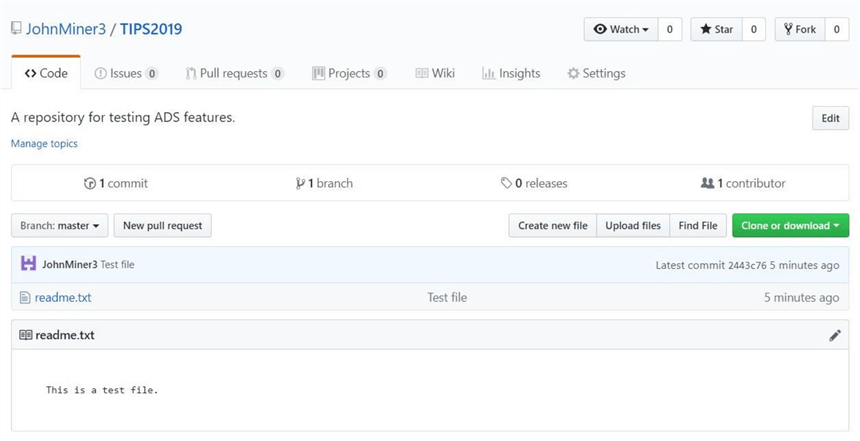
For this simple proof of concept, I am going to create a simple repository using my personal account JohnMiner3 and a new repository I am calling TIPS2019. I start off the project by creating a simple readme.txt file.
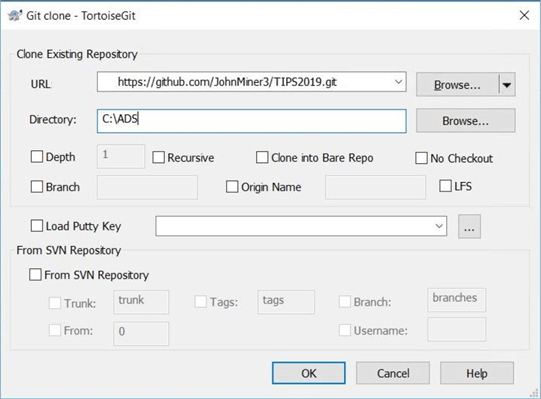
The next step is to manually clone the repository to our working directory called "C:\ADS". I suggest you make a backup of the existing ADS directory. Clear the existing ADS directory. Execute the Tortoise Git Clone action to bring down the file. Last but not least, copy over the files from the backup directory to the current directory.
If you are successful, the windows explorer will show a green dot indicating that the file is check into source control. To enable GitHub integration inside the ADS editor, we need to log into our account.
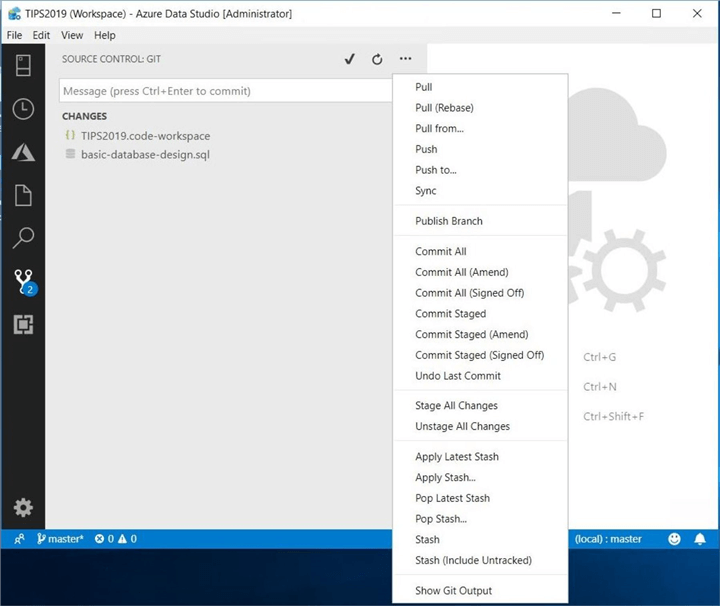
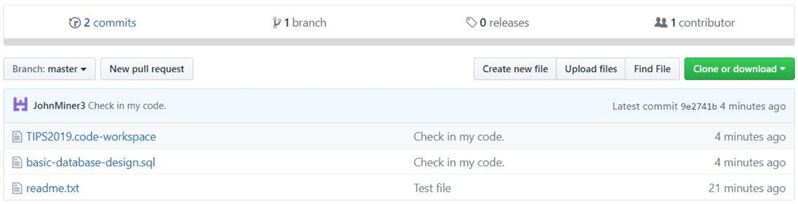
If everything goes as planned, the editor will show the SOURCE CONTROL integration with GIT. The screen shot below shows two files in the ADS directory need to be committed locally and push to the remote repository.
The completion of the action shows the code saved in the cloud with the first comment.
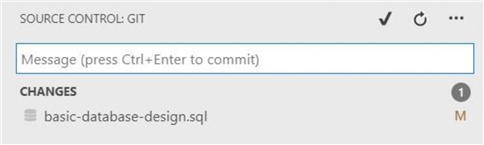
For some reason, I have decided to add spacing to my TSQL script for readability. The ADS editor understands one file has been modified.
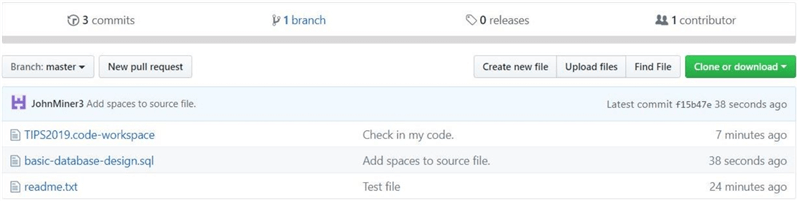
Again, I am going to commit the change to the local repository and push the updated code to the remote repository. Examining the files and comments in GitHub, we can see that the task was successfully completed.
A brief recap of this section shows that the popular GitHub software control product can be easily integrated in Azure Data Studio. The cloning of the repository can’t be accomplished within the tool. Therefore, I used Tortoise Git to perform this one-time action.
Extending & Configuring the editor
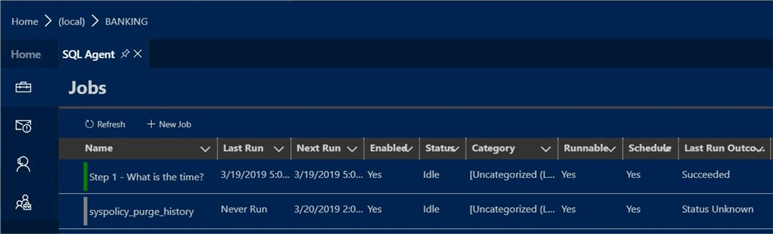
Having the access to an enhanced editor with additional functionality by installing published extensions from Microsoft or third-party providers is a major differentiator. The "Admin Pack for SQL Server" allows the developer to add, edit, delete and monitor SQL Agent jobs. In fact, there are three more features that I will not be covering. The image below shows the installation of this extension.

Azure Data Studio allows for color scheme of the editor to be changed at will. Just right click the gear image (settings menu) and choose the color theme sub menu. The image below shows how my environment looks with the "Tomorrow Night Blue" theme.
Right clicking the local server and selecting the manage option to bring up home page for the server. This will show an over view of the databases and disk space usage. Because we installed the SQL Server Agent extension, we how have an additional window for jobs. I create a job named "Step 1 – What is the time?". It is a silly job that returns the current server date and time.
The main take away from this section is that the editor can be enhanced by installing extensions from Microsoft or third-party providers. If you are tired of the black and white color scheme of SQL Server Management Studio, you will be pleased with the color themes that are part of the editor.
Wrapping up the review
Our boss asked us to create a sample database that is located both on premise and in the cloud. The second task has not been completed yet. The screen shot below shows the creation of a BANKING database on the svr4tips19prd.database.windows.net server in Azure. This script is being executed from the master database.
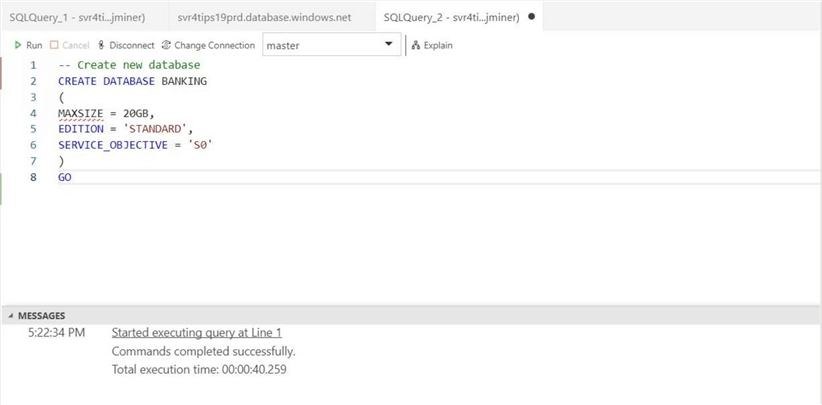
Executing the rest of the script from the BANKING database will complete the task. One nice feature of the editor is that each T-SQL batch executed by the editor returns the execution time. Also, result sets returned from the script show up as separate embedded windows.
In summary, we have completed a full high-level overview of the Azure Data Studio editor for our boss.
Summary
Azure Data Studio shares the same graphical user interface, look and feel, with Azure Studio Code. Adoption of this tool is gaining momentum in the developer community since it is a cross platform and cross database editor. If you spend most of your time as a SQL Developer, you might like using this tool. If you spend a lot of time managing other products such as Integration Services, Reporting Services or Analysis Services, then Visual Studio with SSDT extensions and/or SQL Server Management Studio might be a better fit.
What features does Azure Data Studio lack that other tools might have?
I really like the desired state design principle that is used with Visual Studio database projects. I do not have to worry about how a field added to the middle of a table will be implemented. The deployment wizard automatically takes care of the required steps. Therefore, unless you are a SQL Package expert, you might end up going back to the old school pattern of recreating the database object every time you execute your script. This pattern is great during initial development but a real danger for an existing system with production data.
Another new feature of the ADS editor is SQL notebooks. This functionality was initially added to support the new SQL Server 2019 Big Data clusters. I think it is kind of neat that a notebook can execute TSQL code. However, the retention of variables and temporary tables between cells does not exist. Therefore, you do not get the same experience that you are used to with Python scripts. Also, there is a real danger of saving query results in the notebook. A key feature of every database is security and this notebook feature invalidates that feature.
My opinion is that Azure Data Studio is a good tool right now, but might be a great tool in the future. I will not be changing over to this editor until more features from Visual Studio are incorporated. The ability for continuous integration and continuous deployment is a key requirement for me.
Please see the current documentation for details and announcements page for recent changes to the Azure Data Studio.
Next Steps
- Check out these additional resources


About the author
 John Miner is a Data Architect at Insight Digital Innovation helping corporations solve their business needs with various data platform solutions.
This author pledges the content of this article is based on professional experience and not AI generated.
View all my tips
