By: Eduardo Pivaral | Comments | Related: > Power BI
Problem
You were assigned with the task of analyzing a database of user comments (or another free form text source), and provide a report that includes key phrases, sentiment of the text (positive or negative) and the language of the text. This type of report will be used to determine what users think about the company and the main language of the users so we can target efforts on addressing issues with clear insights.
Developing this analysis from scratch will take a very long time and could not have the desired results, so we need to use an existing service that provides these features.
Solution
With the help of Power BI and its ability to create stunning reports from different sources, and combining it with the Azure text Analytics API, we can achieve this task in no time. In this tip we will learn about this API and how to use it in Power BI.
What is Azure text analytics?
According to Microsoft documentation, Azure text analytics is part of Azure cognitive services, a set of cloud-based machine learning and AI algorithms aimed at language, computer vision, speech and other related projects.
Azure text analytics is part of the language tools and provides language processing over raw text with these main functions: sentiment analysis, key phrase extraction, named entity recognition and language detection.
In order to use it, you need a valid Azure account and create a text analytics resource so we can consume the API in our Power BI report. We will show you how to do it.
Create and configure our Text Analytics resource
We will create the service via the Azure portal (Portal.Azure.com), so the first step is to log in to the portal and then click on the search textbox on the top and type "text analytics":
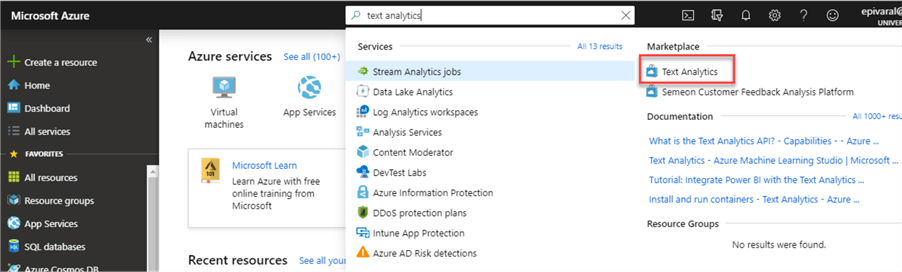
Then select the Text Analytics resource from the Marketplace category, a new window will open where you can create the resource and pricing information as well (for this example we will use the free tier, that allows the service to be called 5,000 times each month).
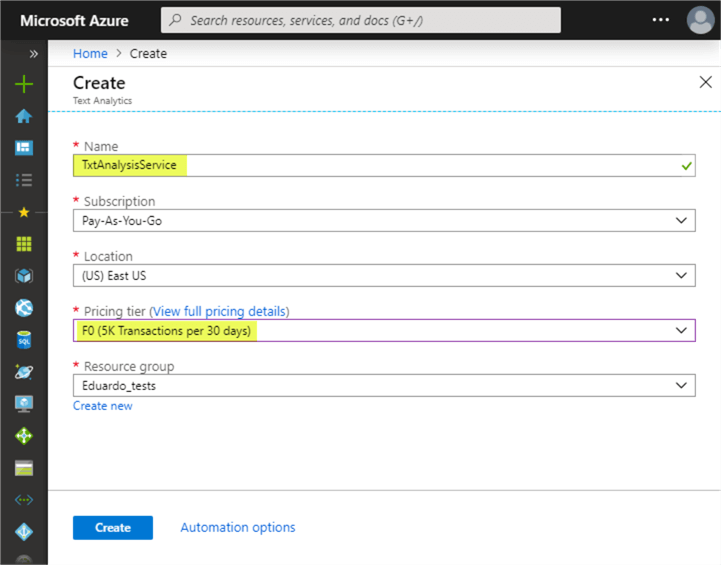
Proceed to enter the name you want for the resource and complete the other information required and click on Create:
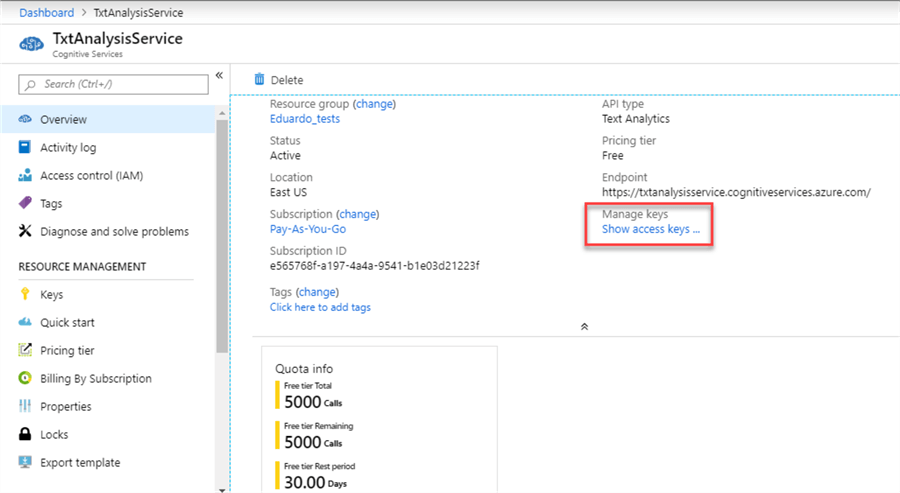
Once it has been created, you can start using the resource, on the overview tab, click on the Show access keys link as we will need the access key later:
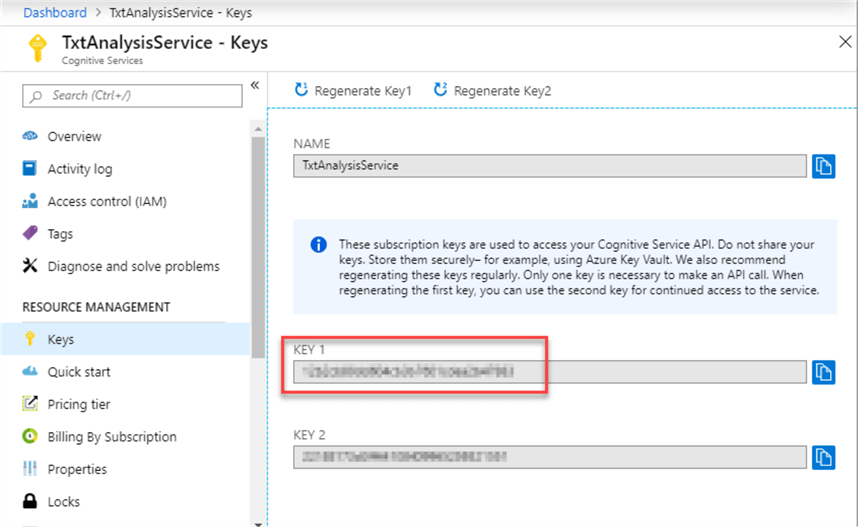
On the next page, your access keys will be displayed, copy Key1 and save it as we will use when calling the API (don’t share these keys as they are private to your subscription):
We are now ready to use the API in Power BI, the API call is written in M language, you can check this tip in case you need an introduction.
Creating the Power BI Report to Read Textual Data
Open Power BI desktop and import the data you want to analyze, for this example I have created a SQL Server database with random comments (taken from random tweets) in different languages:
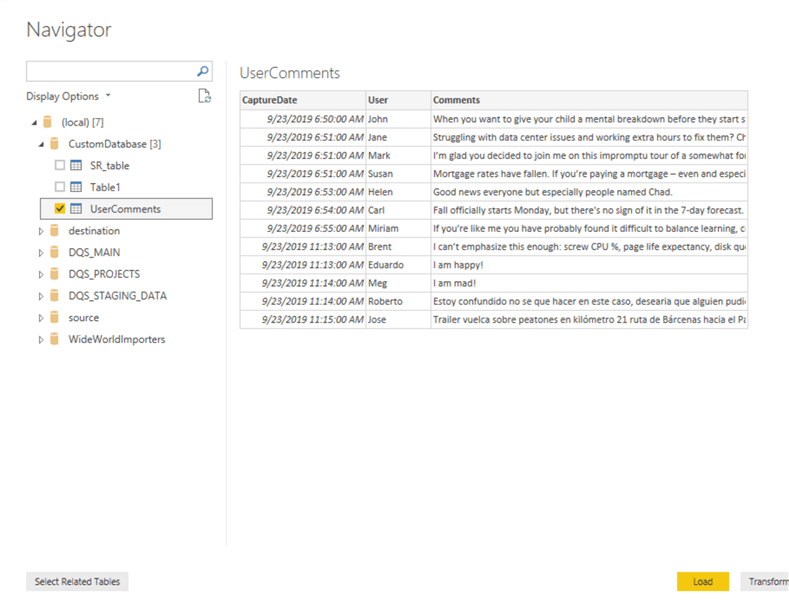
Select the table or tables you want to analyze and click on Load.
Once your data is loaded, click on Edit queries from the Home tab to open the Power Query editor:

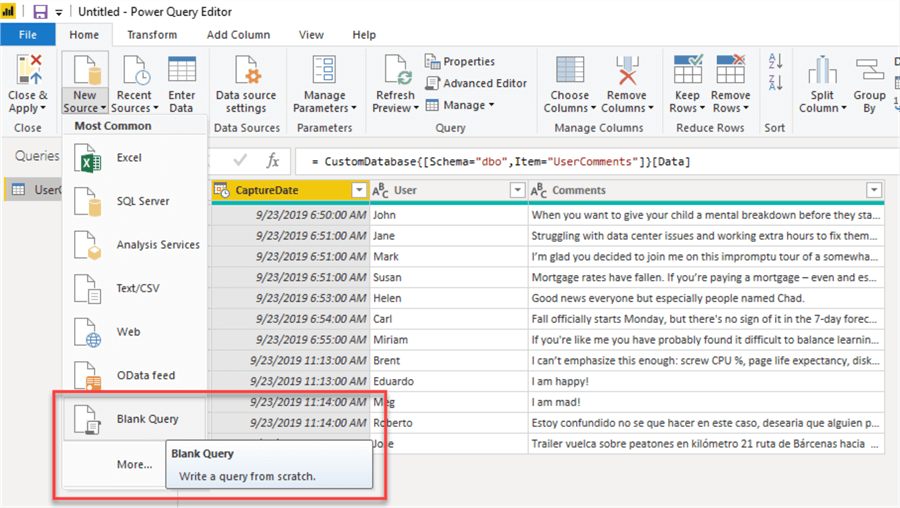
Once the Power Query editor is open, click on New Source and select the Blank Query option:
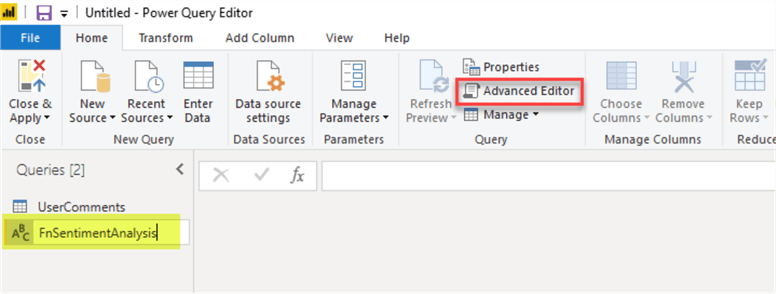
Rename the blank query to the operation you want to do, in our case, we will start with sentiment analysis, and then click on Advanced Editor:
We will obtain the API call in M code from the Microsoft documentation.
The API call is available for the different functions text analytics offers, and the code is something like this:
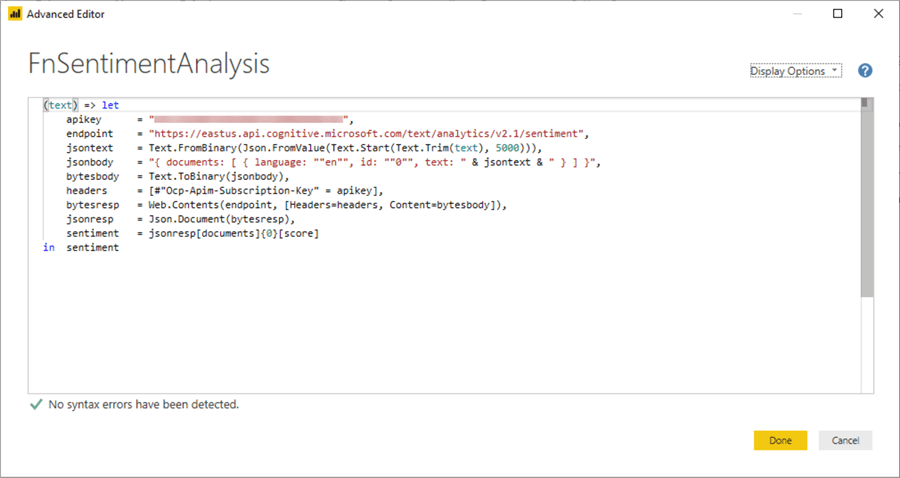
(text) => let
    apikey      = "YOUR_API_KEY_HERE",
    endpoint    = "https://<your_location>.api.cognitive.microsoft.com/text/analytics/v2.1/sentiment",
    jsontext    = Text.FromBinary(Json.FromValue(Text.Start(Text.Trim(text), 5000))),
    jsonbody    = "{ documents: [ { language: ""en"", id: ""0"", text: " & jsontext & " } ] }",
    bytesbody   = Text.ToBinary(jsonbody),
    headers     = [#"Ocp-Apim-Subscription-Key" = apikey],
    bytesresp   = Web.Contents(endpoint, [Headers=headers, Content=bytesbody]),
    jsonresp    = Json.Document(bytesresp),
    sentiment   = jsonresp[documents]{0}[score]
in  sentiment
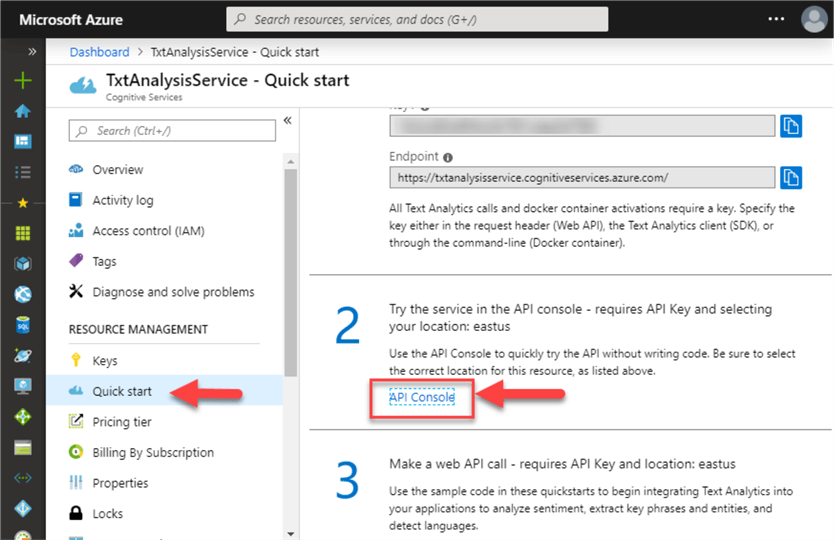
You must change the first parameter apikey to your private key we discussed earlier, and endpoint must be based on your service location, you can check your endpoint URL clicking the following link on the text analytics service on the Azure portal:
Once you are ready, just paste the code, it should look like this:
Now that you have created the function, we are ready to consume it.
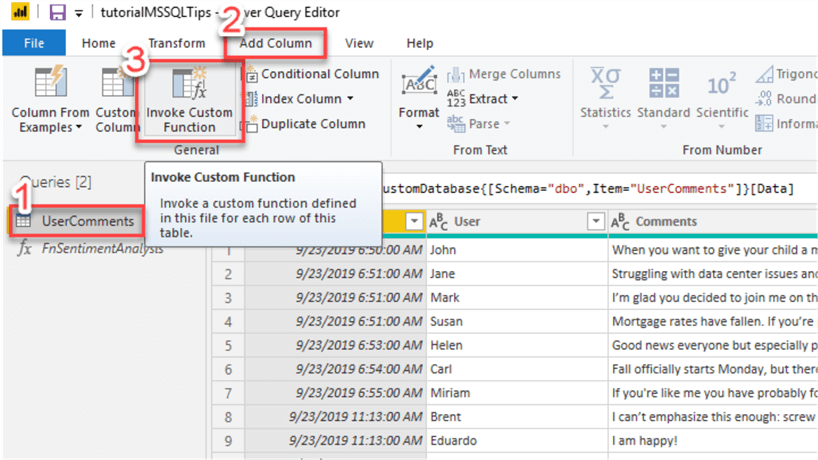
Click on the dataset where your comments are stored, then go to Add Column > Invoke Custom Function:
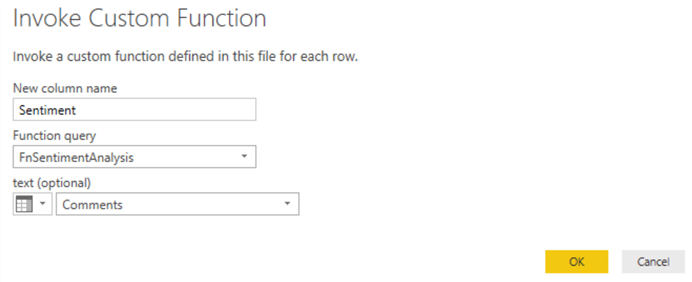
Specify the new column name, and in the function query select the function created in the previous step, then select the text you want as a parameter for our function (for our example, the comments column).
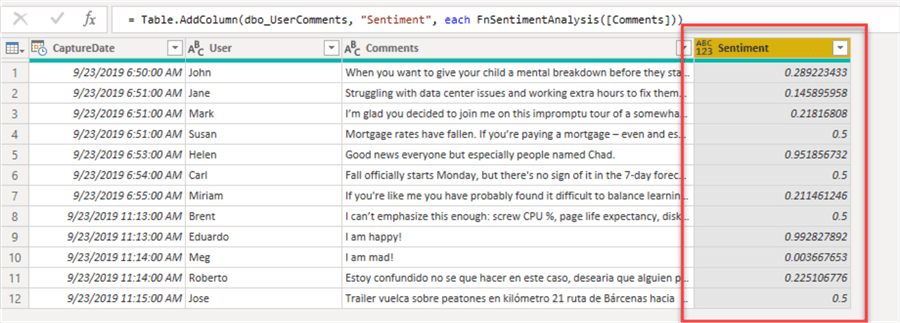
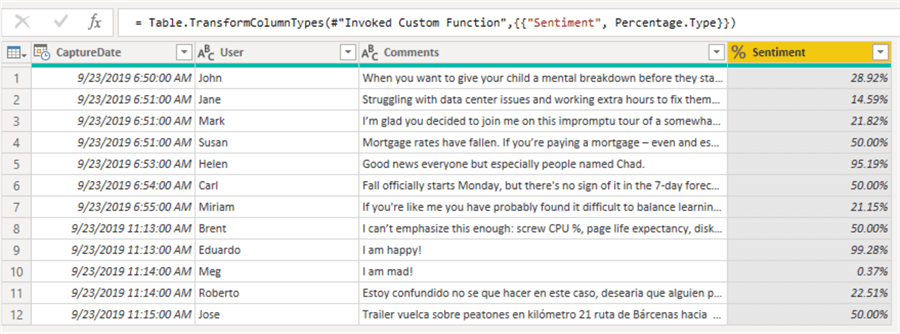
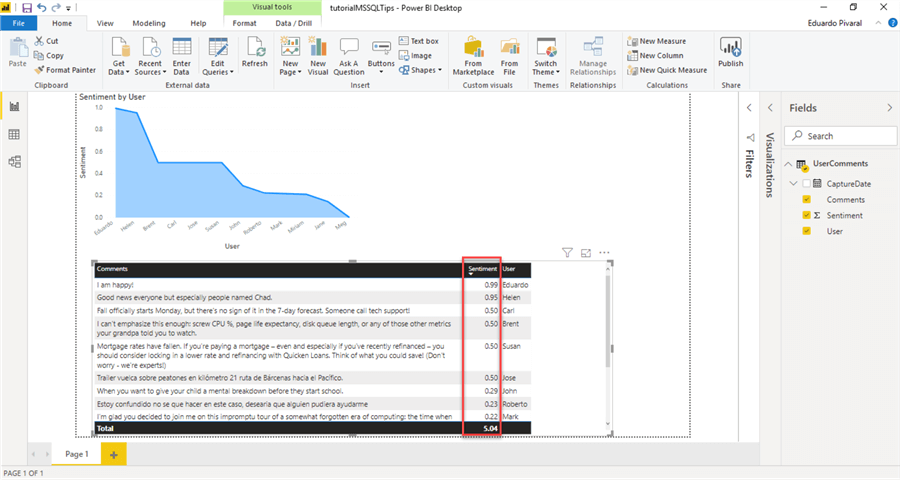
You can see the sentiment analysis is now in place (a number close to 1.00 is a positive sentiment and close to 0.00 is a negative sentiment):
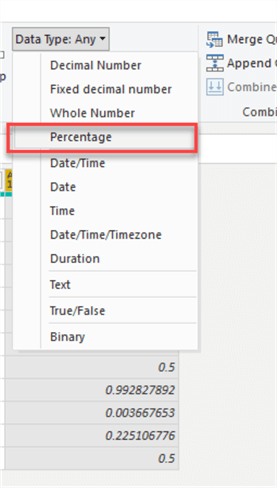
Since this is a percentage, you can format the column with the proper datatype (depending on your needs):
And we can visualize the formatted column:
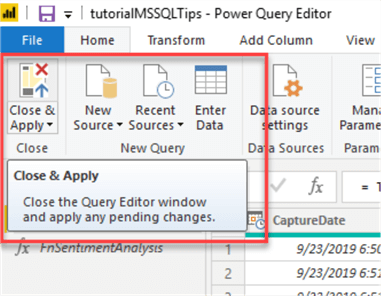
Before adding more functions, we can validate that everything is OK and save the changes and close the Power Query editor.
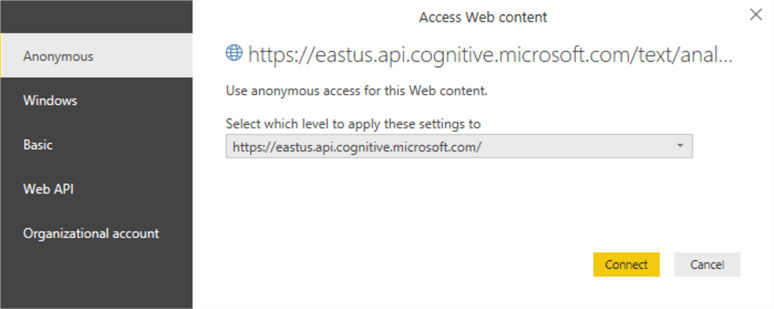
A new window will open for configuring the authentication method for the API call, select Anonymous access and click Connect.
If everything is OK, we can now use the new column in our report (we just drag and drop some visuals):
To add other functions just follow the same steps, this is the code I used for this example:
Key Phrases:
(text) => let
    apikey      = "<YOUR API KEY>",
    endpoint    = "https://eastus.api.cognitive.microsoft.com/text/analytics/v2.1/keyPhrases",
    jsontext    = Text.FromBinary(Json.FromValue(Text.Start(Text.Trim(text), 5000))),
    jsonbody    = "{ documents: [ { language: ""en"", id: ""0"", text: " & jsontext & " } ] }",
    bytesbody   = Text.ToBinary(jsonbody),
    headers     = [#"Ocp-Apim-Subscription-Key" = apikey],
    bytesresp   = Web.Contents(endpoint, [Headers=headers, Content=bytesbody]),
    jsonresp    = Json.Document(bytesresp),
    keyphrases  = jsonresp[documents]{0}[keyPhrases]
in  keyphrases
Language:
(text) => let
    apikey      = "<YOUR API KEY>",
    endpoint    = "https://eastus.api.cognitive.microsoft.com/text/analytics/v2.1/languages",
    jsontext    = Text.FromBinary(Json.FromValue(Text.Start(Text.Trim(text), 5000))),
    jsonbody    = "{ documents: [ { id: ""0"", text: " & jsontext & " } ] }",
    bytesbody   = Text.ToBinary(jsonbody),
    headers     = [#"Ocp-Apim-Subscription-Key" = apikey],
    bytesresp   = Web.Contents(endpoint, [Headers=headers, Content=bytesbody]),
    jsonresp    = Json.Document(bytesresp),
    language    = jsonresp[documents]{0}[detectedLanguages]{0}[name]
in  language
Then proceed to add a new column for each function following the same steps as before:
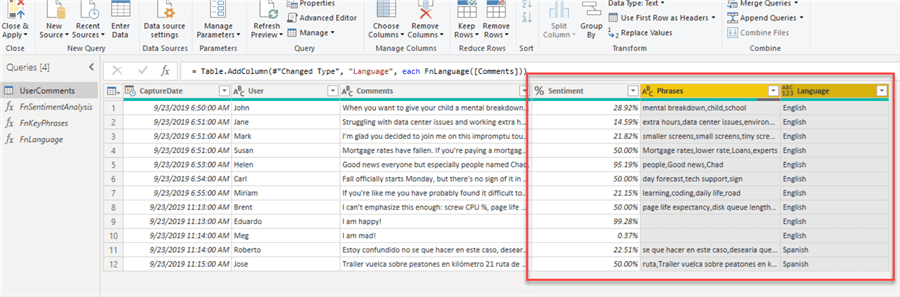
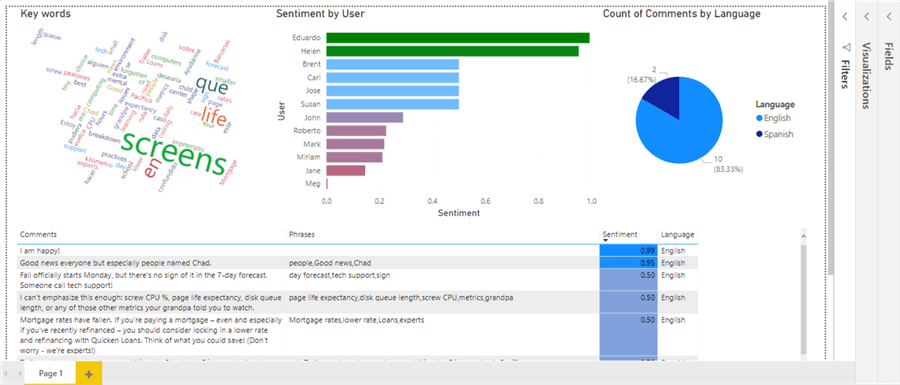
After that, close the Power Query editor and you can now put all your efforts in designing your report:
Next Steps
- Latest release of Power BI desktop can be downloaded here.
- You can check Microsoft official documentation on Power BI architecture here.
- You can check general information, documentation and pricing for other Azure Cognitive Services and more information here.
- You can check out other Power BI tips here.
Learn more about Power BI in this 3 hour training course.


About the author
 Eduardo Pivaral is an MCSA, SQL Server Database Administrator and Developer with over 15 years experience working in large environments.
 This author pledges the content of this article is based on professional experience and not AI generated.
View all my tips
