By: Ron L'Esteve | Comments | Related: > DevOps
Problem
There are many methods of provisioning Azure resources through Infrastructure as Code (IaC) by using Azure Resource Manager Templates (ARM) to define the Infrastructure as Code and then provision them through platforms such as Visual Studio, Terraform and others. Microsoft's recent addition of Azure Blueprints to the Azure portal has introduced a new method of deploying Azure Resources through ARM templates by following IaC best practices. How can one get started with Azure Blueprints?
Solution
The history of blueprints dates back to the mid-1800s as a process to document an Architect's visions and plans on paper which was then blended with chemicals, resulting in a blue page with letters or lines in the original white color of the paper, creating the process of blueprinting. Similarly, Azure Blueprints enables architects and central information technology groups to define a repeatable set of Azure resources that implements and adheres to an organization's standards, patterns, and requirements. This article will demonstrate how to provision Azure resources by using Azure Blueprints.
Create an Azure Blueprint
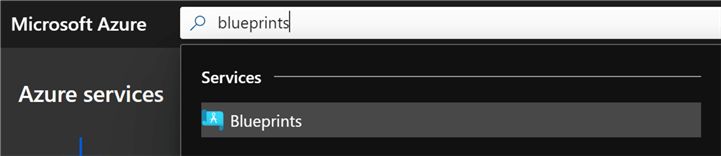
To get started with Azure Blueprints, search for blueprints in the Microsoft Azure portal.
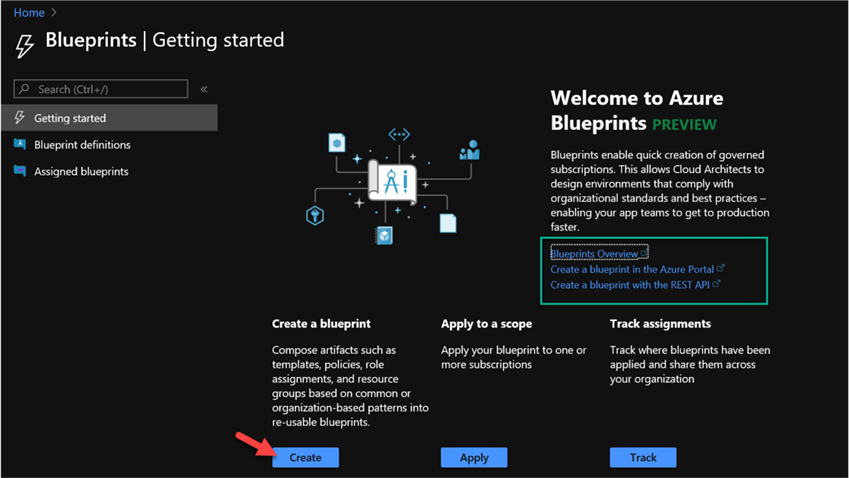
Azure Blueprints is a free Azure service that can be used to deploy Azure Resources and easily manage ARM templates through Infrastructure as Code. For more information on Azure Blueprints, click the Blueprints Overview link on the welcome page. There is also an option to create a blueprint with a REST API.
To begin creating an Azure Blueprint, click Create.
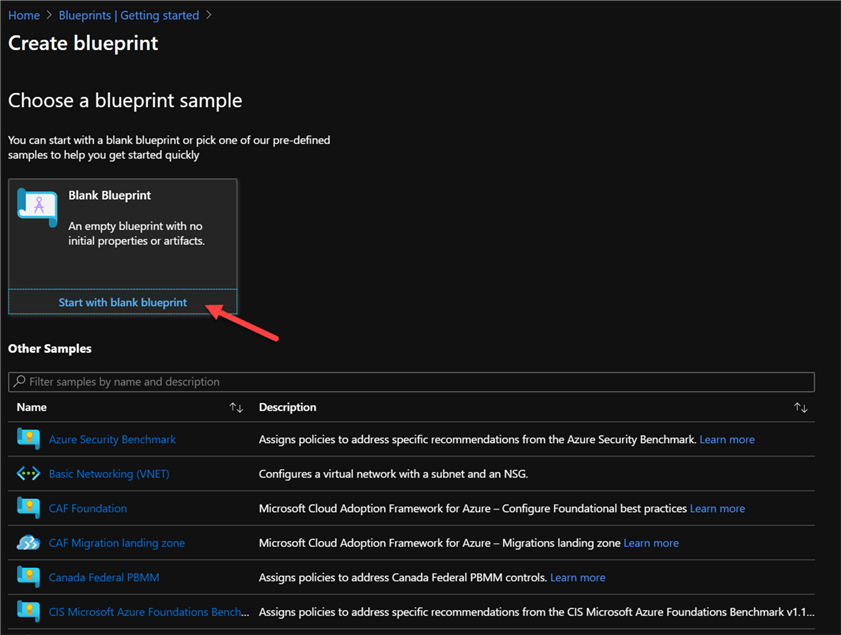
Next, there will be the option to either start with a blank template and bring your own template or use a pre-defined sample template that can be found and filtered in the Other Samples section. Azure Blueprint samples can also be found here.
Click Start with blank template to get started with a blank blueprint.
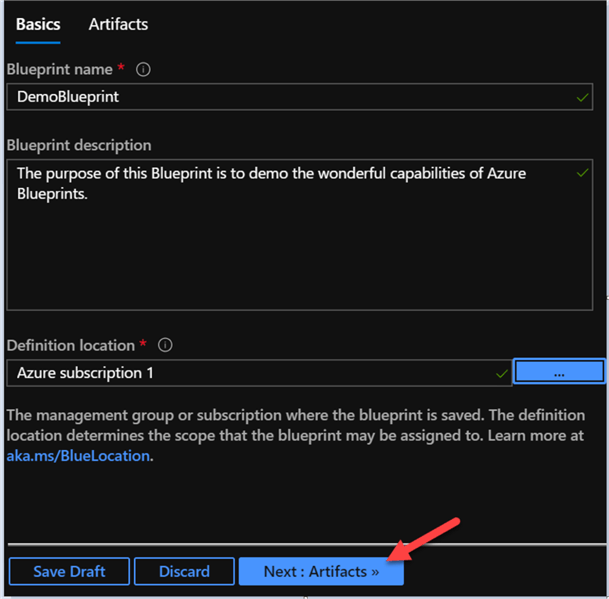
Next, define the basics of the blueprint including the blueprint name, description, and definition location.
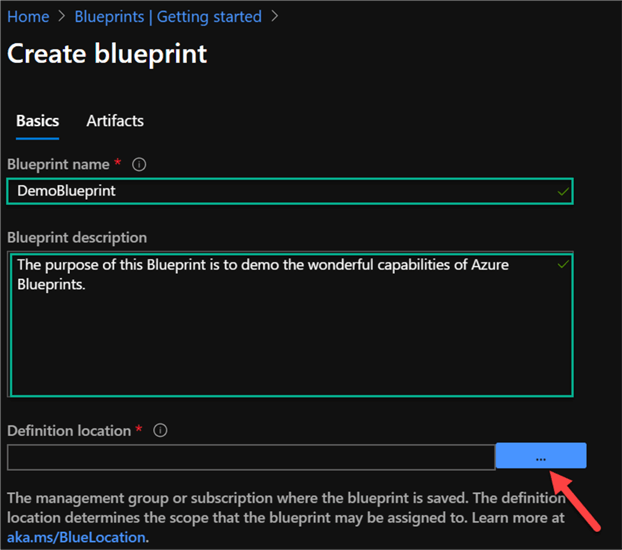
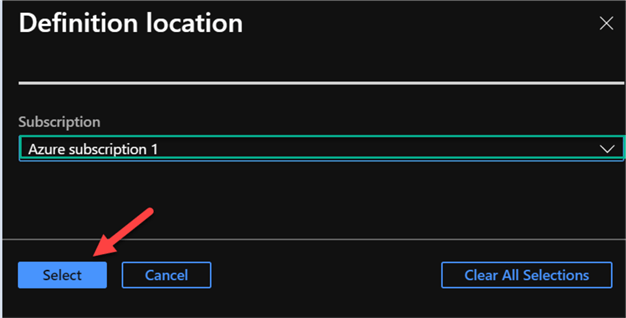
When selecting the definition location, there will be a selection for the Azure Subscription.
Select the desired Subscription and click Select.
Once Basics section is complete, click Next: Artifacts to begin adding artifacts to the blueprint.
Add Blueprint Artifacts
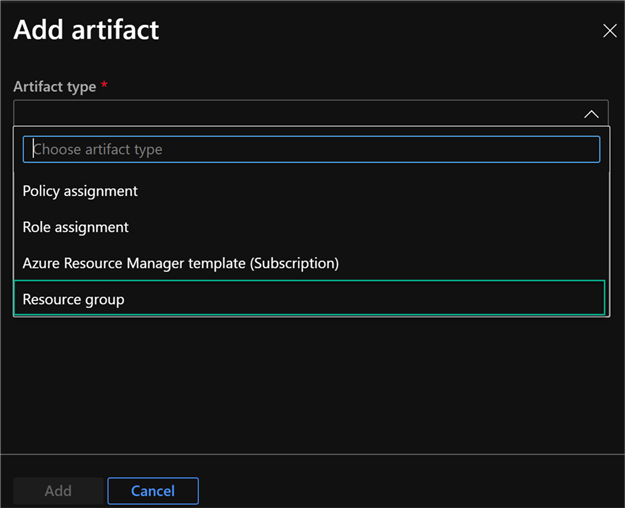
Blueprint artifacts can include:
- Role Assignments: Assign a role to previously created resource.
- Policy Assignments: Implement a tagging policy to append tags to a previously created resource.
- Azure Resource Manager templates: Use pre-defined or custom ARM templates to create and define the resources.
- Resource Groups: Create a resource group to contain a group of related artifacts
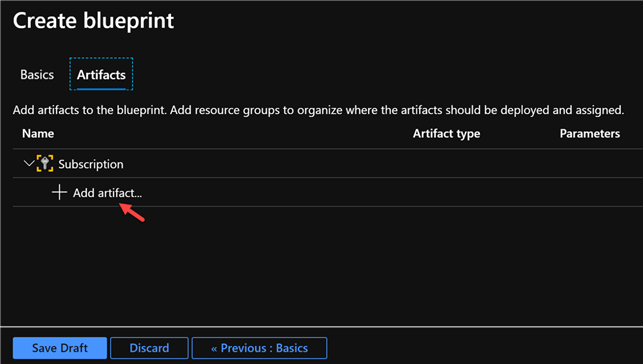
Click Add artifact…to the begin selecting the desired artifacts.
Select Resource Group from the Add Artifact type drop-down menu:
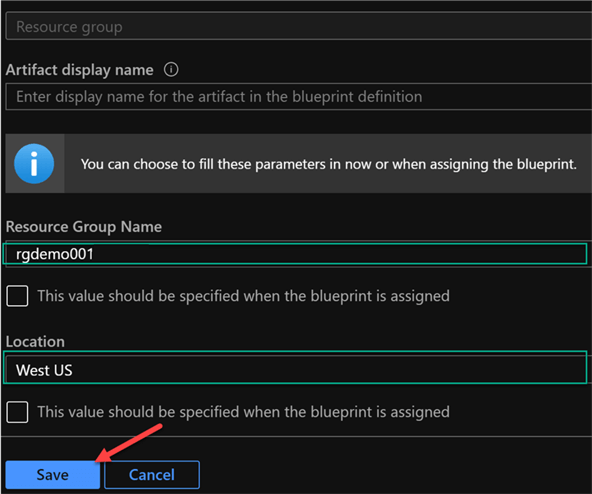
Give the resource group a name, location, and click Save.
Note that there are check boxes under the parameter entry section, which determine whether the value should be specified when the blueprint is assigned. For the purposes of this demo, I will uncheck theses boxes and define these parameters as static values within the blueprints. When deploying these blueprints using PowerShell for a more automated process, the parameters can be defined through a separate parameter file for each artifact.
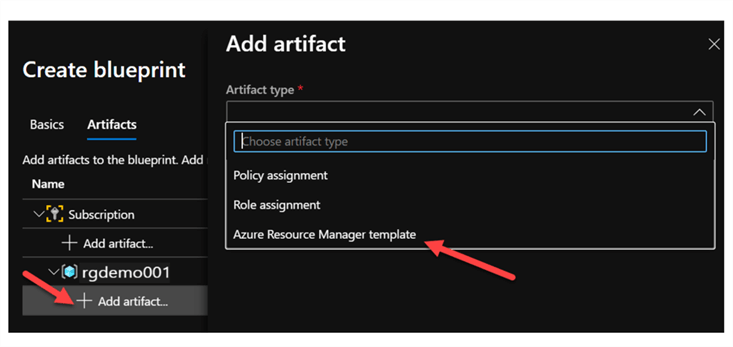
Once the resource group is created, click Add artifact under the newly created resource group artifact to add an ARM template for the resources.
Select Azure Resource Manager template to continue.
Add Azure Resource Manager (ARM) Templates
ARM Templates are a way to declare objects, types, names and properties in a JSON file which can be checked into source control and managed as Infrastructure as code files. Azure resources can be provisioned with ARM Templates that contain parameters that define and customize the deployed resources. These parameters can be entered statically, dynamically at runtime or managed through supplemental JSON parameter files when blueprints are deployed through REST APIs.
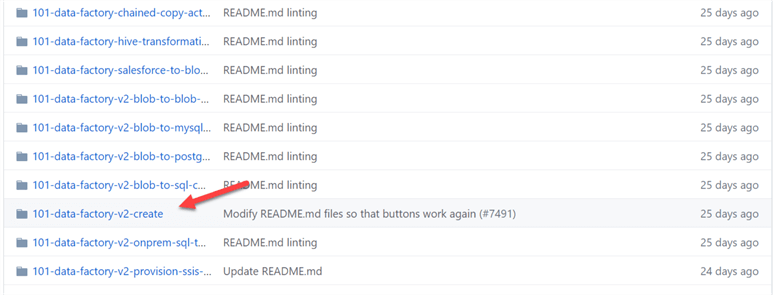
While Azure Blueprints has a vast collection of sample templates, it lacks the availability of many essential Azure resources in the gallery. For that reason, there have been many template contributions to the open-source Microsoft technical developer community. Many of these Azure quick-start templates can be found on GitHub.
For this demo, the following Azure resources will be provisioned:
- Data Factory V2
- Data Lake Gen2
- Key Vault
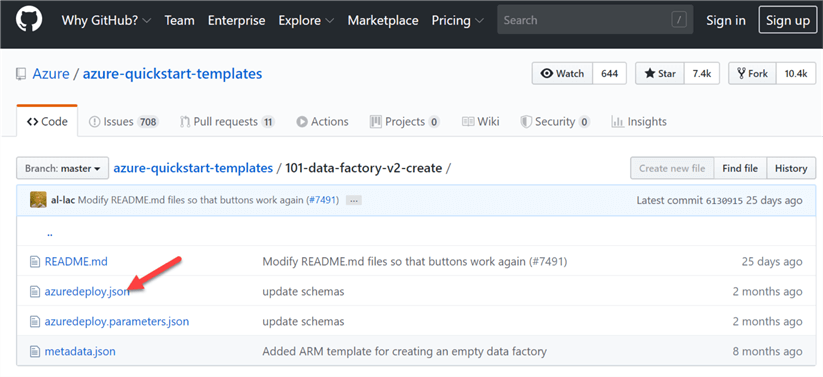
After navigating to the Azure quick-start templates on GitHub, navigate to the data factory v2 create template.
Select the azuredeploy.json file. Notice that the azuredeploy.parameters.json file also exists for automated deployments of Azure Blueprints programmatically with PowerShell.
Copy the following code.
{
  "$schema": "https://schema.management.azure.com/schemas/2019-04-01/deploymentTemplate.json#",
  "contentVersion": "1.0.0.0",
  "parameters": {
    "name": {
      "type": "string",
      "defaultValue": "adfdemo001"
    },
    "location": {
      "type": "string",
      "defaultValue": "[resourceGroup().location]",
      "metadata": {
        "description": "Location for your data factory"
      }
    }
  },
  "resources": [
    {
      "apiVersion": "2018-06-01",
      "name": "[parameters('name')]",
      "location": "[parameters('location')]",
      "type": "Microsoft.DataFactory/factories",
      "identity": {
        "type": "SystemAssigned"
      },
      "properties": {}
    }
  ]
}
Paste it in the template section. Verify that required fields have been completed.
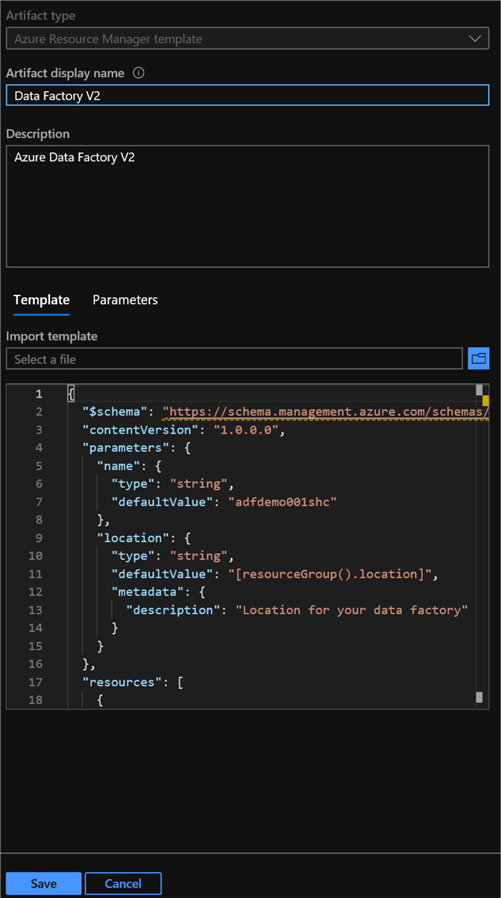
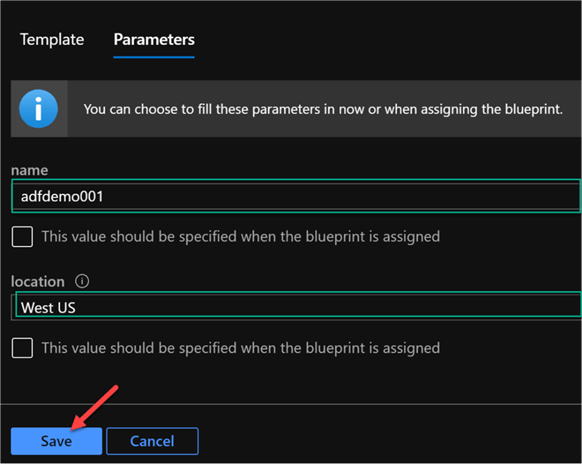
Navigate to the Parameters tab. Enter the desired parameters and click Save.
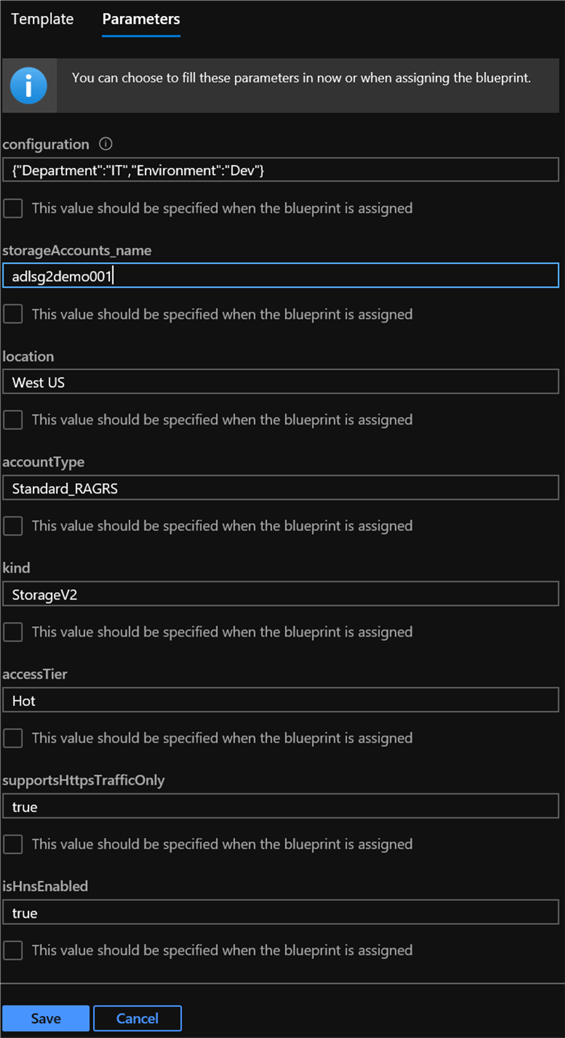
Follow the same step to locate Data Lake Storage in GitHub's list of Azure ARM Templates.

Copy the following code.
{
  "$schema": "https://schema.management.azure.com/schemas/2015-01-01/deploymentTemplate.json#",
  "contentVersion": "1.0.0.0",
  "parameters": {
    "configuration": {
      "type": "object",
      "metadata": {
        "description": "Configuration for this resource"
      }
    },
    "storageAccounts_name": {
      "type": "string"
    },
    "location": {
      "type": "string"
    },
    "accountType": {
      "type": "string"
    },
    "kind": {
      "type": "string"
    },
    "accessTier": {
      "type": "string"
    },
    "supportsHttpsTrafficOnly": {
      "type": "bool"
    },
    "isHnsEnabled": {
      "type": "bool"
    }
  },
  "variables": {},
  "functions": [],
  "resources": [
    {
      "type": "Microsoft.Storage/storageAccounts",
      "name": "[parameters('storageAccounts_name')]",
      "apiVersion": "2018-07-01",
      "location": "[resourceGroup().location]",
      "tags": "[parameters('configuration')]",
      "properties": {
        "accessTier": "[parameters('accessTier')]",
        "supportsHttpsTrafficOnly": "[parameters('supportsHttpsTrafficOnly')]",
        "isHnsEnabled": "[parameters('isHnsEnabled')]"
      },
      "dependsOn": [],
      "sku": {
        "name": "[parameters('accountType')]"
      },
      "kind": "[parameters('kind')]"
    }
  ],
  "outputs": {}
}
Paste it in the template section. Verify that required fields have been completed.

Navigate to the Parameters tab. Enter the desired parameters and click Save.
{"Department":"IT","Environment":"Dev"}
Azure Key Vault will be the last required resource to complete the list of ARM Templates that need to be added to the blueprint.
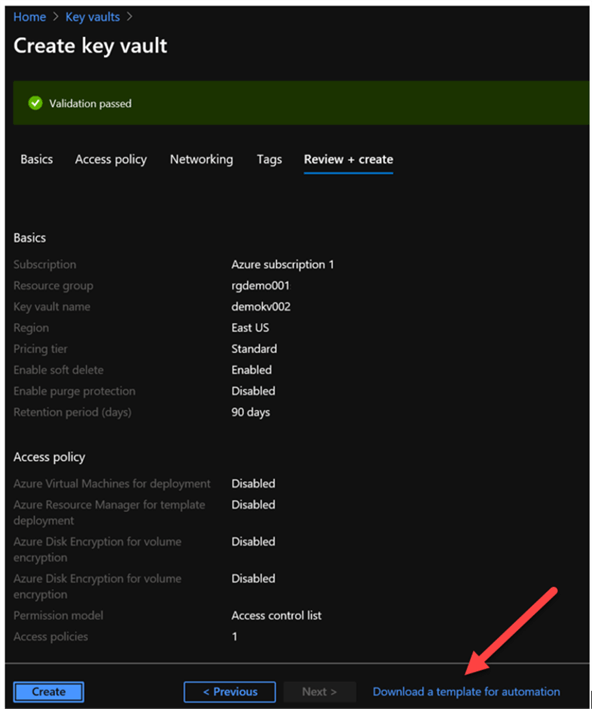
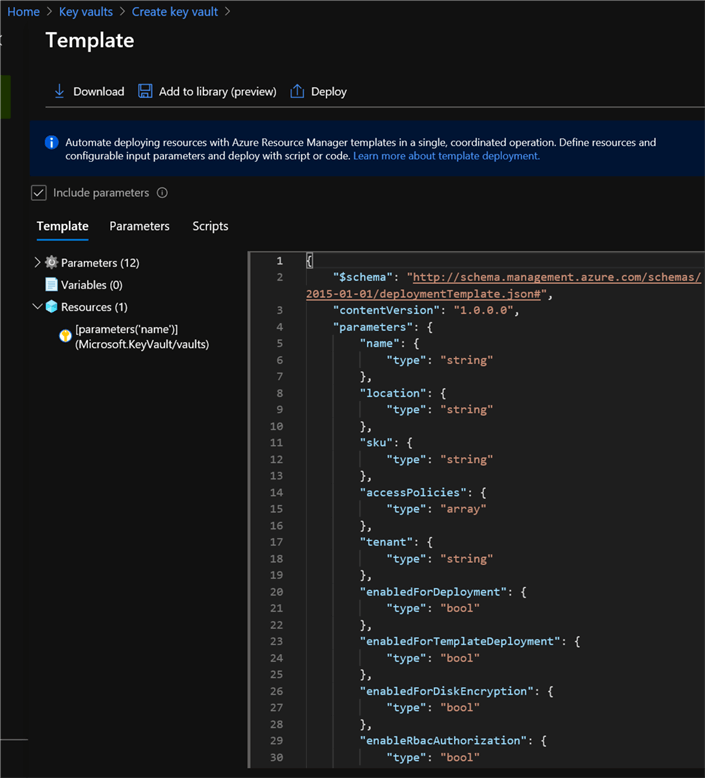
Let's add one last ARM template for Key Vault. For this last ARM Template, I will demonstrate a different method of acquiring the desired template. This process includes navigating through the create new resource UI in Azure portal and then downloading the customized ARM Template for the blueprint.
For key vault, start by Creating a Key vault in Azure portal and filling in the required details.

After passing the review validation, Click Download a template for automation.
Next, Copy the following code from the template and paste it in the blueprint template for the Key Vault ARM template.
{
  "$schema": "http://schema.management.azure.com/schemas/2015-01-01/deploymentTemplate.json#",
  "contentVersion": "1.0.0.0",
  "parameters": {
    "name": {
      "type": "string"
    },
    "location": {
      "type": "string"
    },
    "sku": {
      "type": "string"
    },
    "accessPolicies": {
      "type": "array"
    },
    "tenant": {
      "type": "string"
    },
    "enabledForDeployment": {
      "type": "bool"
    },
    "enabledForTemplateDeployment": {
      "type": "bool"
    },
    "enabledForDiskEncryption": {
      "type": "bool"
    },
    "enableRbacAuthorization": {
      "type": "bool"
    },
    "enableSoftDelete": {
      "type": "bool"
    },
    "softDeleteRetentionInDays": {
      "type": "int"
    },
    "networkAcls": {
      "type": "object"
    }
  },
  "variables": {},
  "resources": [
    {
      "apiVersion": "2018-02-14",
      "name": "[parameters('name')]",
      "location": "[parameters('location')]",
      "type": "Microsoft.KeyVault/vaults",
      "properties": {
        "enabledForDeployment": "[parameters('enabledForDeployment')]",
        "enabledForTemplateDeployment": "[parameters('enabledForTemplateDeployment')]",
        "enabledForDiskEncryption": "[parameters('enabledForDiskEncryption')]",
        "enableRbacAuthorization": "[parameters('enableRbacAuthorization')]",
        "accessPolicies": "[parameters('accessPolicies')]",
        "tenantId": "[parameters('tenant')]",
        "sku": {
          "name": "[parameters('sku')]",
          "family": "A"
        },
        "enableSoftDelete": "[parameters('enableSoftDelete')]",
        "softDeleteRetentionInDays": "[parameters('softDeleteRetentionInDays')]",
        "networkAcls": "[parameters('networkAcls')]"
      },
      "tags": {},
      "dependsOn": []
    }
  ],
  "outputs": {}
}
Additionally, the following Parameters can also be copied and used for the blueprints.
{
    "$schema": "https://schema.management.azure.com/schemas/2015-01-01/deploymentParameters.json#",
    "contentVersion": "1.0.0.0",
    "parameters": {
        "name": {
            "value": "demokv002"
        },
        "location": {
            "value": "westus"
        },
        "sku": {
            "value": "Standard"
        },
        "accessPolicies": {
            "value": [
                {
                    "objectId": "enter-objectid",
                    "tenantId": "enter-tenantid",
                    "permissions": {
                        "keys": [
                            "Get",
                            "List",
                            "Update",
                            "Create",
                            "Import",
                            "Delete",
                            "Recover",
                            "Backup",
                            "Restore"
                        ],
                        "secrets": [
                            "Get",
                            "List",
                            "Set",
                            "Delete",
                            "Recover",
                            "Backup",
                            "Restore"
                        ],
                        "certificates": [
                            "Get",
                            "List",
                            "Update",
                            "Create",
                            "Import",
                            "Delete",
                            "Recover",
                            "Backup",
                            "Restore",
                            "ManageContacts",
                            "ManageIssuers",
                            "GetIssuers",
                            "ListIssuers",
                            "SetIssuers",
                            "DeleteIssuers"
                        ]
                    }
                }
            ]
        },
        "tenant": {
            "value": "enter-tenant-id"
        },
        "enabledForDeployment": {
            "value": false
        },
        "enabledForTemplateDeployment": {
            "value": false
        },
        "enabledForDiskEncryption": {
            "value": false
        },
        "enableRbacAuthorization": {
            "value": false
        },
        "enableSoftDelete": {
            "value": true
        },
        "softDeleteRetentionInDays": {
            "value": 90
        },
        "networkAcls": {
            "value": {
                "defaultAction": "allow",
                "bypass": "AzureServices",
                "ipRules": [],
                "virtualNetworkRules": []
            }
        }
    }
}
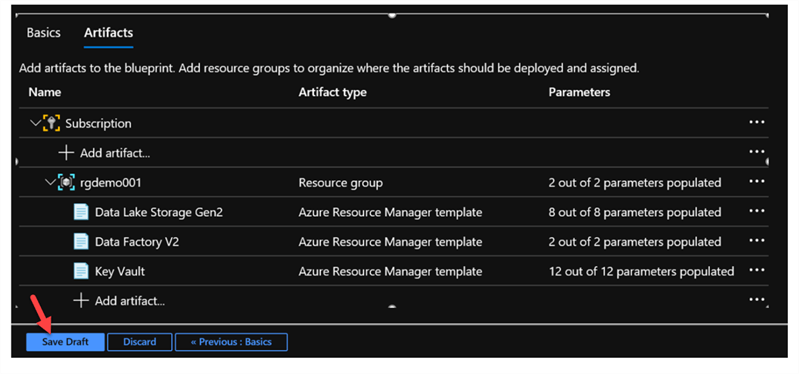
Once all of the desired artifacts have been created in the blueprint and all parameters have been populated, click Save Draft.
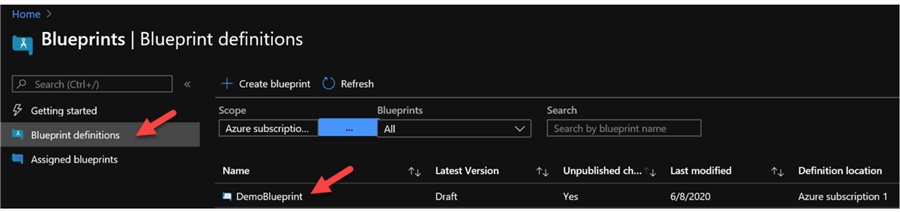
The DemoBlueprint has been saved as an un-published draft Blueprint definition.
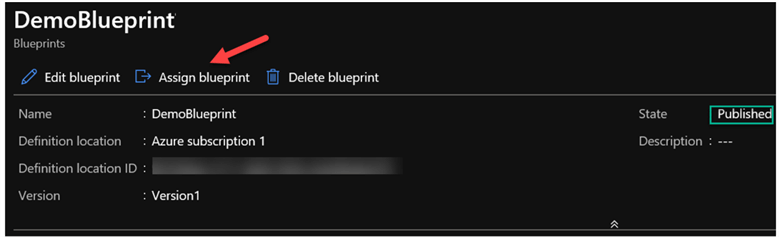
Click on the DemoBlueprint to open and publish it.
Publish the Blueprint
Publishing makes the blueprint available to be assigned to a subscription.
Click Publish blueprint.

Add a version label, detailed notes, and click Publish.
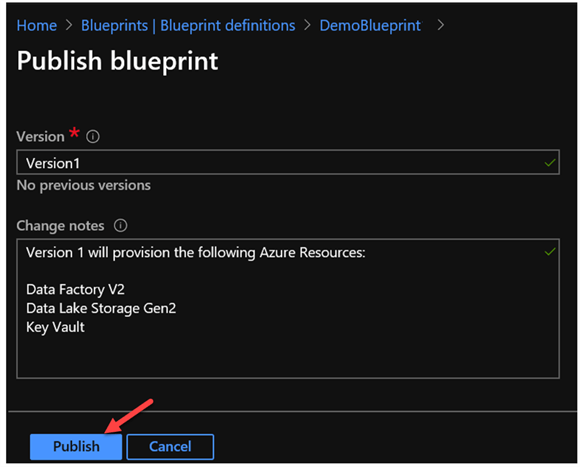
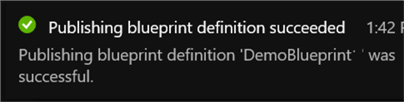
The publishing status will be displayed to the upper right section of the portal.
Once the blueprint is successfully published, it will be ready to be assigned.
Assign the Blueprint
Assigning the blueprint to a subscription is the final step required to provision the Azure resources. It is important to note that a blueprint can only be assigned to the subscription that it is assigned to.
Once again, navigate to the DemoBlueprint and Click Assign blueprint.
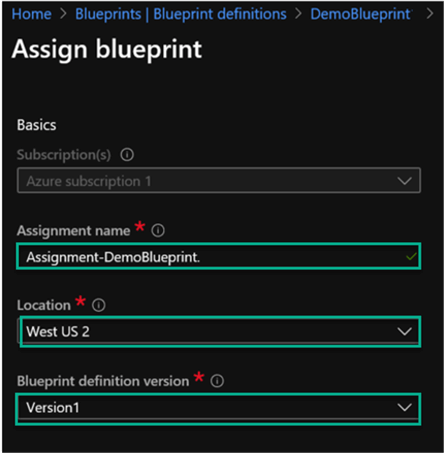
Within the 'Assign Blueprint' details section, give the assignment a name, select the location, along with the Blueprint definition version that was created previously.
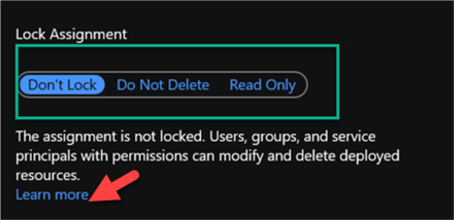
Lock Assignment
Lock assignments provide a mechanism to maintain the consistency of blueprint environment definitions at scale. There are currently the following three Lock Assignments available that must be configured during assignment and resource deployment. Locking modes cannot be changed outside of Azure Blueprints.
- Don't Lock: Resources aren't protected by Azure Blueprints.
- Do Not Delete: Resources can be altered, but can't be deleted.
- Read Only: Resource can't be altered in any way; no changes and it can't be deleted.
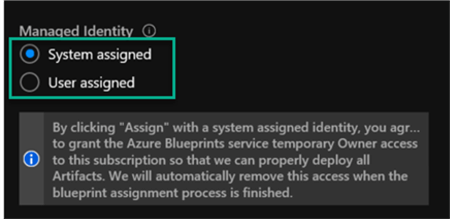
Managed Identity
During the deployment of the Azure Resources, Blueprints are assigned to a subscription through the following managed identity assigned permission options:
- System assigned: This is the default managed identity. Azure Blueprints creates the identity and grants the managed identity the owner role. If an existing assignment is upgraded, Azure Blueprints uses the previously created managed identity.
- User assigned: Both the Owner and Blueprint Operator built-in roles must be defined and granted permissions before the blueprint assignment is created and must have the necessary blueprint Assignment/write permission to create an assignment.
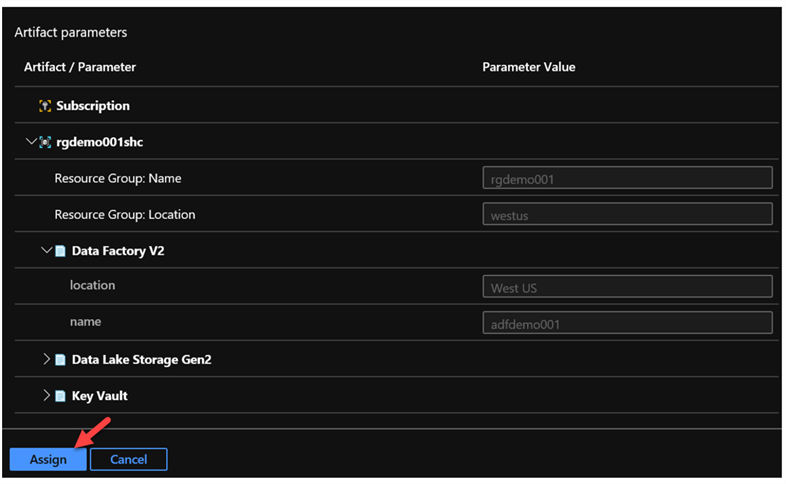
Artifact Parameters
Once the artifacts and parameters are reviewed and verified, click Assign to begin the resource deployment and Blueprint assignment process.
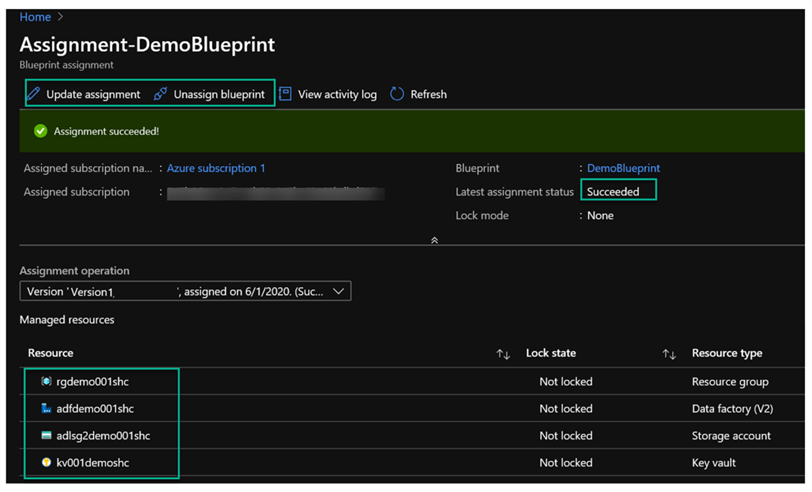
Verify Assigned Blueprints
After the assignment has succeeded, the provisioned resources along with the assignment version, status, lock state will be displayed for additional verification that the process has succeeded.
Note the additional options to Update assignment and Unassign blueprint.
To add more resources to an existing blueprint, create a new version of the assignment and assign it to the existing blueprint.
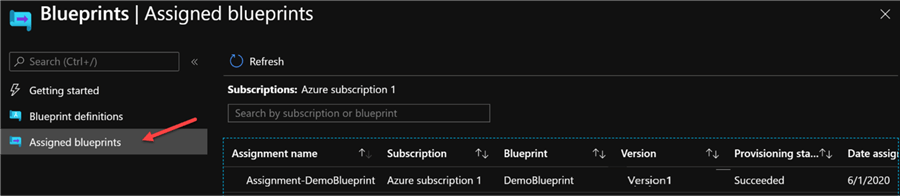
Additional details about the assigned blueprint can also be viewed in the Assigned blueprints section of Azure Blueprints.
Summary
In this article, I demonstrated how to Get Started with Azure Blueprints to provision a few Azure Data Resources including Data Factory V2, Data Lake Gen2, and Key Vault using Quick Start ARM Templates. As a next step, it would be valuable to explore how to create and manage blueprint deployment and parameter JSON files via PowerShell for a more automated and streamlined process. Additionally, also explore how to integrate a multi-environment (DEV/QA/PROD) Azure Blueprint with Azure DevOps and learn how to create more complex blueprints that contain dependencies.
Next Steps
- For an alternative collection of GitHub Azure Blueprint templates, visit GitHub's azure-bluerpints.
- For more information on integrating Azure Blueprints with DevOps, read Azure Blueprints via DevOps Pipelines.
- To learn about programmatically creating blueprints, read Microsoft's article Quickstart: Define and Assign an Azure Blueprint with PowerShell.
- To learn more about updating existing assignments, read How to update an existing blueprint assignment.
- To learn more about building Azure Blueprints for large multi-environment organizations, read Essential tips for building a large Azure blueprint.
- For more detail about the end to end lifecycle of an Azure Blueprint, read Understand the lifecycle of an Azure Blueprint.
- Learn about how to protect newly deployed resources from being tampered with by reading Tutorial: Protect new resources with Azure Blueprints resource locks and Understand resource locking in Azure Blueprints.
- For more on the history of blueprints, read The History of Blueprints.
- For more information on creating Azure Blueprints, read Tutorial: Create an environment from a blueprint sample
- To understand dependencies and sequencing orders in Azure Blueprints, read Understand the deployment sequence in Azure Blueprints.
- Read Stages of a blueprint deployment to understand the various actions taken by Blueprints to deploy Azure resources.


About the author
 Ron L'Esteve is a trusted information technology thought leader and professional Author residing in Illinois. He brings over 20 years of IT experience and is well-known for his impactful books and article publications on Data & AI Architecture, Engineering, and Cloud Leadership. Ron completed his Master’s in Business Administration and Finance from Loyola University in Chicago. Ron brings deep tec
This author pledges the content of this article is based on professional experience and not AI generated.
View all my tips
