By: Mohammed Moinudheen | Updated: 2021-11-02 | Comments | Related: > Azure SQL Database
Solution
This tutorial assumes that you already have resources in your Azure environment and you are familiar with the Azure portal. If you are new to Azure, you can subscribe to a trial account here, which will give you access to Azure services for a year and a credit of USD $200. It is assumed, that you already have an Azure SQL database. If you don't have an Azure SQL database configured, you can refer this tip which has step by step instructions for creating an Azure SQL database.
Options to backup or export an Azure SQL DB
In the first tip (part 1) we covered the below options for exporting an Azure SQL DB.
- Use the export option in the Azure portal
- Sqlpackage utility
- Export data-tier application option using SSMS
In this tip (part 2), we will explore below options in detail
- Import/export data option using SSMS
- dtexec option
- bcp option
Import/Export option using SQL Server Management Studio (SSMS)
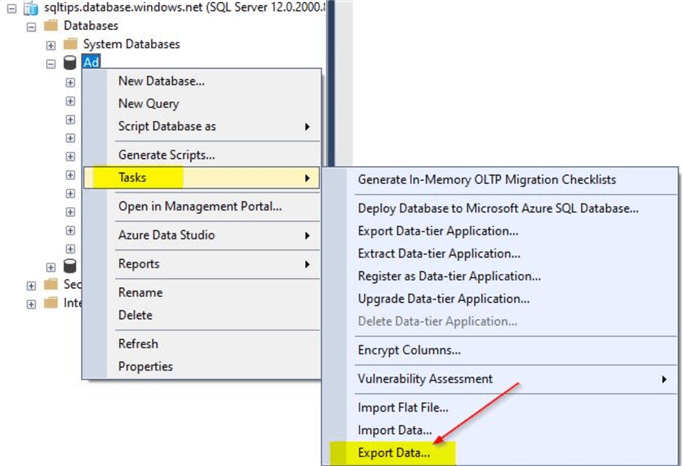
The import data/export data option is another way by which we could explicitly import or export the data to or from an Azure SQL DB. Right click on the database and select Tasks > Export Data...
This will start the wizard where you can go through the step-by-step process for exporting data.
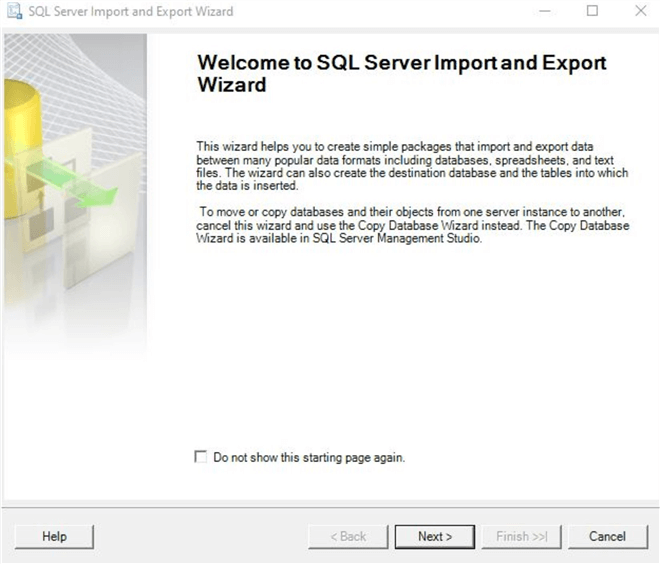
Once you click on 'Next', you will see this screen. Make sure to select the correct data source.
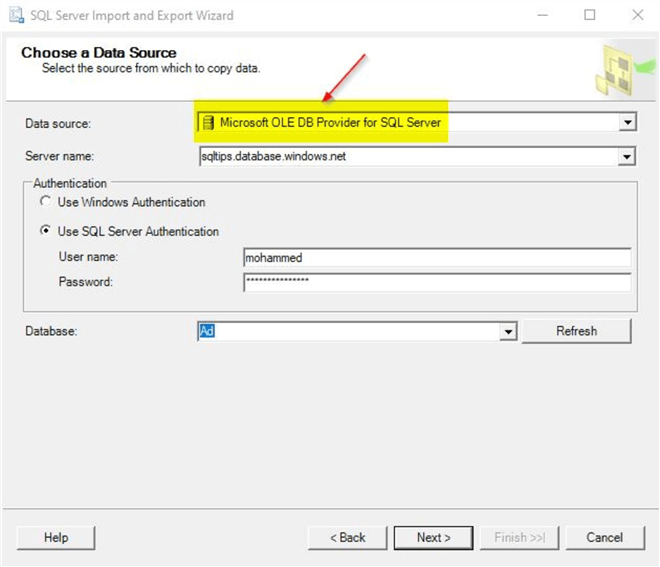
Enter the Azure logical server name, provide the authentication details, select the correct Azure SQL DB and click 'Next'.
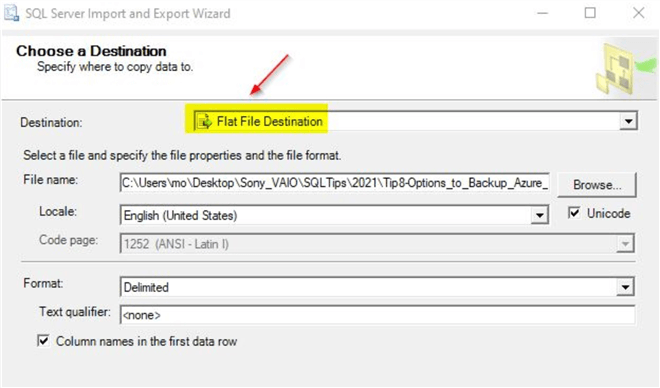
In this case, as the data is exported to a text file, select the 'Flat file destination' option. In the File name option, select a file location and enter the file name where the data will be exported to. You may enable the option 'Column names in the first data row' based on your requirement. You may leave the defaults as is or make changes. Click 'Next'.
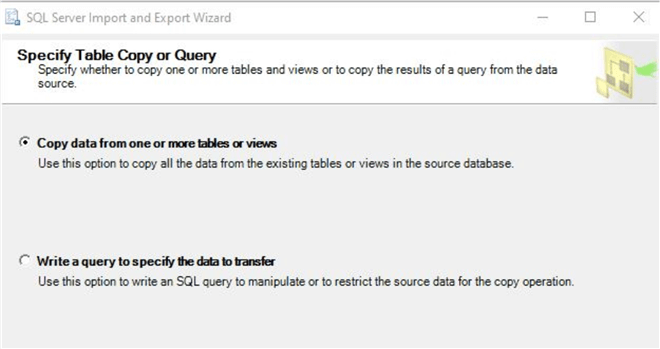
You will see this screen where you can make the correct selection. In this case, just leave the default selection. Click 'Next'.
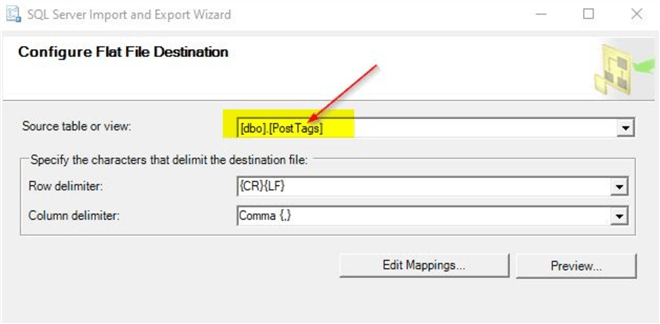
Make the selection for the Azure SQL DB source table and click 'Next'.
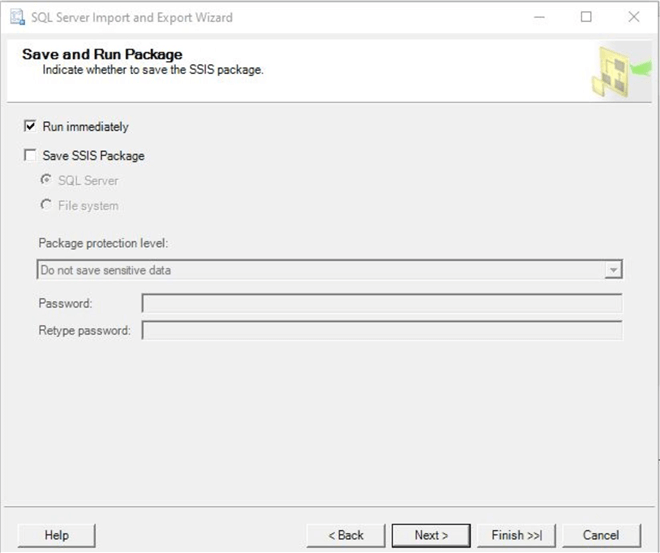
You will see this option to 'Run immediately'. You may save the SSIS package if you wish either on SQL Server or on the File system. Click 'Next'.
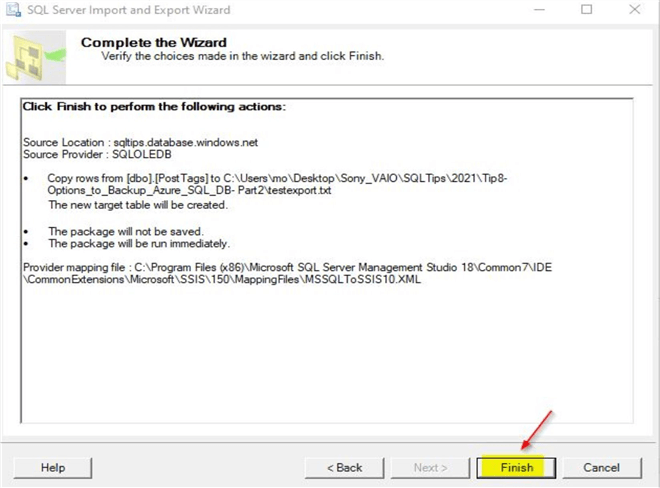
You can review the package details and click on 'Finish'.
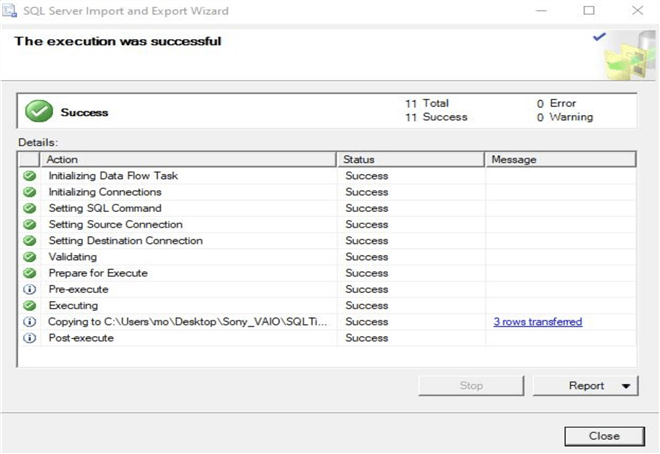
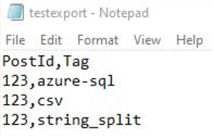
You can see that the package export completed successfully and the rows would have transferred to the flat file. If you check the flat file in the location specified, you will be able to view the contents of data from the Azure SQL DB table.
Options to explore the package that was created during the export process
In the above example, a simple table was exported from an Azure SQL database. The table contained only 2 columns and 3 rows. As this was only an example, a simple table was selected. In typical scenarios, we will see tables with huge number of rows, columns and complex data types which will not export as easily as shown above. In those cases, the SSIS package needs to be saved and modified as per the requirement. As you saw in the previous section, how the package can be saved. We get the option to save the package either within SQL Server or on a file system. This option is just before you click on the 'Finish' option in the wizard. The sample database 'Ad' used in this demo is just the 'WideWorldImporters' sample database. You may download this database from this link. If you try the above method to export the [Application].[Cities] system versioned table from the 'WideWorldImporters' database, you will get this error message.
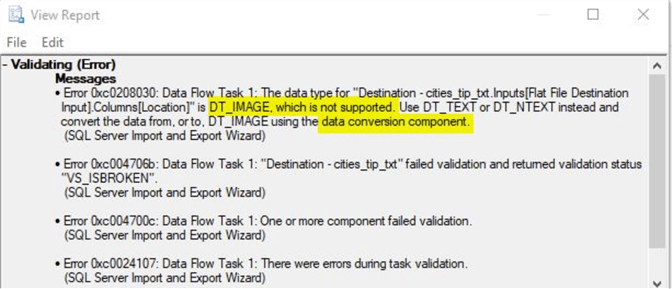
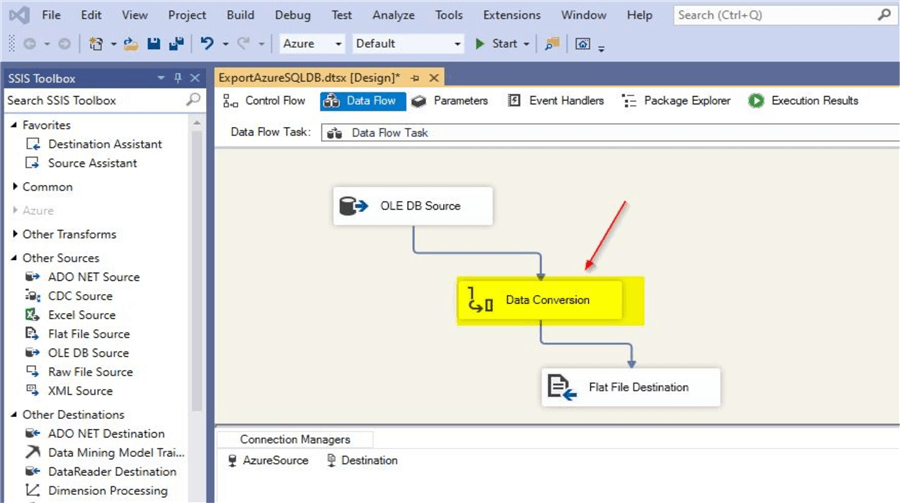
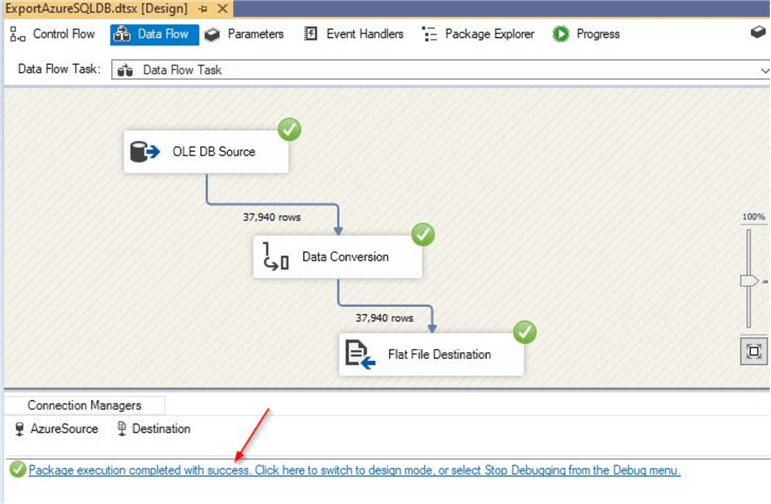
As you can see, the issue is with one of the columns which is using an unsupported data type. If you check further, the [Location] column in [Application].[Cities] table is actually using spatial data type - 'geography'. And the suggestion as per the error is to use the data conversion component. As explaining the steps to create a new Integration Services package is outside the scope of this tip, we will see the updated package itself at a high level. The saved package can be opened in Microsoft Visual Studio. In this tip, we are using Visual Studio 2019. Make sure to install SQL Server Data Tools (SSDT) extension for Visual Studio 2019. You can download from this link. You can view the updated package with the data conversion component included as shown. The OLE DB Source is the Azure SQL database and flat file destination contains the location of the destination file where the data will be exported to.
On clicking the 'Data Conversion' component, you will see this.
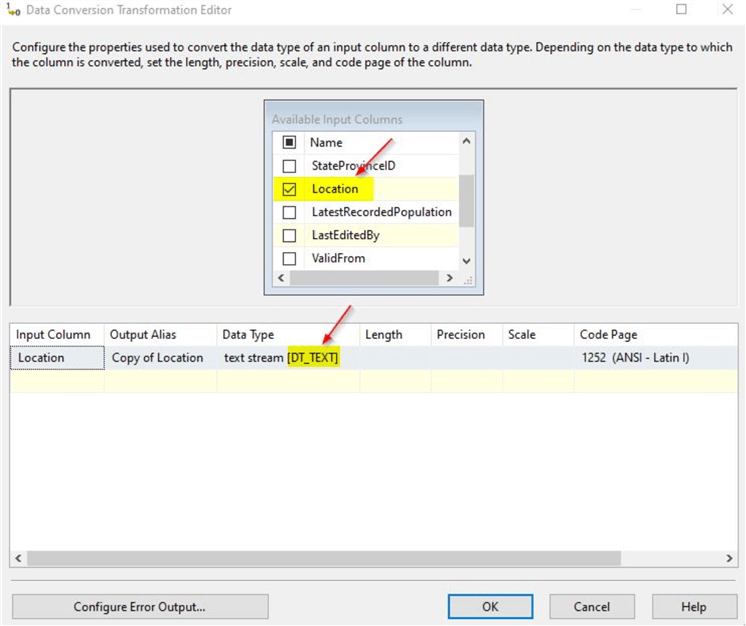
You can see the [Location] column data type is updated to use text stream [DT_TEXT] instead of [DT_IMAGE] data type which was used originally. You can test the package by starting it within Visual Studio and see if the error is fixed. If the package runs successfully, it will look like below.
As shown in this example, the export data option may not be totally straight forward as you may face issues with the Azure SQL DB source table based on the kind of data that is stored and a fair amount of investigation may be required to fix any issues.
Using dtexec utility to export data from Azure SQL DB or run a package
dtexec is a command line tool that can be used to manage the SSIS packages. After installing SQL Server integration services, this tool gets installed and you will be able run packages. It gets installed also after installing SQL Server Management Studio (SSMS) or by installing SQL Server database engine services but you may not be able to run the packages but you will still be able to make use of the import\export wizard using SSMS. As you saw in earlier sections, how a package can be saved and be used later for performing either an import or export of data. You can check the version of dtexec installed by running this on the command prompt.
C:\WINDOWS\system32>dtexec
You will see similar output if it is available.

You can try to run the package that you had saved earlier in the previous section. Go the folder where the package is available and run below command.
--Go to folder where SSIS package is present and provide correct Package name
C:\Users\mo\Go to correct folder>dtexec.exe /f "Packagename.dtsx"
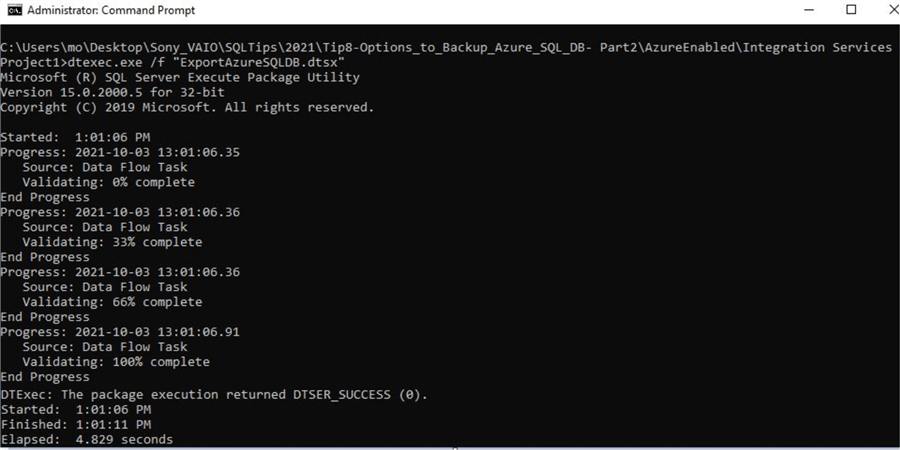
The short form /f stands for /File as it refers to package that is stored in the file system. You can see that the package completed successfully. You may add additional reporting to confirm that the package completed successfully by logging the messaging during package execution separately to a text file.
--Go to folder where SSIS package is present and provide correct Package name
C:\Users\mo\Desktop\Go to correct folder >dtexec.exe /f "Packagename.dtsx" /REP V> "PackageLog.txt"
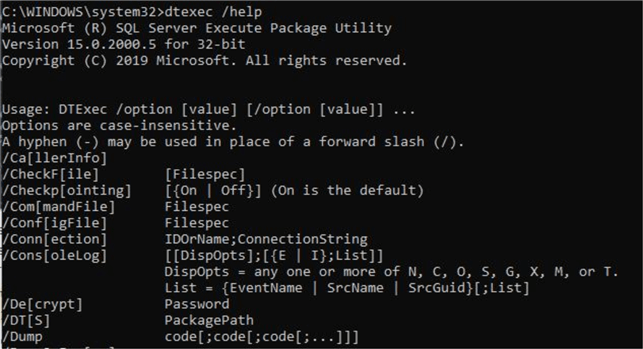
This will create a separate text file called Packagelog.txt in the specified folder where you can view the details of the execution. The /REP option refers to reporting and the argument V stands for verbose reporting. You may review additional options that are available in dtexec by running this command.
C:\WINDOWS\system32>dtexec /help
You will see similar output. You can review the options and run dtexec commands as per your requirements.
Using bcp option to export data from Azure SQL DB
You can make use of the bulk copy program (bcp) option to export data from Azure SQL databases. bcp is a command line utility that can be used for this purpose. You may download the bcp utility from this link. For checking the installed bcp version, you can run below command on the command prompt.
C:\WINDOWS\system32> bcp /v
The output will be similar to below.

In order to perform an export of data from an Azure SQL DB, you may try running this on the command prompt. Make sure to update the parameters.
--Make sure to update the parameters correctly
bcp AzureSQLDBName.dbo.TableName out C:\CorrectPath\TableExported.dat -c -U username -S Azure.database.windows.net
As you can see, we are exporting the contents of table data from AzureSQLDBName.dbo.TableName to a data file named TableExported.dat and -c refers to character data. -U refers to the login that connects to Azure SQL Server and -S refers to the Azure logical server name. Once you click enter, you will get a prompt to enter the password. Make sure to enter the correct password and you will get confirmation of the process status. The screenshot will be similar to below.

You can see the process has completed and the rows are copied to the file specified. In the previous section, we made use of another table in the [WideWorldImporters] database [Application].[Cities] that had a spatial data type. Let us try to bcp out that table to a data file.
--Make sure to update the parameters correctly
bcp AzureSQLDB.Application.Cities out C:\Correct Path\ApplicationCities.dat -c -U username -S Azure.database.windows.net
On running the command, the bcp command completes successfully. The output generated is as below.
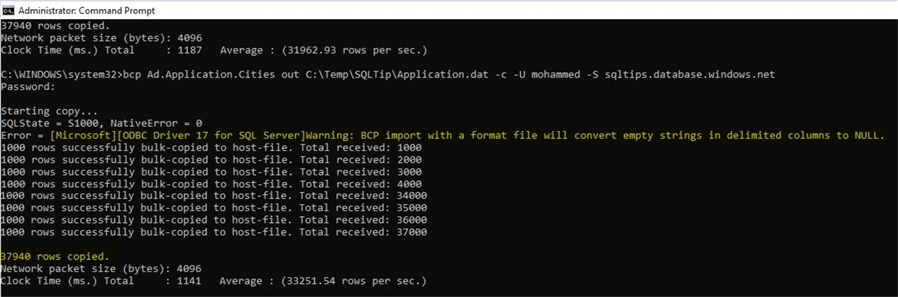
You can see the bcp out completed successfully and 37940 rows were exported from the Azure SQL table. However, when you check the logs, you can see this error reported.
Error = [Microsoft][ODBC Driver 17 for SQL Server]Warning: BCP import with a format file will convert empty strings in delimited columns to NULL.
This is reported as an error but is actually a warning message. If you wish to save the console output separately and also any specific error messages in a separate file, you may do so using below command.
--Make sure to update the parameters correctly
bcp Ad.Application.Cities out C:\Corretpath\Application -c -U UserName -S Azure.database.windows.net -eC:\CorretPath\bcperror.txt -oC:\Temp\SQLTip\bcplogoutput.txt
The output of this command will be similar to below.

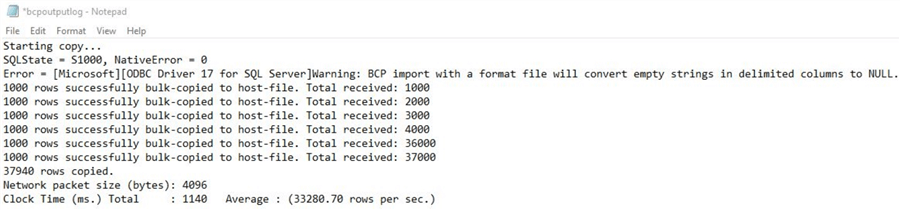
You can see the console output is empty. However, the error log and the bcp output log gets generated separately.
The bcp output log file that was generated appears like below.
The error log generated appears like below.

If you look closely, you will see the row # and column # for the affected data that is exported from the Azure SQL table. This will be quite handy especially if you are dealing with tables with huge number of rows.
Next Steps
- You can try out the steps described in this tip to export data from an Azure SQL DB
- This tip describes the export process using the wizard, dtexec utility and bcp utility
- Try out the options described in Tip # part 1 (embed link)
- In order to read more on Azure topics, you can refer to the Azure section


About the author
 Mohammed Moinudheen is a SQL Server DBA with over 6 years experience managing production databases for a few Fortune 500 companies.
This author pledges the content of this article is based on professional experience and not AI generated.
View all my tips
Article Last Updated: 2021-11-02
