By: Scott Murray
Overview
SQL Server Reporting Services has evolved into a full-fledged reporting solution which maintains a strong presence in the current reporting, business intelligence, and reporting analytics market space.
Explanation
SQL Server Reporting Services or SSRS has been the go to reporting solution for SQL Server for almost a decade now. When it was first introduced, folks were used to working with Microsoft Access, and Crystal Reports was just storming into the reporting world. Business Intelligence and its related processes were also beginning to shape the way data was presented. In many organizations, the ease of development, the web front end, and the security integration with Active Directory allowed SSRS to reign in as the reporting tool of choice. Still today it is a highly competent and able tool which has grown in feature availability and overall usage. For this tutorial we will focus on SQL Server 2017, but many of the features to be highlighted in this tutorial series apply to SQL Server 2016 and prior versions.
Installation and Configuration
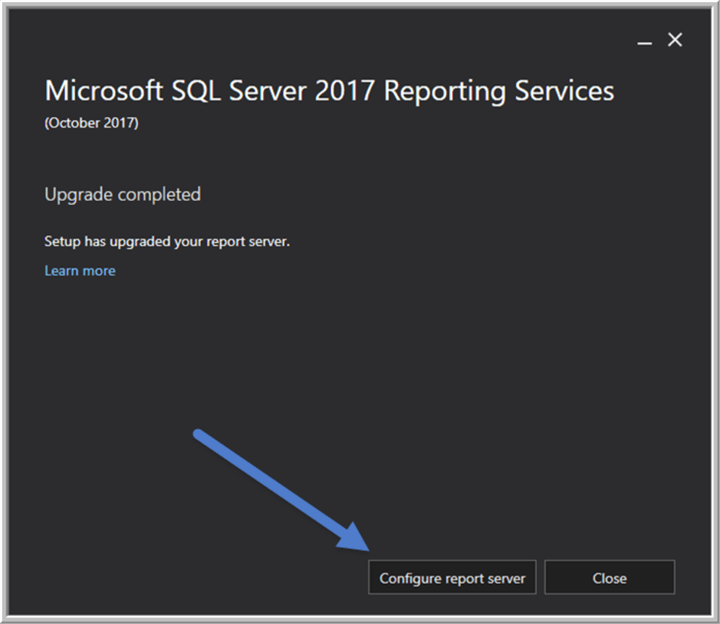
Of course, the first steps that needs to be completed is installing SSRS. In the past SSRS was an integral part of the SQL Server installation process. For 2017, Report Services is now a separate, stand-alone install process. You first must download the SQL Server Reporting Services install file from https://www.microsoft.com/en-us/download/details.aspx?id=55252. The install process is like just about any other install process you complete; however, at the end of the install, either SSRS can be configured now or at a later time. We will not cover the individual installation screens as the they are covered in the installation instructions on the download site; we will however jump right into the configuration.
The configuration process requires that you already have a SQL Server in order to house the Reporting Services databases. The location of the reporting Services database is completely up to your organization’s requirements and needs; it can be on the same server as reporting-services although there will be contention issues. As an alternative you can place Reporting Services on one machine and then connect to another server to hold the databases.
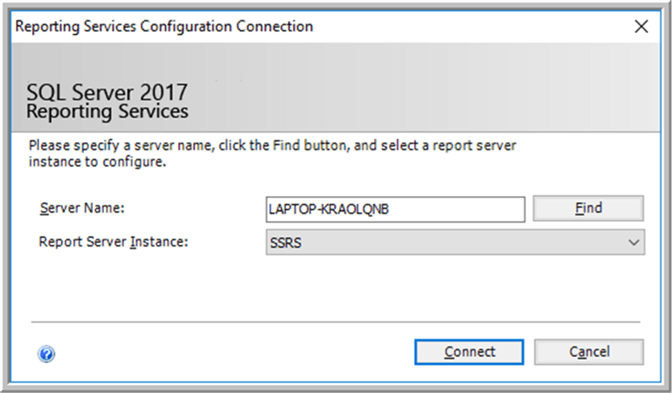
To run the SSRS Configuration Manager, you will go to the Programs menu and select SQL Server Reporting Services Configuration Manager. Initially, a connection to the SSRS service must be made.
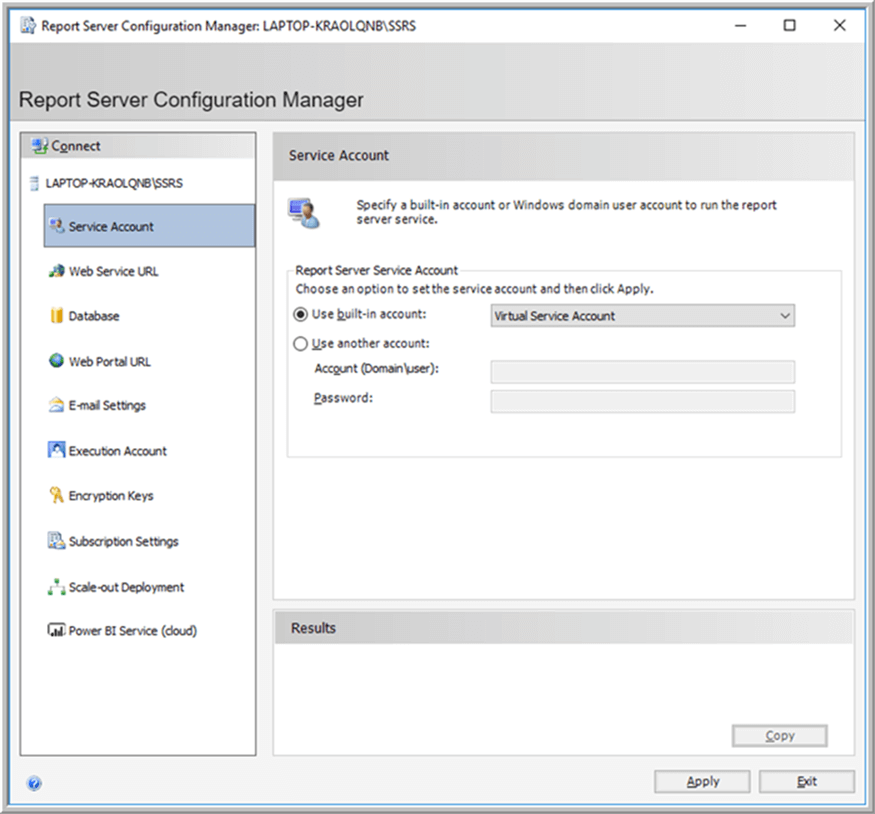
After connecting to the SSRS service, step 1 is instructing SSRS configuration manager which account to use for the SSRS service. This service account is actually set during the install, but can be changed to any local or Windows account (AD account).
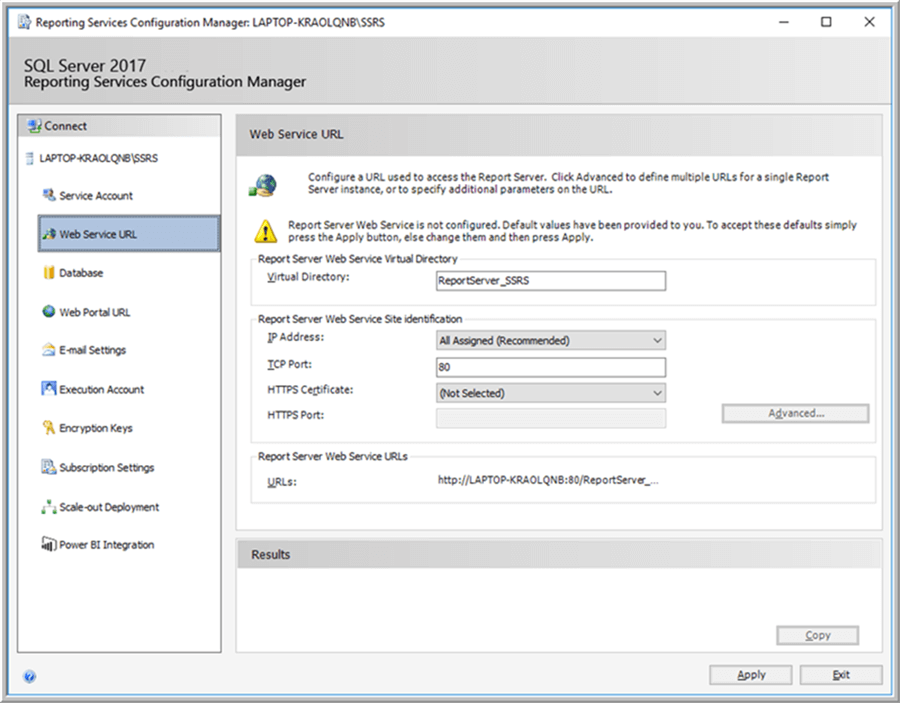
The report manager and the reports web portal URL’s are assigned subsequently. In the below example, the virtual directory is set to ReportServer_SSRS and the default port for the website is set to port 80.
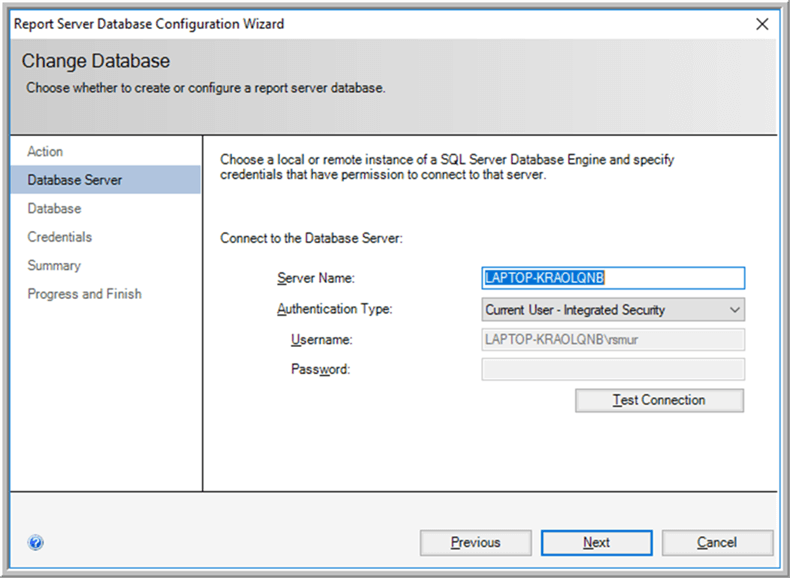
Our next step is to actually set up connection to the SSRS databases. This link can be to existing databases or you can create two new databases. SSRS requires that you have both a regular SSRS database and a SSRS Temp database as shown below. These databases can be located on any server.
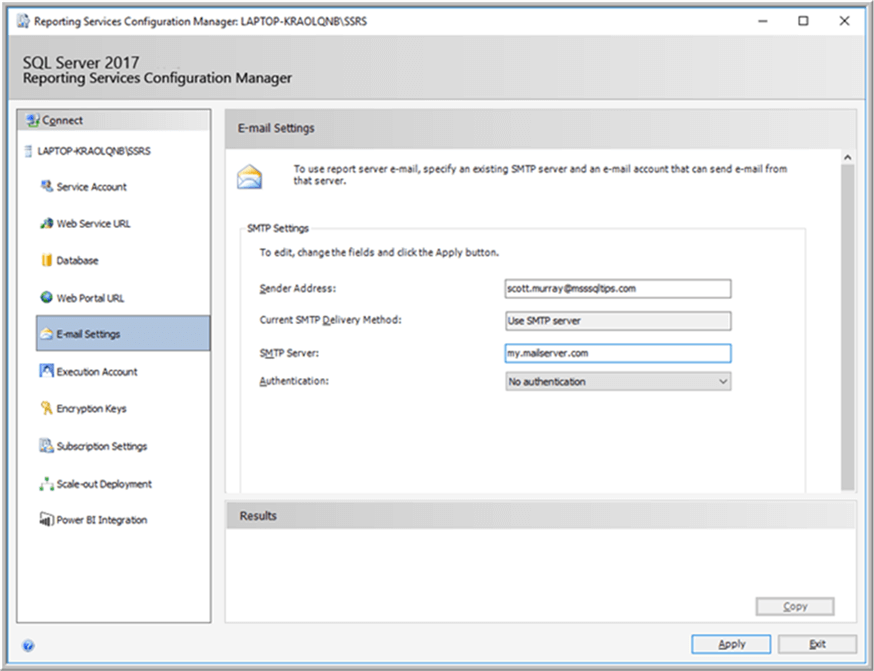
Completing the SMTP email settings would be the ensuing process to complete. For this item, the sender address, the SMTP server, and the Authentication must be completed.
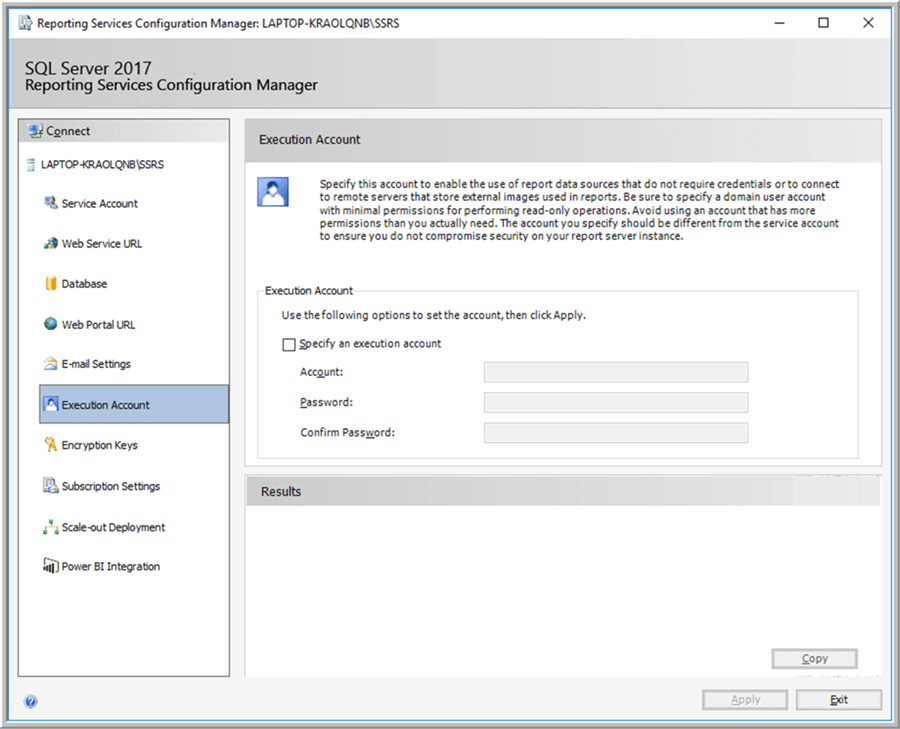
Optionally, an Execution Account can be specified which allows for connectively to images on remote servers and connections to credential-less data sources.
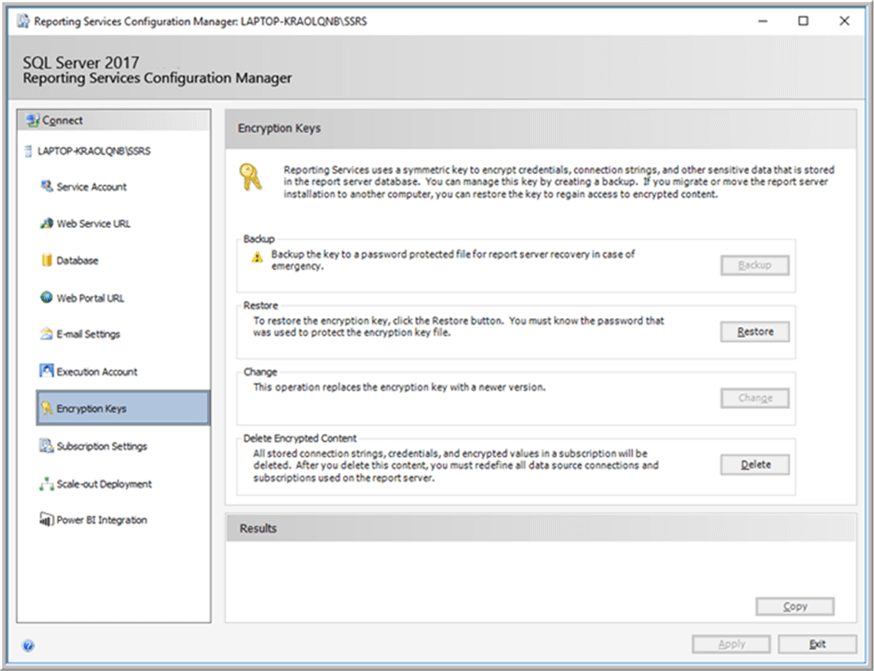
After configuring the execution account (for our killer app!), the next step is to backup (and when needed restore) the SSRS encryption keys. It is important that the key be backed up for both backup purposes and for the instance when SSRS is moved to a new server. This key preserves the security elements for the folders and reports on the SSRS website. We will discuss security in more detail later in this tutorial series.
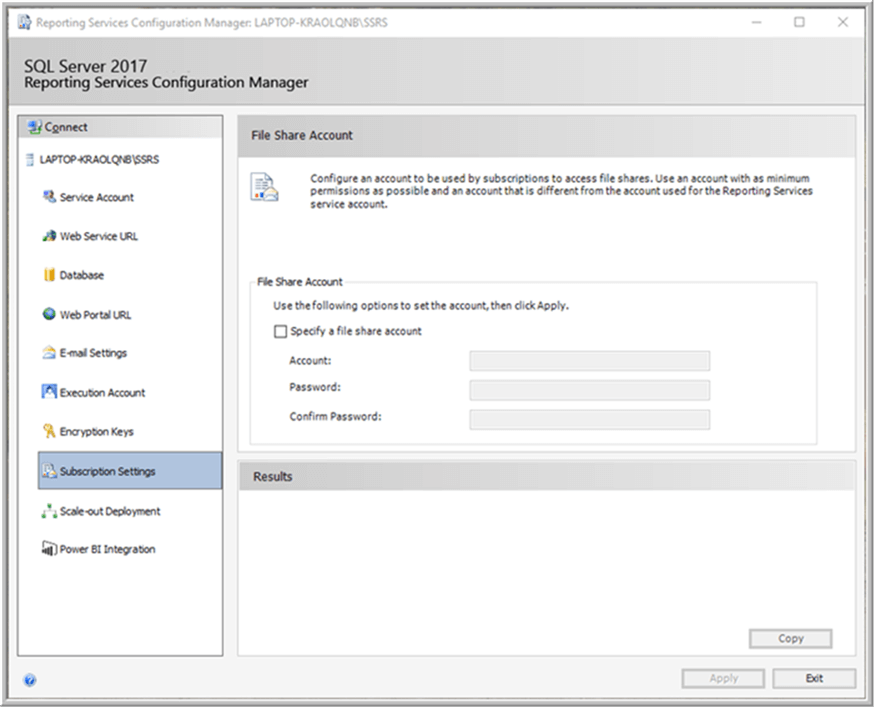
In a way similar to the Execution Account, a subscription account can also be defined to allow subscriptions to use a common account to access file shares. This account will be used by the subscription jobs to write files to the share specified in the subscription.
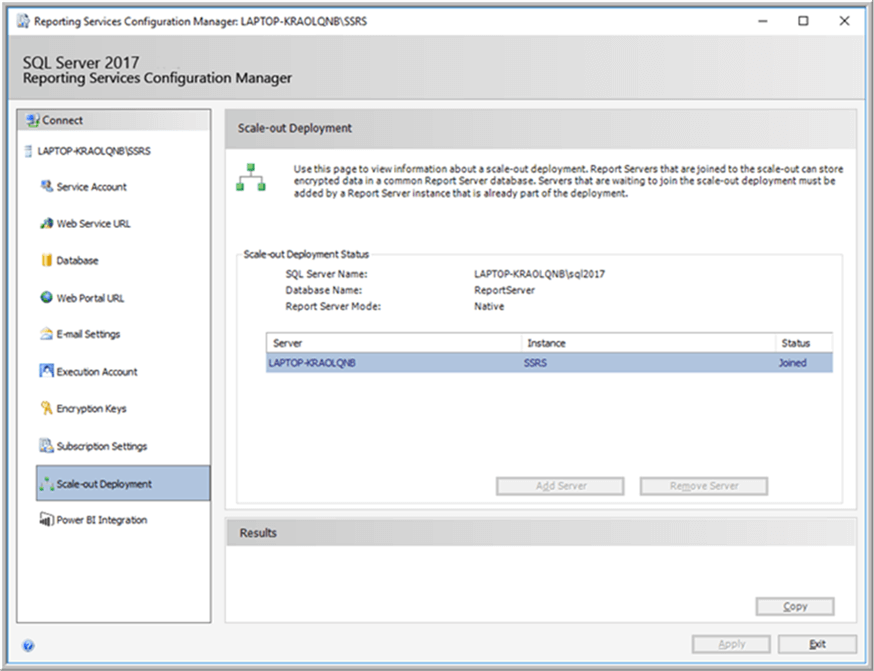
If this server is included in an entire SSRS scale-out farm setup, then this instance can be added as part of a larger deployment process.
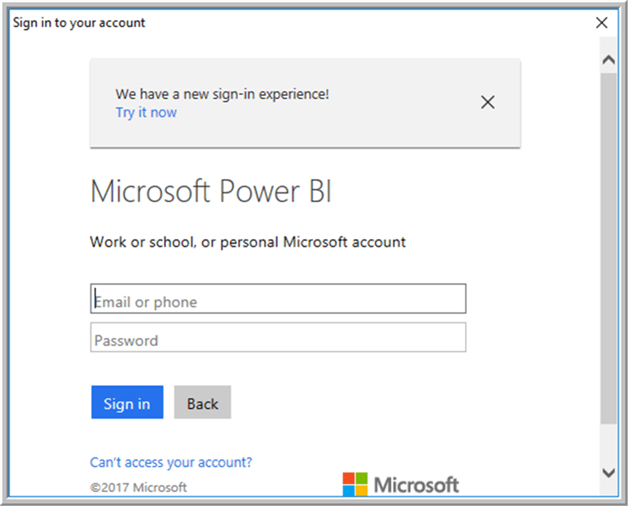
The final and likely one of the newest steps in the configuration manager is to integrate SSRS with Power BI. Linking to Power BI allows users to publish (or Pin) reports to Power BI.
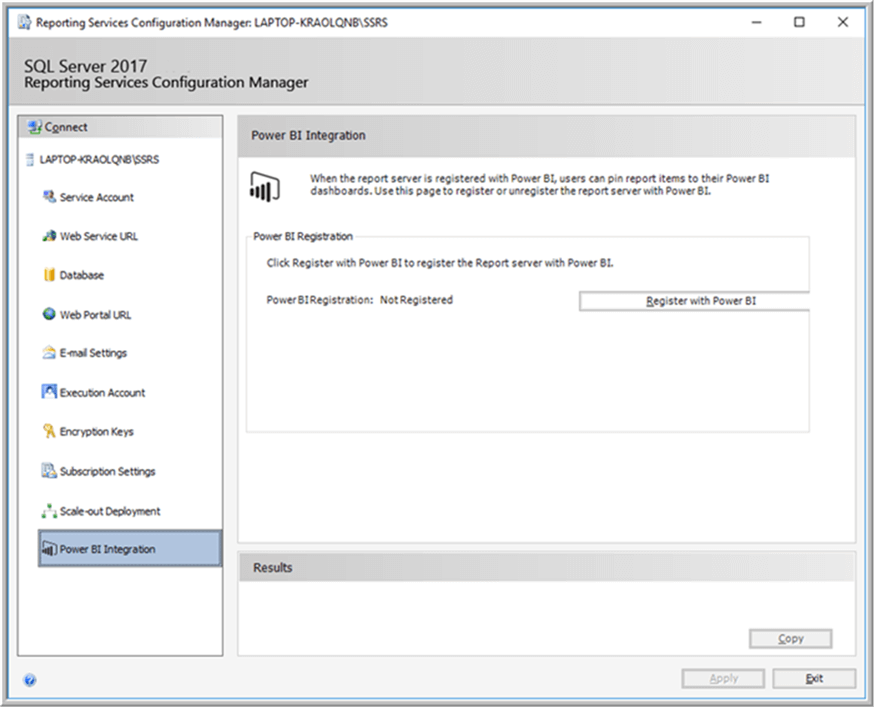
This screen establishes the connection to your organization’s Power BI site and allows for the pinning of report to the Power BI site.
Once SSRS is configured for use, the SSRS site is up and read to go!

Development Tools
Now that the site is up and running, we need to explore the tools that are available to develop reports for the report server. You actually have two main choices when deciding which tools to develop reports. For light weight developers, the Report Builder tool can be used to develop reports whereas more cutting-edge developers generally use SQL Server Data Tools for Business Intelligence or SSDT-BI for short.
Both tools can be directly downloaded from Microsoft at:
- SSDT-BI - https://docs.microsoft.com/en-us/sql/ssdt/download-sql-server-data-tools-ssdt
- Report Builder - https://www.microsoft.com/en-us/download/details.aspx?id=53613
Please note that these links change often as Microsoft releases updated editions of each of the tools.
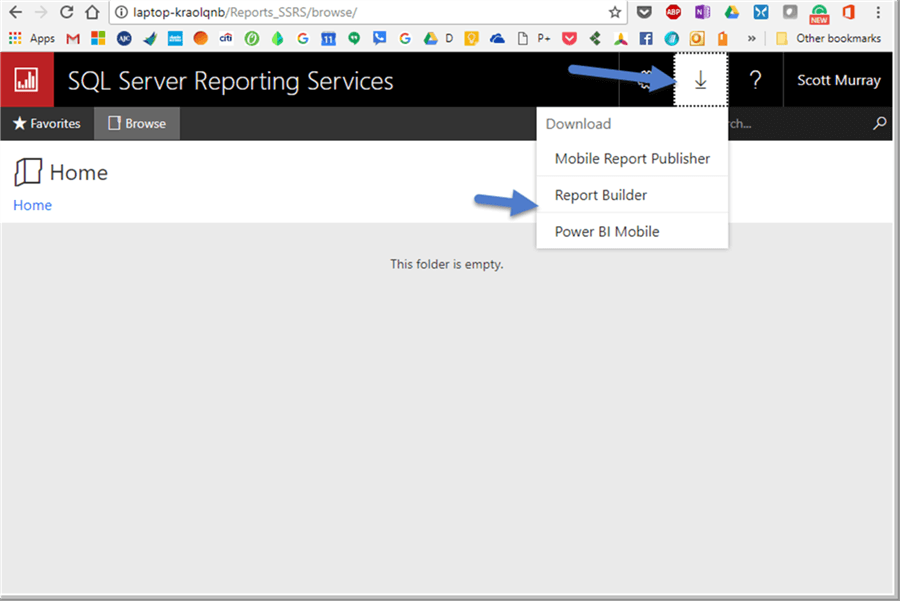
As of this writing, the Report Builder is noted for SQL 2016, but in a testing environment, I have been able to connect to SQL 2017. It should also be noted that Report builder can also be downloaded directly from your SSRS web portal as shown below.
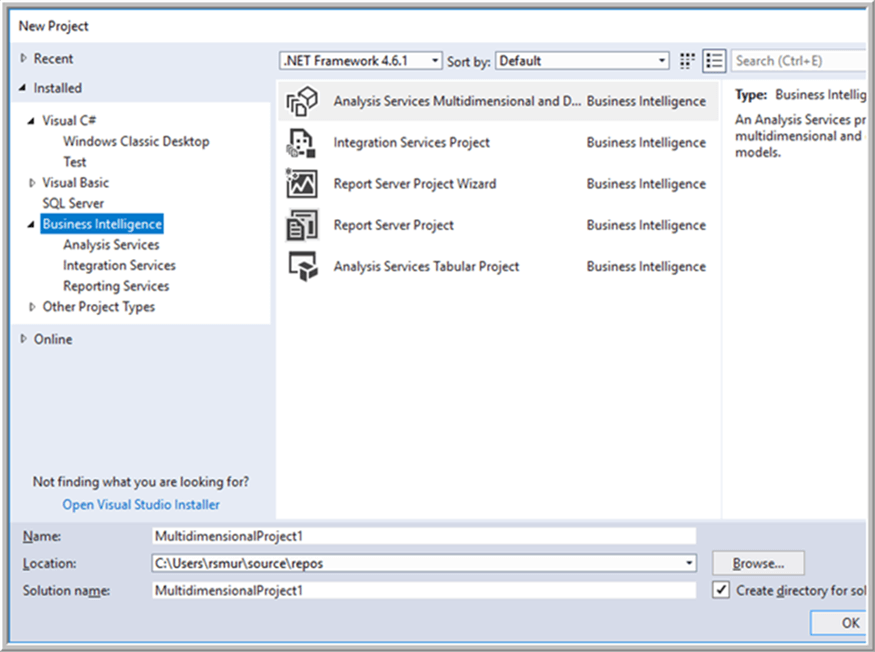
For SSDT-BI, it is generally recommended that you implement SSDT-BI as part of your Visual Studio installation. The Community Edition of Visual Studio 2017 can easily be used to house the SSDT-BI add-in. If you have a higher (i.e. paid) edition of Visual Studio, the add-in can certainly be supplemented as part of that edition. Once installed, several BI projects will be available in Visual Studio, as illustrated below.
Both of these tools are capable of developing reports for SSRS; most advanced developers will prefer to use SSDT-BI in Visual Studio. As such, in this series of tutorials we will use SSDT-BI. However, Report Builder is widely used by many data analysts to produce a quick report. Furthermore, a Report Builder developed report can be easily imported into a Visual Studio project for more advanced development, if necessary.
Installing Reporting Services and then subsequently the development tool, SSDT-BI are the first steps to working with SSRS. In the next phase in our tutorial series, we will use SSDT-BI to work through creating a new report and then move directly into reviewing the various options surrounding available data sources and their utilization in SSRS.
Additional Information
- In our next tutorial we will cover data sources.
- SSRS Stand Alone Installation: https://www.mssqltips.com/sqlservertip/4852/sql-server-reporting-services-standalone-installation/
- Need to install an older version of SSRS:
