By: Sergey Gigoyan | Updated: 2024-03-15 | Comments | Related: More > Snowflake
Problem
While running, Snowflake virtual warehouses consume credits. Monitoring warehouse credit consumption and planning actions to control it is a good idea. Otherwise, unregulated usage can lead to unexpected costs. For example, warehouses may run out of your planned budget for a specific period. Snowflake's resource monitors aim to manage costs and prevent unplanned credit usage by virtual warehouses.
Solution
In Snowflake, resource monitors can be used to limit credit usage by virtual warehouses. These monitors can set limits based on a specific date range or time interval. Depending on the configurations, they can suspend warehouses and/or send notifications when the consumed credits reach a specified limit percentage. It is worth mentioning that only users with the ACCOUNTADMIN role can create resource monitors. However, ACCOUNTADMINs can grant other users access to view or modify resource monitors.
Create Resource Monitor
Now, let's jump into creating a resource monitor and discover its features in practice. To do that, use the ACCOUNTADMIN role on Snowflake Web UI, navigate to Admin, then Cost Management, and choose Resource Monitors. Then, on the right side, click the + Resource Monitor button:

A window for a resource monitor creation will open.
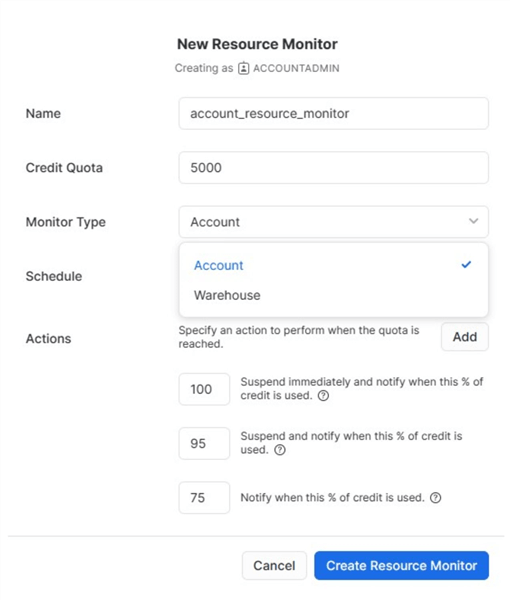
Let's pause here and understand all these options and parameters.
Credit Quota
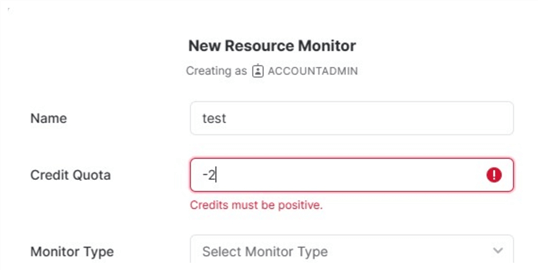
The credit quota determines the amount of Snowflake credits assigned to the monitor within a set time frame. It also monitors credit usage across all warehouses assigned to it, resetting to zero at the designated interval. This quota includes credits used by both user-managed virtual warehouses and those utilized by cloud services. In our example, we specified 5000 as the credit quota. As a quota, according to the Snowflake documentation: "Any number can be specified." In fact, there are limitations. These limitations are not the main points of this topic, but just out of curiosity, let's do some tests. Obviously, the quota cannot be a negative number. If we try to specify a negative number, we will receive an error message:
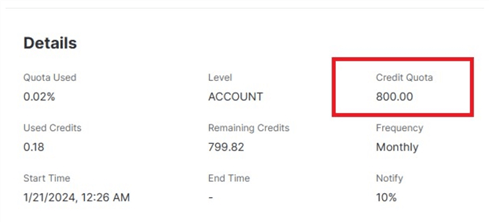
Technically, it is possible to specify a decimal number, but it will be rounded to the whole number before the decimal point:
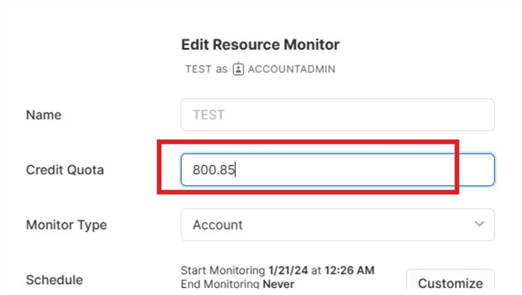
We can check and see that the specified 800.85 is rounded to 800:
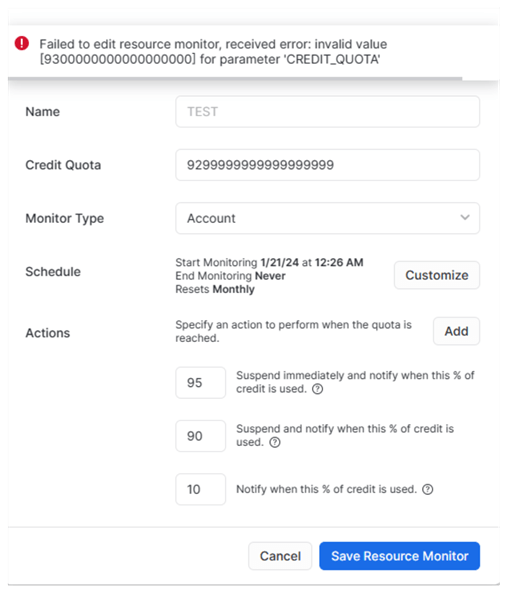
The quota can also be set to zero, but once created, the resource monitor will show all quotas that have been consumed. Additionally, quotas have an upper limit, which is logical. After a couple of tests, we found that it is not possible to specify a 19-digit number such as 9300000000000000000. In our test, we specified the 19-digit number 9299999999999999999, and it rounds it to 9300000000000000000 and throws an error message:
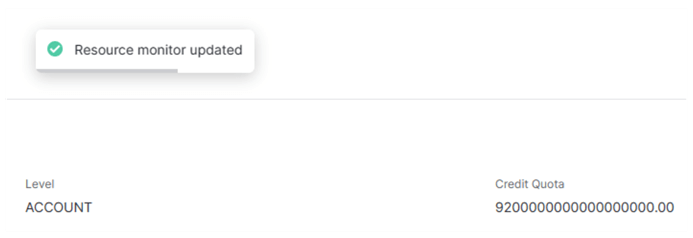
It is possible to specify a lower quota, but it is still a 19-digit number, 9200000000000000000, though:
Monitor Type
The monitor type specifies whether the resource monitor is set at the account level or warehouse level. Only one resource monitor can be assigned at the account level to monitor all warehouses at the account. Technically, Snowflake does not throw an error when you create another monitor and specify it at the account level. Nevertheless, this new one will become the account-level resource monitor, and the account level of the existing monitor will be removed.
If we create a warehouse-level resource monitor, one or more warehouses can be assigned. However, a warehouse can be assigned to only a single warehouse-level resource monitor. A resource monitor at the account level doesn't replace the resource monitor settings for individual warehouses. If either the account-level resource monitor or the warehouse-level resource monitor hits its specified limit and there's a suspension action set, the warehouse will be suspended.
Schedule
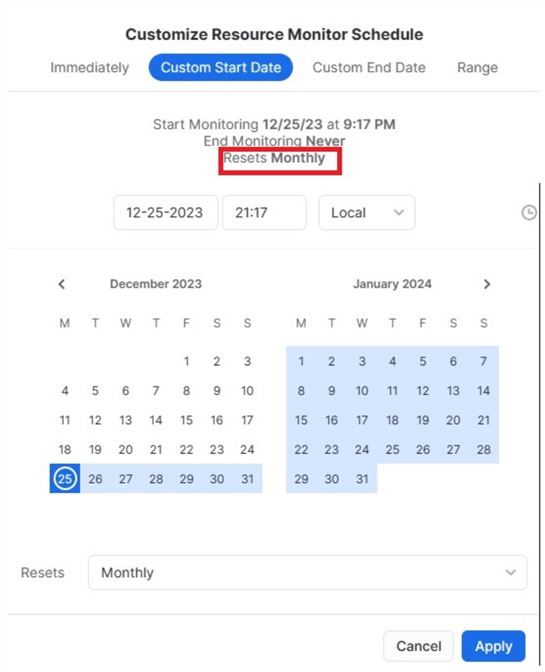
The schedule specifies the monitoring time frame of the resource monitor. The usual setup for a resource monitor is to start monitoring credits immediately and reset the used credits to zero at the beginning of each month, which matches Snowflake's billing cycle. If you want, you can change the schedule for a resource monitor. In our example, we specified the custom start date, but kept the default reset interval set to monthly:
Actions
Actions (or triggers) set limits as a percentage of the credit quota assigned to the resource monitor. A specific action is taken when this limit is reached during the specified timeframe. It's important to mention that actions support thresholds exceeding 100%.
There are three types of actions:
- Suspend Immediately and Notify… - Sends notifications to all account administrators (if notifications are enabled) and suspends all assigned warehouses immediately, canceling all active statements on those warehouses.
- Suspend and Notify… - Sends notifications to all account administrators (if notifications are enabled) but suspends all assigned warehouses after all active statements on those warehouses are completed.
- Notify - Only sends notifications to all account administrators (if notifications are enabled).
In our example, we configured actions to send notifications when 70% of the quota is used, send notifications and suspend when 95% is used, and send notifications and suspend immediately when 100% of the quota is used:
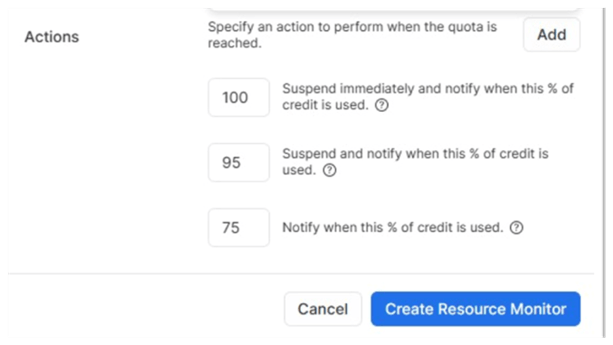
Now, click Create Resource Monitor to create it. After successfully creating it, we can find it under "Cost Management" -> " Resource Monitors."

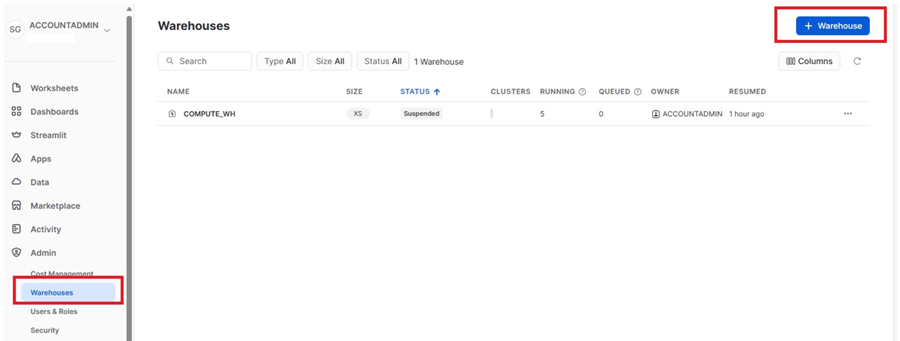
This is an account-level resource monitor, as we specified. Now, let's create virtual warehouses and then practice creating warehouse-level resource monitors. Under "Admin" -> "Warehouses," click + Warehouse to create a new warehouse:
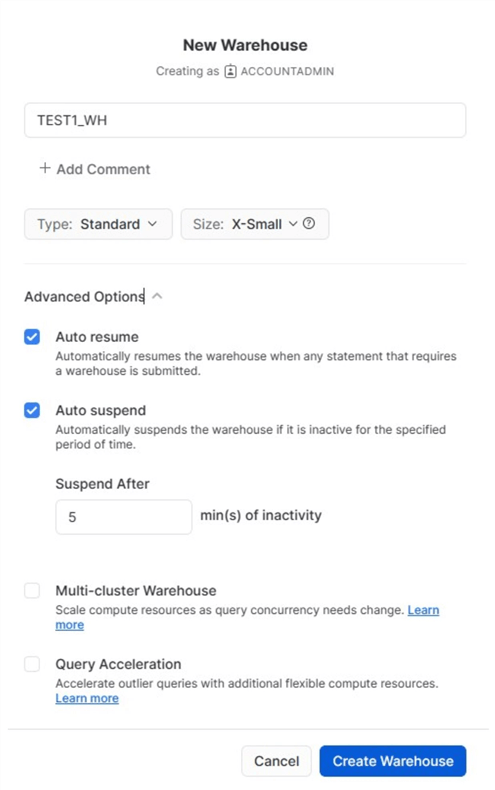
We will create two XS warehouses for our tests, TEST1_WH and TEST2_WH.
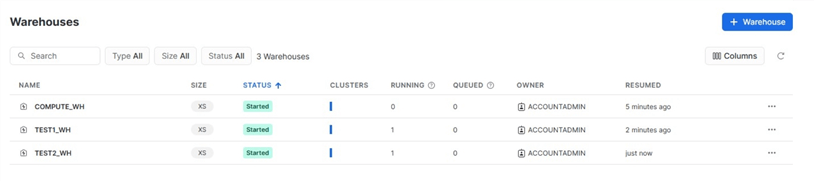
After creation, we can see the newly added warehouses under "Warehouses":
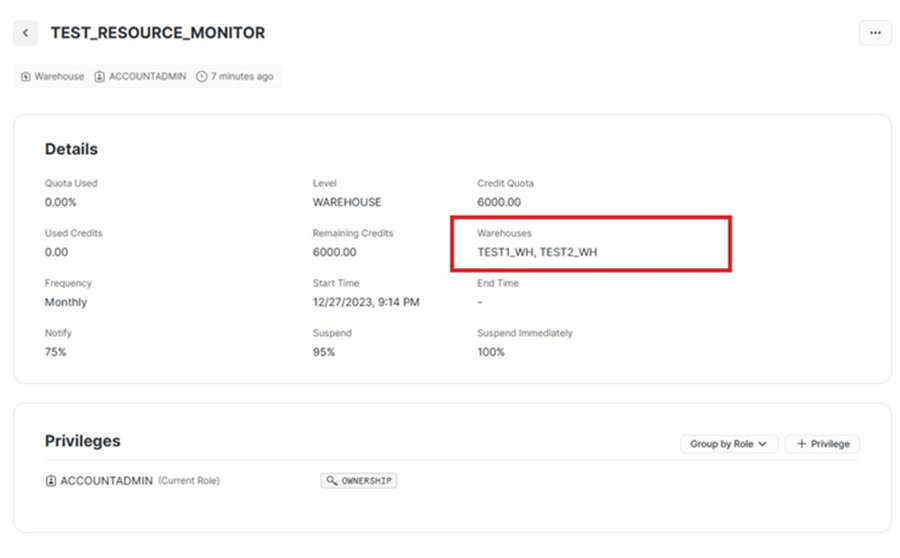
Next, we will create a warehouse-level resource monitor and assign these two new warehouses to that monitor:
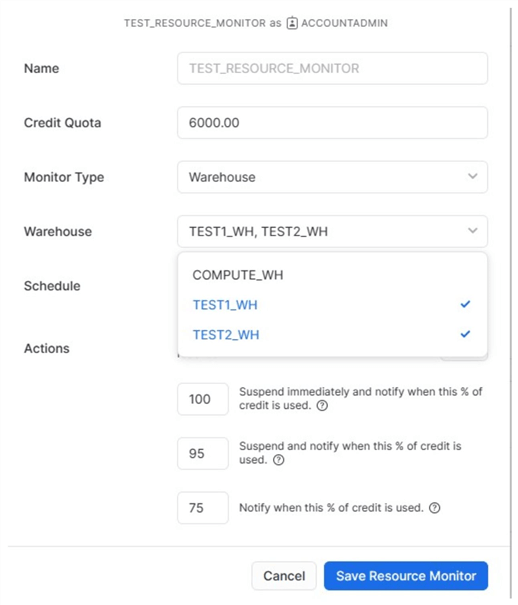
As we can see, both TEST1_WH and TEST2_WH are assigned to the TEST_RESOURCE_MONITOR:
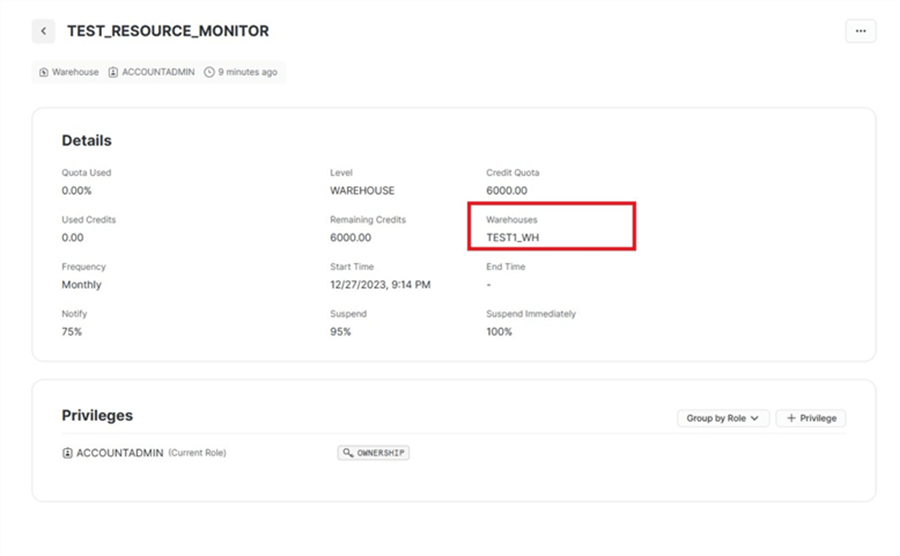
What if we create a new warehouse-level resource monitor - TEST2_RESOURCE_MONITOR and assign TEST2_WH (already assigned to the TEST_RESOURCE_MONITOR) to that monitor?
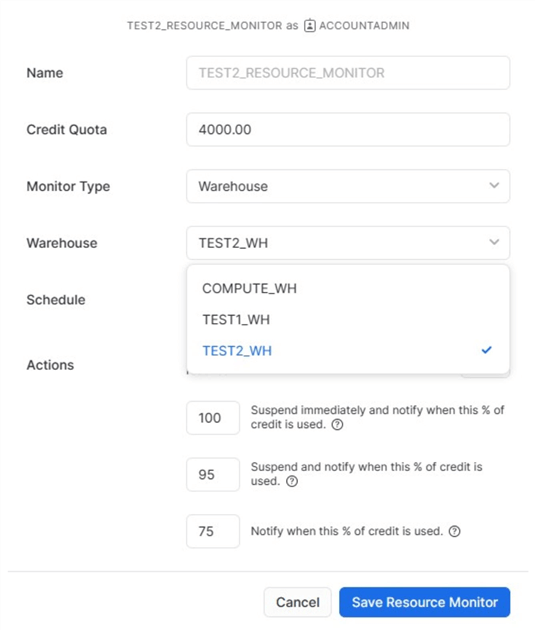
We can see that it will be successfully assigned to the new resource monitor and automatically removed from the previous one because, as mentioned before, a warehouse can be assigned to a single warehouse-level resource monitor.
Enabling Notifications
Based on specified actions and quota consumption previously assigned, notifications will be sent to account administrators only if notifications are enabled. Now, let's look at how to enable notifications.
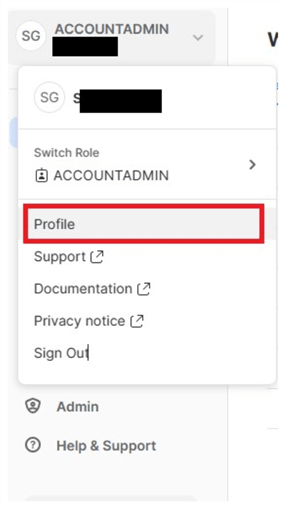
On Web UI, navigate to the Profile of the user:
Select the checkbox "Enable notifications from resource monitors":
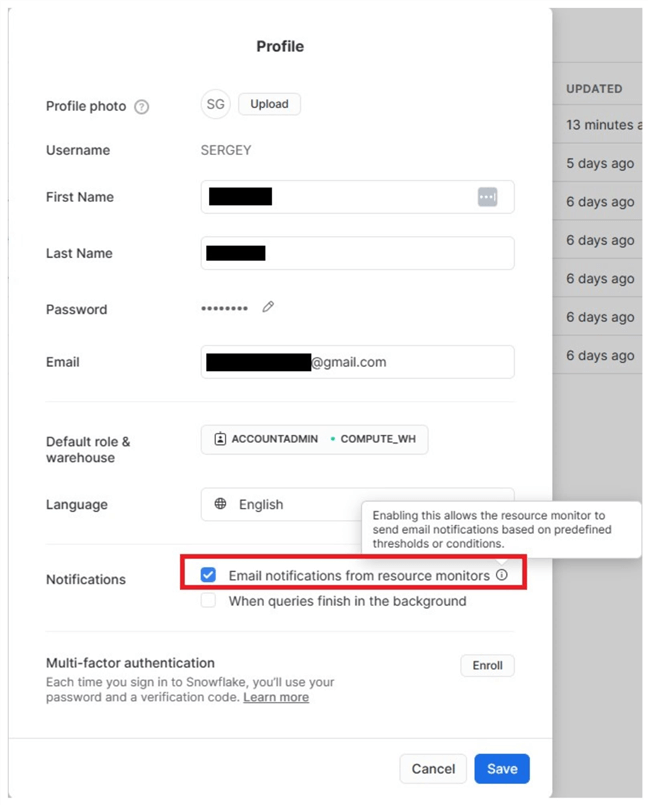
Note: To enable email notifications, the email address must be verified.
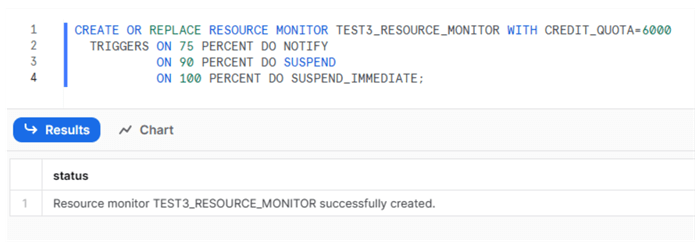
Hence, we created and tested resource monitors using Web UI. It also creates and modifies resource monitors via Snowflake SQL DDL commands. The following DDL creates a resource monitor TEST3_RESOURCE_MONITOR:
CREATE OR REPLACE RESOURCE MONITOR TEST3_RESOURCE_MONITOR WITH CREDIT_QUOTA=6000
  TRIGGERS ON 75 PERCENT DO NOTIFY
           ON 90 PERCENT DO SUSPEND
           ON 100 PERCENT DO SUSPEND_IMMEDIATE;
In DDL, however, there is no option to specify the level of the resource monitor:

After creation, however, it is possible to set the level by assigning a warehouse or account to that resource monitor. In the example below, we are assigning a warehouse to the resource monitor:
ALTER WAREHOUSE "TEST1_WH" SET RESOURCE_MONITOR = "TEST3_RESOURCE_MONITOR";
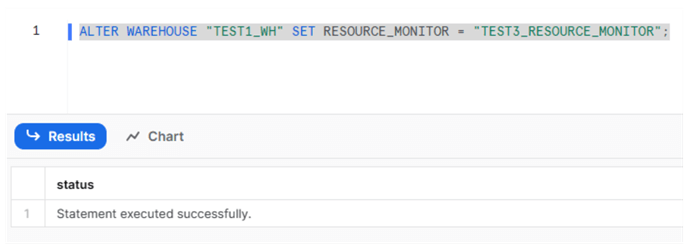
This sets the resource monitor level to "Warehouse":

Conclusion
Snowflake Resource Monitors play a crucial role in monitoring and controlling credit usage by virtual warehouses. Depending on their configurations, these monitors can notify and/or suspend warehouses when predefined credit limits are reached. Resource Monitors can be set at both the account level (limited to one per account) and the warehouse level. While the same Resource Monitor can be assigned to more than one warehouse, each warehouse can have only one Resource Monitor assigned to it. Using Resource Monitors significantly contribute to expense optimization by effectively managing credit usage in virtual warehouses.
Next Steps
- Working with Resource Monitors | Snowflake Documentation
- CREATE RESOURCE MONITOR | Snowflake Documentation


About the author
 Sergey Gigoyan is a database professional with more than 10 years of experience, with a focus on database design, development, performance tuning, optimization, high availability, BI and DW design.
This author pledges the content of this article is based on professional experience and not AI generated.
View all my tips
Article Last Updated: 2024-03-15