By: Hristo Hristov | Updated: 2024-03-26 | Comments | Related: > Python
Problem
In process automation, a file needs to be served back to the client application. Then, the user may need to use this file at a later date in a digital or hardcopy form. How do you create your own PDF-generating cloud-based micro application?
Solution
While there are many ways to produce a PDF file, automating the file generation is a bit more challenging. One way to solve it is using Azure functions, Python runtime and the xhtml2pdf package. For this tip, we will use a specific library to generate the PDF and serve it back to the client app as a REST response. To illustrate, let's assume we must create a label to be printed and attached to pallets in a warehouse. Here is an example:
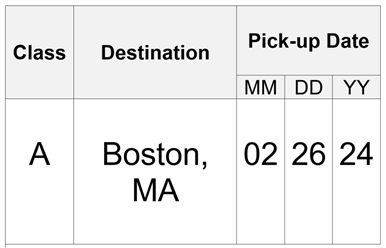
The label has three parameters: class, destination, and pick-up date. These parameters are available through another application.
Azure Function Project
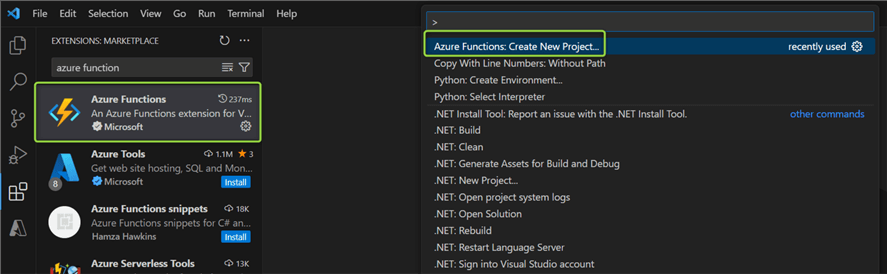
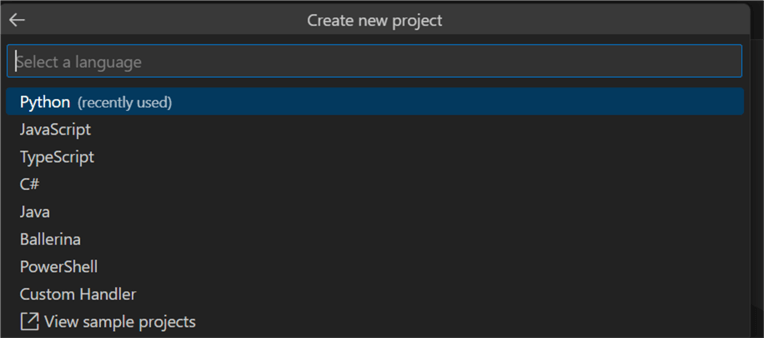
Let's start with setting up a local project. Open your local project folder in VS Code. Make sure the Azure functions extension for VS Code is installed. Hit Ctrl+Shift+P and choose Azure Function: Create New Project…
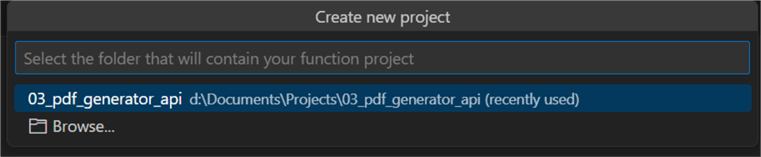
Browse for a folder or choose one, then pick the programming language:
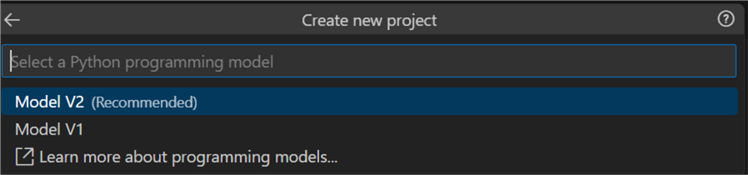
Then choose programming model V2:
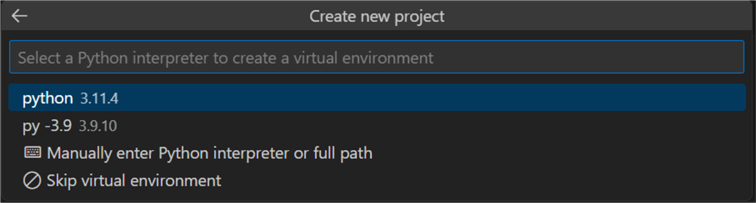
Next, select the base interpreter for your virtual environment:
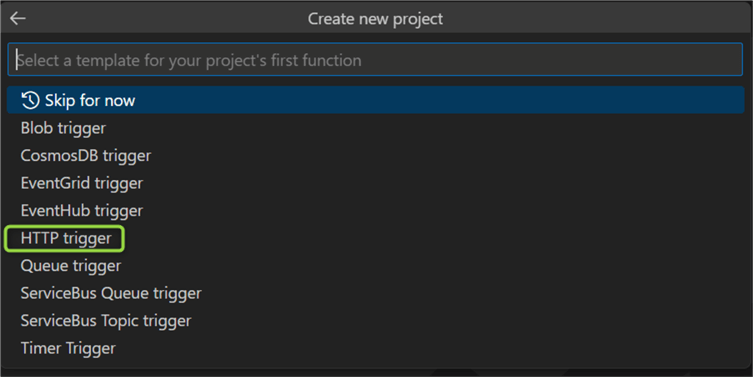
The following prompt will appear for the trigger type. For this function, we will need the HTTP trigger:
Next, give it a name:

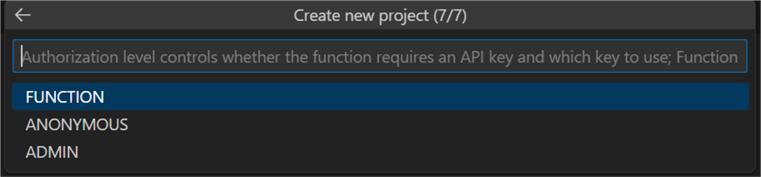
Finally, choose an authorization method. If you plan to use the project in production, choose FUNCTION (function-specific API key) or ADMIN (master key). In this case, choose ANONYMOUS.
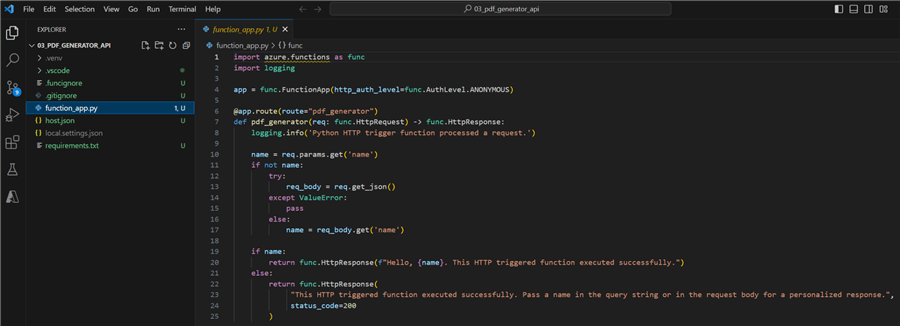
VS Code will start creating your venv and project structure. At this point, the screenshot below shows what the namespace looks like with the function_app file open:
So far, so good! If you have not developed or deployed Azure functions yet, install the Azure functions core tools. It will enable you to develop and test your functions on your local computer.
Environment Dependencies
Next, install the package we need to generate PDF files and the Azure functions package:
pip install xhtml2pdf azure.functions

Solution Code
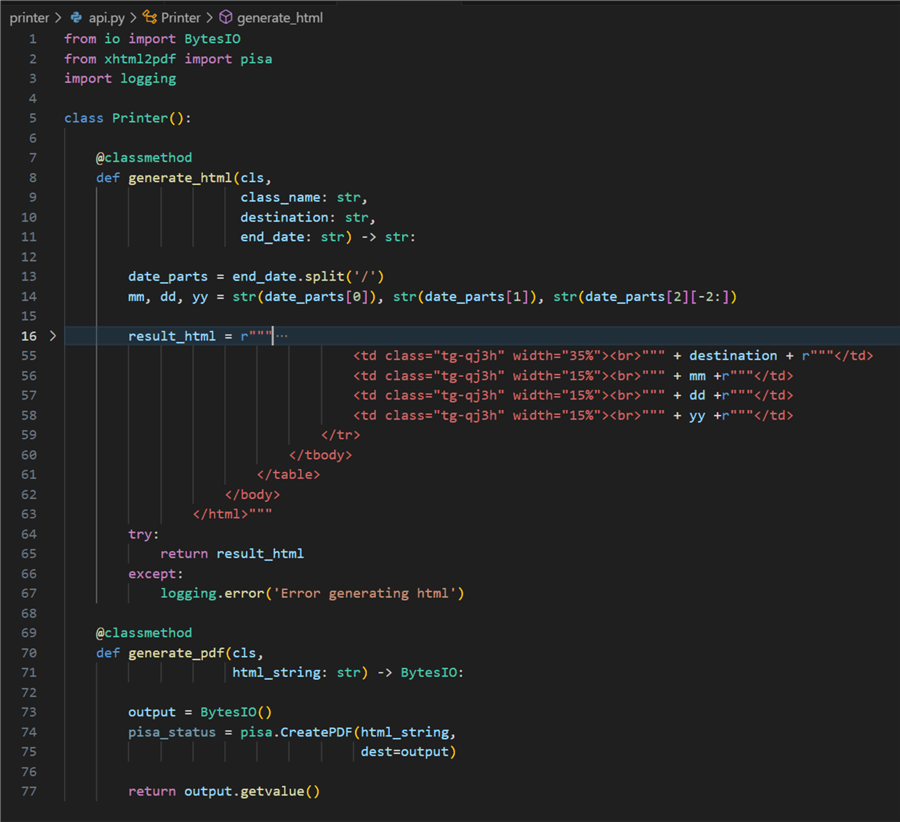
Create the Printing API Module
We will create a subfolder called printer inside our namespace, then add a file api.py. The file contains a single class with two class methods, one for generating an HTML output and another for generating the PDF file. Below is the code:
01: from io import BytesIO
02: from xhtml2pdf import pisa
03: import logging
04:
05: class Printer():
06:
07:     @classmethod
08:     def generate_html(cls,
09:                       class_name: str,
10:                       destination: str,
11:                       end_date: str) -> str:
12:
13:         date_parts = end_date.split('/')
14:         mm, dd, yy = str(date_parts[0]), str(date_parts[1]), str(date_parts[2][-2:])
15:
16:         result_html = r"""
17:             <!DOCTYPE html>
18:             <html>
19:                 <style type="text/css">
20:                     @page {
21:                         size: a5 landscape;
22:                         margin: 1cm;
23:                         }
24:                     .tg  {border-collapse:collapse;border-spacing:0;}
25:                     .tg td{border-color:black;border-style:solid;border-width:1px;font-family:Arial, sans-serif;font-size:14px;
26:                     overflow:hidden;padding:10px 5px;word-break:normal;}
27:                     .tg th{border-color:black;border-style:solid;border-width:1px;font-family:Arial, sans-serif;font-size:14px;
28:                     font-weight:normal;overflow:hidden;padding:10px 5px;word-break:normal;}
29:                     .tg .tg-ojej{background-color:#efefef;font-size:36px;text-align:center;vertical-align:top}
30:                     .tg .tg-qj3h{font-size:48px;text-align:center;vertical-align:top}
31:                     .center {
32:                         font-weight:bold;
33:                         text-align: center;
34:                         margin-left: auto;
35:                         margin-right: auto;
36:                         }
37:                 </style>
38:                 </body>
39:                     <table class="tg">
40:                         <thead>
41:                             <tr>
42:                                 <th class="tg-ojej" rowspan="2"><br><span class="center">Class</span></th>
43:                                 <th class="tg-ojej" rowspan="2"><br><span class="center">Destination</span></th>
44:                                 <th class="tg-ojej" colspan="3"><span class="center">Pick-up Date</span></th>
45:                             </tr>
46:                             <tr>
47:                                 <th class="tg-ojej center">MM</th>
48:                                 <th class="tg-ojej center">DD</th>
49:                                 <th class="tg-ojej center">YY</th>
50:                             </tr>
51:                         </thead>
52:                         <tbody>
53:                             <tr>
54:                                 <td class="tg-qj3h" width="20%"><br>""" + class_name + r"""</td>
55:                                 <td class="tg-qj3h" width="35%"><br>""" + destination + r"""</td>
56:                                 <td class="tg-qj3h" width="15%"><br>""" + mm +r"""</td>
57:                                 <td class="tg-qj3h" width="15%"><br>""" + dd +r"""</td>
58:                                 <td class="tg-qj3h" width="15%"><br>""" + yy +r"""</td>
59:                             </tr>
60:                         </tbody>
61:                     </table>
62:                 </body>
63:             </html>"""
64:         try:
65:             return result_html
66:         except:
67:             logging.error('Error generating html')68:
69:     @classmethod
70:     def generate_pdf(cls,
71:                      html_string: str) -> BytesIO:
72:
73:         output = BytesIO()
74:         pisa_status = pisa.CreatePDF(html_string,
75:                                      dest=output)
76:
77:         return output.getvalue()
Let's break it down:
- 01 – 03: Import the necessary external modules.
- 07 – 67: Define a method for generating HTML output. According to
the requirement (see the example label at the start of the article), the method
needs three parameters: class name, destination, and date.
clsis a keyword used to access the class method. - 13 – 14: Split the date into the needed parts: month, date, and year.
- 16 – 63: Build the HTML string. I have used this handy table generator. On lines 54 to 58, I have inserted the variables we have for the label data. The whole HTML code block constitutes a literal string so that it is stored as it appears, hence, the prefixed 'r.'
- 64 – 67: Finally, we return the HTML string within a try except block that will log an error if such arises.
- 69 – 77: Define a method for generating the PDF output. It has one single parameter, an HTML string of type string.
- 73: Initialize an empty
BytesIO(bytes object) that will act like a container in which we dump the binary representation of the PDF file. - 74: Using the
CreatePDFmethod, we supply the HTML string and a bytes handle to receive the result. - 77: Finally, we return the bytes-object holding the generated PDF.
In short, in less than one hundred lines, we have created functionality to generate HTML and parse it into a PDF file. This is what the file looks like in the editor:
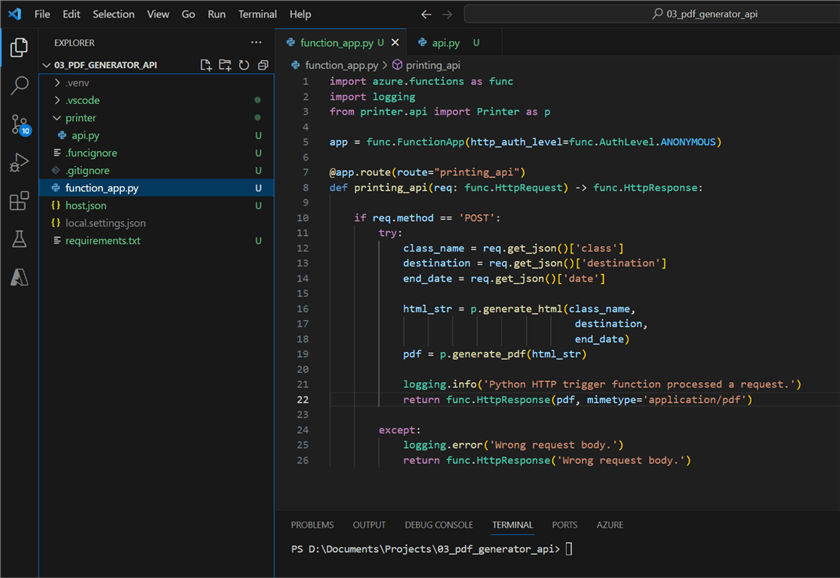
Update the Function App File
Having created the printing API module, it is time to update the core function file. It will run every time the function is executed. This is what the updated file looks like:
01: import azure.functions as func
02: import logging
03: from printer.api import Printer as p
04:
05: app = func.FunctionApp(http_auth_level=func.AuthLevel.ANONYMOUS)
06:
07: @app.route(route="printing_api")
08: def printing_api(req: func.HttpRequest) -> func.HttpResponse:
09:
10:     if req.method == 'POST':
11:         try:
12:             class_name = req.get_json()['class']
13:             destination = req.get_json()['destination']
14:             end_date = req.get_json()['date']
15:
16:             html_str = p.generate_html(class_name,
17:                                         destination,
18:                                         end_date)
19:             pdf = p.generate_pdf(html_str)
20:
21:             logging.info('Python HTTP trigger function processed a request.')
22:             return func.HttpResponse(pdf, mimetype='application/pdf')
23:
24:         except:
25:             logging.error('Wrong request body.')
26:             return func.HttpResponse('Wrong request body.')
Let's break it down:
- 01 – 03: Import the necessary external modules, including our own module "printer", its single file "api," and class "Printer."
- 05: Standard code for creating the function app with anonymous level of access
- 07: App route decorator defining the path to the function file, which must bear the same name as the entry method.
- 08: Method signature for the entry method. It accepts and returns an http response.
- 10: We would like our API to support one single HTTP request method "POST" (although, in this case, it can also be a "GET").
- 12 – 14: Wrapped in a try block, we extract the parameter values from the request body JSON structure.
- 16 – 18: Generate an HTML string using our new module.
- 19: Generate a PDF using the HTML string.
- 21: Log the successful request.
- 22: Return an HTTP response containing the PDF file. It is critical that the mimetype is correctly set as 'application/pdf.'
Below is a quick check of the namespace:
Run the Solution Locally
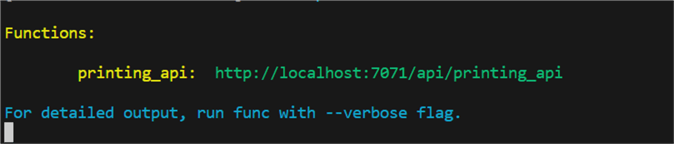
From the VS Code terminal, type and run
func start. This command
will run the function API on a localhost, enabling us to test it with Postman or
another API testing tool.

If the function runtime found no errors either in the configuration or the Python code, you should see the following:
Now, let's head to Postman and see if our code works. When you open a new request, you must perform the following steps:
- Request method – POST
- Host URL - http://localhost:7071/api/printing_api
- Request body in raw format, formatted as JSON. The request body contains the three parameters as previously defined:
{
    "class": "C",
    "destination": "Boston, MA",
    "date": "15/01/2025"
}
- Hit the blue SEND button (right) to send the request. The function will work with the parameter values provided, generate an HTML, pass it to the PDF generating method, and serve back the PDF file as an HTTP response.
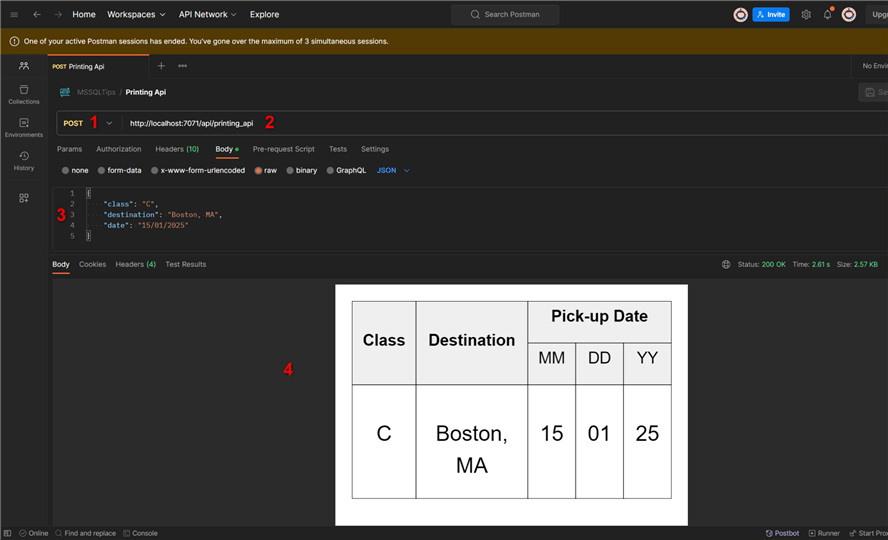
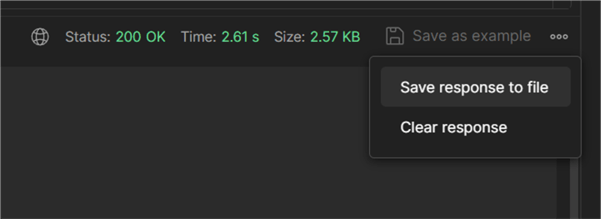
The result is a nicely formatted PDF file generated on demand. Postman allows us to see a preview of the file and save it:
Deploying to Azure
First, run pip freeze > requirements.txt
from the root folder in the solution. This command will update the dependencies
list. Next, run az login
to log in to your Azure subscription, then run
func azure functionapp publish <FunctionAppName>.
This will deploy your function to the cloud using an existing function app with
Python runtime. Additional documentation related to
deployment is available.
Conclusion
Using Azure functions, Python, and the xhtml2pdf package, we have successfully created a cloud-based PDF-generating API. The PDF files can be served in a client app or via email. Feel free to experiment with this solution, adapt the HTML output to a more complex table or document structure, or add additional API parameters that will appear in the PDF file.
Next Steps
- How to Generate a QR Code with Power Apps and Azure Function with Python Runtime
- Python standalone PDF creation
- Develop azure functions locally


About the author
 Hristo Hristov is a Data Scientist and Power Platform engineer with more than 12 years of experience. Between 2009 and 2016 he was a web engineering consultant working on projects for local and international clients. Since 2017, he has been working for Atlas Copco Airpower in Flanders, Belgium where he has tackled successfully multiple end-to-end digital transformation challenges. His focus is delivering advanced solutions in the analytics domain with predominantly Azure cloud technologies and Python. Hristo's real passion is predictive analytics and statistical analysis. He holds a masters degree in Data Science and multiple Microsoft certifications covering SQL Server, Power BI, Azure Data Factory and related technologies.
This author pledges the content of this article is based on professional experience and not AI generated.
View all my tips
Article Last Updated: 2024-03-26