By: Temidayo Omoniyi | Updated: 2024-05-06 | Comments | Related: > Azure Synapse Analytics
Problem
In today's data-driven world, the need for a unified platform where all types of data professionals can work together to produce a desired output is in higher demand than ever. The issue of having multiple platforms for data-related tasks can be overwhelming, thereby losing track of individual platforms.
Solution
The introduction of Microsoft Azure Synapse Analytics brought an end to this multi-platform issue when building a data-related solution. Azure Synapse Analytics provides a unified platform where Data Engineers (Synapse Pipelines, Synapse Notebooks, Azure Storage), Data Scientists (Synapse Notebook, Azure ML Studio), and Data Analysts (Power BI) can work together to accomplish a desired output.
Prerequisites
To follow along with this article, you should have a basic understanding of the following:
- Power BI Desktop and Service.
- Azure Fundamentals.
- Azure Portal (Active user. Optional, depending on the account type).
Azure Synapse Analytics
The Microsoft Azure Synapse Analytics is an enterprise-based analytics solution that speeds up the time to insight for big data platforms and data warehouses. It combines the most advanced features of Apache Spark big data technologies, Azure Data Explorer for log and time series analytics, and SQL technologies used in enterprise data warehousing, pipelines for ETL/ELT and data integration, as well as strong connectivity with Azure services like AzureML, CosmosDB, and Power BI.
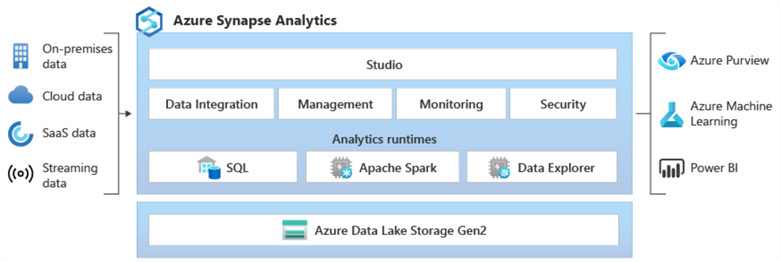
Azure Synapse Analytics Architecture
The Azure Synapse Analytics Architecture is made up of several components, which are highlighted below.
Unified Big Data and Data Warehousing
Azure Synapse Analytics supports multiple data warehousing types used in big data processing, data virtualization, streaming, and machine learning.
- Serverless SQL Pool: A high-level security data warehouse that provides a flexible, auto-scaling option for querying both structured and semi-structured data without having to manage infrastructure.
- Dedicated SQL Pool: Formerly known as Azure SQL Data Warehouse, this offers a structured data warehousing operation and provides easy usage with a well-known SQL interface for SQL Server users.
Apache Spark
The most widely used open-source big data engine, Apache Spark, is integrated deeply and smoothly with Azure Synapse and can be used in machine learning, ETL, data engineering, and data preparation. The Apache Spark storage is based on the same idea as a "Lakehouse," a term used to describe a contemporary data architecture that combines the finest elements of warehouses and data lakes to produce a single platform for data management and analysis.
Azure Data Lake Gen2 Storage
Azure Data Lake Storage (ADLS) Gen2 in Azure Synapse Analytics is a crucial part of Synapse Analytic data storage and forms the basis of its Lakehouse architecture. The ADLS in Synapse Analytics supports different file formats, such as structured, semi-structured, and unstructured.
The Resolute and Serverless SQL pools in Synapse Analytics can also access and query data stored in the ADLS Gen2 using the following methods:
- External Table: The user can register ADLS Gen2 as an external table, and you can directly query data without the need to move.
- Note: This technique usually requires some configuration and security before usage.
- PolyBase: This allows users to query files in their native formats directly in ADLS Gen2
- Spark: Large datasets in ADLS Gen2 can be processed quickly and effectively by serverless Spark pools utilizing the Spark Dataframe.
Data Integration
Azure Synapse Analytics has a built-in ETL tool called Synapse Pipeline, similar to Azure Data Factory. Sophisticated, large-scale ETL pipelines can be built inside Azure Synapse Analytics without leaving the platform thanks to the same data integration engine and user interface found in Azure Data Factory.
Data Explorer
Still in preview, the Azure Data Explorer provides a quick, fully managed data analytics solution for real-time and time-series analysis on massive amounts of data streams from business and human operations, applications, websites, Internet of Things (IoT) devices, and other sources.
Create Azure Synapse Analytics Workspace
The following steps should be followed when creating an Azure Synapse Analytics Workspace:
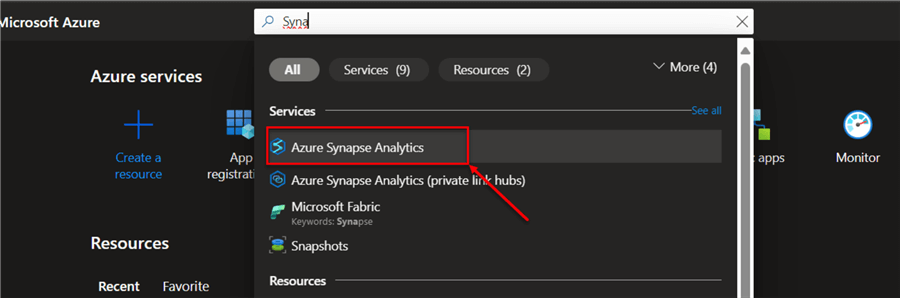
Step 1: Create Synapse Workspace
In your Azure Portal, search for Azure Synapse Analytics. This will take you to another window.
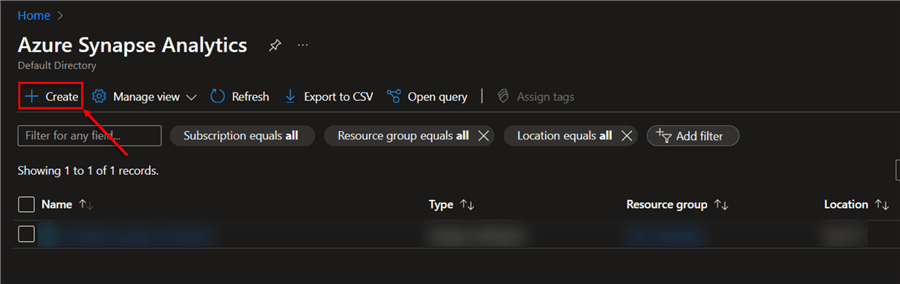
In the new window, click Create at the top left corner, which will take you to the settings environment.
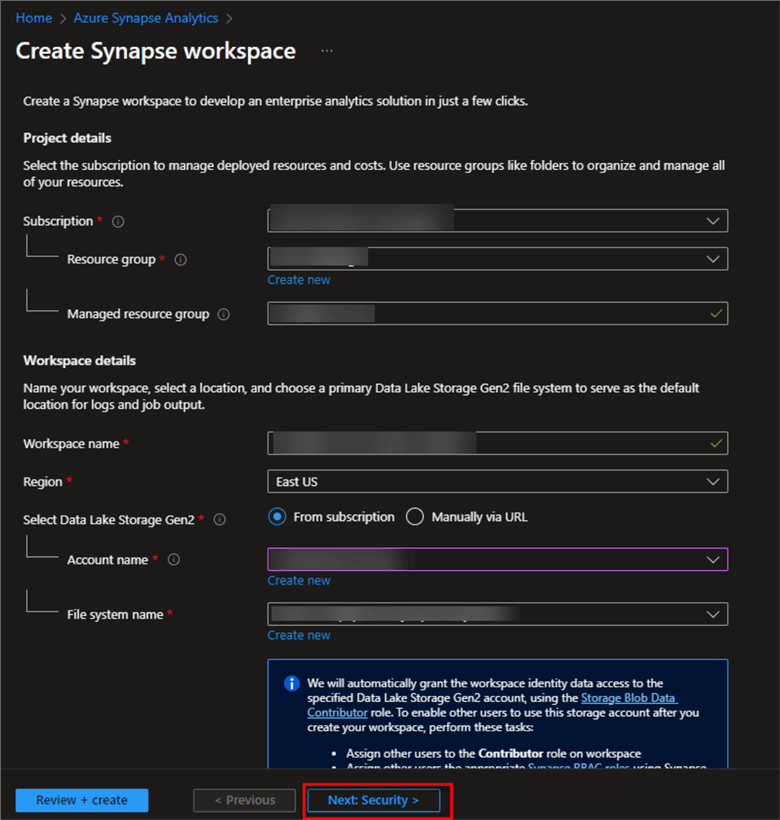
Step 2: Basic Settings
In the basic settings, fill in the following configurations:
- Subscription: Select the subscription from the dropdown you want to use.
- Resource group: The Azure Resource Group is a container that allows you to manage and arrange relevant resources together. You can either create a new resource group or use the existing one.
- Managed resource group: This is a container that holds ancillary resources created by Azure Synapse Analytics for your workspace.
- Workspace name: Provide a unique workspace name for your resources.
- Select Data Lake Storage Gen2: This account will serve as
the workspace's principal storage account, storing catalog information and
workspace-related metadata.
- Account name: choose between two options: create a new ADLS Gen2 or use an existing one. For this article, I will use an existing one to save resources and cost.
- File system name: you can create a container in the ADLS Gen2 where Synapse will be writing information too.
Click Next: Security.
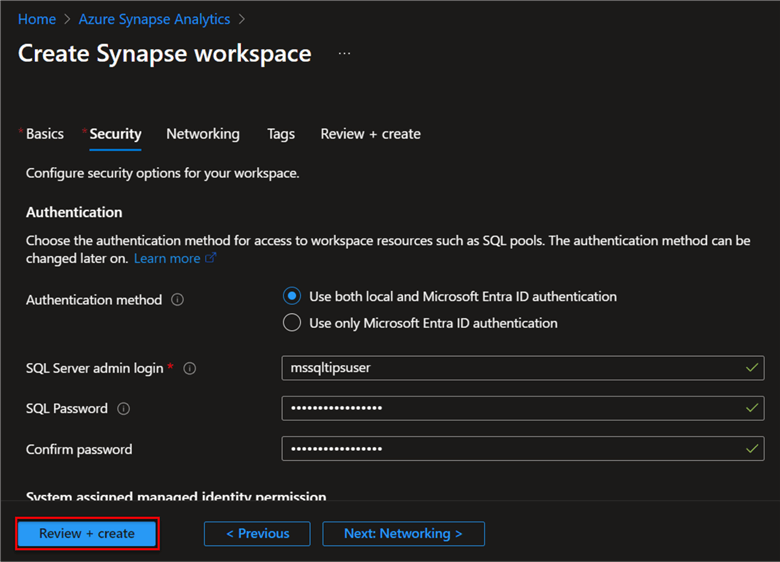
Step 3: Security
For security, provide SQL Server admin login credentials for Synapse, keeping the remaining settings at default. Click on Review + Create.
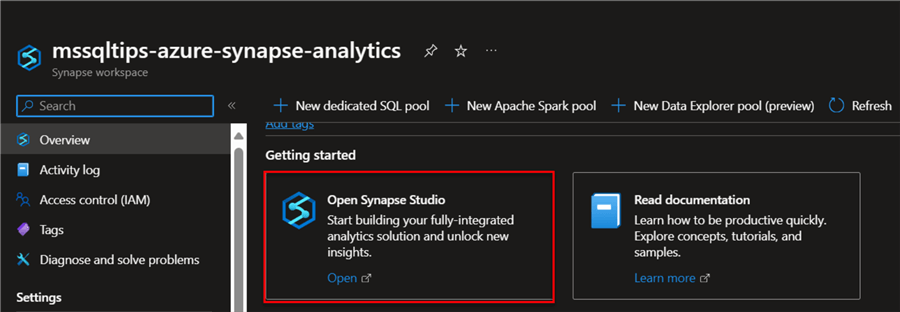
It should take a couple of minutes to validate and provision after clicking on the Go to Resource.
Overview of Azure Synapse Studio Environment
The Azure Synapse Studio may remind you of the Azure Data Factory. However, Azure Synapse was built for more, it integrates many other services.
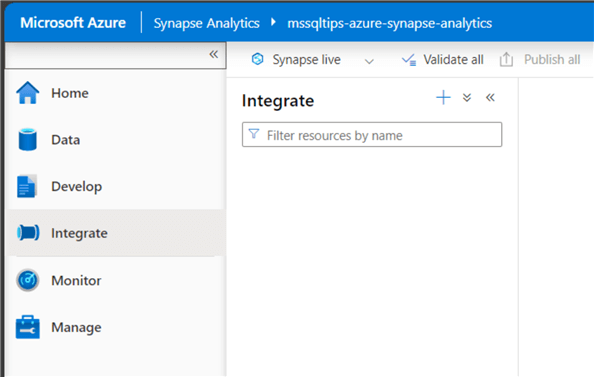
The Azure Synapse Studio is made up of five major hubs, each hub servicing a particular function.
- Data Hub
- Explore and manage your data assets.
- Browse through different data assets stored in the Data Lake, data warehouse, and Azure Data Explorer.
- Developer Hub
- Supports SQL scripts, notebooks, and data pipeline development. Developers can develop and execute notebooks supported in different languages, such as Python, SQL, and Scala, for exploration and analysis.
- Ability to create graphical pipelines for ETL processes usually found in Azure Data Factory.
- Integration Hub
- Responsible for the data integration with multiple systems and sources.
- Monitoring Hub
- Helps to check the functionality and condition of Synapse workspace resources, much like Azure Data Factory Monitor.
- Managed Hub
- Manages your workspace - all resources are controlled from SQL pools configuration setting to access control.
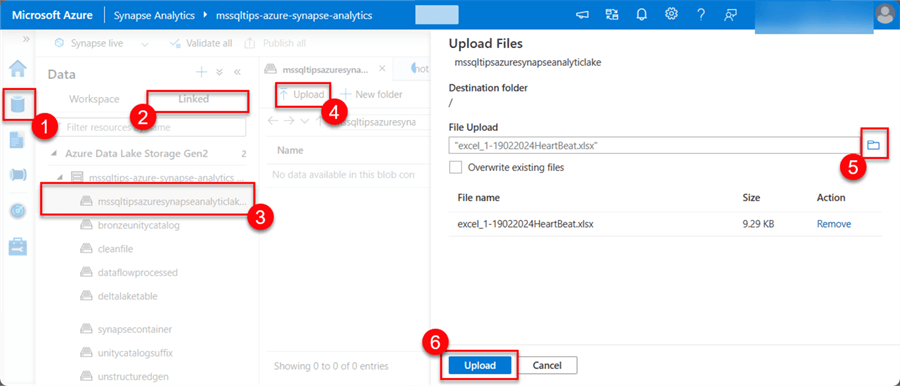
Upload File to Azure Synapse Storage
In Azure Synapse Studio, click the Data tab, then select Linked. This shows the linked storage to either Data Lake Gen2 or Blob storage. Select the storage container you want to use. Click Upload. The Upload files window appears. Choose the file by clicking on the folder icon, then click Upload at the bottom of the window.
Connect Power BI to Azure Synapse Analytic Workspace
To integrate Power BI Services with the Azure Synapse workspace, you will need a dedicated organization account with the Power BI subscription. This is a major blocker, and the account currently used to create the Azure Synapse workspace is a Hotmail account linked to my current subscription.
How can we overcome this issue? If you are the admin of your current subscription or have certain privileges, you can create a new user with the accepted domain name.
Create New User
Since the Power BI account does not accept personal email, we will need to create a new account linked to an organization with the correct domain.
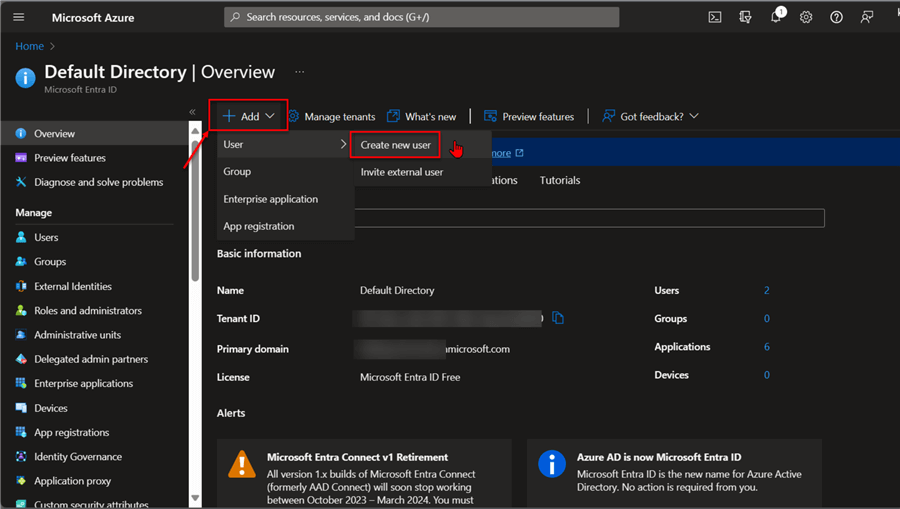
Step 1: New User
In the Azure portal, search for Active Directory, then click Add → User → Create new user.
This will take you to another window to provide the configuration settings.
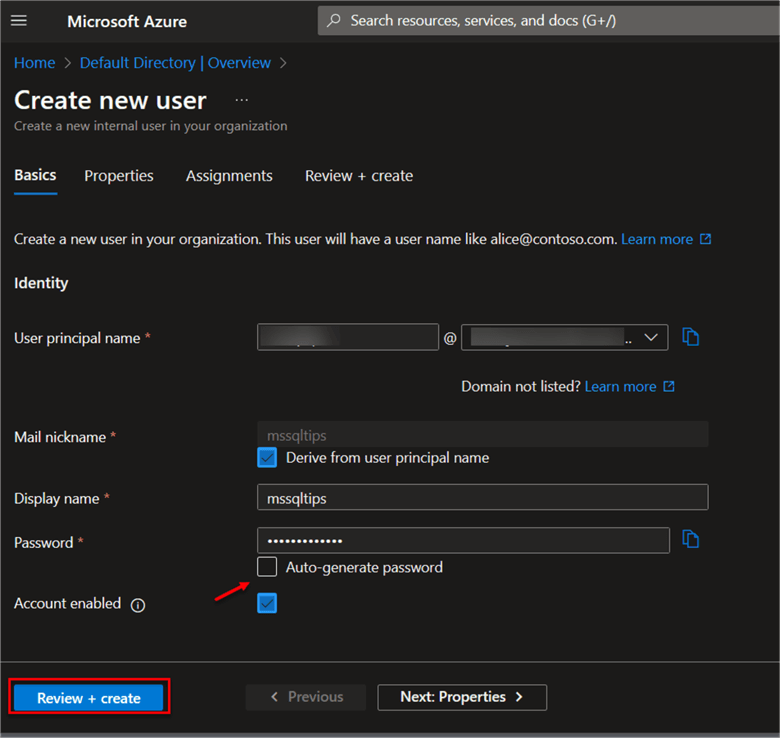
Step 2: Configuration
In the basic configuration, provide your User principal name and a password (to be changed later). After filling in the necessary information, click Review + create. If successful, you should receive a notification: "User successfully created."
After clicking Review + create, click on the User tab to see all the users available in that active directory.
Create a Power BI Account
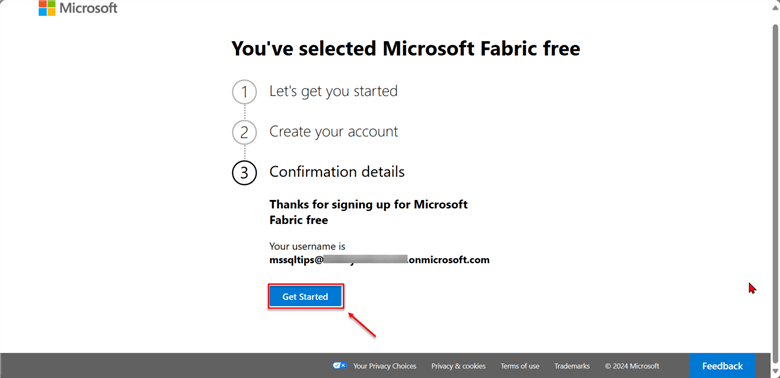
Microsoft Power BI is a tool utilized by most data analysts for analysis, modeling, and visualization. To create a Power BI account, open your browser and navigate to https://app.powerbi.com. Log in with the new user account we just created in the Azure portal.
You will be prompted to change your password. Ensure your information and password are known by you alone. Click Sign in.

Click on the Get Started button when you are done with the necessary configuration.
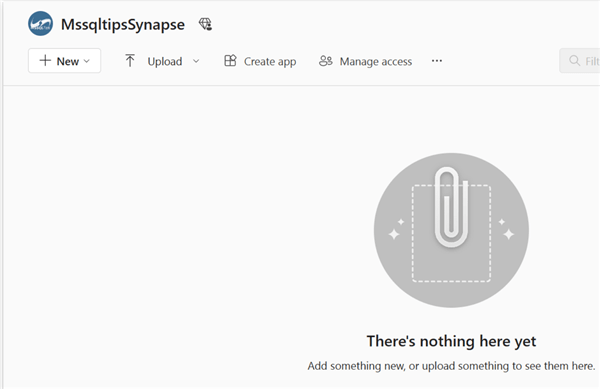
Create Workspace
The Microsoft Power BI workspace is a shared environment for a group operating under a tenant. Workbooks, datasets, Power BI dashboards, reports, apps, and dataflows are all housed in them as containers. You can read more on Power BI workspaces in a previous article: Understanding Power BI Security Options - Row-Level, Column-Level and Object-Level Security.
Connect Power BI Desktop to Azure Synapse Analytics
To connect to Azure Synapse Analytic storage using Power BI desktop, check our previous article, which explained how to connect Power BI Desktop to Azure Data Lake Gen 2: Connect Power BI to Azure Data Lake Gen2 Storage for Reporting.
Get Endpoint URL
In the Azure Synapse Analytics workspace, click the Data Hub, then the Linked tab. Navigate to the ADLS storage used during creation of the Azure Synapse resource, select the Properties tab in the 3 dots, and click the copy icon to copy the EndpointURL.

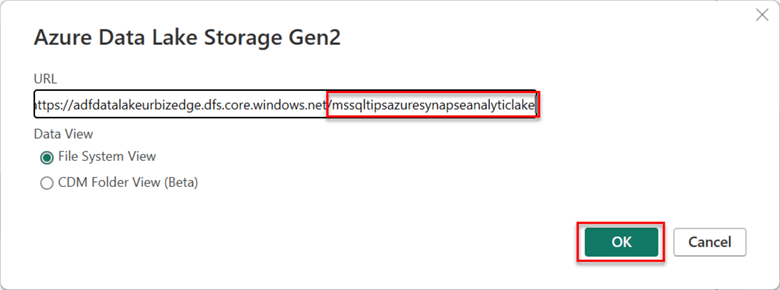
Get Data from ADLS2
In Power BI Desktop, search for Azure Data Lake Gen 2 and paste the Endpoint URL with the container folder directory to the link.
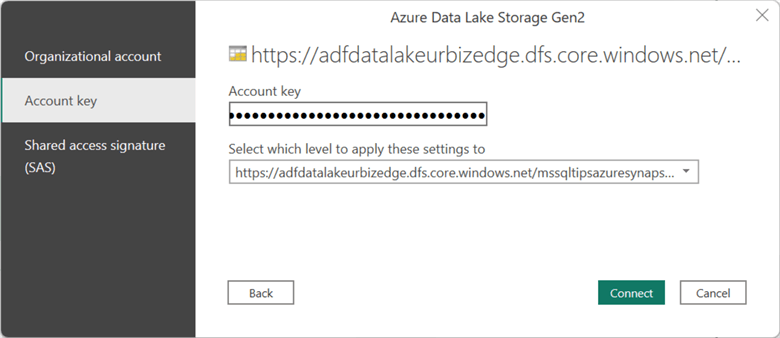
After pasting the Endpoint URL link, you need to provide access tokens, which can be obtained in the Azure storage Access key. At this point, you are expected to perform all necessary transformations in Power BI Power Query to standardize the data.
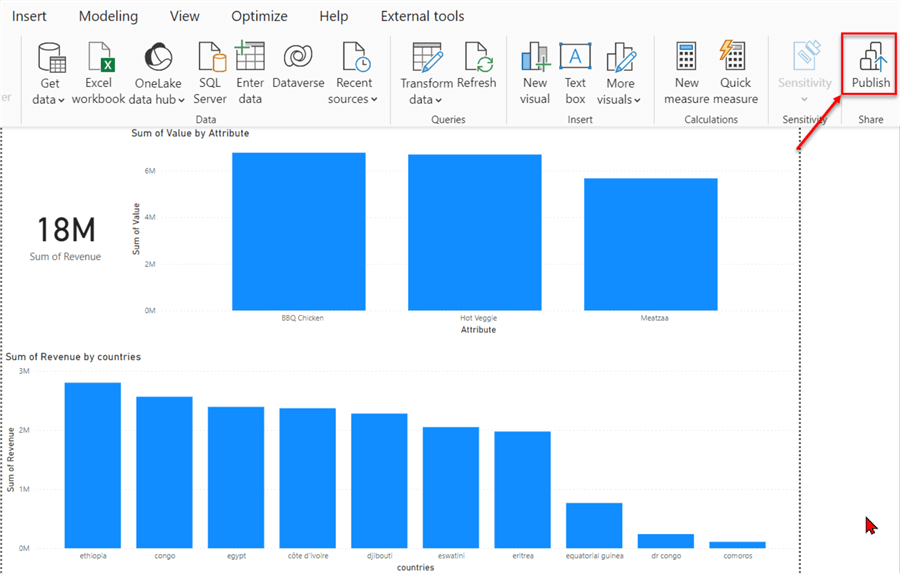
Publish Report to Power BI Service Workspace
In Power BI Desktop, click Publish in the top right corner and select the workspace where you want to push your report.
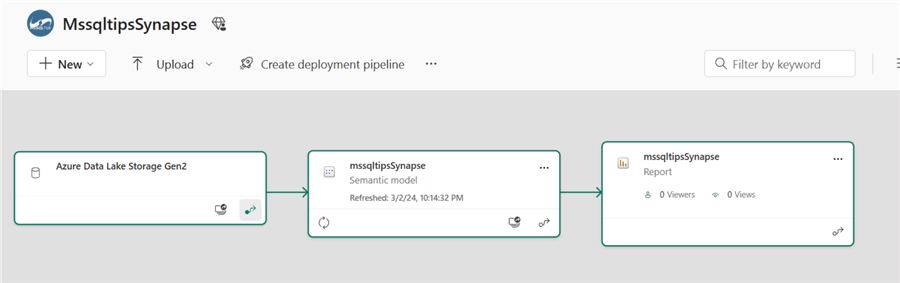
In the Power BI workspaces, there will be two items: the Power BI report and the semantic model (formerly dataset).
Credential Issue
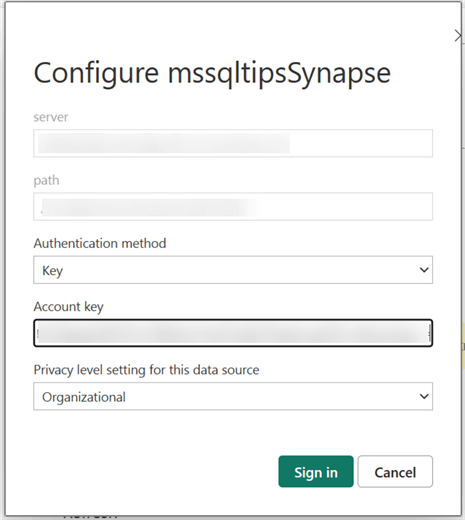
Publishing your report for the first time might cause a data source credential issue. We will fix it by setting the data source credentials. In your Power BI workspace, click the 3 dots in the semantic model and select Settings. This should take you to another window.
In the Data source credentials, click on Edit credentials and provide it with the necessary information. Note: The Account key can be obtained from the ADLS Access Key from the Azure Portal. Click Sign in.
Data Lineage View
You can also view the data lineage, which provides you with tracking ability to view data from its origin/source to its destination.
Setting-Up Credentials
We are now finished with the Power BI setup on the Power BI service. We need to give the new user access to the Synapse resources, storage, and resource group.
Grant Azure Resource Access
Let's start by granting the new user access to the Azure resource to which all our resources are allocated.
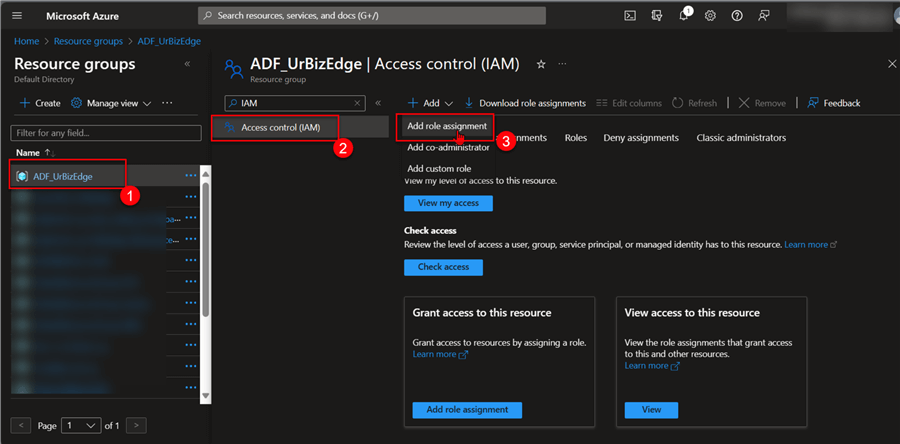
Add Role Assignment
In the Azure Portal, navigate to the resource group where you have your Azure Synapse Analytics. Click on Access control (IAM), then select Add role assignment.
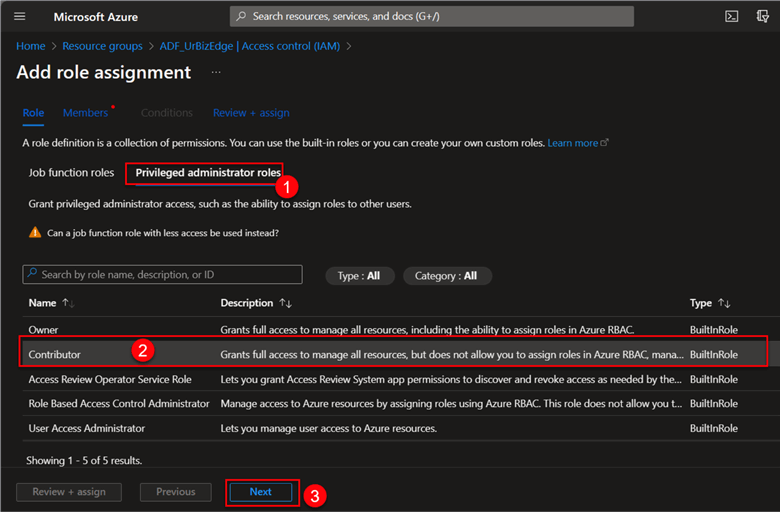
Add Contributor
In the new window, select the Privileged administrator roles, select Contributor, and click Next.
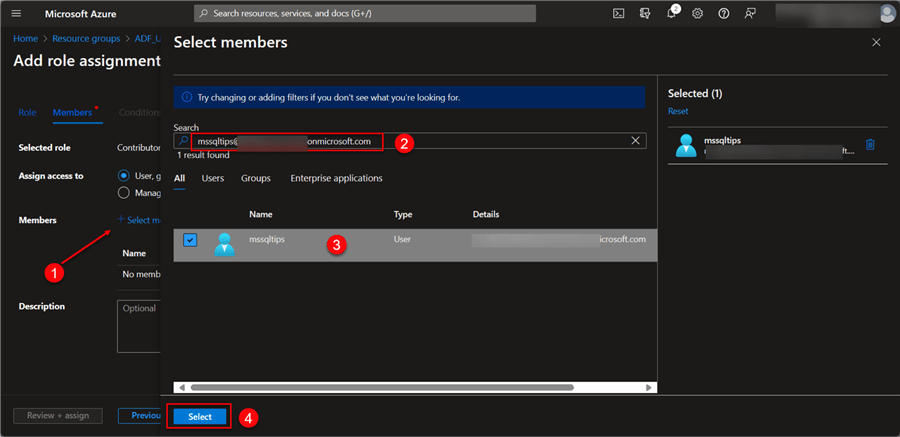
In the new window, click Select member, search for the new user, and add. After that, click on the Review + assign.
Grant Azure Storage Access
We need to grant the new user access to the Azure Storage (ADLS).
Add Role Assignment
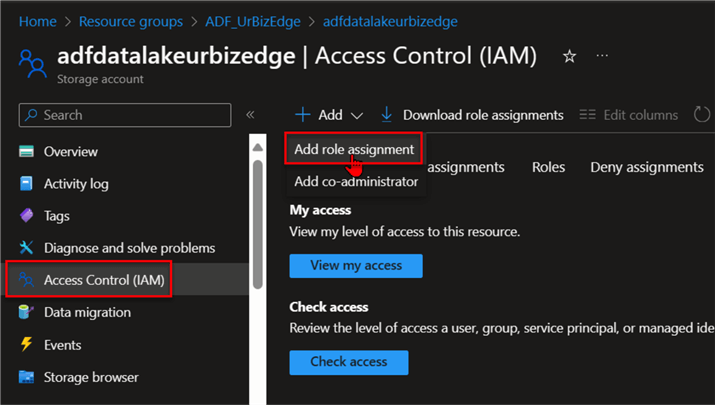
In your Azure storage (ADLS), select Access Control (IAM), then Add role assignment. This will open another window.
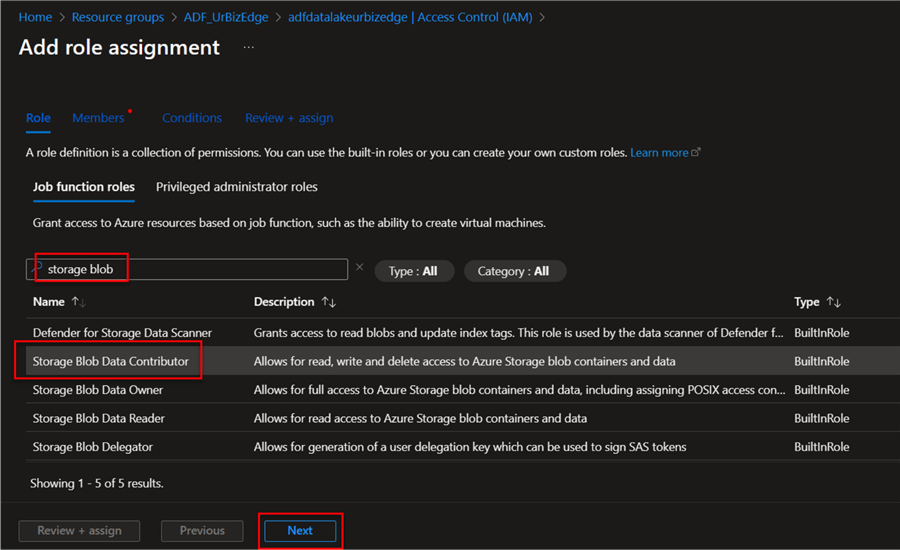
Add Storage Contributor
In the Add role assignment window, search for Blob contributor, then select Next.
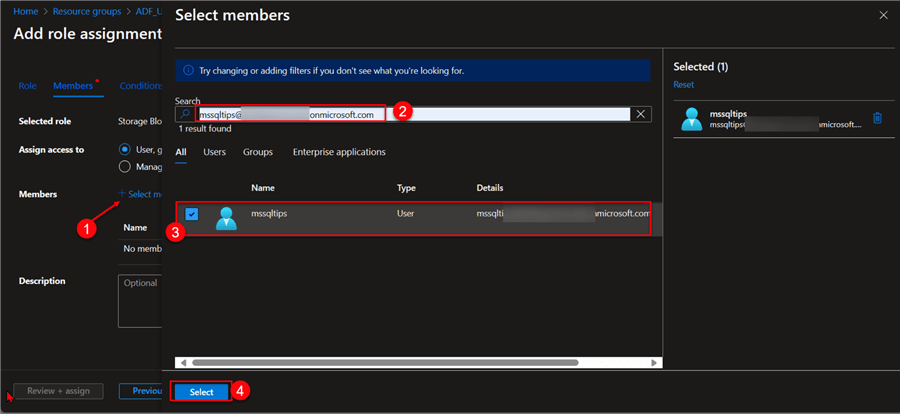
Click Select member and search for the new user. This will grant the user permission to access the storage account.
Grant Azure Synapse Analytics Access
We also need to grant the user access to the Azure Synapse resource that was created. The following steps can help us achieve that.
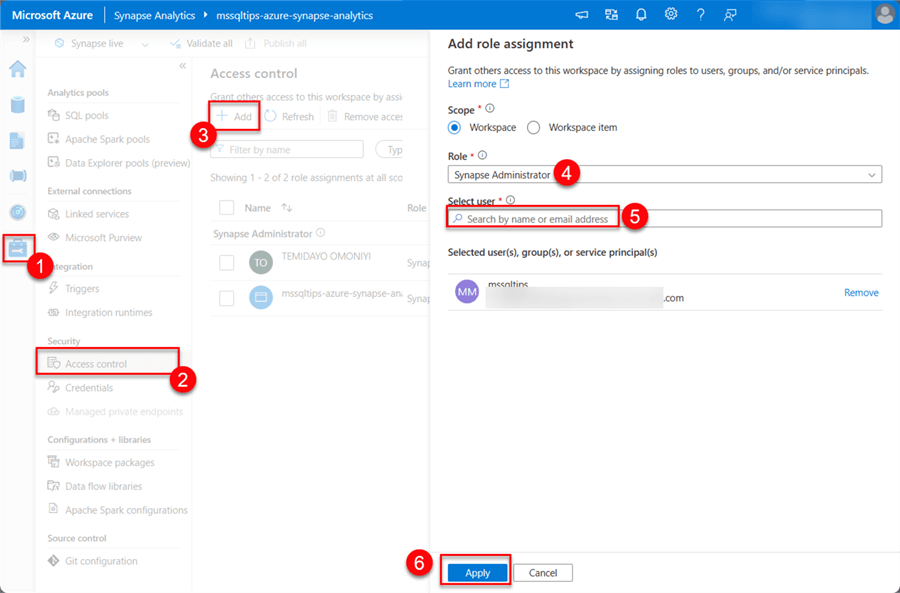
Create Synapse Administrator
Head to your Azure Synapse Analytics workspace. In your Synapse Studio, click the Manage tab, then select Access control. In the Access control, click the Add button, which will open another tab.
In the Add role assignment tab, select the Synapse Administrator role and add the new user we just created. Click Apply.
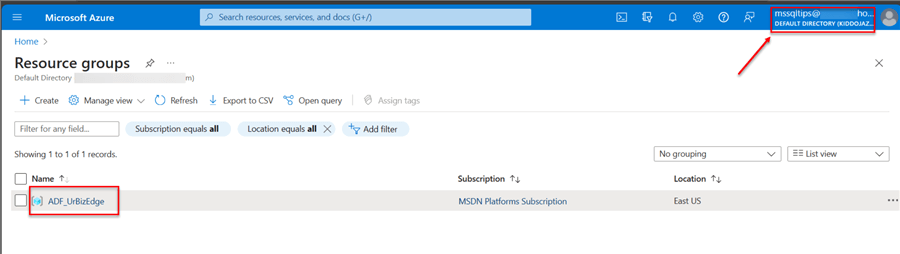
Confirm Access Control
Now that we have done all the necessary configuration, log into your Azure Portal with the new user created and check if the resource group is available. From the image below, you will notice that the resource group has been added to the new user.
Integrate Power BI Service with Azure Synapse Analytics Studio
We need to connect the Power BI Service report created with the Azure Synapse Studio. Log in to the Azure Synapse Analytic Studio with the new user created.
Note: The user now has access to all resources in your resource group, including the Azure Synapse Analytics workspace.
The following steps are needed when setting up Power BI in Azure Synapse:
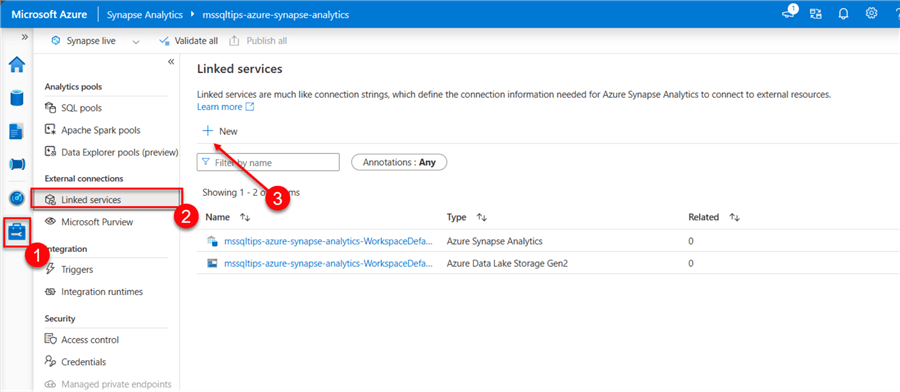
Step 1: Create Power BI Linked Service
The Synapse Linked Service is used to create a safe link between your Data Factory/Synapse pipeline and other external data sources.
To create a Power BI Linked Service, click the Manager tab, then select Linked services. Click the New icon at the top. This will open another window.
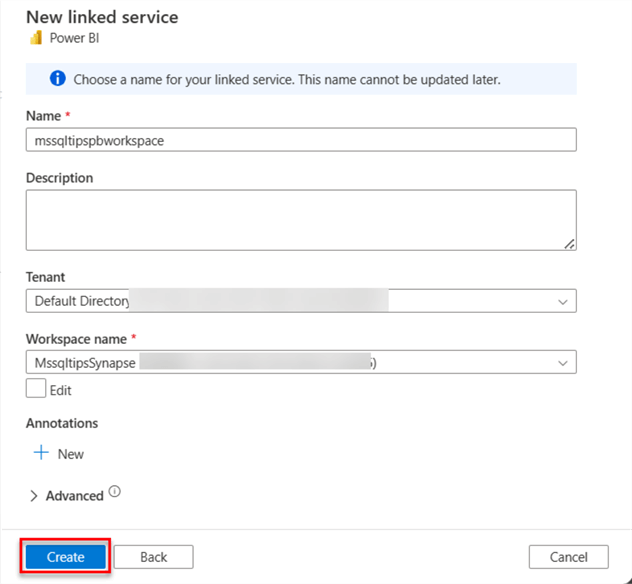
Step 2: Configure Power BI Linked Service
In the New linked service, search for the Power BI connector and click Continue.
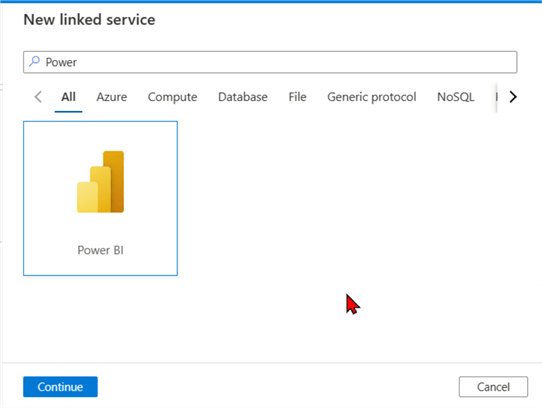
Fill in all necessary information and click Create. Ensure you Publish all to save all changes made.
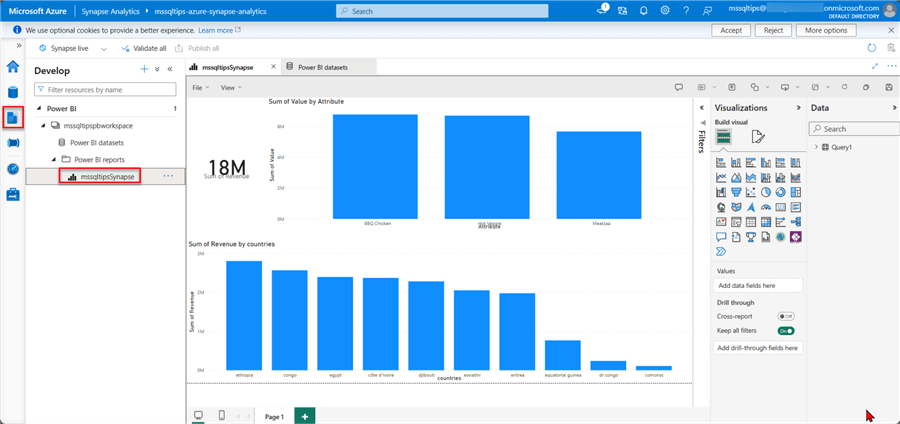
Step 3: View Report
Click the Develop tab, then select the report. This will give you the same experience as a Power BI Desktop when you edit the visual and perform additional formatting. You can also add more data by clicking on the dataset.
Conclusion
In this article, we created the Azure Synapse Analytics workspace and performed different integrations. A new user was created, and access control was granted to the user for the necessary resource group. We covered how to create a Power BI workspace and publish your Power BI report from Desktop to Power BI service.
It should be noted that the report in Synapse Analytics does not support data modeling and schedule refresh. Users might need to go to Power BI services, do all that, and then refresh to update the information in the Azure Synapse workspace. Also, take into consideration that the only reason a new user was created is that the default account did not have the appropriate domain name.
Next Steps
- Integrate Power BI with Azure Synapse Analytics.
- Link Power BI to Azure Synapse Analytics.
- Azure Synapse Analytics Overview.
- Real-Time Analytics, Advanced Analytics and Reporting in Azure Synapse Analytics.


About the author
 Temidayo Omoniyi is a Microsoft Certified Data Analyst, Microsoft Certified Trainer, Azure Data Engineer, Content Creator, and Technical writer with over 3 years of experience.
 This author pledges the content of this article is based on professional experience and not AI generated.
View all my tips
Article Last Updated: 2024-05-06