By: Joe Gavin | Updated: 2024-04-24 | Comments | Related: > SQL Server Agent
Problem
SQL Server Agent can be a very useful tool to automate and schedule Microsoft SQL Server administrative tasks. In this tutorial, we look at how to get it setup, create jobs and send email notifications, which are daily needs for Database Administrators.
Solution
As an introduction to SQL Server Agent, this tip will walk through the following:
- What is the SQL Server Agent
- Configure Database Mail
- Configure the SQL Server Agent
- Create a SQL Server Agent Operator
- Create a SQL Server Agent Job
- Run SQL Server Agent Job
- Disable SQL Server Agent Job
The examples shown were completed on a newly installed SQL Server 2022 and will go through configuring the ability to send notifications and performing a simple job.
What is SQL Server Agent?
The SQL Server Agent is a SQL Server component used to manage job scheduling as well as handle alerts and notifications. The data for these items is stored in the MSDB database of the MS SQL Server instance.
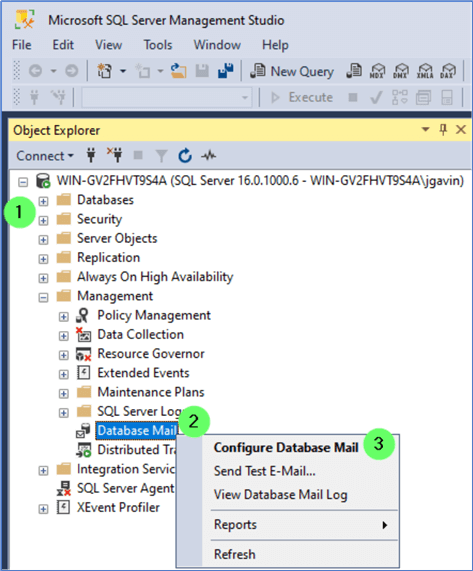
Configure Database Mail
Although not required, we will likely want notifications sent on our SQL Server Agent jobs. So, let's configure Database Mail first.
Connect to your SQL Server with SQL Server Management Studio (SSMS)
- Expand the server dropdown.
- Right-click on Database Mail.
- Select Configure Database Mail.
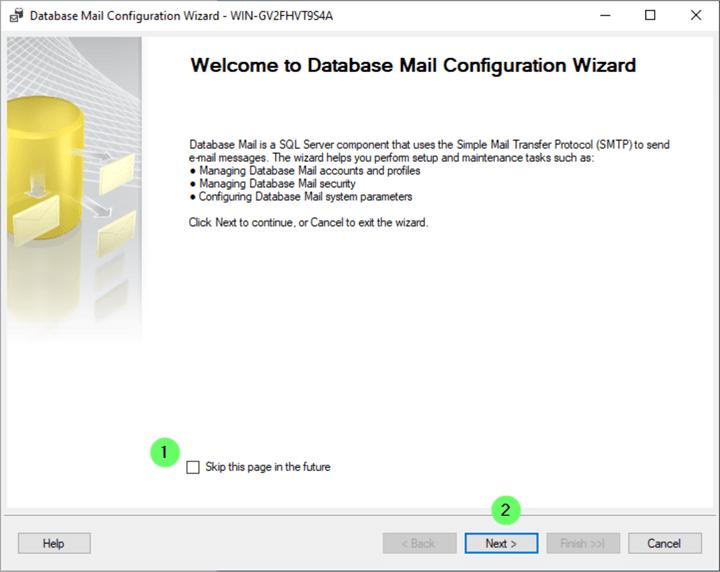
Database Mail Configuration Wizard
- Check 'Skip this page in the future' if you don't want to see it again (optional).
- Click Next.
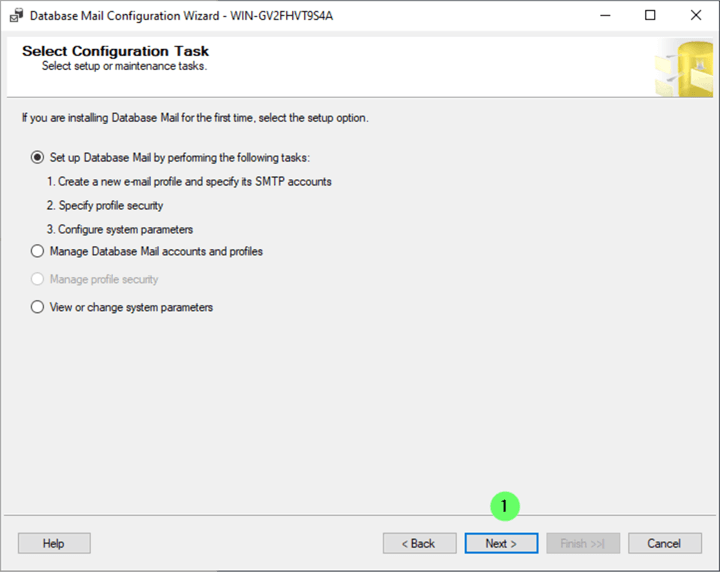
Database Mail Configuration Wizard – Select Configuration Task
Since this is the first time we are installing Database Mail, making sure this option is selected.
- Click Next.
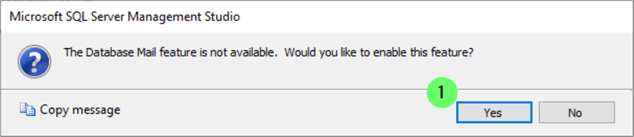
We're prompted to enable Database Mail as it has not yet been setup.
- Click Yes.
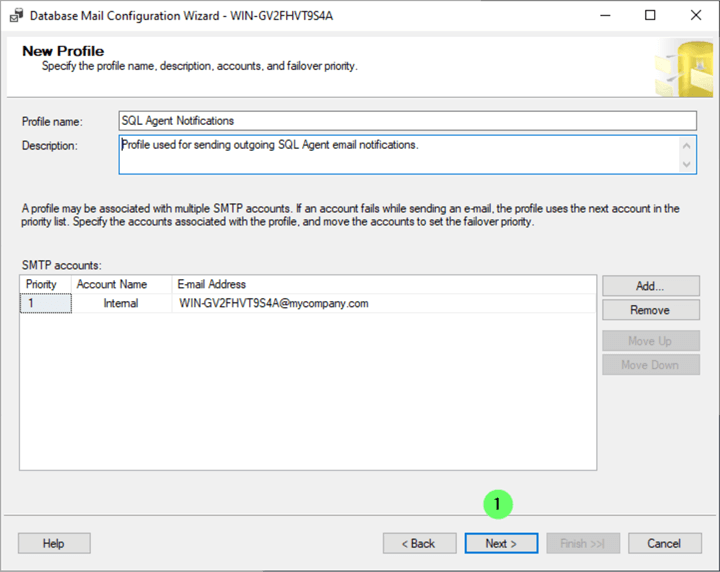
Database Mail Configuration Wizard – New Profile
- Enter a Profile name.
- Enter a Description.
- Click Add... and the New Database Mail Account window will appear.

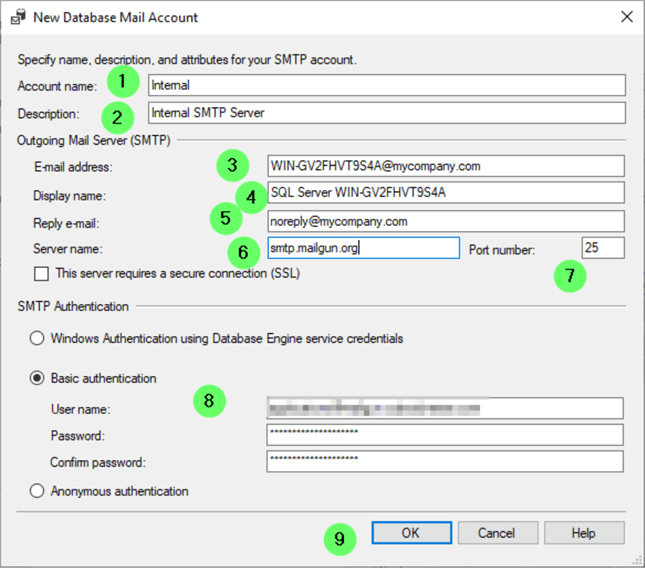
New Database Mail Account
- Enter a name for the account.
- Provide a description.
- Enter a 'sent from' Email address - doesn't need to be real, just in the form [email protected].
- Enter a 'sent from' Display name- doesn't need to be real, just in the form [email protected].
- Enter a 'reply to' email address - doesn't need to be real, just in the form [email protected].
- Enter your SMTP server name.
- Verify or change the SMTP port number.
- Select 'Windows Authentication using Database Engine service credentials' or 'Basic authentication' along with username and password if either is applicable. Or leave the default of 'Anonymous authentication' if no credentials are needed.
- Click OK. You will return to the Database Mail Configuration Wizard – New Profile window.
Database Mail Configuration Wizard – New Profile
- Click Next.
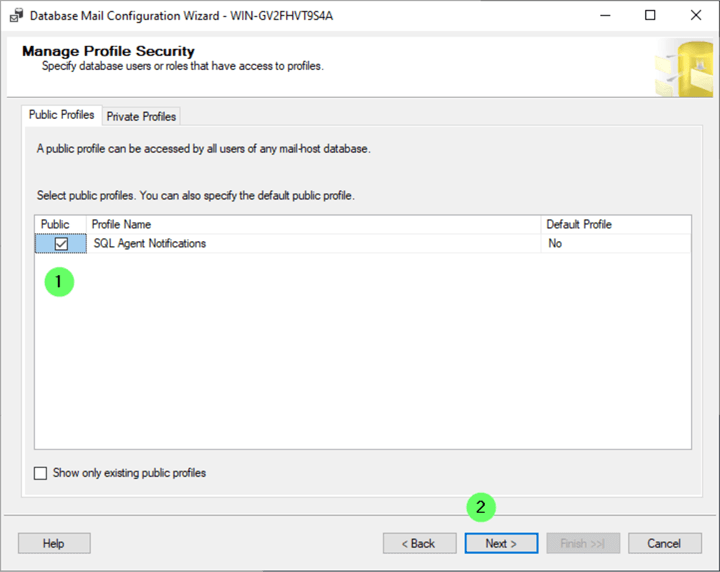
Database Mail Configuration Wizard – Manage Profile Security
- In the Public Profiles tab, select Public.
- Click Next.
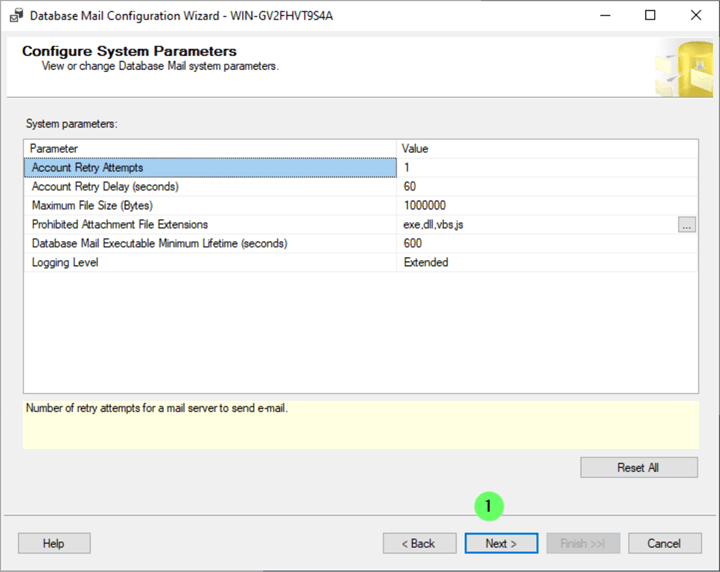
Database Mail Configuration Wizard – Configure System Parameters
- Click Next.
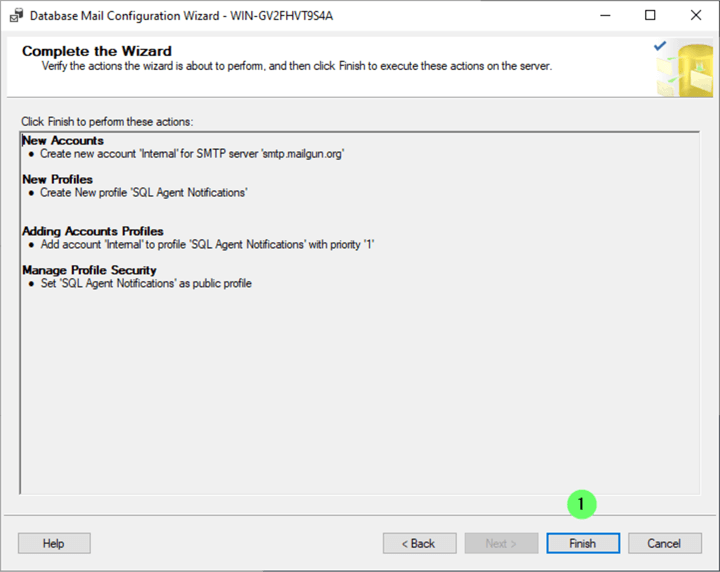
Database Mail Configuration Wizard – Complete the Wizard
- Click Finish.
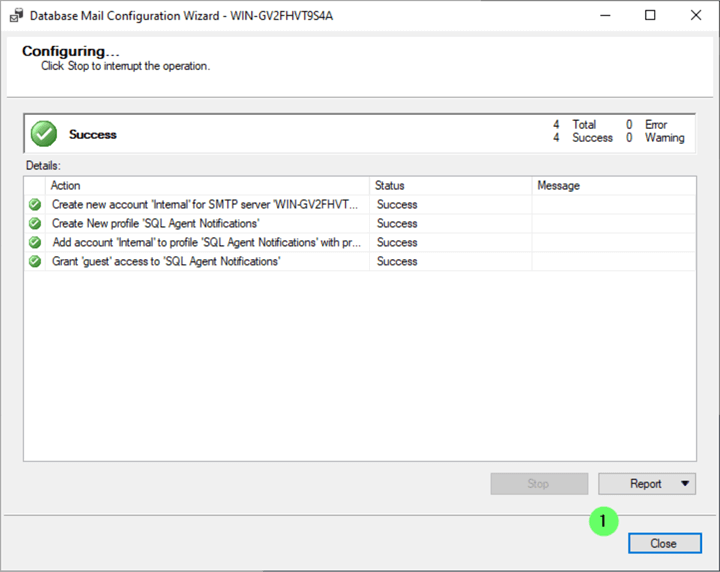
Database Mail Configuration Wizard – Configuring…
- Once the operation has completed successfully, click Close.
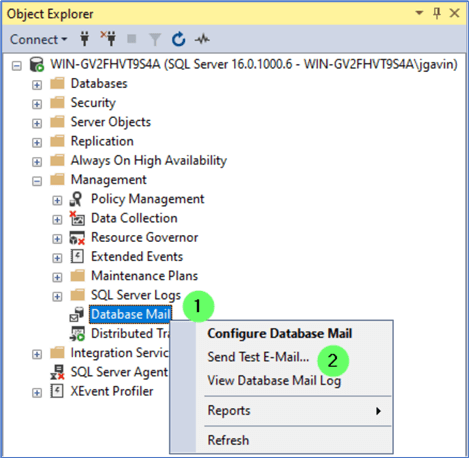
Send a Test Email
- In SSMS, right-click on Database Mail.
- Select Send Test E-Mail…
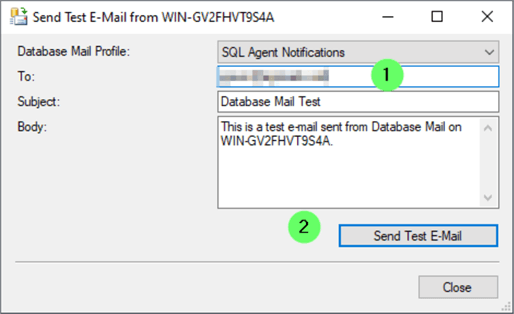
To send a test email:
- Enter your email address.
- Click Send Test E-Mail.
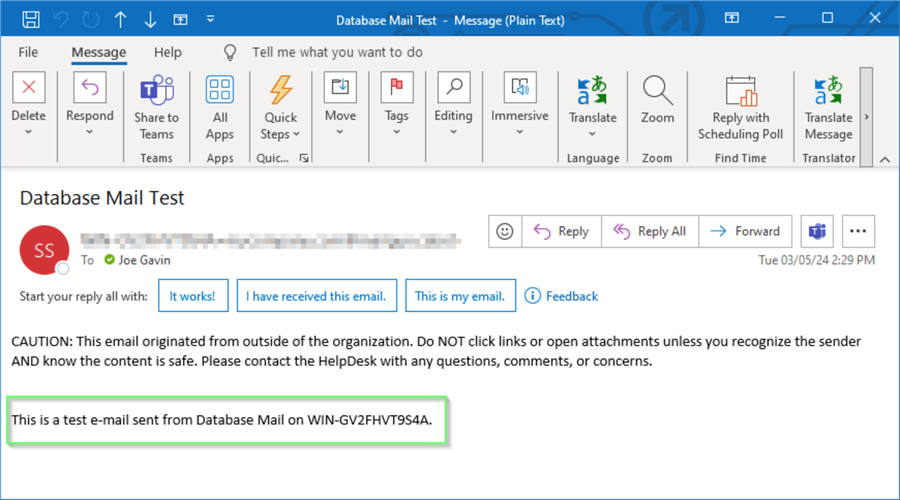
Below is the test email:
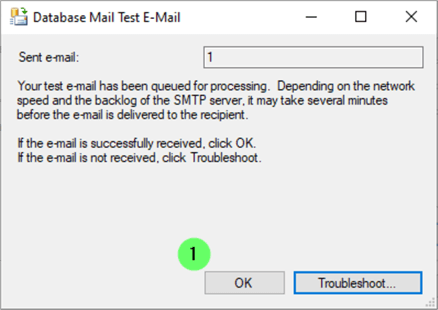
- If the email was received, click OK.
Configure the SQL Server Agent
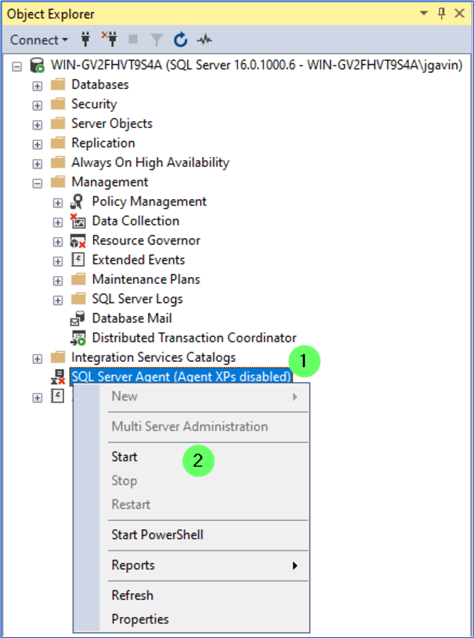
- In SSMS, right-click on SQL Server Agent.
- Select Start ('Agent XPs disabled' will disappear).
Note: Starting the SQL Server Agent will enable Agent XPs. If you look in the error log, you'll see something like this that shows starting the Agent enables the SQL Server Agent Extended Stored Procedures (XPs):
Configuration option 'show advanced options' changed from 0 to 1. Run the RECONFIGURE statement to install.
Configuration option 'Agent XPs' changed from 0 to 1. Run the RECONFIGURE statement to install.
Configuration option 'show advanced options' changed from 1 to 0. Run the RECONFIGURE statement to install.
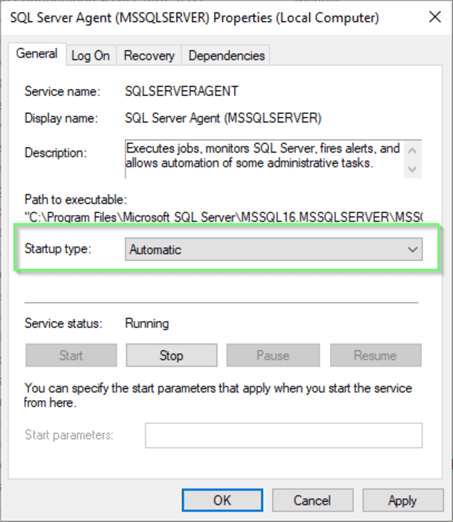
Open Windows Services (Start -> Run -> services.msc), double click on SQL Server Agent, and verify that 'Startup type' is set to Automatic or set it if it is not. The default is Manual if the installer does not choose Automatic during the initial installation. Click OK.
The next step is very easy to overlook, and you will need to troubleshoot your first SQL Server Agent job since the notification emails are not working. To avoid that unnecessary pain, we'll enable the 'mail profile' now.
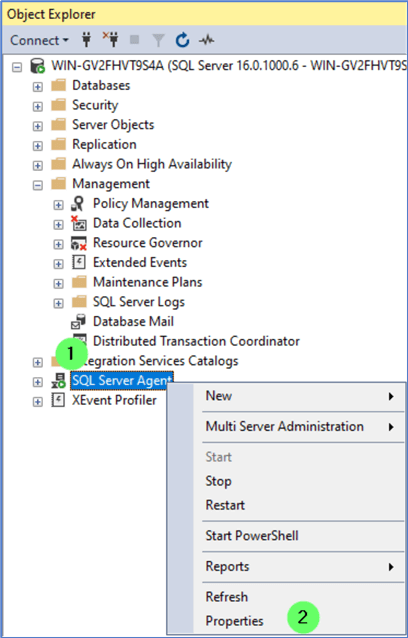
- In SSMS, right-click on SQL Server Agent.
- Click on Properties.
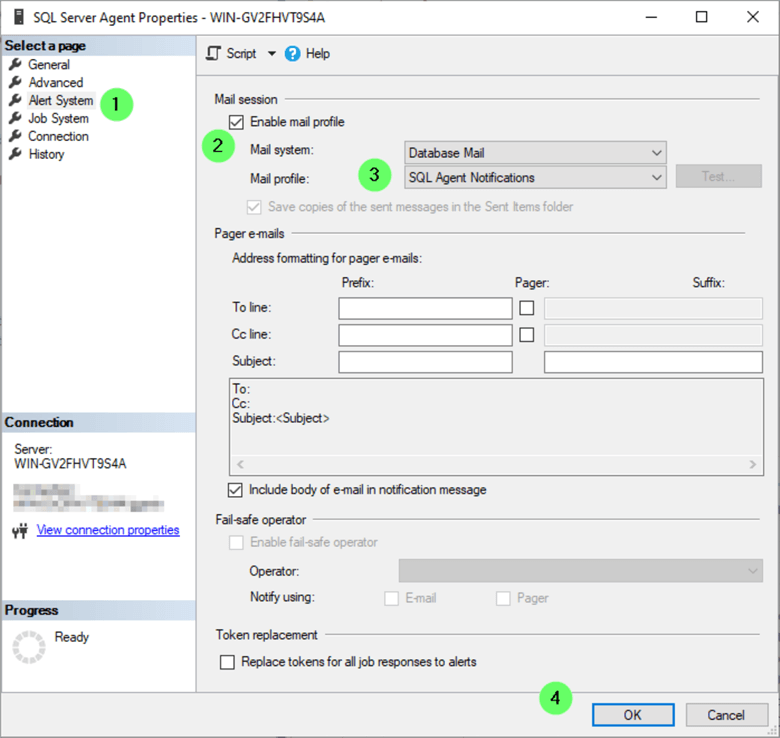
SQL Server Agent Properties
- Choose Alert System.
- Check 'Enable mail profile.'
- Select previously created 'Mail profile' from dropdown.
- Click OK.
Create a SQL Server Agent Operator
We have an email profile set up. Now, we need somewhere to send the email to.
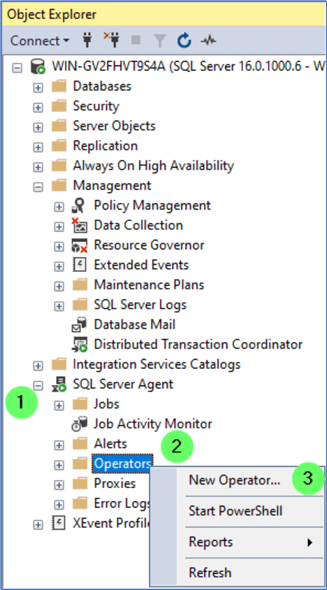
- In SSMS, expand SQL Server Agent.
- Right-click on Operators.
- Select New Operator…
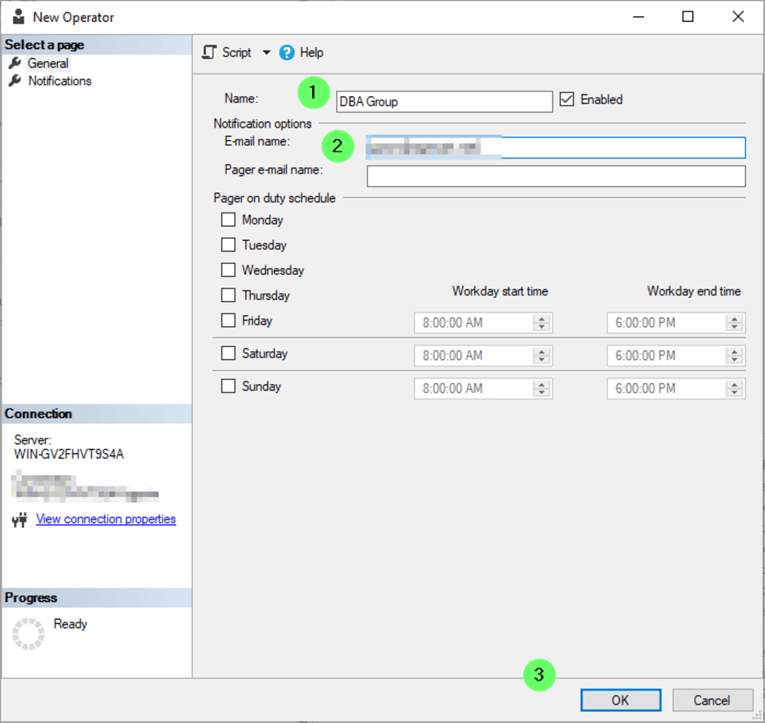
New Operator
- Under the General page, give a name to the Operator.
- Enter an email address. Note: This will likely be an email distribution list.
- Click OK.
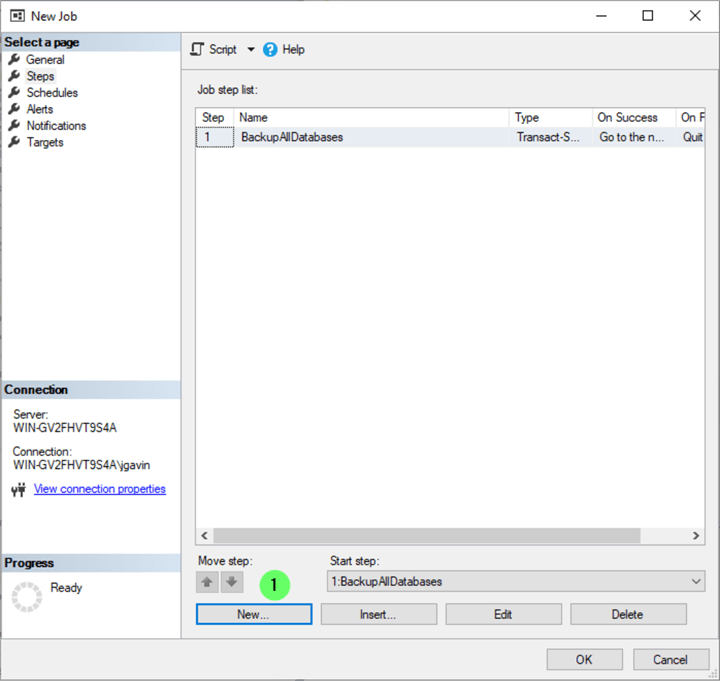
Create a SQL Server Agent Job
We're creating a new job that will run the Ola Hallengren database backup and integrity check Transact-SQL stored procedures in two job steps.
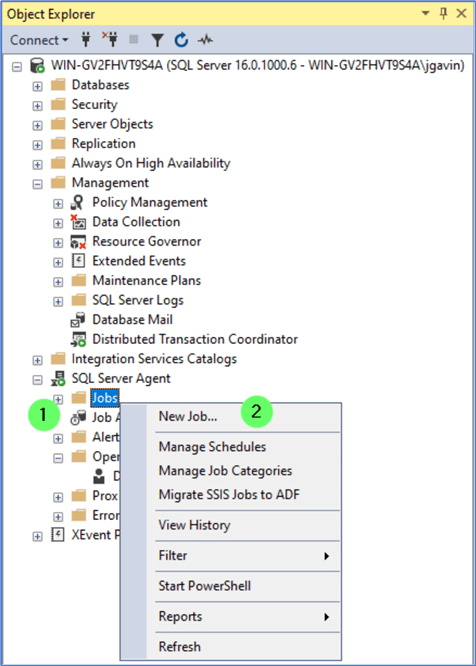
- In SSMS, right-click on Jobs.
- Select New Job…
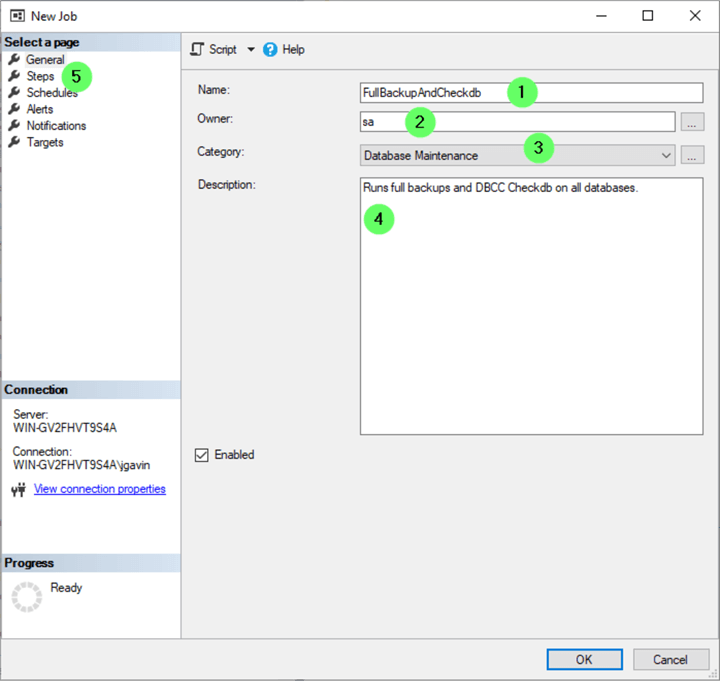
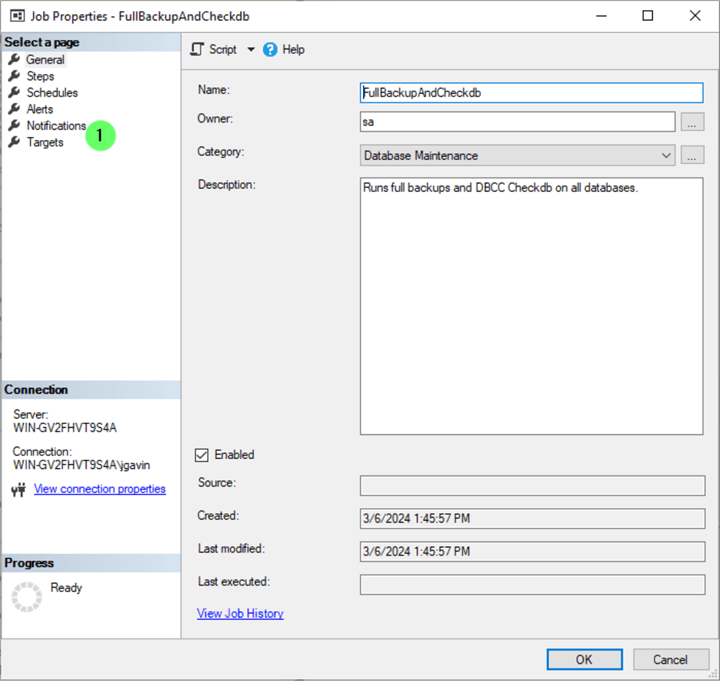
New Job – General Page
- Name the job
- Change the owner to sa. (The default owner is the login creating the job. This can be problematic if that login goes away. Changing the owner to sa eliminates that issue and will work even if you're not using SQL Authentication or the sa login is disabled, not causing a permissions issue.)
- Choose a category from the dropdown (optional)
- Enter a description of what the job will do
- Click on Steps in the left pane.
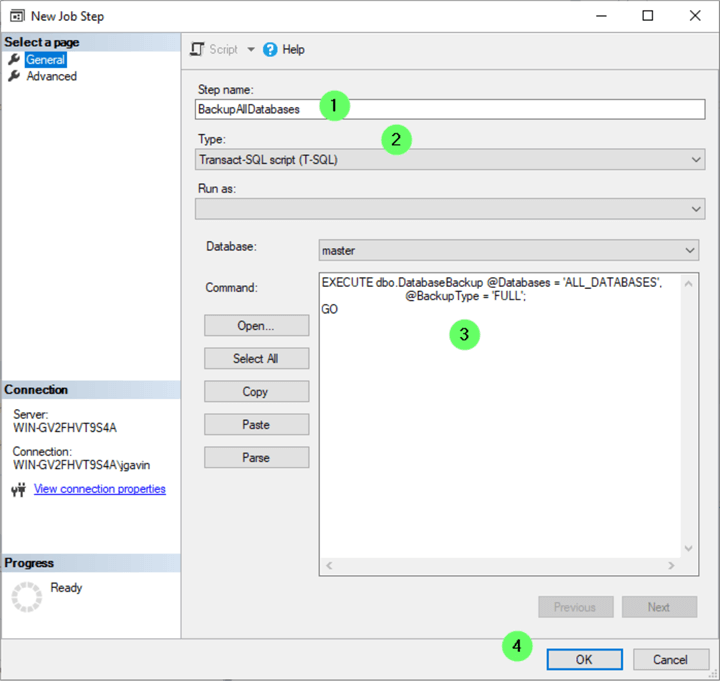
New Job Steps
The first step is to backup all databases.
- Name the step
- Select the Type from the dropdown menu (optional).
- In the Command block, enter the SQL statement to run.
- Click OK.
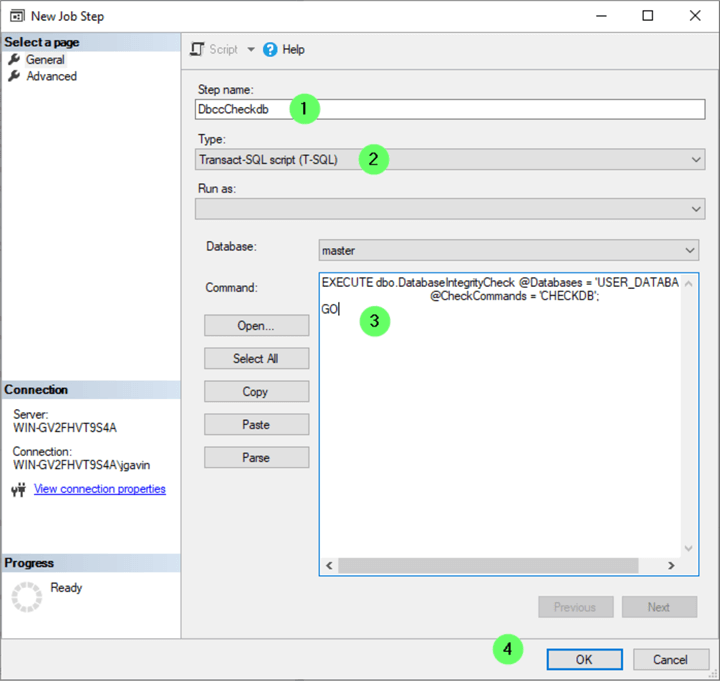
The next step will be to run DBCC CHECKDB on all SQL Server databases.
- Click New…
Then, perform the same actions as before.
- Name the step.
- Select the Type from the dropdown (optional).
- In the Command block, enter code to run.
- Click OK.
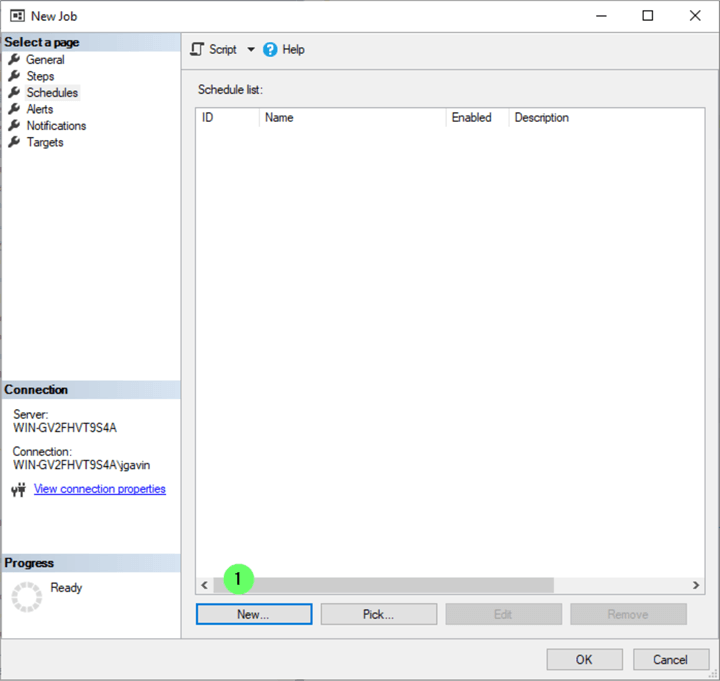
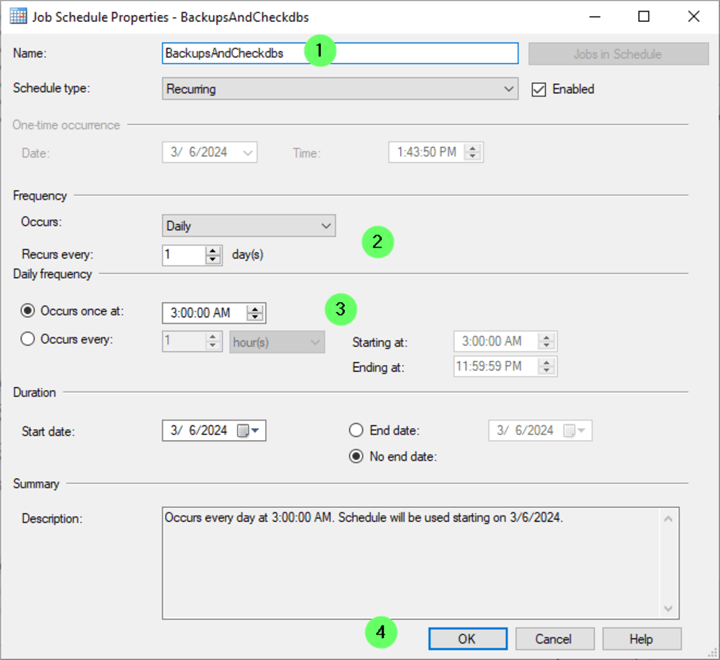
Schedules
Let's set the job to run at 3:00 AM every day.
- Click Schedules in the left pane.
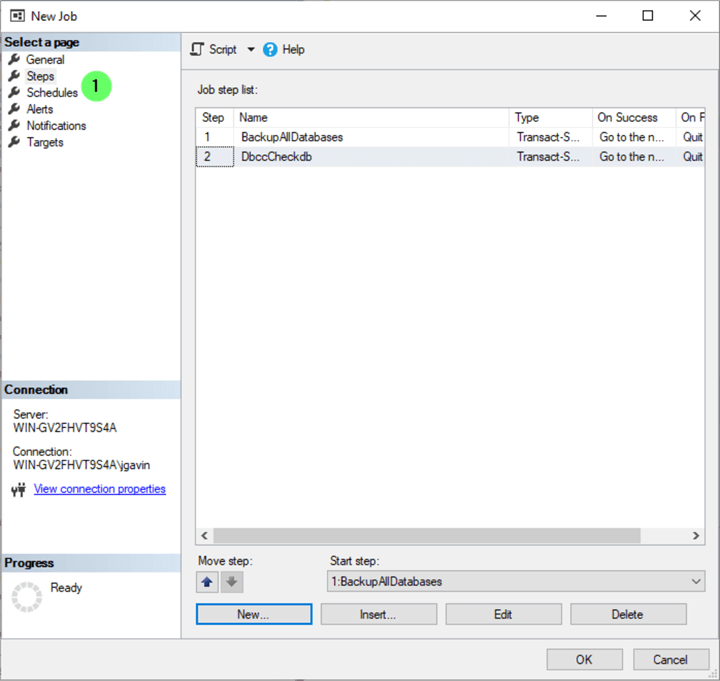
- Click New…
Job Schedule Properties
- Name the Schedule.
- Choose the Frequency.
- Choose a time.
- Click OK.
Notifications
Let's set up a notification to email us when the job is completed, whether successful or not.
- In the left pane, choose Notifications.
- Check the box next to E-mail.
- Select SQL Server Agent Operator.
- Choose fails, succeeds, or completes from the dropdown menu.
- Click OK.
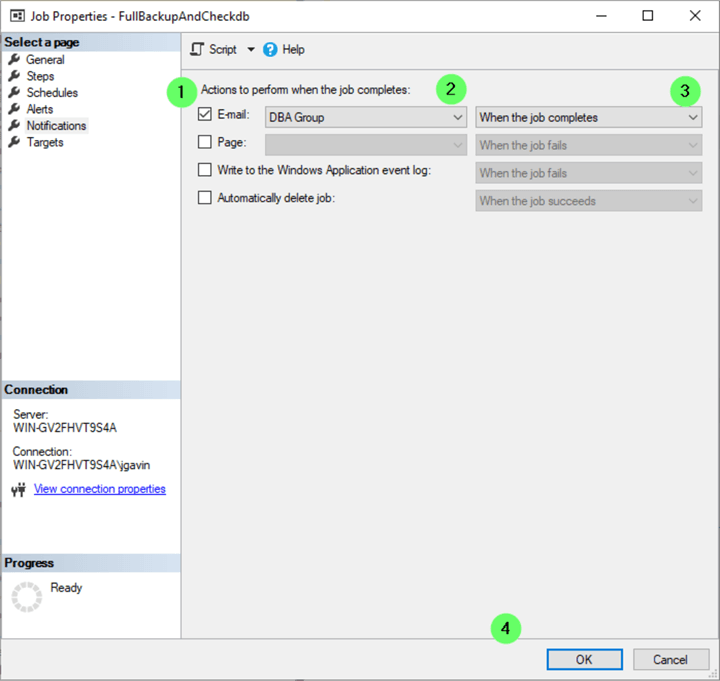
- Click OK.
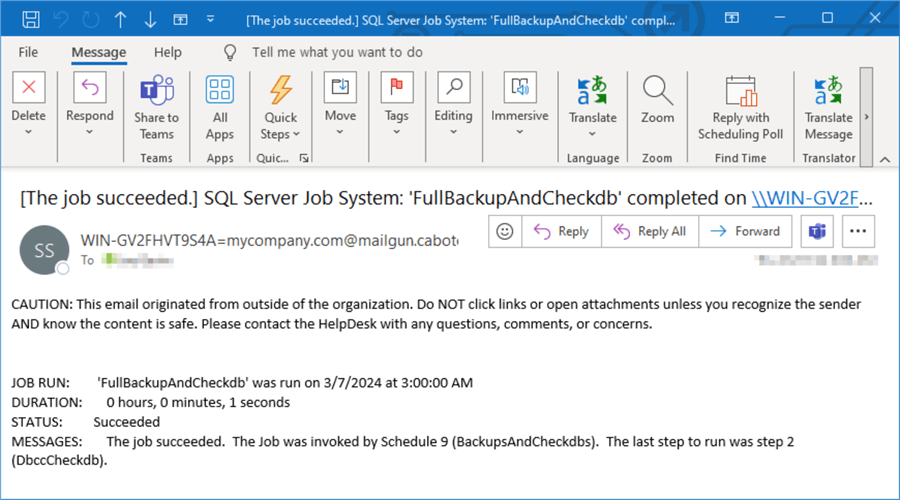
The email below says both steps ran successfully.
Run a SQL Server Agent Job
The preceding example shows how to run a job based on a schedule.
- In SSMS, right-click on the job to run in Object Explorer.
- Click Start Job at Step…
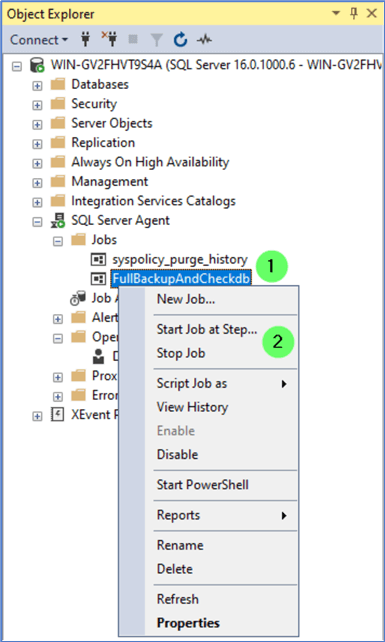
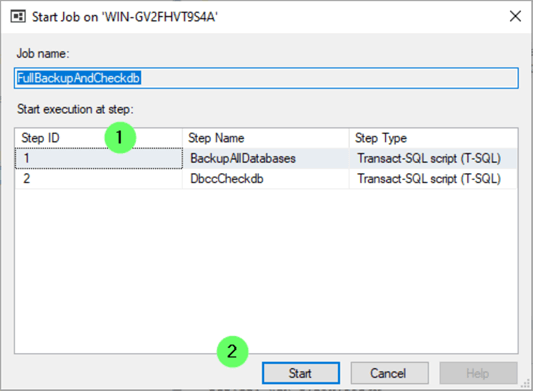
If there were only one step, the job would start immediately. Since our job has two steps, we're prompted to select which step to start.
- Click on the step to begin with.
- Click Start.
 .
.
Or to run the job programmatically, execute sp_start_job passing it the job name.
EXEC msdb.dbo.sp_start_job @job_name = 'FullBackupAndCheckdb';
GO
Disable a SQL Server Agent Job
- In SSMS, right-click on the job.
- Select Disable.
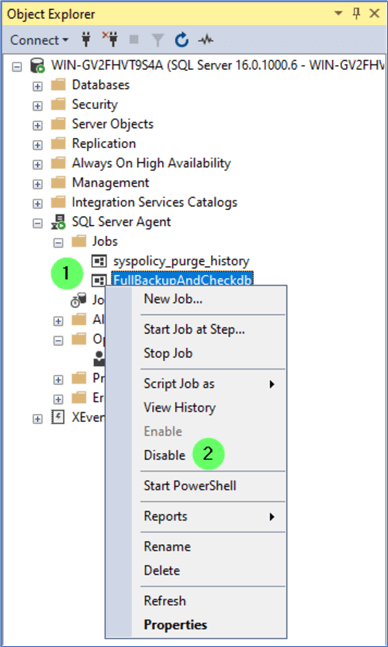
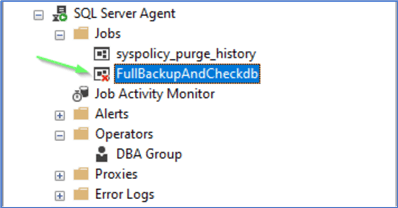
A small red 'x' will appear to show it's disabled.
It's important to point out here that disabling an Agent job only prevents the scheduler from running it. If you start the job directly from SSMS or with sp_start_job, the job will still run.
Next Steps
- We've seen a basic introduction to SQL Server Agent jobs for DBAs, what you need for sending notifications, and creating, running, and disabling jobs. The SQL Server Agent is a very powerful tool for automation with so much more to it than we've seen so far. SQL Server Agent is available for on-premises installations as well as some cloud offerings (Azure, AWS and Google), but is not available with Express Edition.
- To find a wealth of further information, go to SQL Server Agent Tips.
- Check out all of the Database Administration tips on MSSQLTips.com.
- Learn about SQL Server T-SQL commands and PowerShell logic.


About the author
 Joe Gavin is from the Greater Boston area. He started working with SQL Server and Sybase in 1998 in the financial services industry and has been a SQL Server Database Administrator for a dairy cooperative since 2011. He graduated from Northeastern University in Boston with a Bachelor of Science in Engineering Technology (BSET) degree in Computer Technology. Joe has spoken at the Boston and Providence SQL Saturday events.
 This author pledges the content of this article is based on professional experience and not AI generated.
View all my tips
Article Last Updated: 2024-04-24