By: Temidayo Omoniyi | Updated: 2024-03-14 | Comments (5) | Related: 1 | 2 | 3 | 4 | > Azure SQL Database
Problem
Organizations worldwide are beginning to adopt cloud services. As a result, the painstaking task of moving data from on-premises to the cloud has been on the rise for most data professionals. Using the best platform and technique for moving data is more crucial than ever.
Solution
Azure Data Factory (ADF) is an ETL tool used by data professionals worldwide for data ingestion and transformation. It has built-in links that allow users to connect to an on-premises data source using Microsoft Integration Runtime, a third-party tool.
Project Architecture
For this article, we will dynamically copy data from an on-premises SQL Server to Azure SQL Database using the Lookup and ForEach activity. Also, we will need to use the Microsoft Integration Runtime, which will link the Azure Data Factory Source Dataset and our on-premises server.
What is Microsoft Integration Runtime?
The Microsoft Integration Runtime (IR) serves as a data integration connector, connecting to and transferring data between on-premises and cloud data stores. Since it is a managed service, infrastructure must be installed or maintained.
Since the data that will be our source is an on-premises data source on SQL Server, the IR will serve as a connection point between the on-premises and ADF.
Set Up Microsoft Integration Runtime
Before we start any data migration, we need to set an integration runtime. The self-hosted integration runtime is installed and maintained on your infrastructure, allowing you complete control over the hardware, software, and network setup of the integration runtime.
Step 1: Download and Install Integration Runtime
You must download the Microsoft Integration Runtime on your desktop computer, open your browser, and follow this URL.
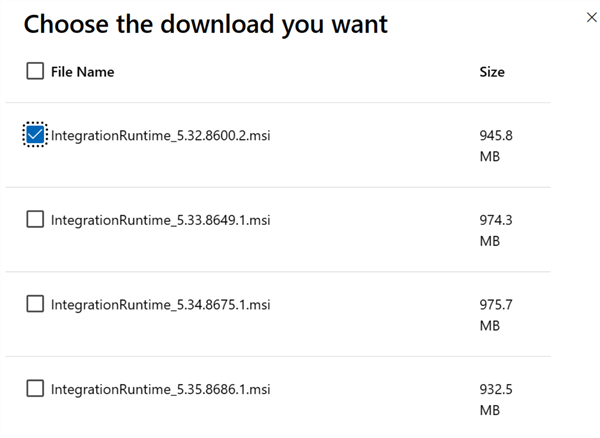
In the Integration Runtime website, select the version suitable for your system and click Download.
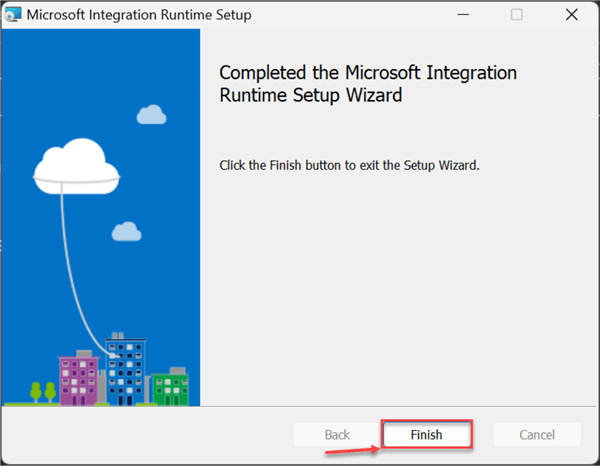
If installed successfully, you will see the window appear below. Click Finish.
Step 2: Create IR Connection in ADF
After installing the IR, go to the ADF resource and create a new Integration Runtime connection.
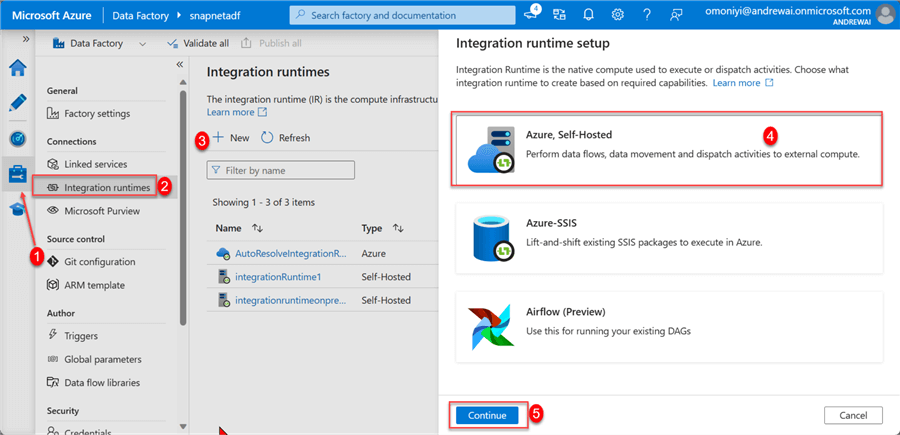
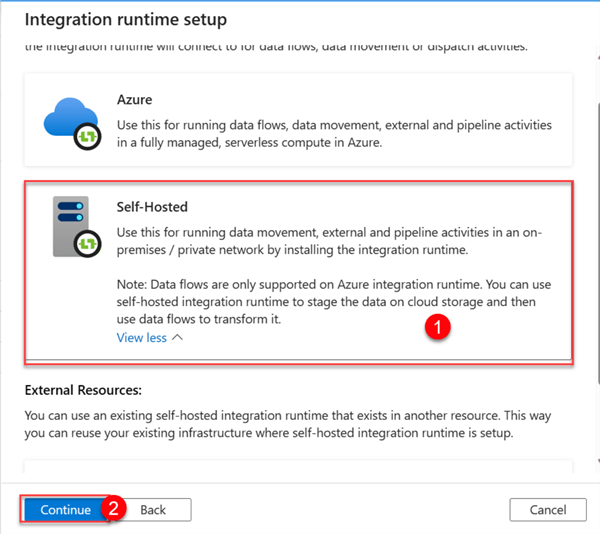
In your ADF environment, click the Managed tab in the left pan and select Integration runtimes. This should open another window. Click New, and then select Azure, Self-Hosted. Click Continue.
In the new window, select Self-Hosted and click Continue.
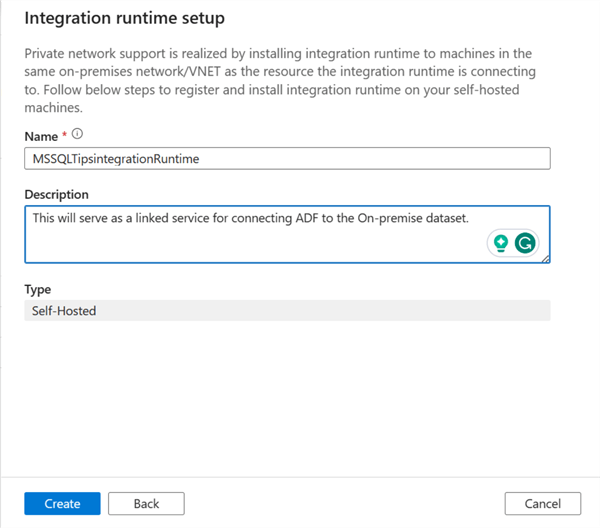
We are expected to create a unique name for the Integration runtime setup. Click Create.
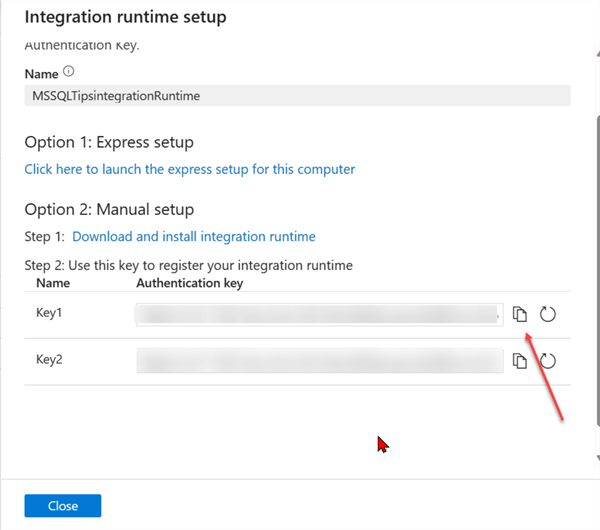
Step 3: Authentication Keys
At this stage, we need to set an authentication key in the installed Integration Runtime in our on-premises environment. Start by copying the keys provided in the Integration Runtime set-up. Now head to your installed integration runtime on your on-premises and paste the copied key.
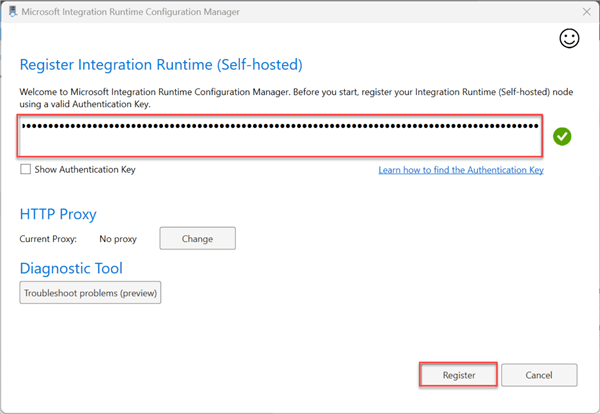
In your IR on-premises environment, paste the copied keys and click on Register. This should take you to another environment.
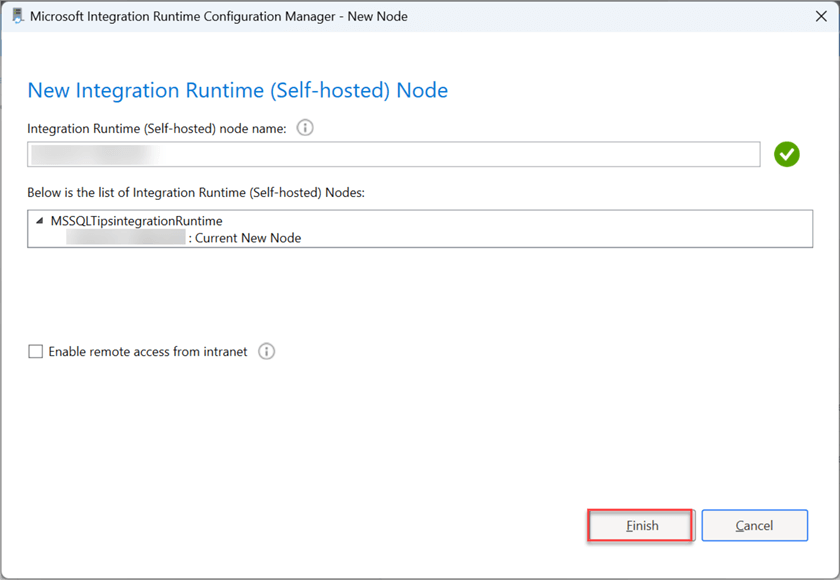
In the new window, click Finish. Configuring the IR in your on-premises environment should take a couple of minutes.
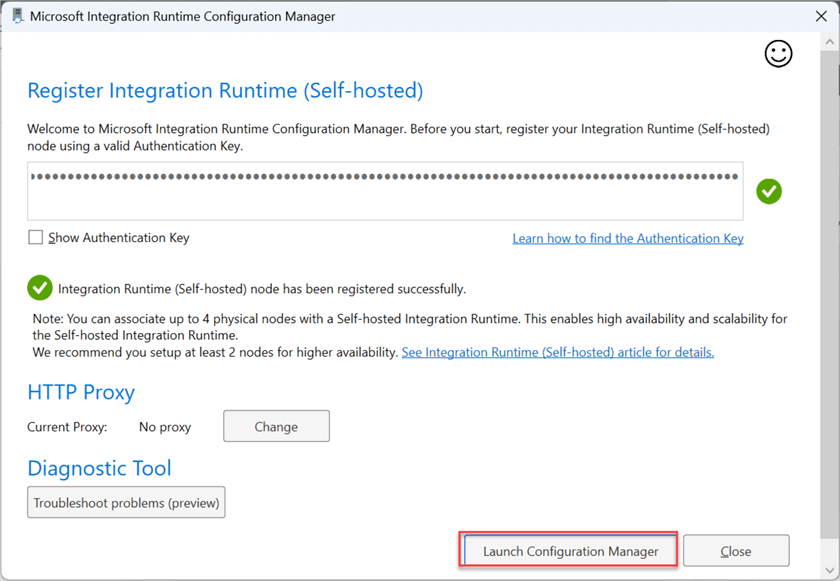
Click Launch Configuration Manager to fully set up the Integration Runtime with the appropriate number of nodes.
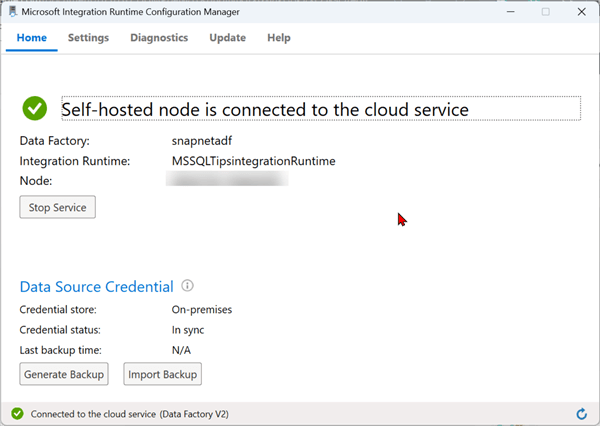
After launching the configuration, you should get the image below showing your IR is working.
Create a Simple Copy Activity in ADF
To do this, we will create a simple copy activity to help move data from the SQL Server Management Services (SSMS) on-premises table to the Azure SQL Database.
For this demonstration, we will use Microsoft's AdventureWorks dataset and move the Human Resource Department table from on-premises to the Azure SQL cloud.
Linked Service Connection
We need to set up a linked service that will be required to connect to external data sources.
The following steps should be followed while setting up your SQL server-linked service.
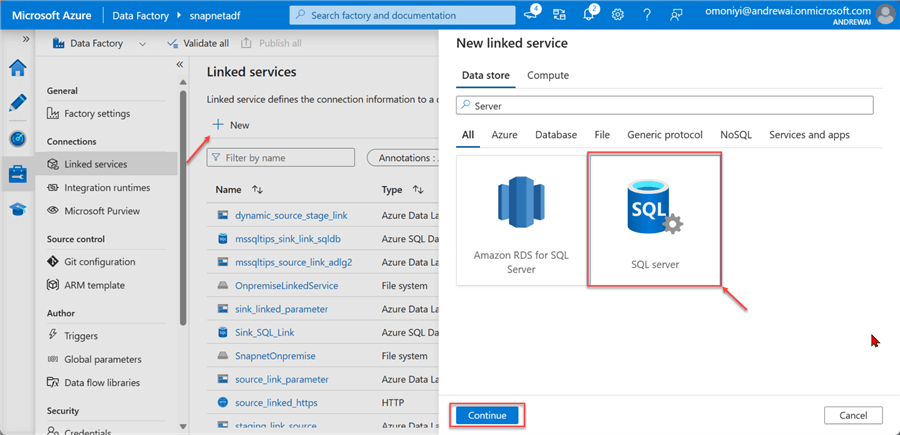
Step 1: Create Server Linked Service. Click the Manager icon in your ADF. Under Linked Services, select New. Search for and click on SQL Server. Click Continue.
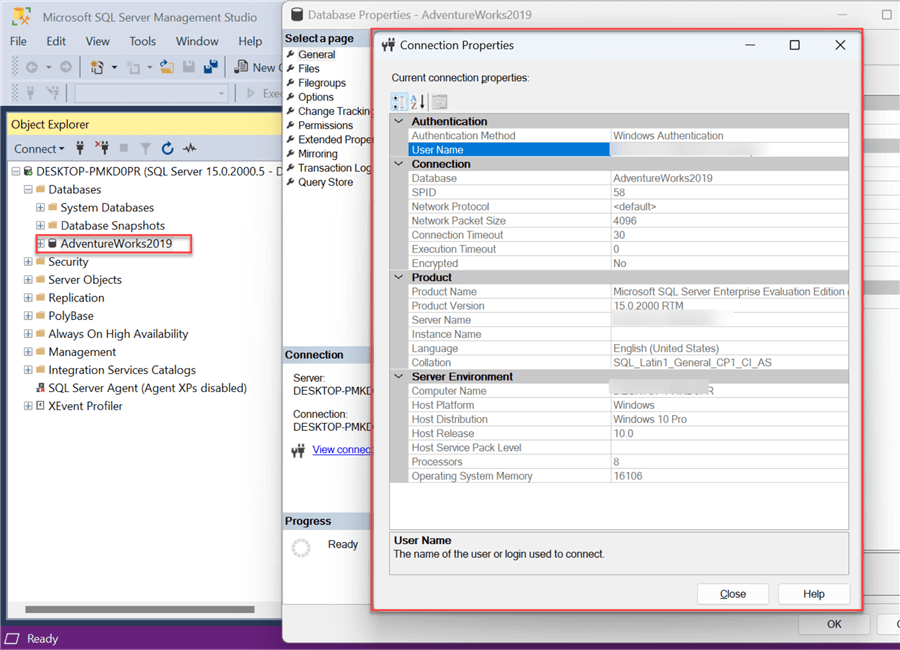
Step 2: Configure Linked Service Connection. To get all the requirements, first go to your SSMS and select the database you want to use. In the database, right-click and select Properties. This will open a window providing you with all the necessary information.
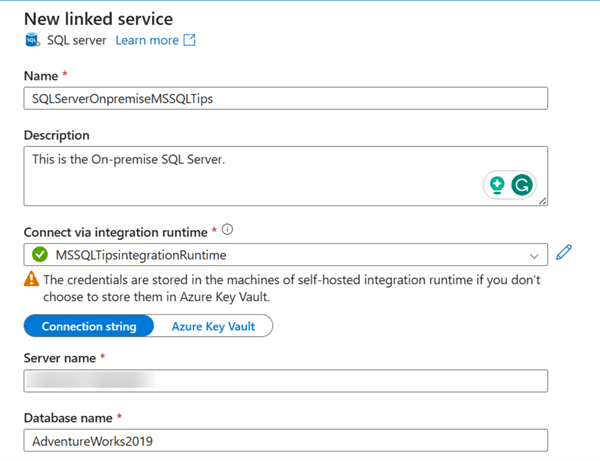
In ADF linked service, fill in the following configuration:
- Name: Provided your linked service with a name you can easily identify.
- Connect via Integration Runtime: Select the Integration runtime created earlier.
- Server name: This should be the server name of the SSMS.
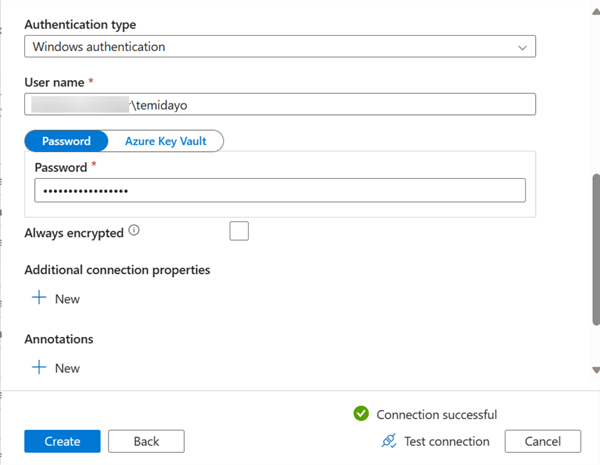
- Authentication Type: The options are SQL authentication or Windows authentication. For this article, we will use Windows Authentication.
- Username and Password: To find your PC username, open a command prompt and type whoami.
- Test Connection and Create: Click on the test connection and Create.
Create Source Dataset
In ADF, click on Data and create new data. In the new window, search for SQL Server and continue.
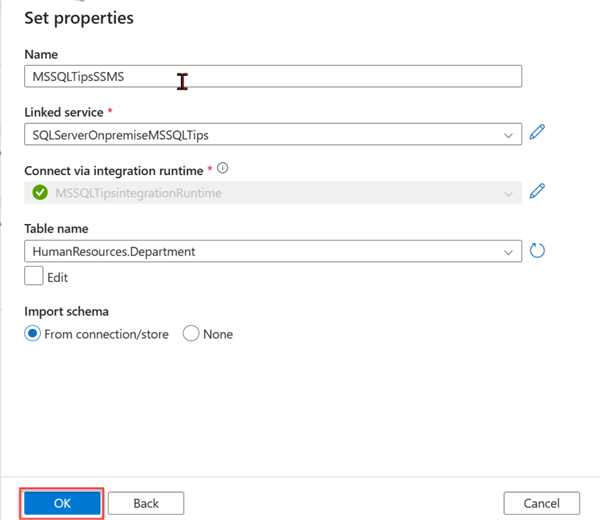
- Set Properties. Set the following properties to fully connect with SSMS.
- Name: Give your Dataset source a name that can easily be identified.
- Linked service: Select the linked service created earlier.
- Integration Runtime: Select the Integration Runtime created earlier.
- Table Name: Select the list from the dropdown of the table you want to work with.
Create Sink Linked Connection
The sink will be our Azure SQL Database since we plan to move the data from on-premises SSMS to Azure SQL Database. For information on creating an Azure SQL Database, see this previous article: Data Transformation and Migration Using Azure Data Factory and Azure Databricks.
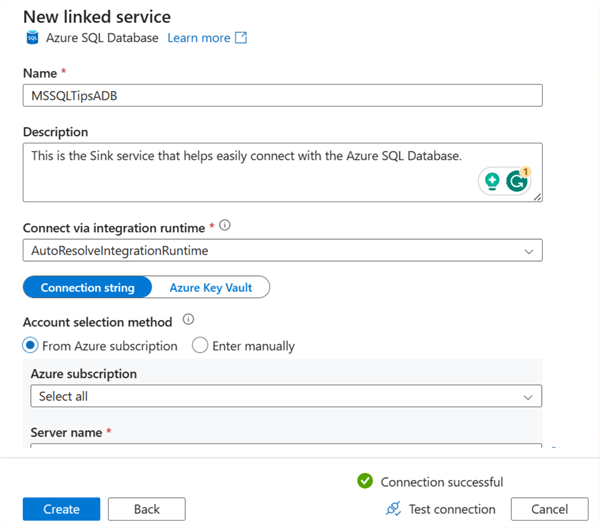
The following configuration should be provided to set the sink configuration:
- Name: Provide the name of the linked service connection you want to use.
- Connection via integration runtime: Select the default integration runtime in your ADF.
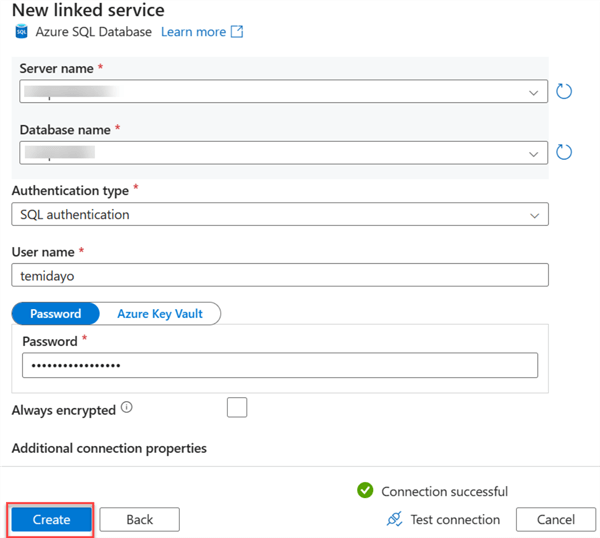
- Server name: This is the server name of your Azure SQL Database.
- Authentication: Settle the authentication type. For this article, we will use SQL authentication for the sink.
- Username and Password: This is the username and password needed to log in to your Azure SQL Database.
Create Sink Dataset
We need to create a dataset in ADF that will serve as our sink data. Before we do that, let's create data tables in our Azure SQL Database.
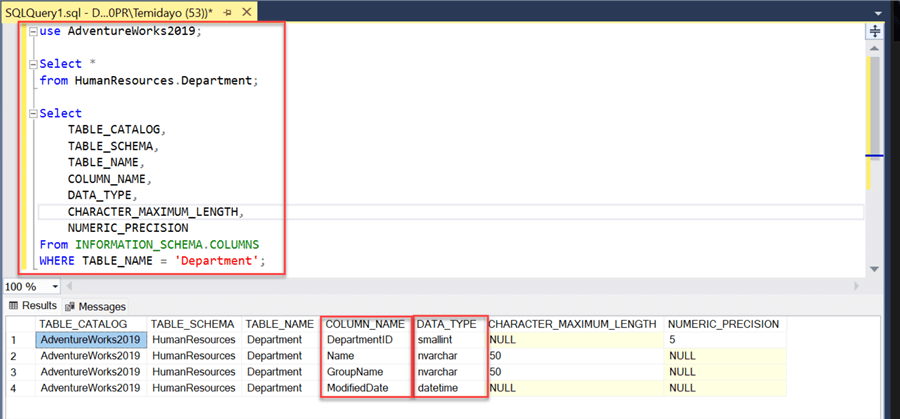
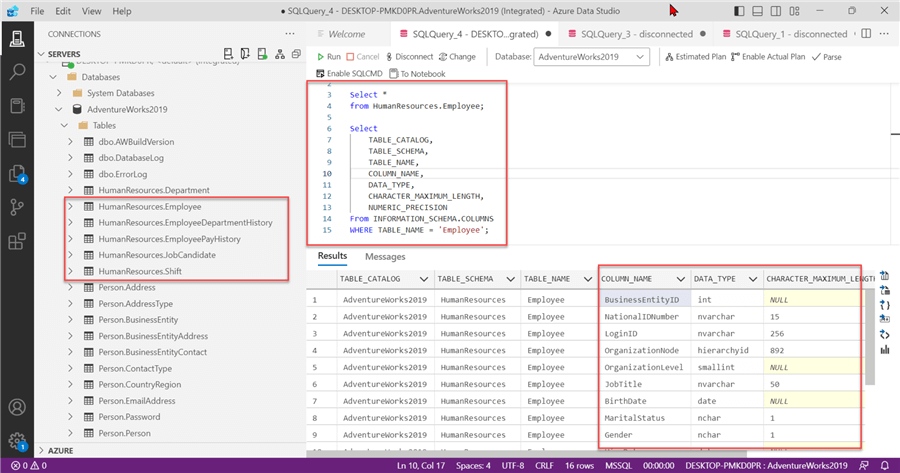
Get Datatype. We plan to move the data from HumanResources.Department table from SSMS to Azure SQL Database. But first, let's get the exact datatype we will use in our Azure SQL Database when creating the table.
The following SQL command will help get the exact datatype for HumanResources.Department table from SSMS:
use AdventureWorks2019;

Select *
from HumanResources.Department;

Select
   TABLE_CATALOG,
   TABLE_SCHEMA,
   TABLE_NAME,
   COLUMN_NAME,
   DATA_TYPE,
   CHARACTER_MAXIMUM_LENGTH,
   NUMERIC_PRECISION
From INFORMATION_SCHEMA.COLUMNS
WHERE TABLE_NAME = 'Department';
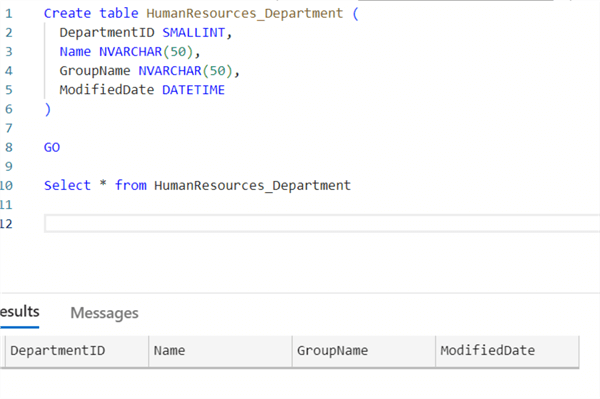
Now that we know the datatype for the individual columns/fields, let's go to Azure SQL Database. I will be using Azure Data Studio as it provides me with an easy user interface.
Create table HumanResources_Department (
  DepartmentID SMALLINT,
  Name NVARCHAR(50),
  GroupName NVARCHAR(50),
  ModifiedDate DATETIME
);
Select * from HumanResources_Department
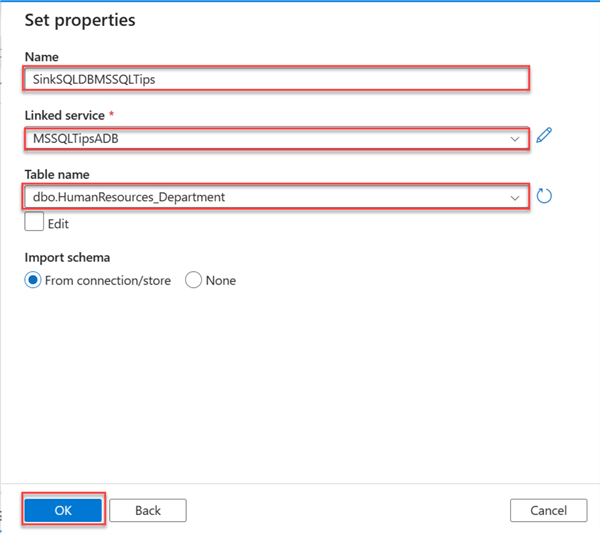
Now that the table is in our Sink Azure SQL Database, we need to create the sink dataset in our ADF.
In ADF, click Create New Dataset and select Azure SQL Database. Fill in the following configuration settings:
Copy Activity
To set the copy activity, you will need the source and sink datasets created earlier. From the activity tab, drag the copy activity to the pipeline canvas, set the source and sink, and then click Debug to run the pipeline.
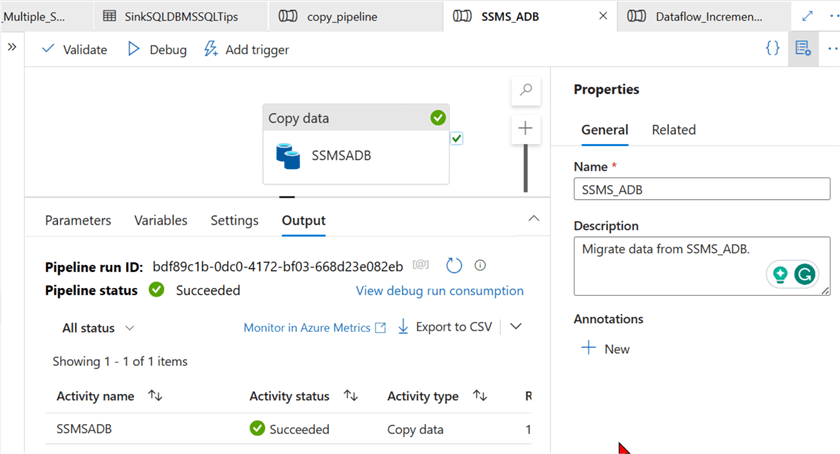
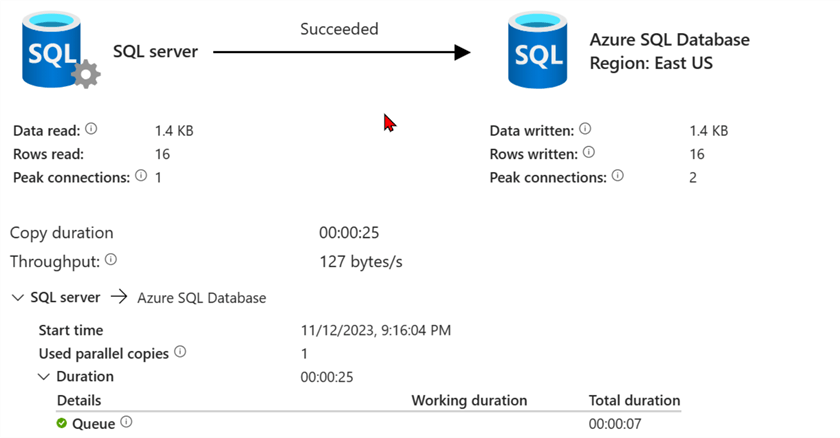
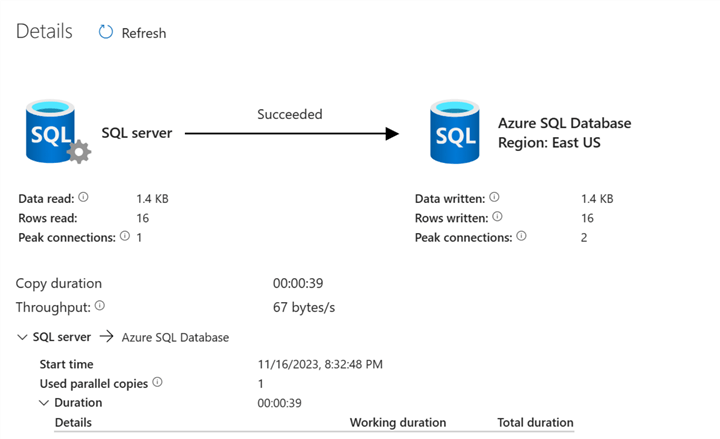
The output shows that data moved successfully from SSMS on-premises to the Azure SQL Database.
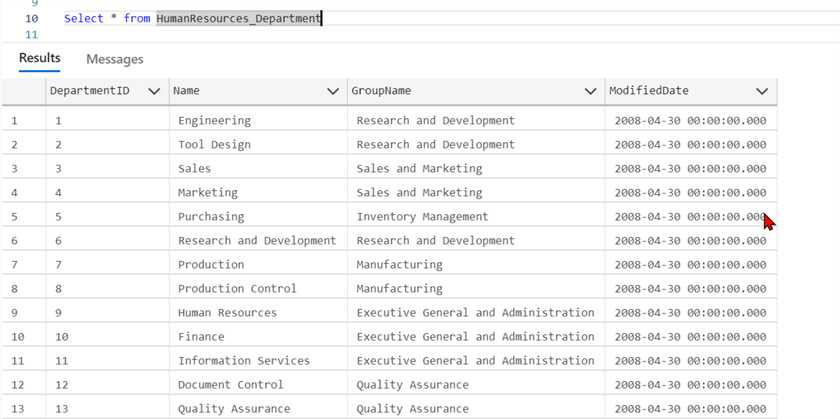
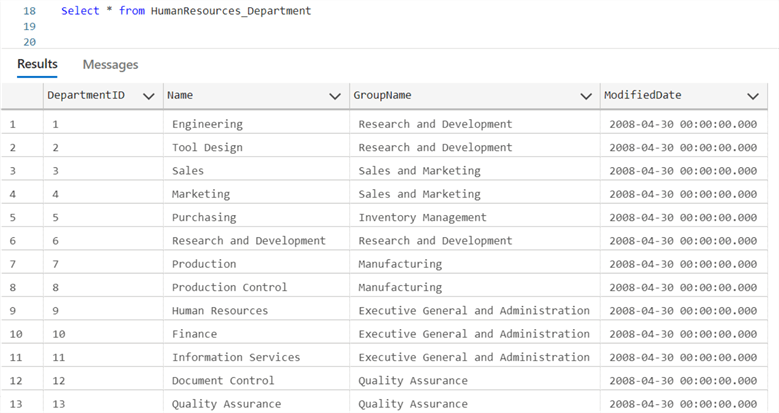
Using Azure Data Studio, the table output can be seen as shown below.
Set ADF Copy Parameter
In the ADF pipeline, parameters dynamically pass values to ADF activities or datasets.
Set Parameter Pipeline
We must add parameters to all the necessary components in our pipeline, including the source, sink, and activities.
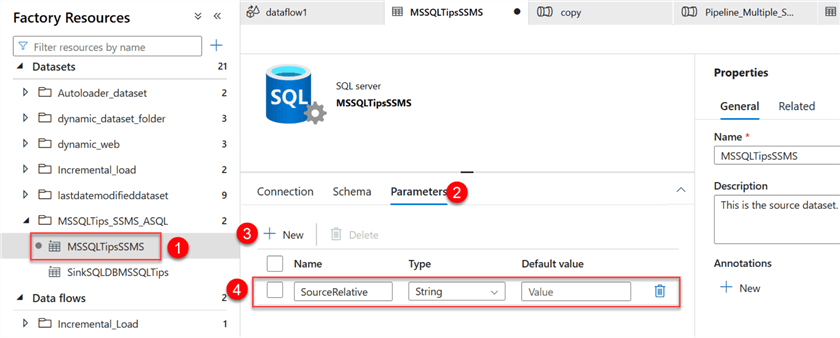
Step 1: Set Source Parameter. In ADF, click on the source dataset in the left pane and select the Parameters tab. In the parameter field, add a new parameter called "SourceRelative."
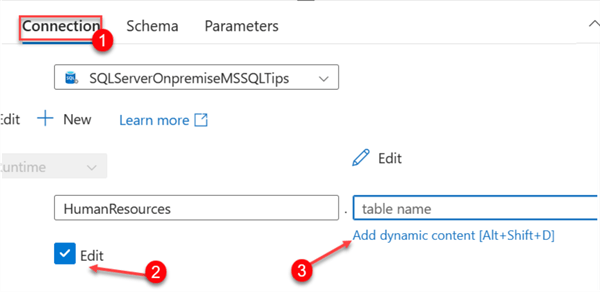
After you have created the parameter, select the Connection tab. We want to create a Dynamic file path setting. In the Connection tab, select Add dynamic content. Note: Before you add the dynamic content, enable the editing feature by clicking the Edit check box. This should open another window where you will set the parameter we just created.
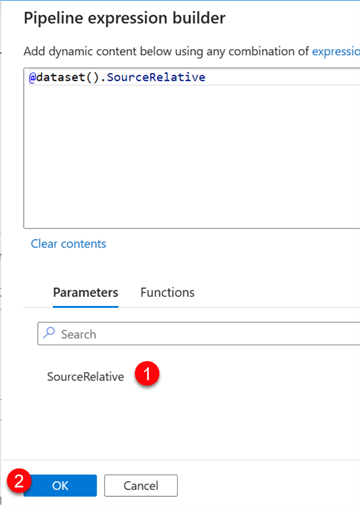
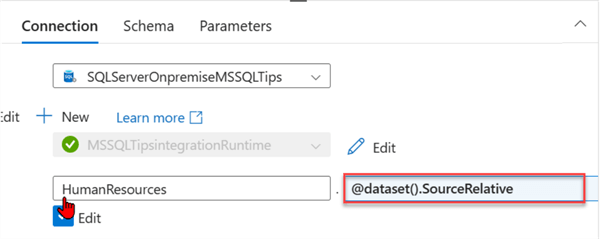
In the Dynamic Content Pipeline builder, select the parameter we just created. Click OK.
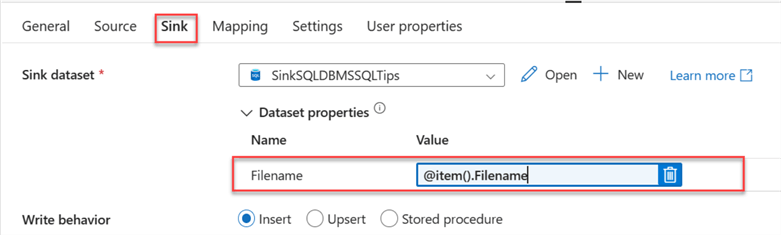
Step 2: Set Sink Parameter. Repeat the same process for the sink dataset. Start by clicking on the sink dataset and selecting the Parameters tab. In the Parameters tab, click on New and add "Filename."
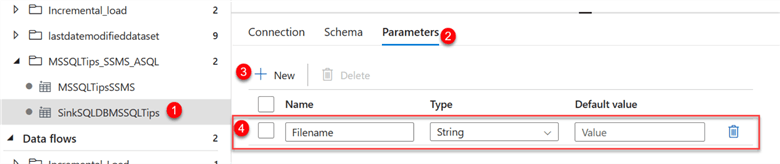
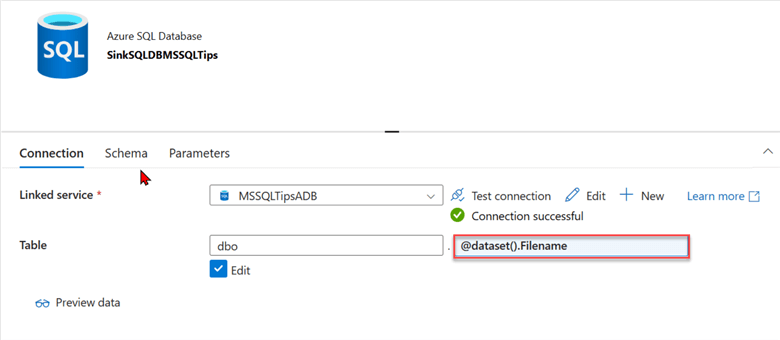
Next, we need to add the new parameter Filename to the Connection. Click the Connection tab, select Add dynamic content, and fill in the information below.
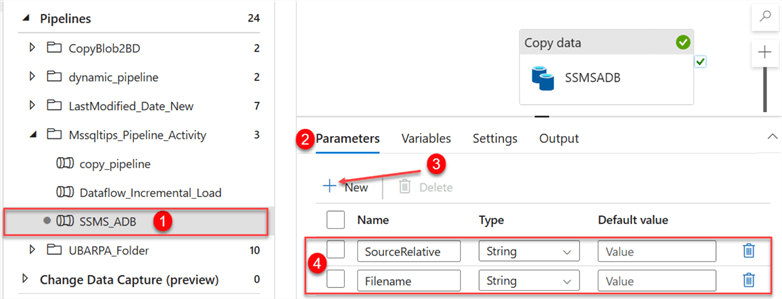
Step 3: Set Pipeline Parameter. We need to set the parameter for the ADF pipeline we created earlier. Select the pipeline, select the Parameters tab, click New, and fill in the following information, as seen in the image below.
Step 4: Set Activity Parameter. We also need to set parameters for the copy activity we created. This will be done on both the source and sink tabs.
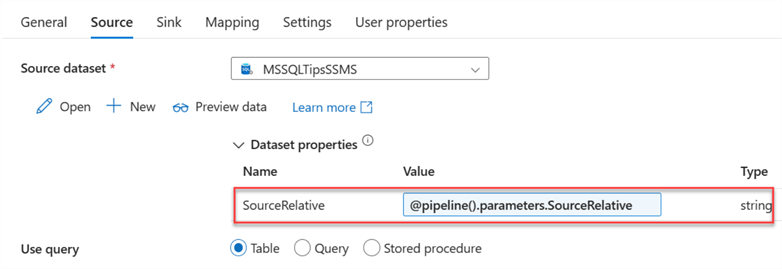
Start by clicking on the Source tab of your copy activity and selecting Dynamic Content. This should take you to another window where you can choose the source parameter. Click OK.
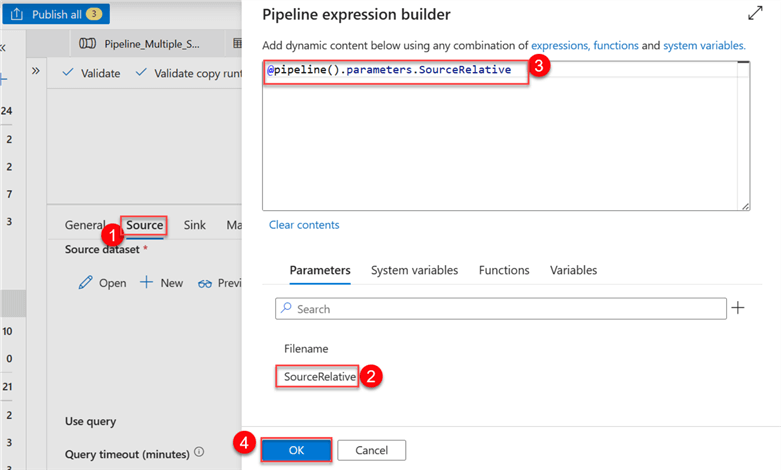
Notice that the value in the Dynamic Content now shows the parameter name.
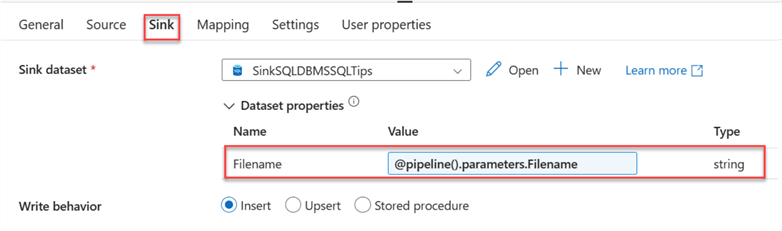
Repeat the same process for the Sink tab.
Step 5: Publish All, Validate, and Debug. This is the last step. We need to Publish all to save all the changes made in our ADF environment. Validate helps check for errors, and Debug is a manual way of running the pipeline.
Note: Before debugging, remove all records in the table we created earlier using the TRUNCATE command in SQL.
TRUNCATE TABLE HumanResources_Department;
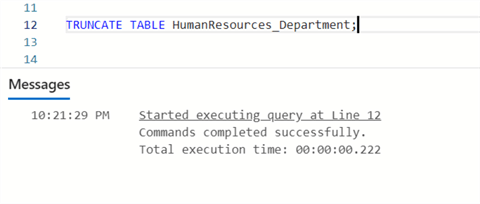
After running your SQL SELECT statement, all the values or records in the table are empty.

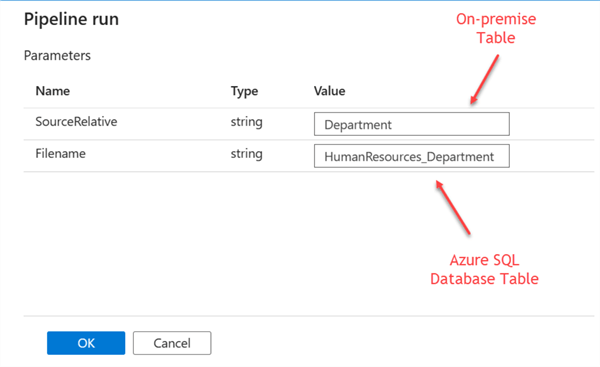
After you click to debug the table, a new window will appear on the right side. Complete the following details. The Filename should be from your Azure SQL Database table, and SourceRelative should be the name of the table from SSMS. Click OK.
After successfully running the pipeline, you will receive a success message.
Dynamically Copy Multiple Tables from the SQL Server to the Azure SQL Database
The essence of this article is to help readers learn how to move data in bulk from an on-premises SQL Server to an Azure SQL Database. To get started, we must create the tables in our Azure SQL Table for the other HumanResources.
Note: Each table in Azure SQL Database should have the same datatypes for each field/column.
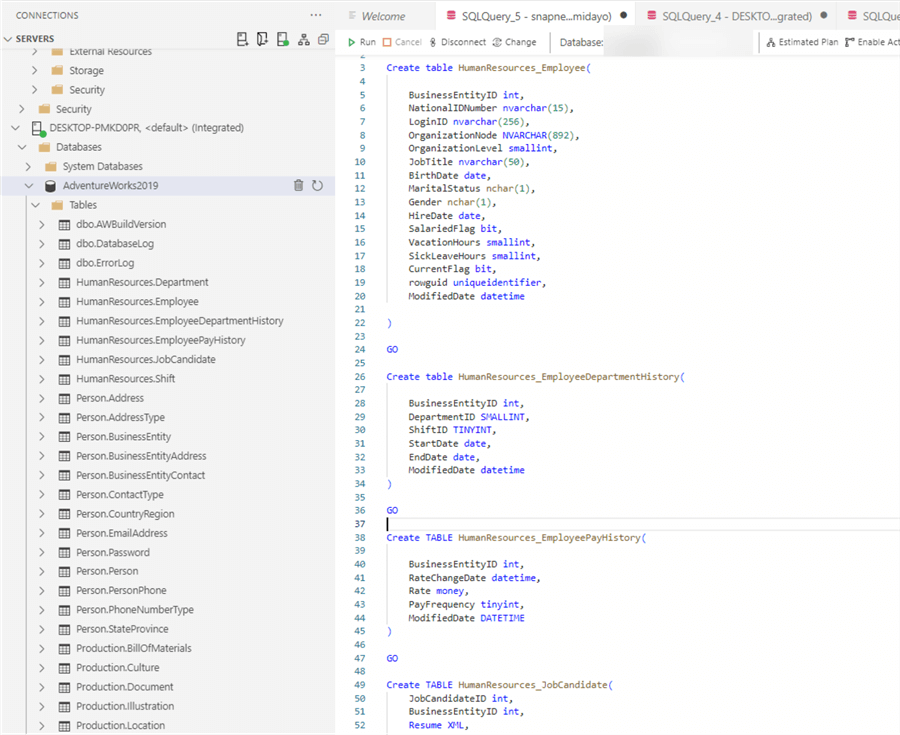
Get Tables Datatypes
This process will be done for all the HumanResources Tables in the AdventureWorks database. We can create the appropriate tables in our Azure SQL Database with the right datatypes.
File Configuration
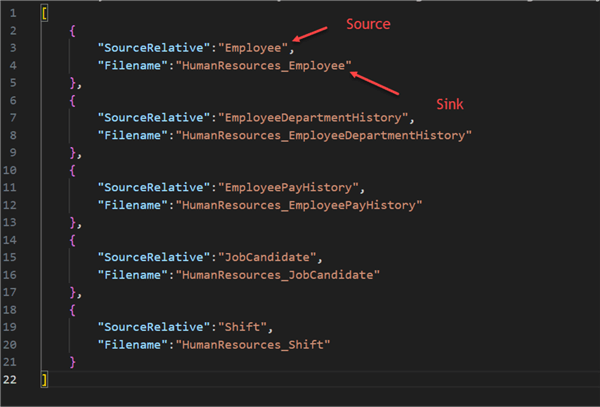
Now that we have created the needed tables in Azure SQL Database, we need to create a JSON file to help us dynamically pick the different tables from our on-premises SSMS and migrate them to Azure Database.
Lookup Activity
This activity in ADF retrieves data or information from a dataset and feeds the received information to subsequent activities in a pipeline.
ForEach Activity
This activity is used to iterate over a collection of items and perform a specific action on them.
The following steps are needed to perform Dynamic Migration from SSMS to Azure SQL Database:
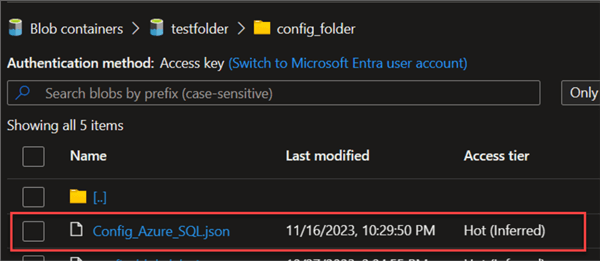
Step 1: Upload Config File to Storage. The first step is to upload the JSON file to our Azure Data Lake storage. The image below shows the uploaded config file.
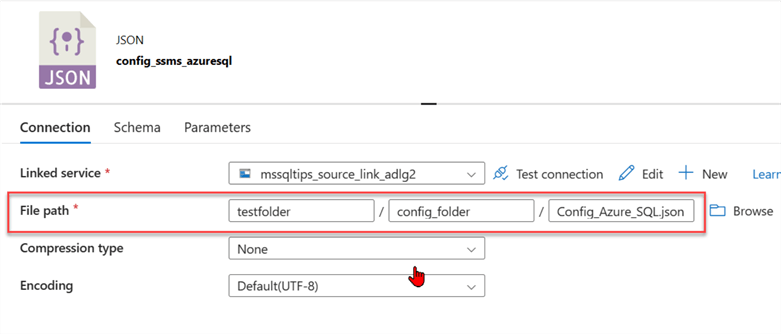
Create a new dataset in ADF and set the file path directory to pick the data from the Azure storage. Also, take into consideration that this is a JSON file type.
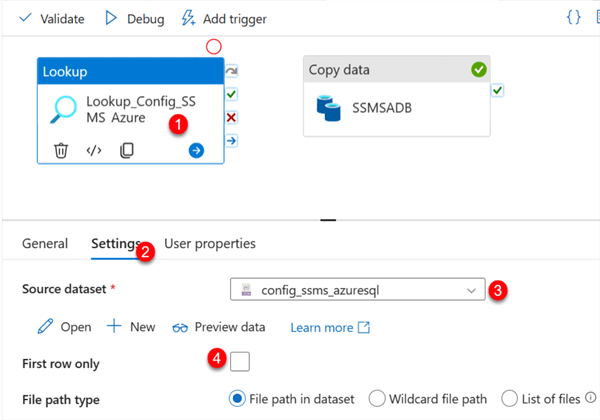
Step 2: Add Lookup Activity. In your ADF environment, search for Lookup and add it to the pipeline canvas.
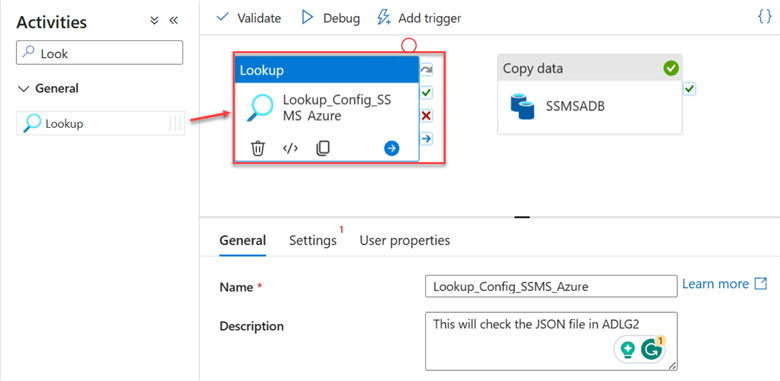
Select the Lookup activity and perform the following configuration in the Settings tab.
- Source dataset: This is the config dataset in JSON we just added from the Data Lake. It contains information about the directory from both source and sink.
- First row only: Uncheck the box to allow the data to read the entire file in the Data Lake JSON file.
Step 3: Add ForEach Activity. Search for the ForEach activity and drag it to the pipeline canvas. In your design canvas, connect the Lookup activity to the ForEach activity.
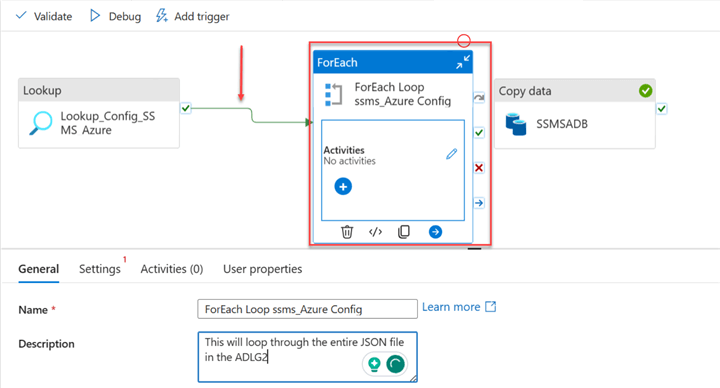
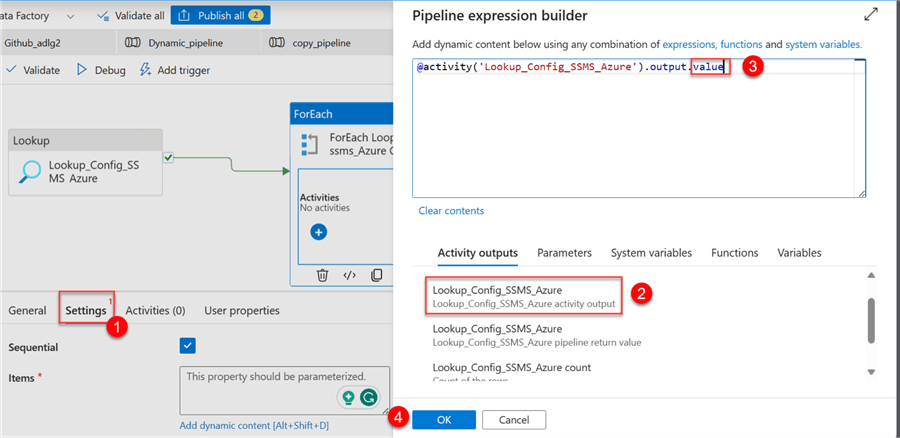
After connecting the Lookup activity to the ForEach activity, we need to configure the ForEach. In ForEach, click the Settings tab. Click on the dynamic content in the items area.
A new window will open. Select the activity output of the Lookup and add .value to the end of the code. Click OK.
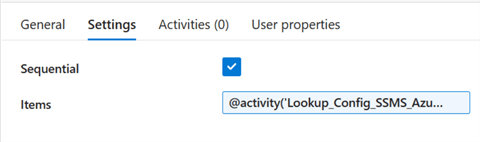
After clicking OK, you will notice the Lookup activity has been added to the item's dynamic content area.
Step 4: Cut and Paste the Copy Activity in the ForEach. We need to make the Copy Activity dynamic by cutting it from our pipeline design canvas and pasting it inside the ForEach activity. You can see the image below on how we can go about this.
Now, go back to the pipeline. Click on the pipeline canvas, select the Parameters tab, and delete all the parameters.

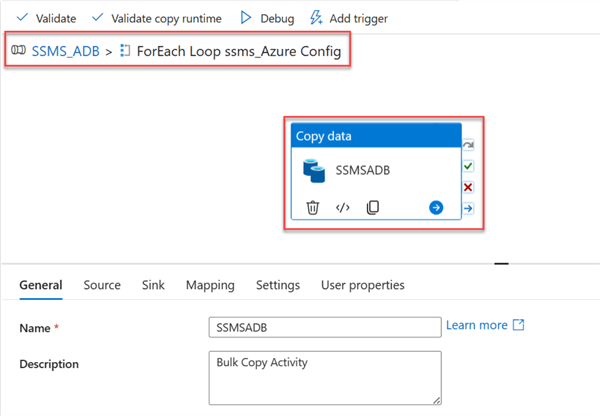
Add Source Copy Activity. Deleting the Source and Sink parameter from the pipeline canvas affected the source and sink in the copy activity. Now, go to the ForEach and select the Copy activity inside.
You will receive a warning indication from both the Source and Sink tab. Let's start by fixing the SourceRelative path.
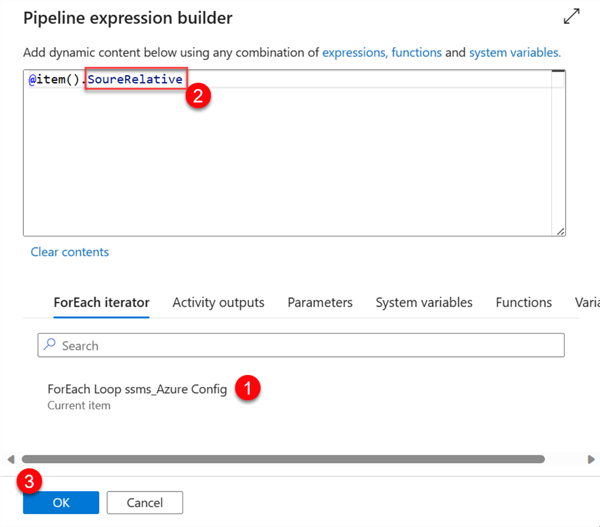
Delete the value and select the dynamic content.
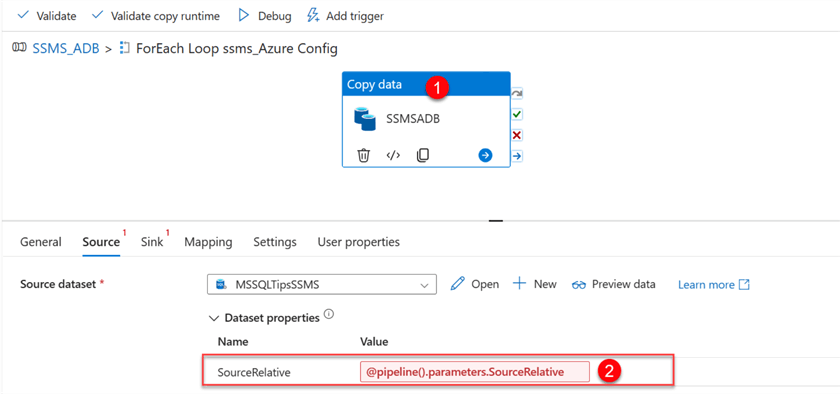
After deleting the pipeline parameter, click in the Dynamic Content, select the ForEach Loop Config, and add the SourceRelative from the JSON file to the item line of code.
Add Sink Copy Activity. Repeat the same process for the Sink dataset in the Copy activity.
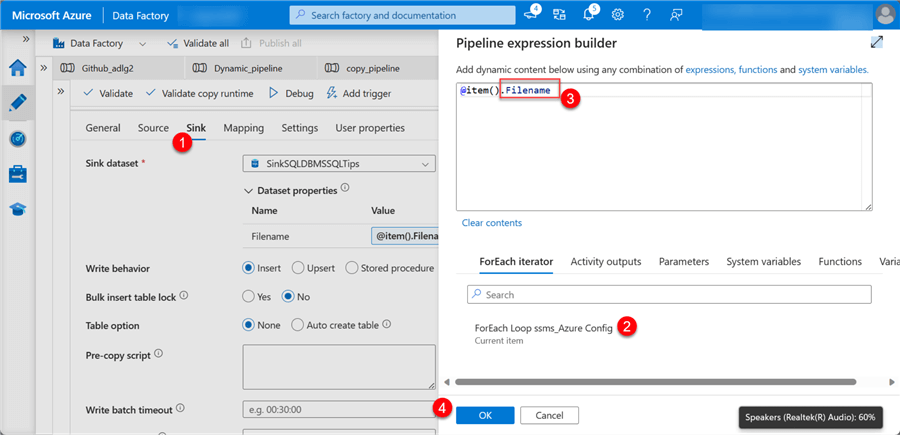
Notice that the dynamic content for the Filename has changed.
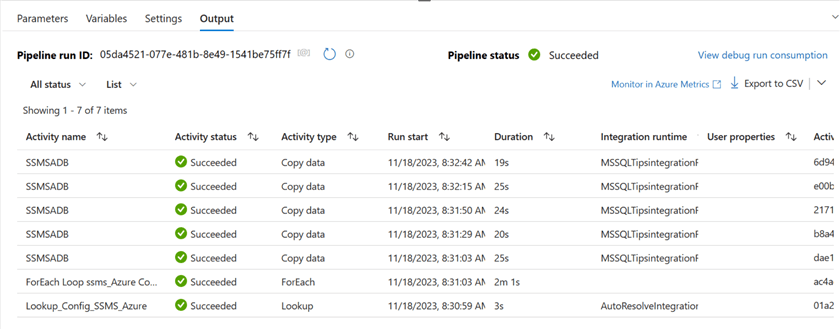
Step 5: Publish All, Validate, and Debug. Publish All to save all changes, Validate to check for errors, and Debug to manually run your pipeline. If all is done correctly, you should not have errors.
As you can observe in the Pipeline Output, all data flows ran successfully and copied data from the SQL Server on-premises to the Azure SQL Database tables.
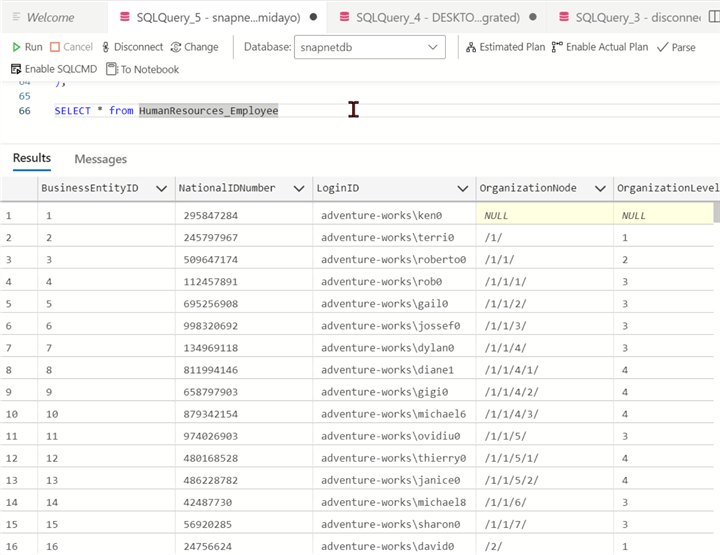
Let's go to our Azure Data Studio or Azure Portal for SQL Database. Run the following SQL command to confirm that the data successfully migrated to the Azure Database table:
Conclusion
In this article, we have learned how to dynamically move large amounts of data tables from SQL Server on-premises to Azure SQL Database tables. We also discussed Microsoft Integration runtime, which provides a means of connectivity from ADF to on-premises and its installation. In our next tip, we will migrate a SQL Server database to an Azure SQL Database.
Next Steps
- Tutorial: Migrate SQL Server to Azure SQL Database using DMS (classic)
- Migration guide: SQL Server to Azure SQL Database
- Tutorial: Migrate SQL Server to Azure SQL Database (offline)


About the author
 Temidayo Omoniyi is a Microsoft Certified Data Analyst, Microsoft Certified Trainer, Azure Data Engineer, Content Creator, and Technical writer with over 3 years of experience.
 This author pledges the content of this article is based on professional experience and not AI generated.
View all my tips
Article Last Updated: 2024-03-14