By: Haroon Ashraf
Overview
The best way to run DAX queries against a Data Model is in the form of Tabular Analysis Services Database. The Data Model when deployed to Tabular Analysis Server becomes Analysis Services Database.
This section deals with the available options to set up Tabular Analysis Services Database so that it can be queried using DAX.
Tabular Analysis Database Setup Options
There are two ways to setup Tabular Analysis Database:
- Deploying Data Model to Tabular Analysis Server through SQL Server Data Tools (SSDT)
- Restoring Tabular Analysis Database from Power Pivot (created in Excel)
Method 1: Deploying Data Model through SQL Server Data Tools (SSDT)
Steps Summary
This method requires the following steps:
- Creating Analysis Services Tabular Model Project in Visual Studio
- Choosing Workspace Server option
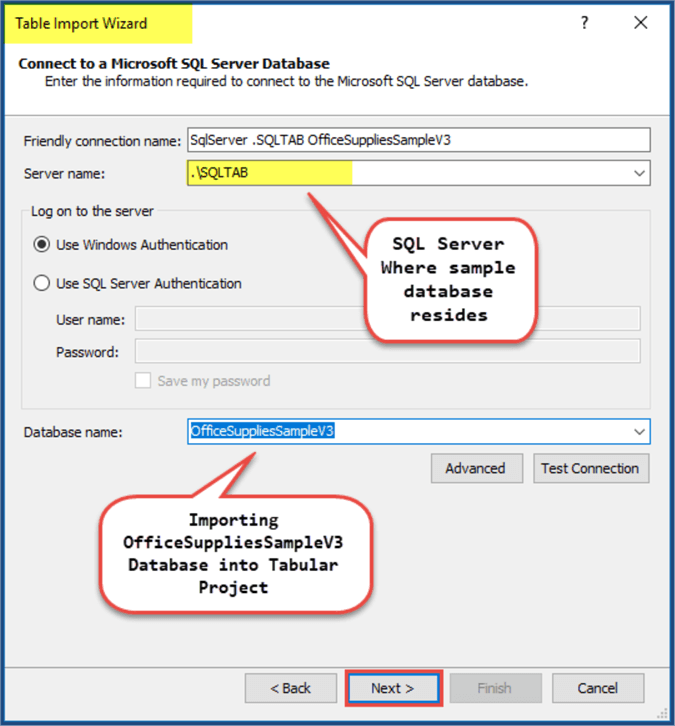
- Creating and Populating a Sample SQL Database (OfficeSuppliesSampleV3)
- Importing SQL Database (OfficeSuppliesSampleV3) to Load Data Model
- Rename Date table as DimDate
- Creating relationship by Joining DimDate table with Orders table
- Adding a role (by adding your username) to solve access problems
- Deploy the Data Model to Analysis Server as a Tabular Analysis Services Database
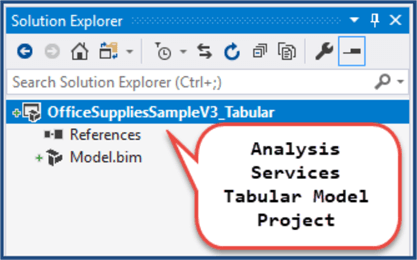
Step 1: Creating Analysis Services Tabular Model Project
Create a new Analysis Services Tabular Project in Visual Studio SQL Server Data Tools (SSDT) and name it OfficeSuppliesSampleV3_Tabular:
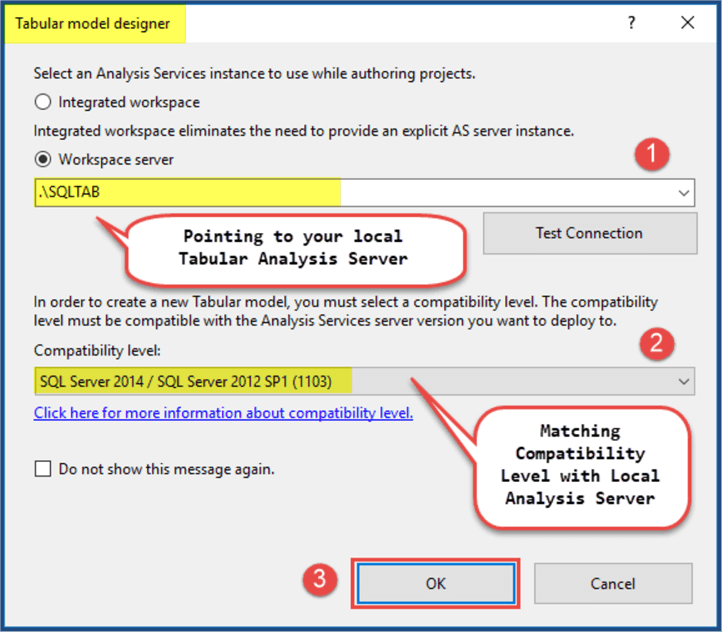
Step 2: Choosing Workspace Server Option
Choose Workspace Server option and point it to the installed Tabular Analysis Server:
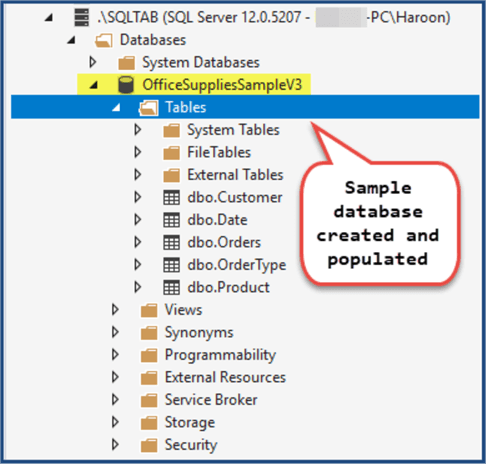
Step 3: Creating and Populating Sample SQL Database
Please run the following scripts to setup and populate SQL Database OfficeSuppliesSampleV3:


Step 4: Import SQL Database (just created) to Load Data Model
Import the database into the Tabular Model Project:
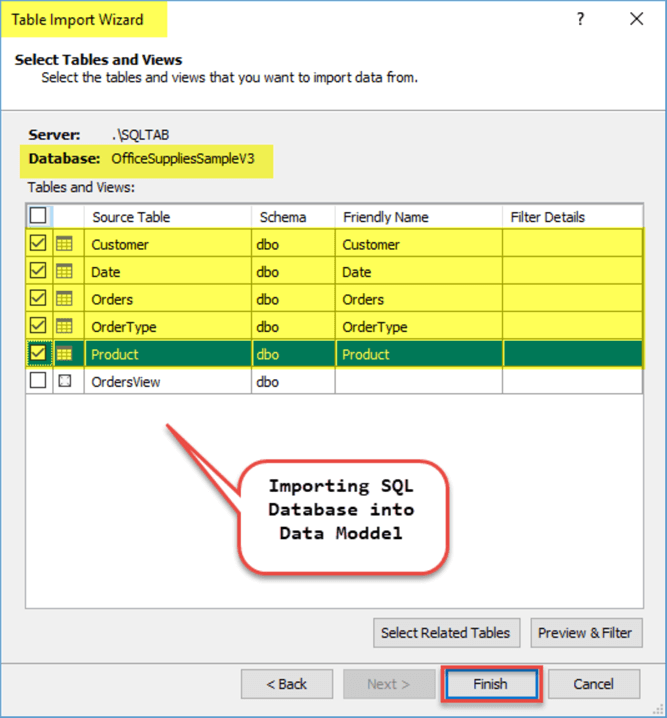
Select desired database objects (tables) to be imported ignoring the OrdersView:
Step 5: Rename Date table as DimDate
Rename Date table as DimDate to avoid getting confused with Date reserved work.
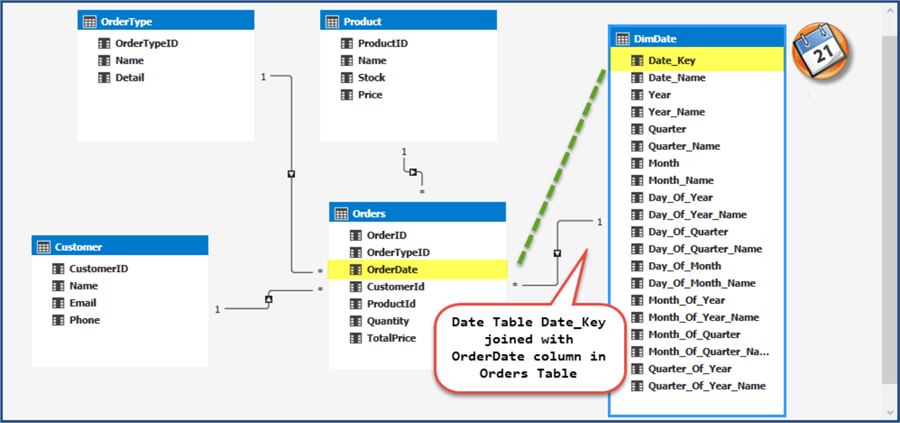
Step 6: Creating relationship by Joining DimDate table with Orders table
Switch to Diagram View of Data Model and join Datetable Date_Key with Order_Date column in Orders table, once Date table is renamed as DimDate:
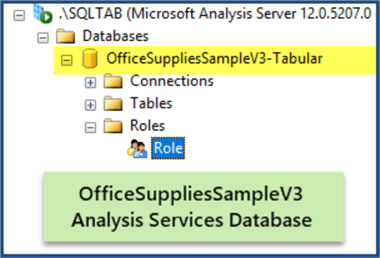
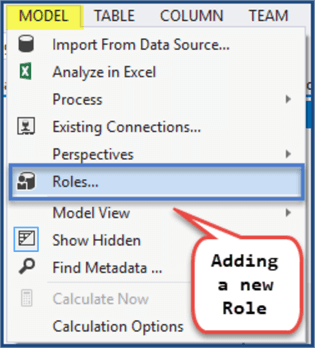
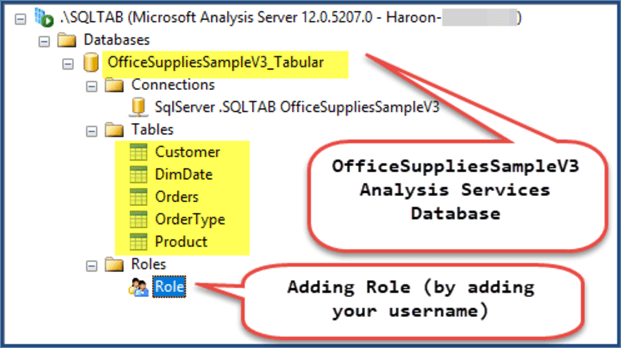
Step 7: Adding a role (by adding your username) to solve access problems
Add a new role by clicking MODEL > Roles… form the main menu in Visual Studio:
Next add your user name as a new Role by first clicking New button and then Add button is used to assign your user name to the freshly created Role as shown below:

Step 8: Deploy Data Model to the Analysis Server:
Finally deploy the model to the Analysis Server:
For further information please go through the following previous tips:
- Create Tabular Model Sample from SQL Server Database - Part 1
- Create Tabular Model Sample from SQL Server Database - Part 2
Method 2: Deploying Data Model through Power Pivot
There is a more direct approach to deploy tabular model to Analysis Server from Power Pivot created in Excel.
Since the detailed steps of creating Power Pivot in Excel from a sample database is beyond the scope of this tutorial, we assume an Excel Power Pivot file has been crated from sample database OfficeSuppliesSampleV3.
Steps Summary
This method requires the following steps:
- Creating Excel Power Pivot based on OfficeSuppliesSampleV3
- Providing Analysis Server access to the Excel File
- Deploying OfficeSuppliesSampleV3 on Analysis Server by choosing Restore from Power Pivot option
- Adding a role (by adding your username) to solve access problems
Step 1: Creating Excel Power Pivot based on OfficeSuppliesSampleV3
Please download OfficeSuppliesSampleV3 Power Pivot Excel file:
Step 2: Providing Analysis Server access to the Excel File
Once we have created Power Pivot from Excel file it should be accessible by Analysis Server which is done by providing access rights to the file.
Right-click the Excel Power Pivot sheet and click Properties.
Under the Security Tab click Edit and then click Add:
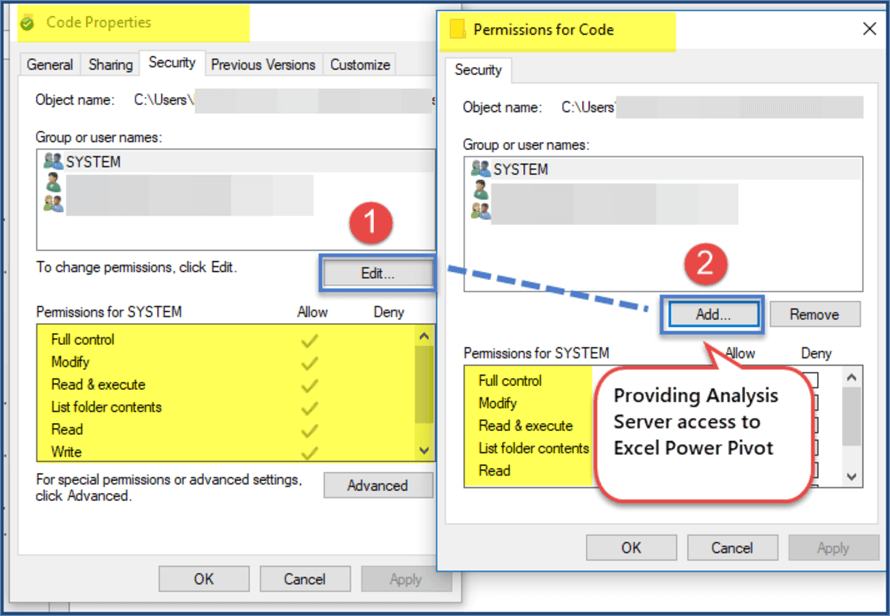
Click Advanced and then click Find Now and then locate Tabular Analysis Server in the list and click OK:

Step 3: Deploying OfficeSuppliesSampleV3 on Analysis Server
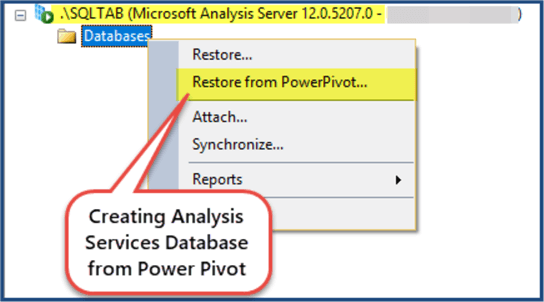
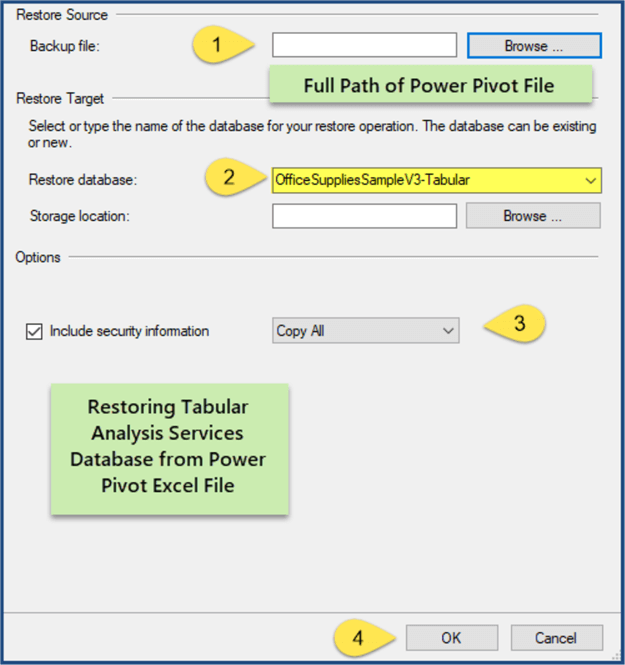
Connect to Tabular Analysis Server in SSMS (SQL Server Management Studio) and right-click Databases and then click Import from PowerPivot…
Locate the path and file name of the Power Pivot file and click OK:
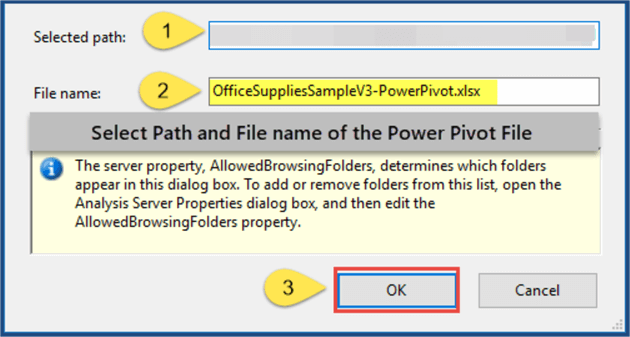
Restore database as OfficeSuppliesSampleV3-PowerPivot-Tabular:
Step 4: Add New Role
Add new Role by providing yourself your username) access to this tabular database: