By: Ben Snaidero
Overview
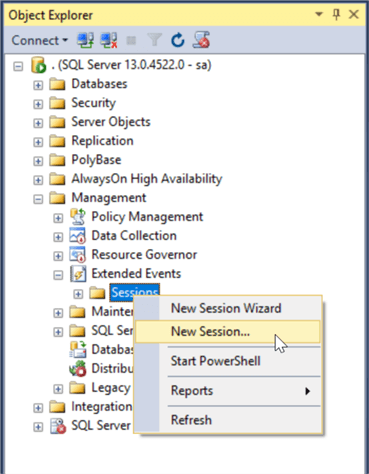
Using the New Sessions dialog is very similar to the Wizard except that it exposes all the functionality within the Extended Events architecture. To start using the dialog we again open Object Explorer in SSMS and expand the "Management" folder, then the "Extended Events" node and then right-click on "Sessions" as shown below. This time however we select "New Session..."
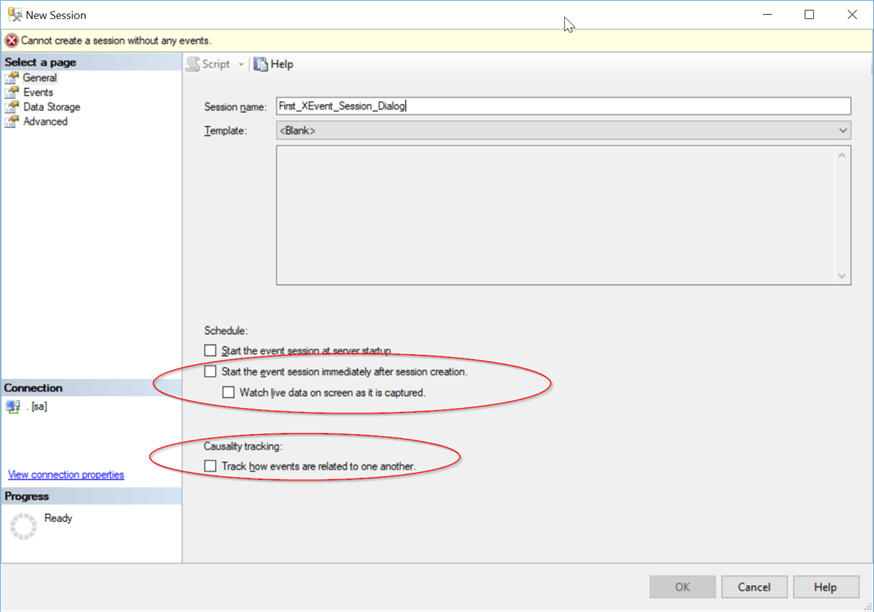
Once selected the below window will open where we are presented with 4 separate pages to enter the information to create our session, General, Events, Data Storage and Advanced. The initial page, "General", is where we can enter a name for our session. This page is similar to the window we saw when using the wizard however there are a couple extra options shown below circled in red. The first set of options allows you to start the session right after creation and monitor the event data on your screen (we had a similar option in the final window using the wizard). The second, causality tracking, will track how events are related to each other across related tasks. That is when one event causes work to be done in another event.
Once we are done with the "General" page we can select the "Events" page. This first part of this page is very similar to the one we saw in the wizard where we can select the events we want to add to our session. Once done selecting the events you require you can click the "Configure" button shown below circled in red.

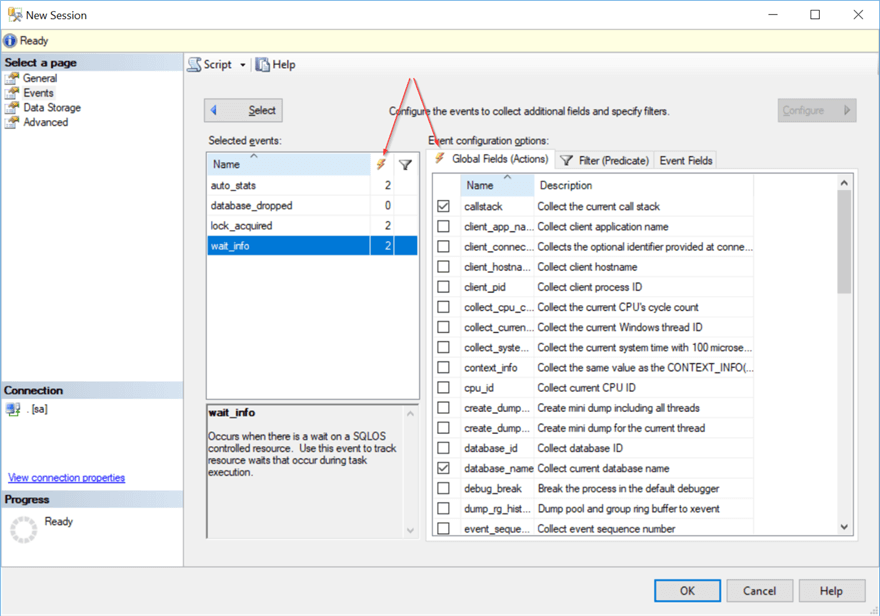
After clicking this button you are then presented with the list of selected events on the left along with 3 tabbed windows on the right. The first tab allows you to select any "Global Fields" for each event. Notice the red arrows in the screenshot below. As you select an action for each event a counter is incremented beside the event list.
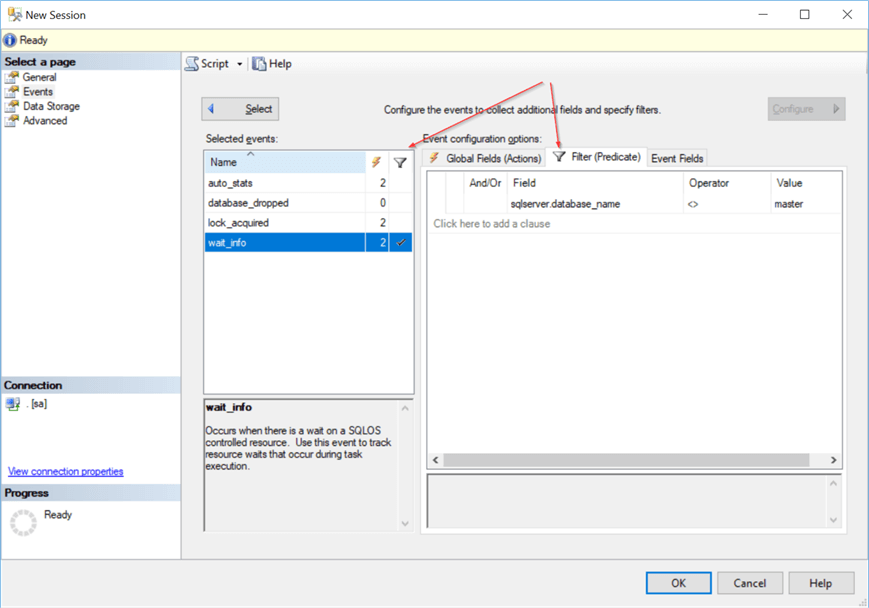
The next tab "Filter" allows you to add any filter predicates to the events you selected as shown below. Notice again that as you add filters it’s noted in the event list on the left that the particular event has a filter (red arrows).
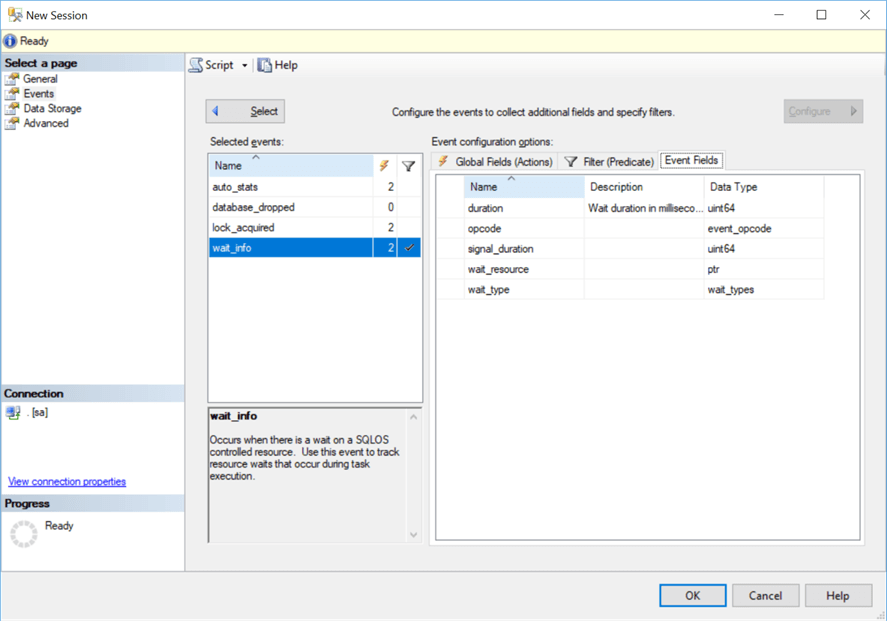
The last tab, "Event Fields", is similar to what we saw when selecting events with the wizard. It gives you a description of each of the fields for the selected event and allows you to select which fields you want to capture. Note that some fields are mandatory and do not have a checkbox that allows them to be selected/deselected. Fields that are expensive to capture are deselected by default.
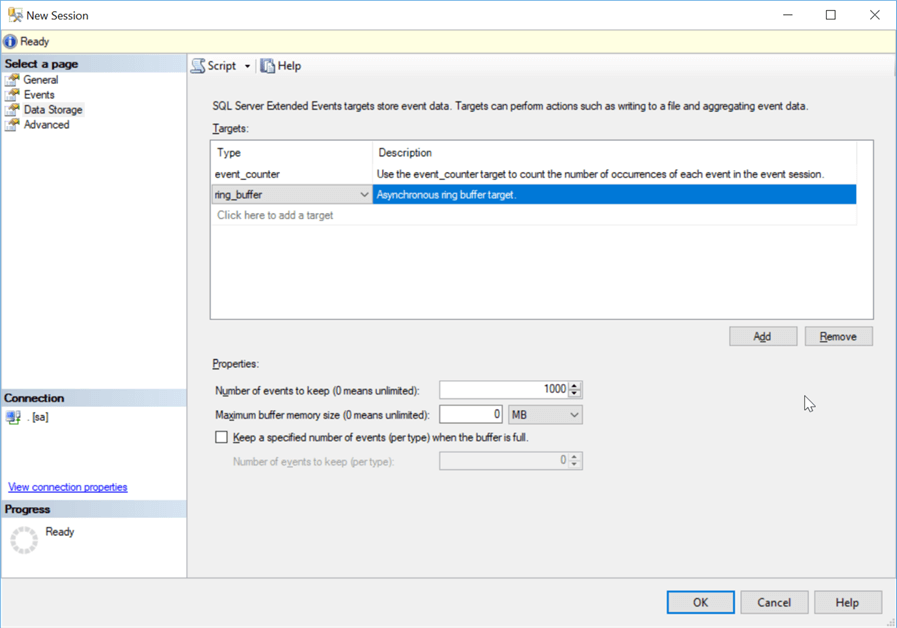
After you have all your events selected and configured you can move on to the "Data Storage" page. As shown below with this window we now have all the Extended Events targets available, not just the ring_buffer and event_file targets as we did with the wizard.
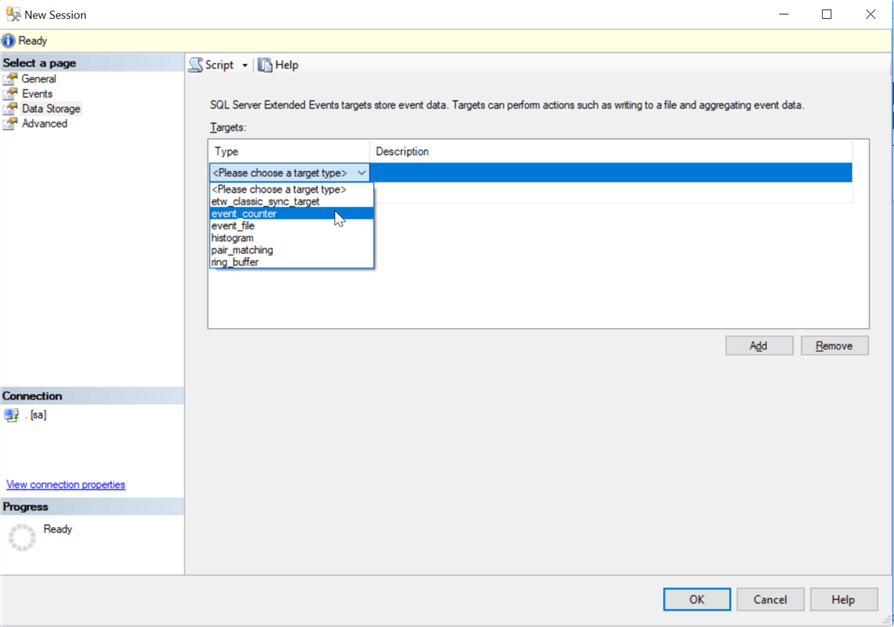
For this example, we will create an event_counter and ring_buffer targets. Notice that as you add a target and then highlight it the options for configuring the target appear below.
Finally, there is the "Advanced" options page. On this page we can configure some options around event retention and memory usage. More details on these options are here. Once that is done you can click "OK" and your session is created.

Next we will cover more methods to create an Extended Events session.
