Problem
SQL Server 2025 has been released in preview, and I’d like to try out some of the new features. I don’t think it’s a good idea to install the preview on my machine. Is there an option to quickly try out and install SQL Server 2025 in Azure?
Solution
At the time of writing, SQL Server 2025 (version 17.x) has been released in public preview, as Community Technology Preview (CTP) 2.0. You can find a list of all current SQL Server 2025 releases on the community-maintained webpage, SQL Server Builds. There are many new features in SQL Server 2025, and you can find an overview in the official documentation.
Options to Test and Try SQL Server 2025
There are several options to try:
Most features are also available in Azure SQL Database (especially new T-SQL features) or Azure SQL Managed Instance. If you quickly want to try something out, spinning up an Azure SQL Database is much faster and cheaper than installing SQL Server. Keep in mind that not all features of SQL Server 2025 are covered in their Azure counterparts, as some functionality is only relevant in an on-premises installation (like Availability Groups, for example).
You can also use Fabric SQL Database to try out new features (like the new JSON data type). To optimize cost-efficiency, think about using a small Fabric capacity that can be paused once testing is finished.
You can download the SQL Server 2025 software and install it on your machine or in a virtual machine. Since it’s a preview version of SQL Server, installing it directly on a machine is not recommended, as it is not guaranteed that you can upgrade to the final version of SQL Server 2025. Installing the preview in a virtual machine that you can discard later is a better solution.
The last option is to create a virtual machine in Azure that comes with the most recent version of SQL Server 2025 pre-installed. This method is the best option if you want to try a feature and know exactly how it behaves in SQL Server 2025 (as opposed to Azure SQL Database). Since you can pause a virtual machine, you can save on costs, and it’s easy to discard the virtual machine and create a new one if needed.
In this tip, we’ll explore option 4.
Configure Virtual Machine in Azure with SQL Server 2025 Pre-Installed
To create resources in Azure, you’ll need a valid subscription. However, to create a pre-configured virtual machine with SQL Server 2025, you need a subscription without a spending limit or temporary payment methods. Unfortunately, this means that Visual Studio MSDN subscriptions with a certain amount of free Azure credits cannot be used, and, most likely, free Azure trials are also not an option. If you try to use such a subscription, you’ll get the following error:

If you don’t have such a subscription available, you’ll need to resort to installing SQL Server 2025 on an on-premises machine (a VM is preferred) or using an Azure SQL DB or similar for your testing. This limitation might possibly be lifted in the future.
Create New Azure Resource
In the Azure Portal, create a new resource and search for “sql server 2025” in the marketplace. This will lead you to a Windows Virtual Machine with the SQL Server 2025 CTP 2.0 preview pre-installed. (At some point, a more recent preview may become available.)
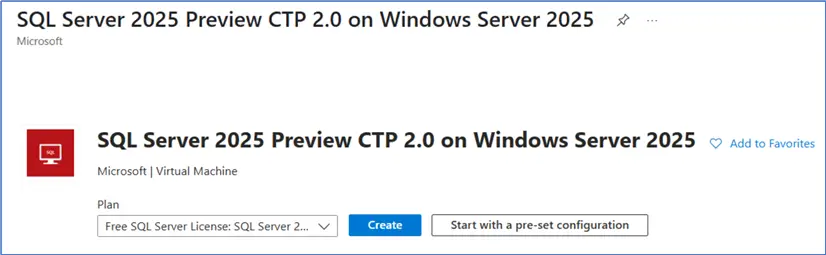
There are two plans to choose from: the Enterprise Developer or Standard Developer editions. A new feature of SQL Server 2025 is that there are now two types of Developer editions:
- One with the Enterprise features – the same as the Developer edition of previous SQL Server versions.
- One with only the features included in the Standard edition. This way, it’ll be easier for companies to test out SQL Server if they have the Standard edition.
Choose your plan and hit Create.

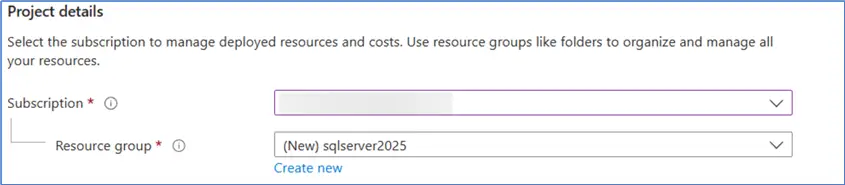
Pick Subscription
First, pick a valid subscription and either choose a resource group or create a new one.
Configure Instance Details
For the instance details, choose a name for the VM and pick a region.
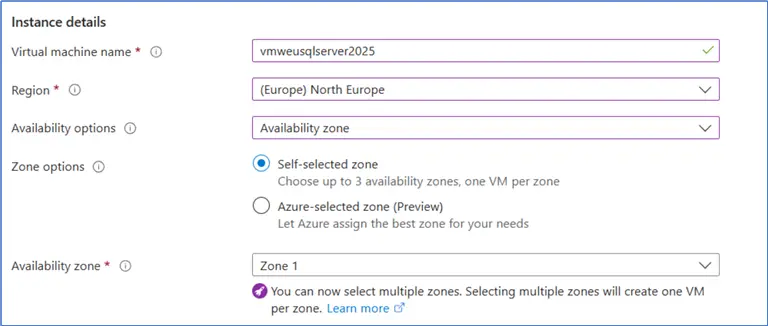
By default, there will be availability zones selected, but you can change this to a lower setting:
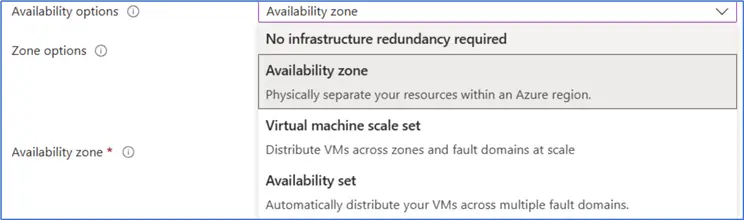
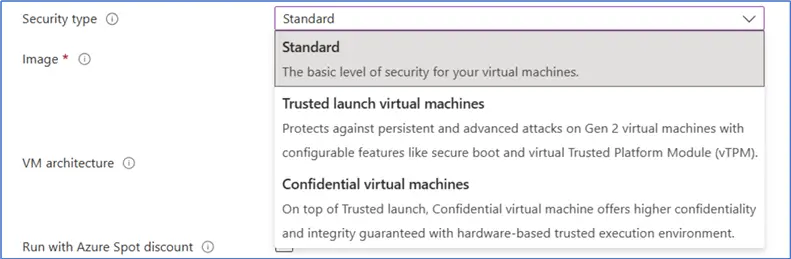
Since this is only a VM for testing purposes, choose to use no infrastructure redundancy to save on costs. Similarly, there is an option to choose the lowest security setting:
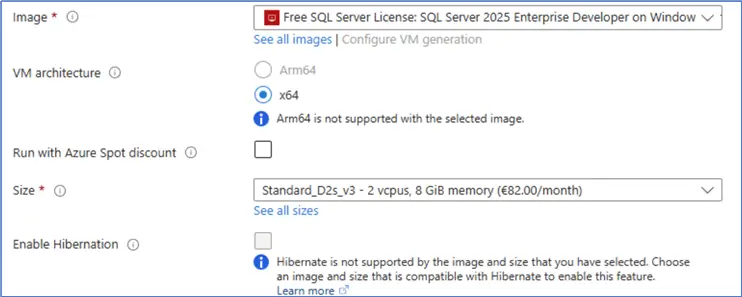
The image and the VM architecture are pre-selected and cannot be changed.
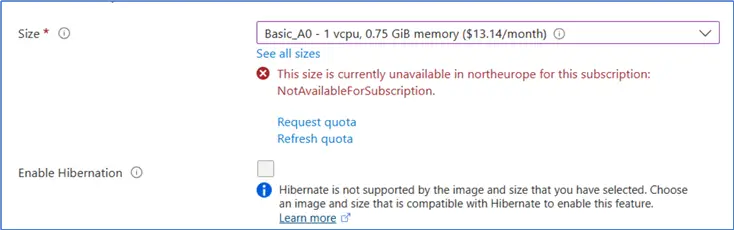
Not all VM sizes are available in every region, as shown below:
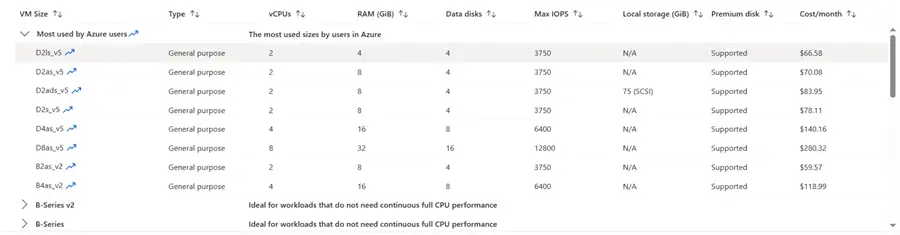
Select VM Size
It’s recommended to review the list of VM sizes and pick the appropriate one.
Next, specify an administrator account and password. You’ll use this account to log into the VM and the SQL Server instance.
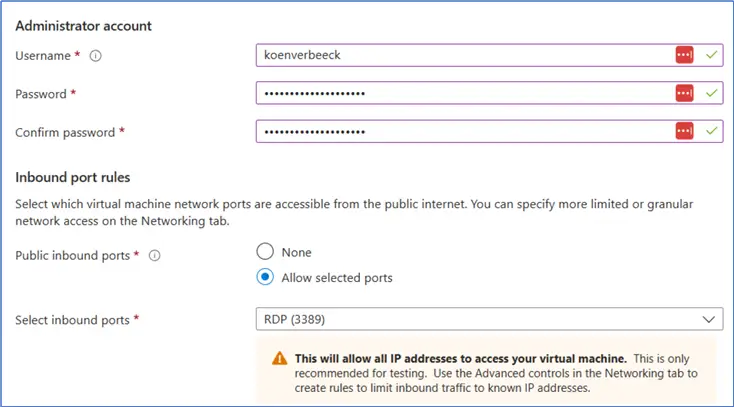
For easy access to the VM, leave the RDP port open to use remote desktop to connect with the VM.
Setup Disks
Next up is the Disks tab, where you specify the size and speed of the operating system disk. SSDs cost more than HDDs but are much faster.
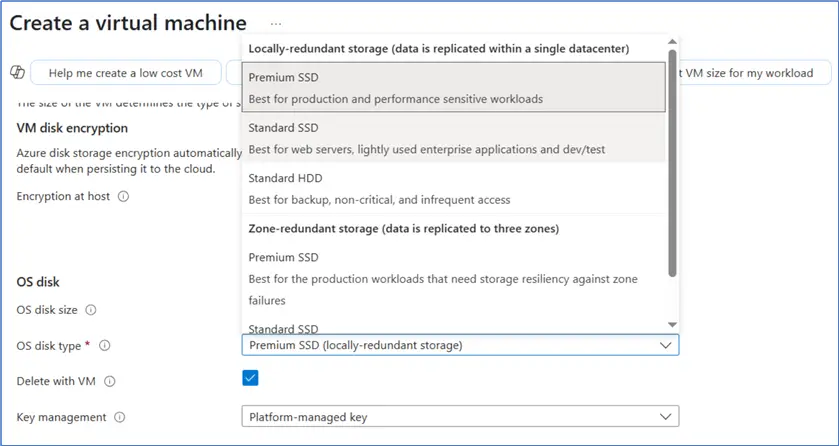
Note: You’ll be paying for the disk even when the VM is paused.
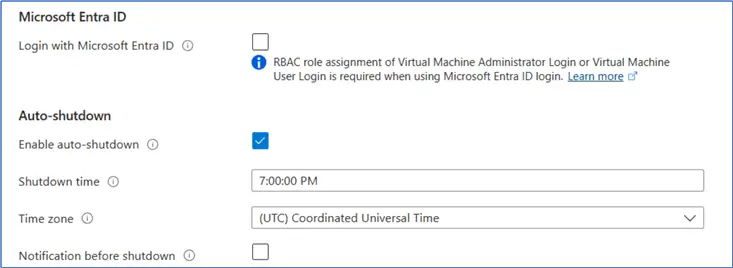
Under the Networking tab, you can leave everything as-is. And, in the Management tab, choose a time for the VM to shut itself down. Since it’s easy to forget to manually pause the VM, I would leave this option enabled for a test VM. It will shut itself down and ultimately save on costs.
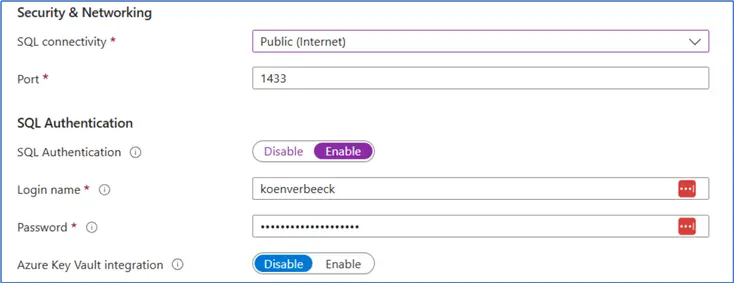
Security and Authentication
At this point, you can enable SQL Authentication in the SQL Server settings tab. Also, this is where you change if the database is publicly accessible.
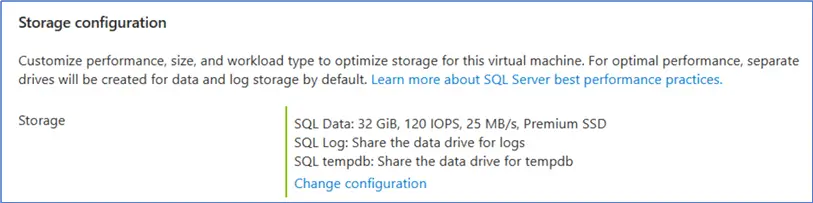
It’s also possible to change how the SQL Server instance stores its data, log, and tempdb files. Since this is a VM for simply testing features, I’ve configured it to store everything on one single disk.
Review and Create
Finally, go to the Review + create tab for a summary of the VM configuration and a cost estimate.
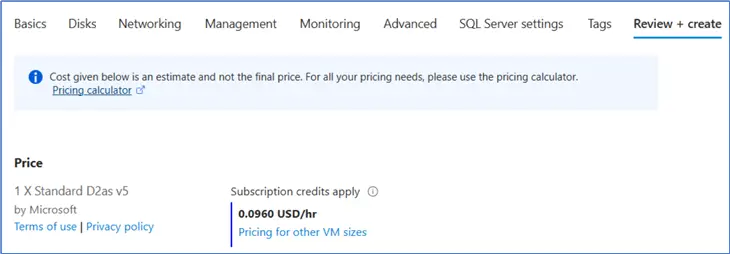
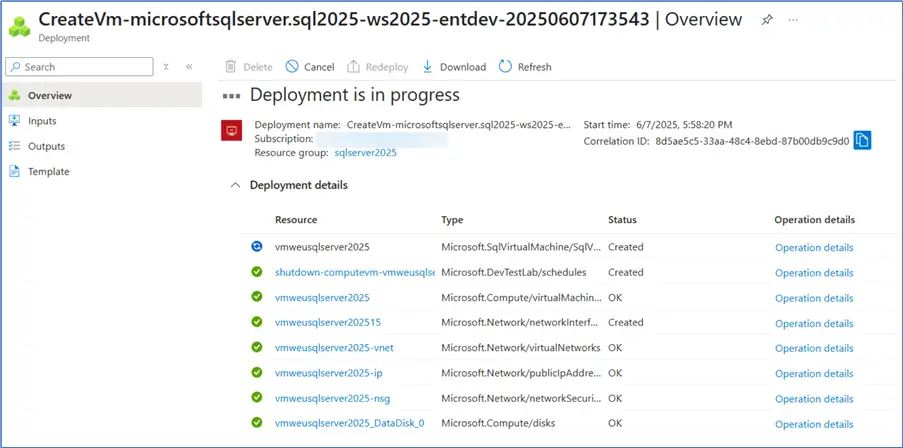
Click Create at the bottom of the screen to provision the VM. This might take a couple of minutes.
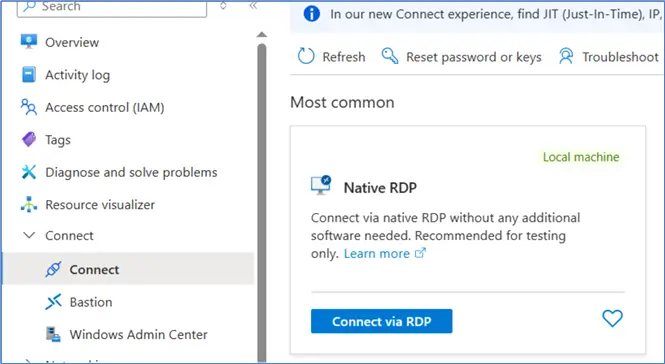
Connect to VM via RDP
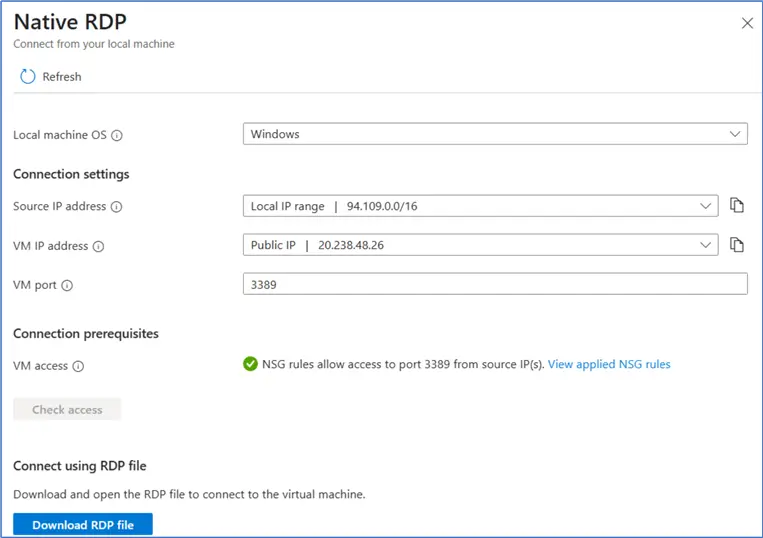
In the VM overview page, click Connect.

This will take you to the Connect pane, where you choose to connect via RDP.
In the next screen, download a pre-configured RDP connection.
When you double-click on the RDP file, a security warning will appear:
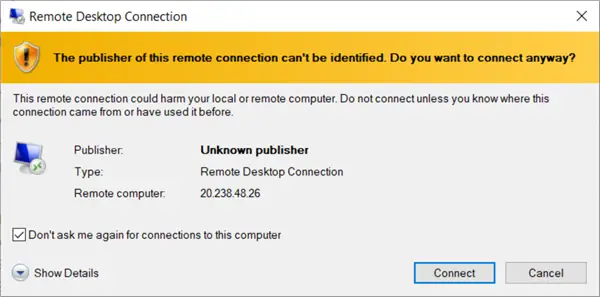
Check the checkbox to hide the warning in the future, then click Connect. Windows Security will ask for your credentials; however, you most likely will not be using your Windows credentials to log into the VM. Click on More choices to get a list of alternative login methods.
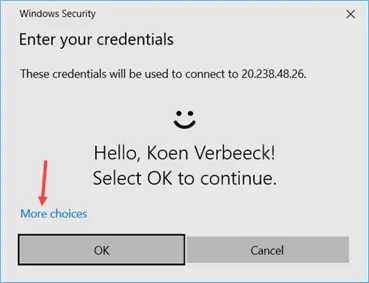
Choose the option to use a different account.
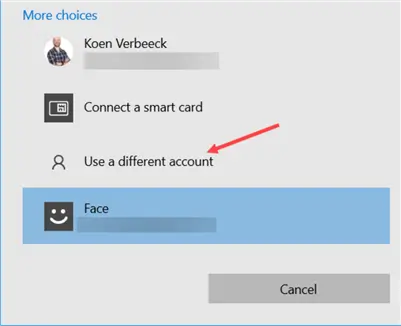
To log directly into the VM itself, we need to specify the user account that was created during the VM setup and prefix it with “localhost\” or “.\”.
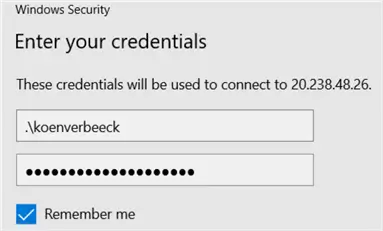
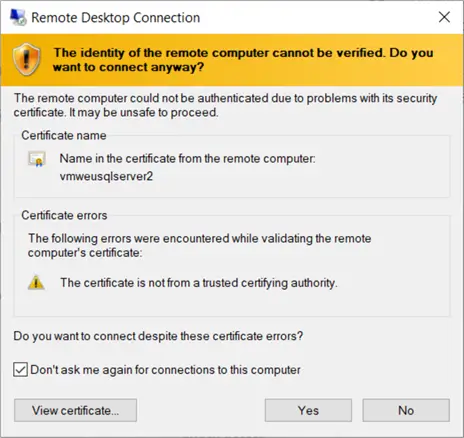
Another security warning will appear because the certificate isn’t trusted yet. Click the checkbox and then Yes.
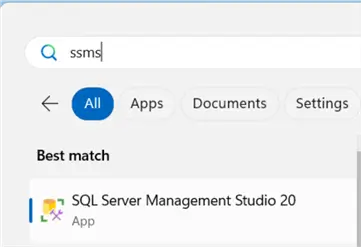
Open SSMS and Login to SQL Server 2025
The RDP connection is made, and a new window will open. SSMS 20 should be pre-installed on the VM.
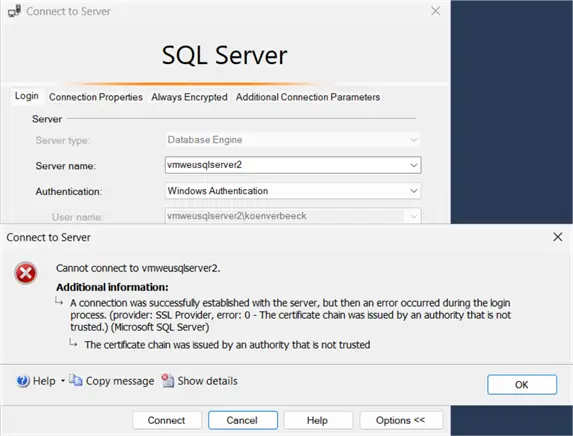
When logging into the database instance, make sure Encryption is set to Optional.
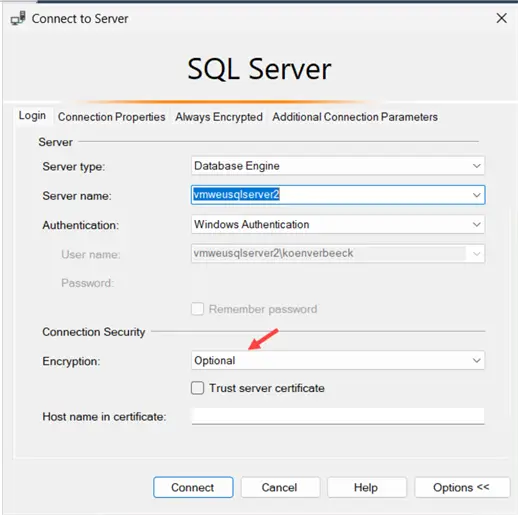
If left on Mandatory, an error message may appear about the certificate chain not being trusted:
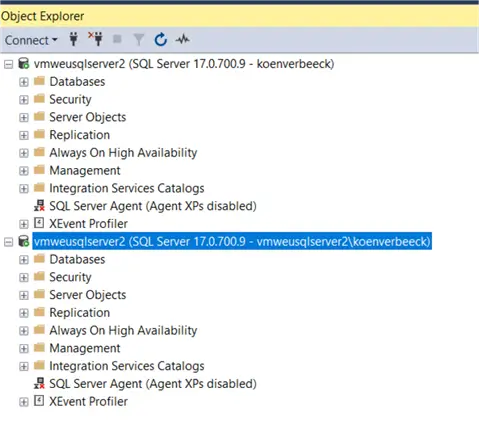
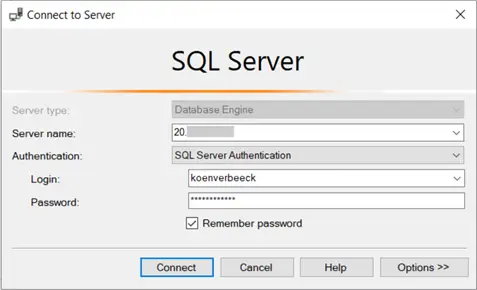
Log in using the Windows account created during the VM setup, or using SQL Authentication if it is enabled:
If public access and SQL Authentication are enabled, you could also use SSMS from your own machine to connect to the database instance instead of using an RDP connection. You can find the public IP of the VM on the overview page of the VM itself.
All that is left is to create a database and try out those new features!
Next Steps
- Keep an eye on MSSQLTips.com, as there are tips in the pipeline that will explain some of the brand-new features of SQL Server 2025.
- You can find all SQL Server 2025 tips in this overview and the SQL Server 2025 Getting Started Guide.
- The documentation lists all features that have already been announced, up until the current preview.
