By: Arshad Ali | Comments (6) | Related: > Azure
Problem
SQL Data Sync is a feature of Windows Azure SQL Database which synchronizes data across multiple SQL Server and Windows Azure SQL Database instances without writing any code. How do you get started with using this feature and how does it work?
Solution
SQL Data Sync is a feature of Windows Azure SQL Database built on Microsoft Sync Framework technologies. With the use of this feature, you can either setup single direction or bi-directional data synchronization and data management to allow easy data sharing across Windows Azure SQL Databases across multiple data centers or between on-premises SQL Server databases and Windows Azure SQL databases.
In my last tip, "Understanding SQL Data Sync" I talked in detail about this new capability, in this tip I am going to demonstrate how you get started using it.
In this demonstration, I am going to show how a Windows Azure SQL Database will be synched to a SQL Server database on-premises and vice versa.
Creating a Sync Agent on Azure
The first step in using SQL Data Sync is to create a New Sync Agent (this manages communication between Windows Azure SQL Database and the on-premises SQL Server database without compromising the firewall) on the Windows Azure SQL Database instance.
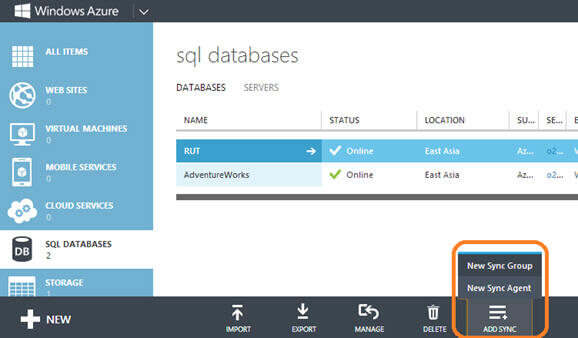
You need to go to the SQL DATABASES tab on the Windows Azure Management Portal, click on ADD SYNC and then click on New Sync Agent as shown below:

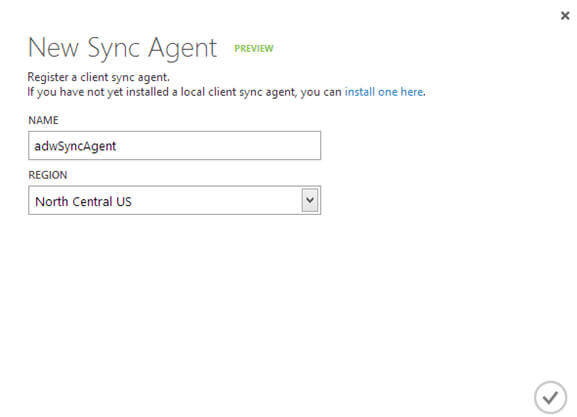
On the New Sync Agent wizard, specify the name of the sync agent and then region where it should be created. For best practices on selecting the right region, please check my earlier tip, "Understanding SQL Data Sync". Also, please note, SQL Data Sync is in Preview mode as of this writing and might have some changes in the final release of the product.
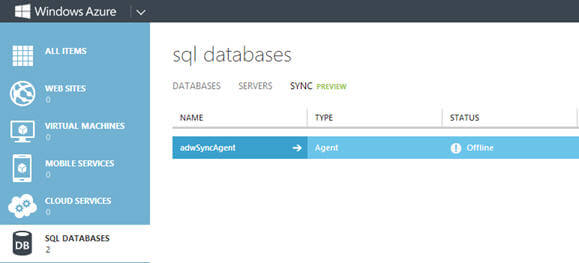
Once the Sync Agent is created, you can see it here on the Sync tab on the top right side of the screen (please note this tab will be available only after you create your first sync agent). As you can see, the status of the created sync agent is offline as we have just created it and not configured it.
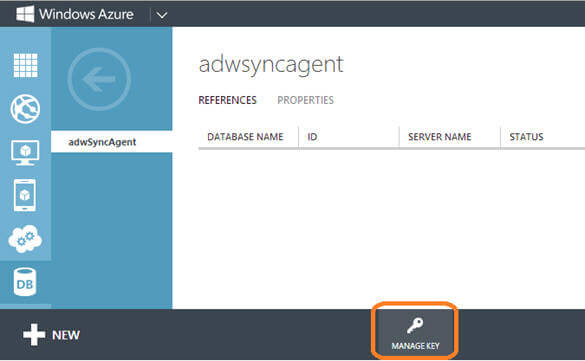
I am going to demonstrate the bi-directional data synchronization between Windows Azure SQL Database and on-premises SQL Server database, so I need to setup the Sync Agent for the on-premises machine as well. But before that, I need to get the Sync Agent access key (which I just created), so that it can be contacted by the Sync Agent of the on-premises machine. To get this key, click on the Sync Agent on Windows Azure Management Portal and then click on MANAGE KEY as shown below:
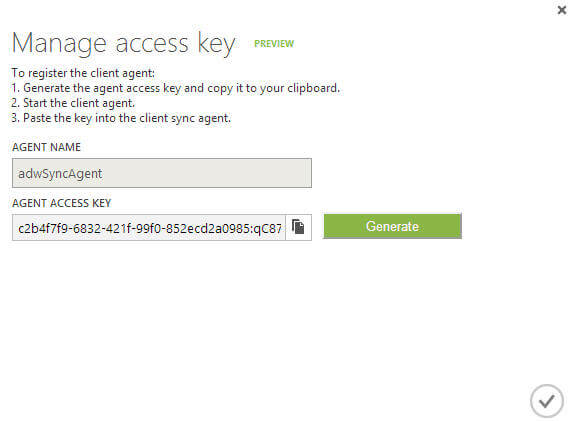
Click on the Generate button on the Manage access key wizard, copy the Agent access key for use in the next section.
Installing and Setting up a Microsoft SQL Data Sync Agent On-Premises
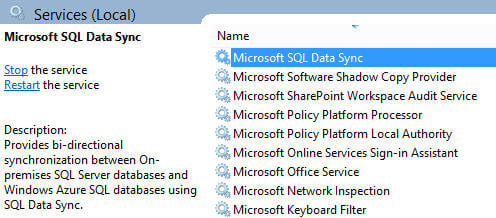
In order to synchronize an on-premises SQL Server Database to a Windows Azure SQL Database or vice versa, you need to install and configure SQL Data Sync Agent on your local machine. You can download it from here for installation and once installed you should see a new Windows service (Microsoft SQL Data Sync) as shown below. Make sure this service is running.
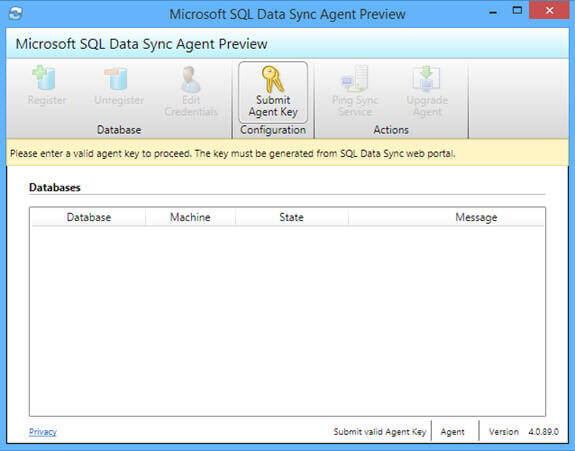
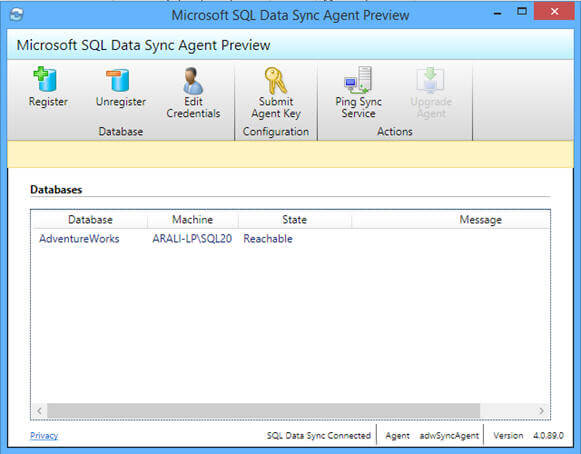
Now go to All Programs and launch the Microsoft SQL Data Sync Agent application which should look like this. Click on the Submit Agent Key as shown below:
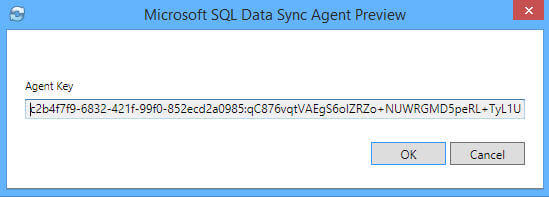
Copy or enter the Agent access key, which we copied in the first section of this tip, and click on OK.
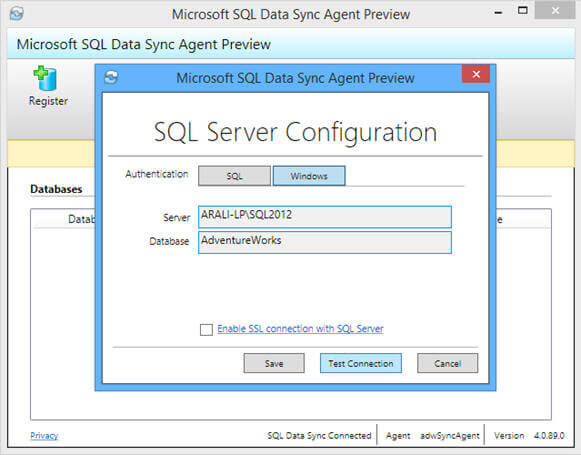
Now you should see the Register icon has become enabled, click on this and specify the connection information to connect to the database from your on-premises SQL Server instance. You can click on the "Test Connection" to validate the information and save it as shown below:
Once you have the on-premises database registered in SQL Data Sync Agent, you can see it here as shown below:
Creating and configuring a Sync Group on Azure
Now you need to create a sync group, which is actually a logical grouping of Windows Azure SQL Databases and databases from the on-premises SQL Server instance (in case you want to sync an on-premises SQL Server database). To do this, go to the SQL DATABASES tab on the Windows Azure Management Portal, click on ADD SYNC and then on New Sync Group as shown below:
On the first screen of the Create Sync Group wizard, specify the name of the sync group and region where you want this sync group to be created. For best practices on selecting the right region, please check my earlier tip, "Understanding SQL Data Sync".

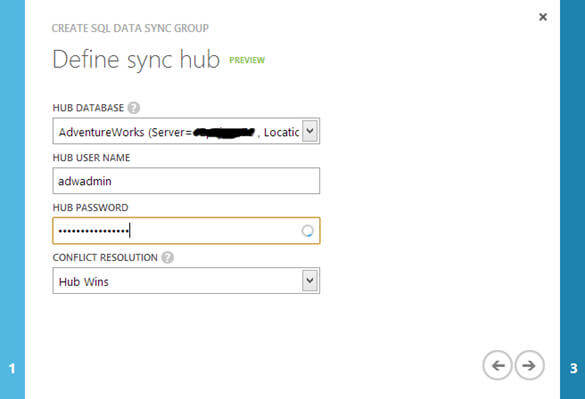
On the second screen of the Create Sync Group wizard, specify one of the databases from the Windows Azure SQL database instance as a hub database for this configuration. You need to specify the right credentials to connect to the specified database and the setting to use when there is conflict. In my case I chose Hub Wins in case of conflicts as shown below:
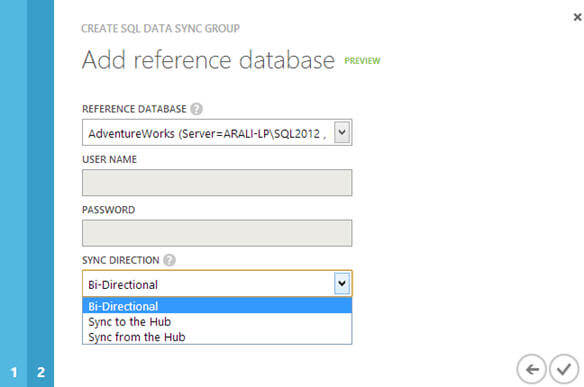
On the last screen of the Create Sync Group wizard, you will notice the on-premises SQL Server database gets listed in the list of reference database (this is because we configured Sync Agent on the local machine using the agent access key of this Sync Agent and registered an on-premises database), choose the database you want to use as a reference database for synchronization; specify the credentials and sync direction as shown below:
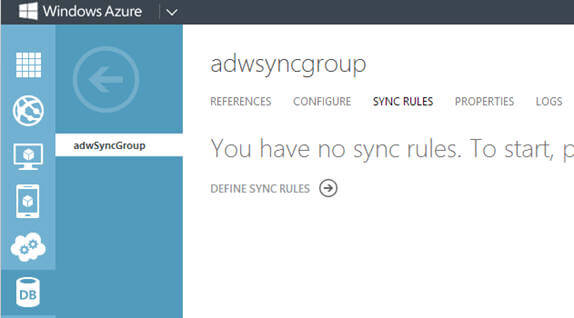
So far we created a sync group which includes databases for synchronization, we still need to specify tables and columns for synchronization. To do that, click on the sync group you created, click on SYNC RULES then click on the DEFINE SYNC RULES link as shown below:
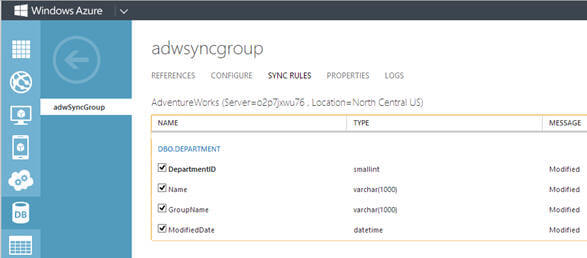
Now specify the tables and columns from each table to be synchronized as shown below and then save it:
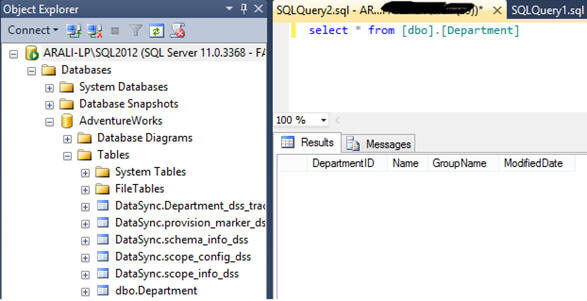
In my case I have a Department table in Windows Azure SQL Database which has data and the same table in my on-premises SQL Server database which does not have data. So what I want to do, is to synchronize from Windows Azure SQL Database to the on-premises SQL Server database:
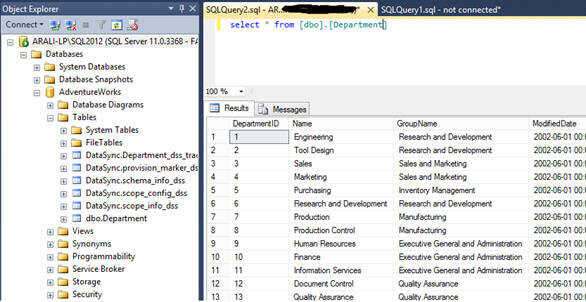
When you kick off data synchronization, you can see data is synchronized to the on-premises SQL Server database as shown below. Also, if you notice there are some objects that get created when we register the database in the sync agent to be used by the sync agent for synchronization.
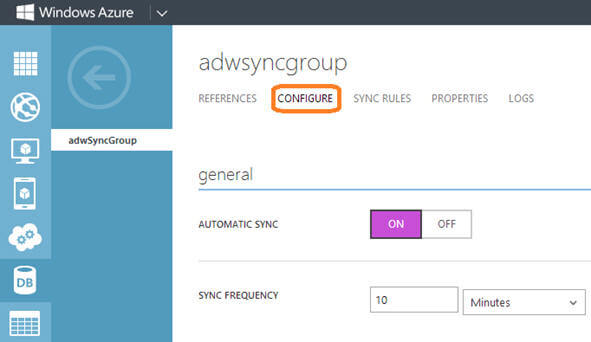
As you might have noticed in the last step, we manually kicked off data synchronization but what if I want to set it up to be automated. To configure automatic synchronization, go to the CONFIGURE tab of the sync group you have created, specify automatic synchronization along with the synchronization frequency. Please refer my last tip, "Understanding SQL Data Sync" on best practices for synchronization and frequency.
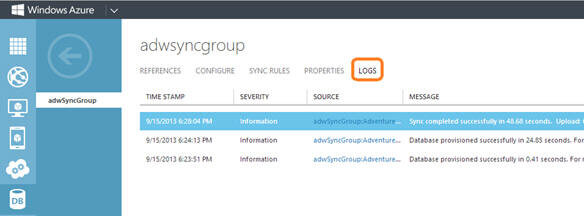
You can go to the LOGS tab of the sync group to analyze the logs generated by the sync service during data synchronization as shown below.
Please note, SQL Data Sync is in Preview as of writing this tip and features might change in the final release of the SQL Data Sync product; for the latest updates on SQL Data Sync refer to this msdn documentation.
Next Steps
- Review How To: Install a SQL Data Sync (Preview) Client Agent on msdn.
- Review How To: Create your Sync Group (SDS) on msdn.
- Review SQL Data Sync (Preview) documentation on msdn.
- Review Windows Azure SQL Database related tips.
- Review my previous tips.


About the author
 Arshad Ali is a SQL and BI Developer focusing on Data Warehousing projects for Microsoft.
This author pledges the content of this article is based on professional experience and not AI generated.
View all my tips
