By: Manvendra Singh | Comments | Related: > Database Mirroring
Problem
Suppose you have a new requirement to change the failover mode from manual to automatic for a SQL Server Database Mirroring configuration. As we know the witness server is mandatory for automatic failover, so we need to add a witness server to the database mirroring configuration to achieve automatic failover. Follow this step by step process of this tip if you need to add witness server to an existing SQL Server database mirroring configuration.
Solution
Database mirroring is a solution for increasing the availability of SQL Server databases. The operating modes for database mirroring are high-safety mode and high-performance mode. High-safety mode supports synchronous operation whereas high-performance mode runs asynchronously. Manual failover can be used in both operating modes. But if you need automatic failover then high-safety mode will be required by adding a third server instance, known as a witness. Unlike the two partners, the witness does not serve the database. The witness supports automatic failover by verifying whether the principal server is up and functioning. The mirror server initiates automatic failover only if the mirror and the witness remain connected to each other after both have been disconnected from the principal server.
Microsoft recommends running the same version of SQL Server on both partners and the witness server which are going to be added to an existing mirroring configuration. This is also a recommendation that the witness should reside on a separate computer from either of the partners. The service account used by the witness must be in the same domain as the service accounts used by the principal and mirror server instances.
Adding a Witness to an existing SQL Server Database Mirroring Configuration
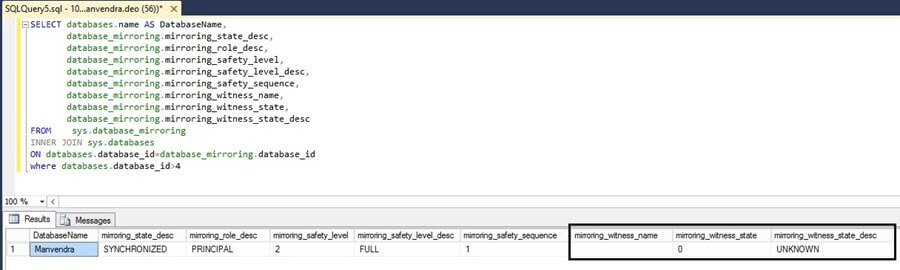
Step 1: First we should check whether database mirroring is working correctly and if the databases are in-sync. We can also see whether the witness server is added to this mirroring configuration. Run the below command to get the status of the witness server as well as the status of the database mirroring configuration.
SELECT databases.name AS DatabaseName,
       database_mirroring.mirroring_state_desc,
       database_mirroring.mirroring_role_desc,
       database_mirroring.mirroring_safety_level,
       database_mirroring.mirroring_safety_level_desc,
       database_mirroring.mirroring_safety_sequence,
    database_mirroring.mirroring_witness_name,
    database_mirroring.mirroring_witness_state,
    database_mirroring.mirroring_witness_state_desc
FROM sys.database_mirroring
INNER JOIN sys.databases
ON databases.database_id=database_mirroring.database_id
where databases.database_id>4
You can see the mirroring state is good, but the witness is not configured for this configuration because the "mirroring_witness_name" has no value and its state description shows "UNKNOWN". Here is a link to learn more about sys.database_mirroring.
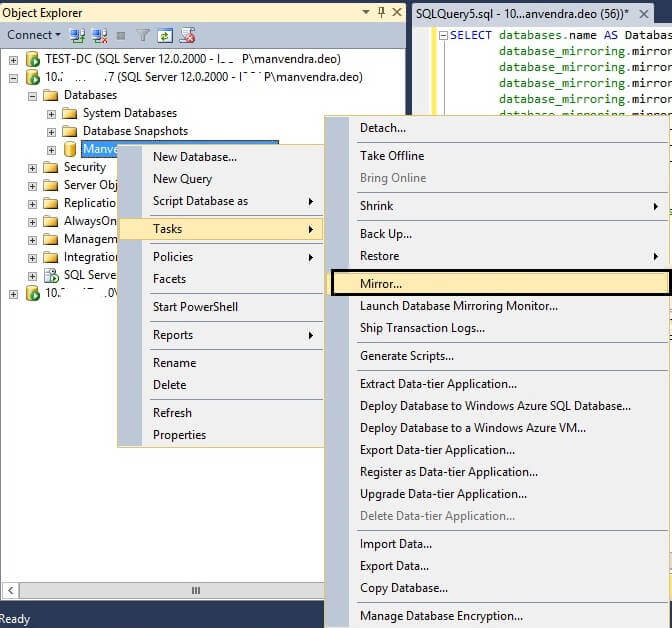
Step 2: Now we have to add a witness server to this configuration to allow for automatic failover. To do so, right click on the mirrored database where you want to add a witness and choose "Tasks" and click on "Mirror..." as shown in the below screenshot.
Step 3: The Database Properties window for your target database (Manvendra) will open with the "Mirroring" tab selected. You can see the operating mode is "High safety without automatic failover" in the below screenshot, because the witness is not configured.
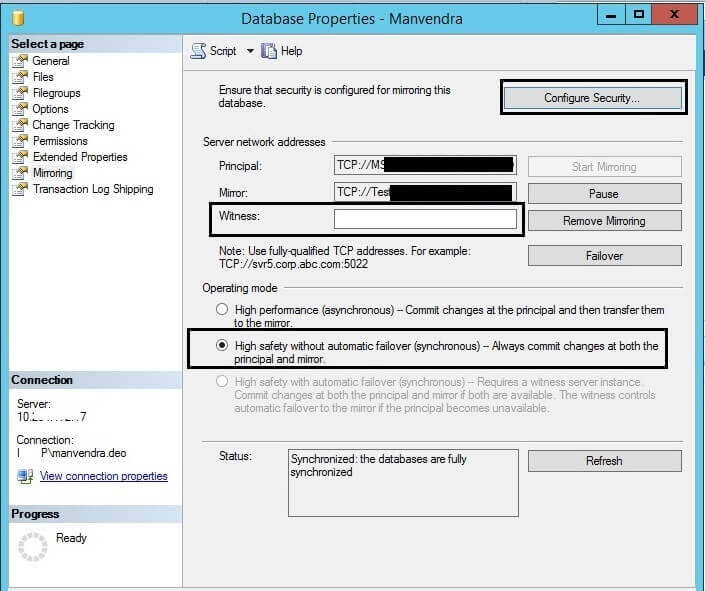
Step 4: Click on the "Configure Security..." button as shown in the above screenshot. Once you will click this option, the welcome page of the "Configure Database Mirroring Security Wizard" will appear on the screen as per the below screenshot.
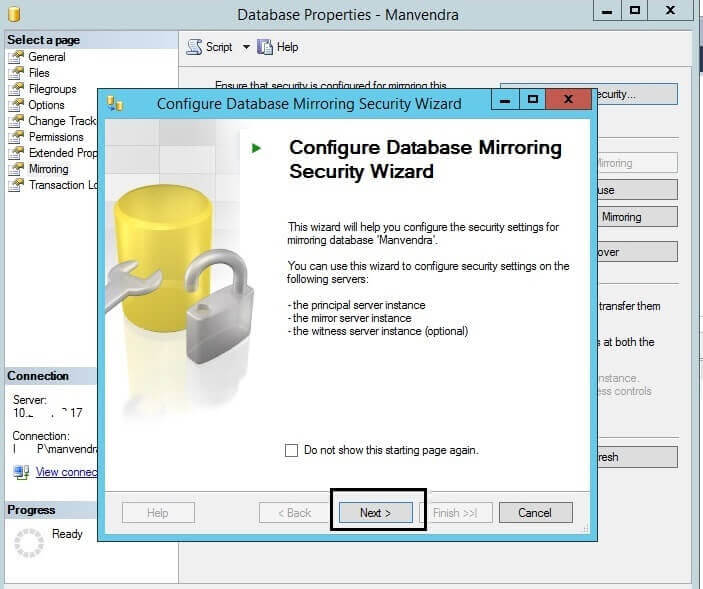
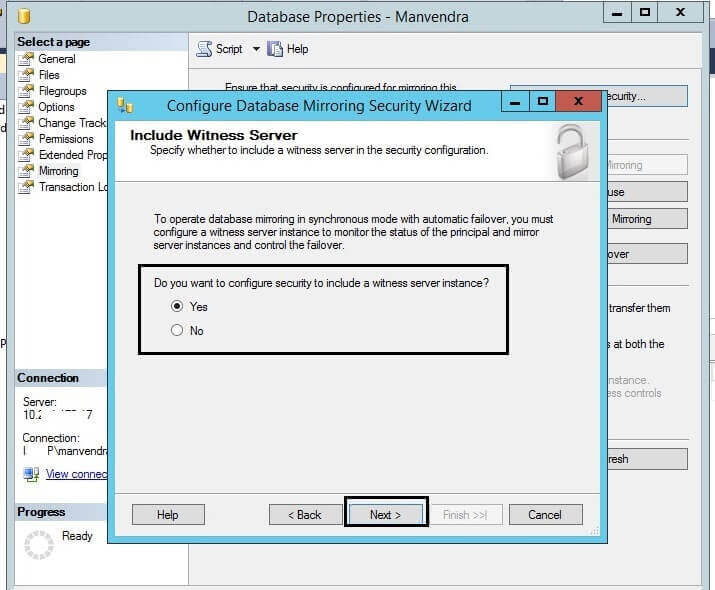
Step 5: Click on the "Next" button to proceed with the wizard. The next window will ask you whether to include the witness server in the security configuration or not. Choose "Yes" to include a witness server to the security configuration as per the below screenshot and then click on the "Next" button.
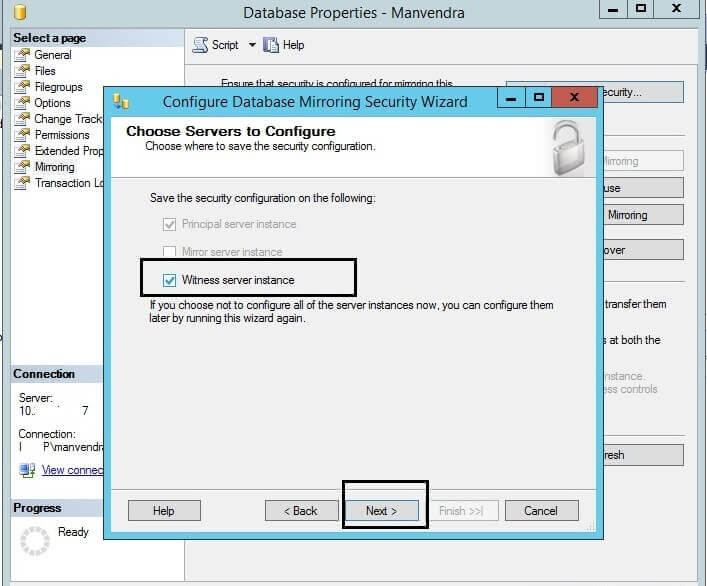
The next page of the Wizard will determine the "Witness server instance" option. Select this option and click on the "Next" button.
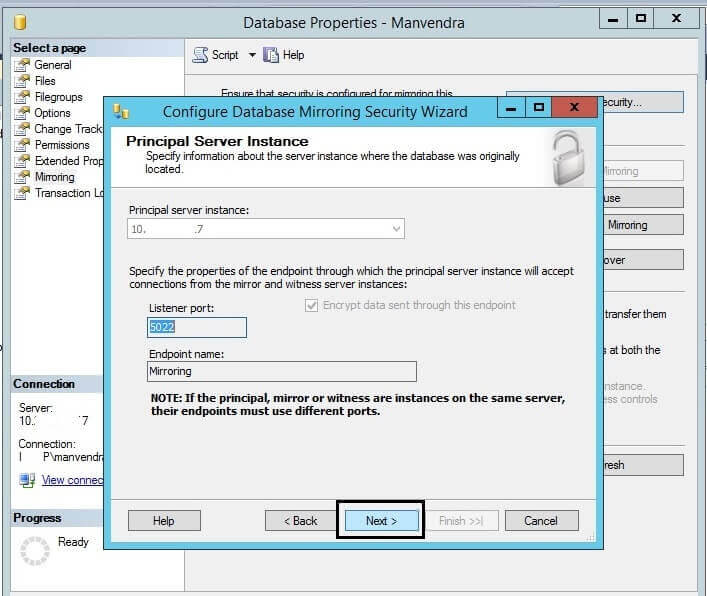
Step 6: Once you click on the "Next" button the "Principal Server Instance" wizard will load with all the options grayed out, because Database Mirroring is already configured. The Principal server instance and listener port will load in their respective section. Click on the "Next" button to proceed.
Step 7: The next page will configure the witness server instance. This is the interface where you need to enter the details about your witness server instance. The wizard informs you that the principal and witness server cannot be on the same server, so note this point.
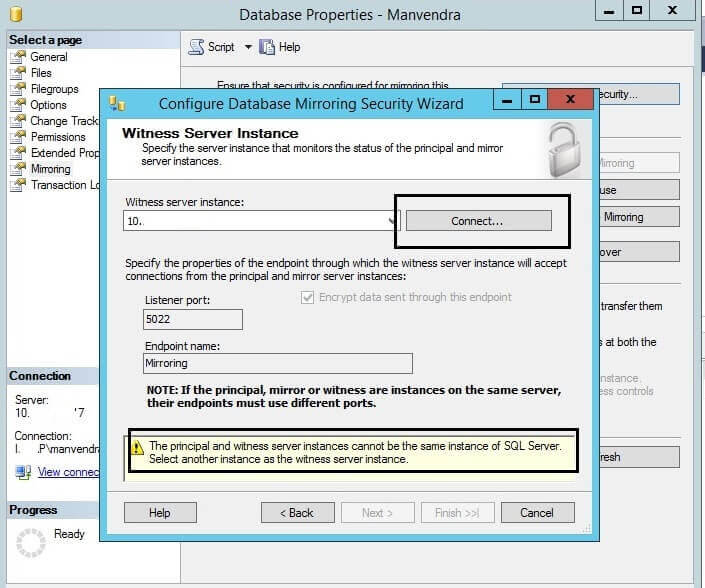
Click on the "Connect..." button to enter the witness server instance details to make a connection to the witness server instance. See the below screenshot of this step.
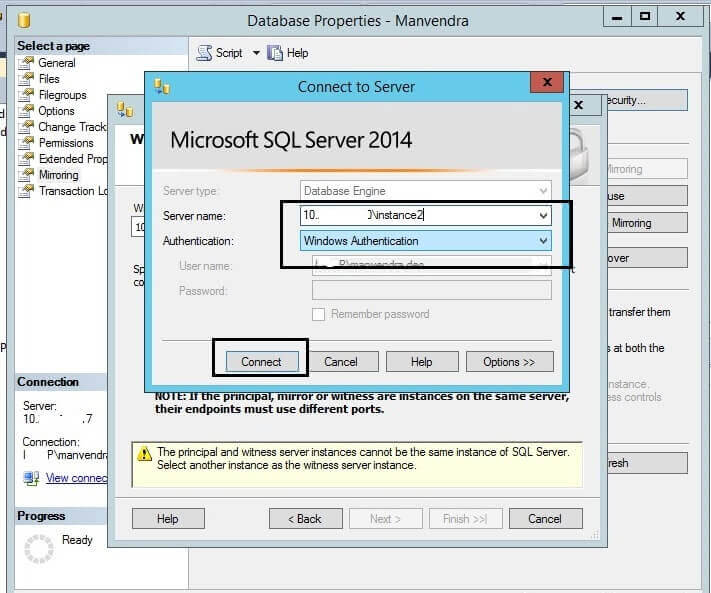
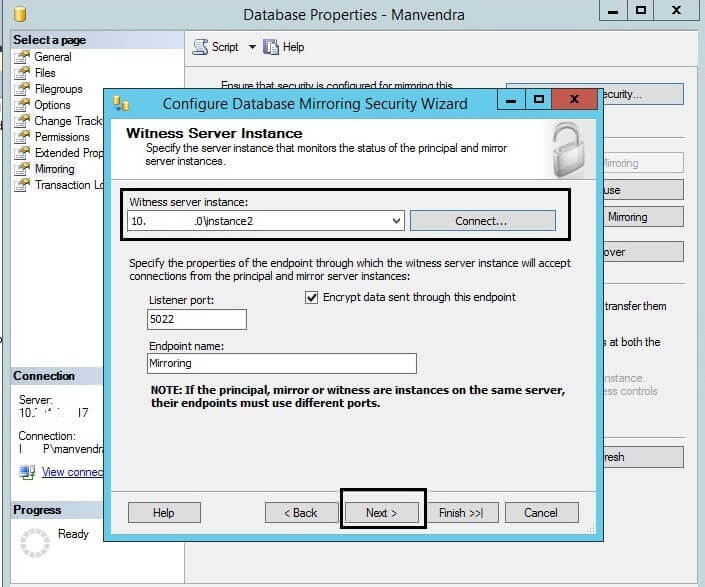
Once you enter the details, click on the "Connect" button as highlighted in the above screenshot. Once a connection is established, the listener port and database mirroring endpoint of the witness server instance are displayed on the Witness Server Instance dialog box. Click "Next" to proceed.
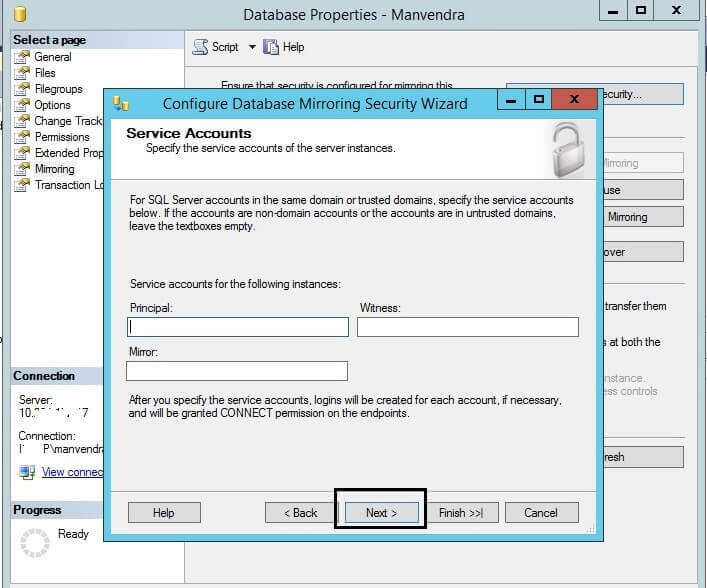
Step 8: In the next screen, it is time to configure the service accounts. The service accounts dialog box contains fields for the domain service accounts of the principal, mirror, and witness server instances. If the server instances all use the same service account, leave the fields blank. If the witness server instance uses a different service account from either of the partners, fill in the Principal, Mirror, and Witness fields with the account name: DOMAINNAME\username. Make sure to add the SQL Server service account as a login with connect permission to the SQL Server instance. I have used the same service accounts for all instances, so I will leave this section blank.
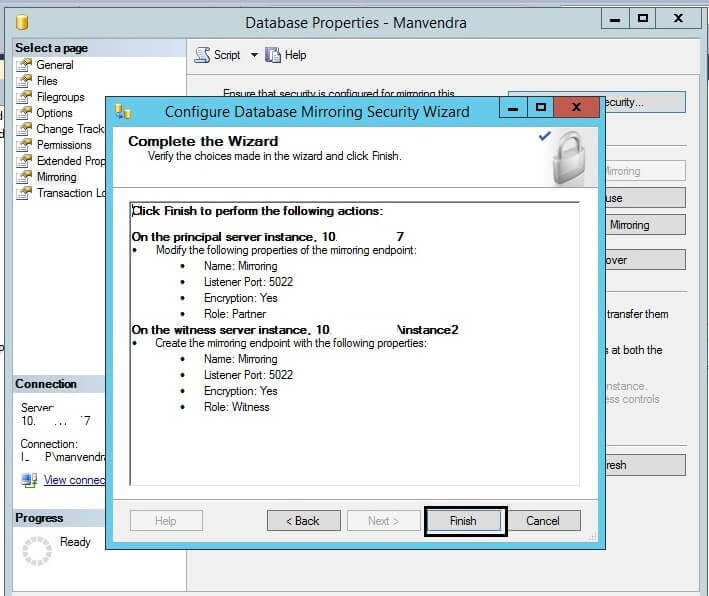
Step 9: The next step in the wizard is to verify all the details which you want to change or keep for this configuration. Verify the details and click on the "Finish" button as shown in the below screenshot.
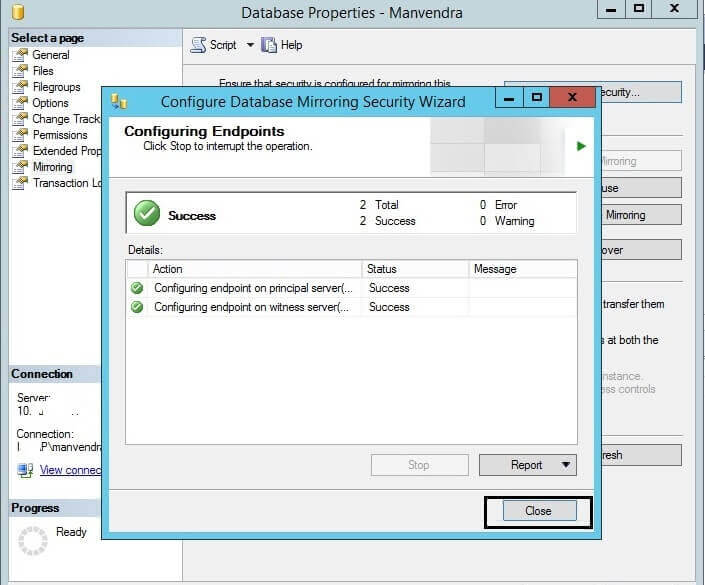
Once you click on the "Finish" button, the "Configuring Endpoints" window will load with the status of the witness configuration for both the principal and witness server instances as shown in the below screenshot. Now click on the "Close" button to complete the process.
Validate SQL Server Database Mirroring Witness Configuration
Once you click on the "Close" button of the above screenshot, the wizard returns you to the Database Properties dialog box where the server network address of the witness now appears in the Witness field as we can see in the below screenshot.
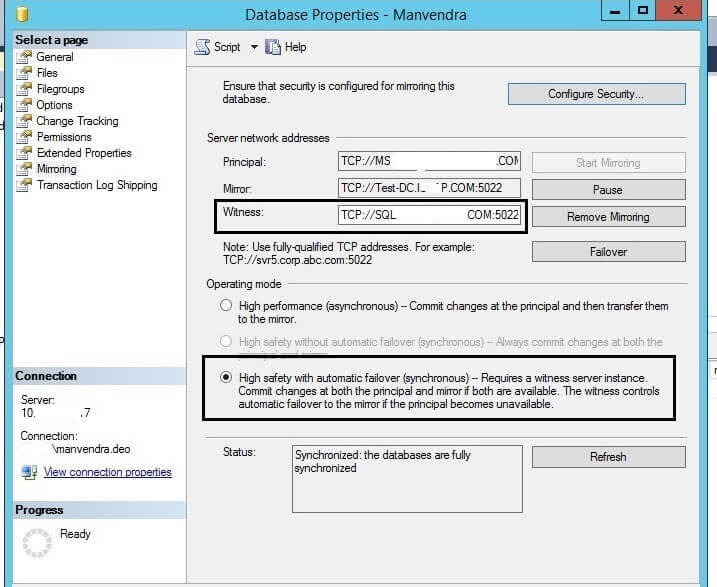
We can see one more thing here by comparing the above screenshot with the one shown in step 3. Here you can see the operating mode of this configuration has been changed from "High safety without automatic failover" to "High safety with automatic failover". Therefore we can validate that the witness server has been added to the existing SQL Server Database Mirroring configuration.
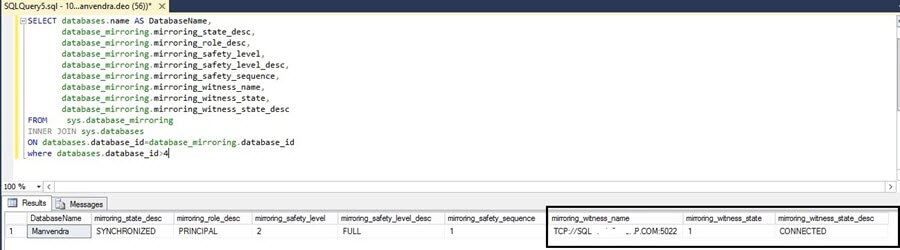
We can also validate the witness configuration by running the same command in step 1. We can see the "mirroring_witness_name" along with some other witness related columns that now have valid values which we just entered during witness configuration. Now the mirroring witness state should have a value of "Connected" as shown below.
Next Steps
- Keep in mind changes to the SQL Server Database Mirroring configuration can be made if required.
- Be sure to test any change to your SQL Server Database Mirroring configuration in a lower life cycle environment prior to production.
- Explore more knowledge on:


About the author
 Manvendra Singh has over 5 years of experience with SQL Server and has focused on Database Mirroring, Replication, Log Shipping, etc.
This author pledges the content of this article is based on professional experience and not AI generated.
View all my tips
