By: Manvendra Singh | Comments | Related: > SQL Server on Linux
Problem
I explained how to install SQL Server vNext on Ubuntu in my last tip and in this tip we will look at how to install SQL Server tools on the Ubuntu server.
Solution
As I discussed in my last couple of articles, SQL Server vNext does not install sqlcmd and BCP utility with the SQL Server installation on Red Hat Linux and Ubuntu servers, but we need the sqlcmd utility to make a database connection from the Linux based servers. We will walk through the steps to install these tools on the Ubuntu server.
SQL Server Tools Installation on Ubuntu Server
Before going forward, you need to have an Ubuntu server with SQL Server vNext installed on that machine. I followed the step by step method of Microsoft's online documentation to understand this installation. Let's start the SQL Server tools installation on Ubuntu.
Step 1: First connect to the target Ubuntu server on which you have installed SQL Server vNext. You can directly connect to the server by logging in to the server to do this exercise or you can use PuTTY, a third party tool, to make a server connection. I used PuTTY to login on this server. I launched PuTTY and entered the IP address of the Ubuntu server and then clicked the open button. A black screen known as the PuTTY terminal will appear asking you to enter the login information to connect to the target server. I entered the login name as manvendra followed by its password to make a successful connection as shown below.
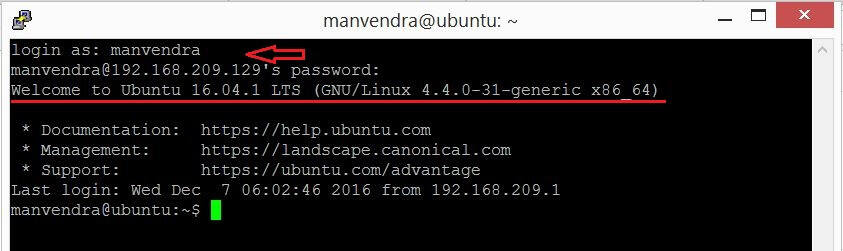
Once you would have established a successful connection, you can see the version of the Ubuntu server as shown in the above screenshot.
Step 2: You can see that I made a successful connection to this Ubuntu server where I installed SQL Server in my last tip. Now let's check and verify the SQL Server installation on this machine. Run the below command to check the mssql-server service.
#check the status of mssql-server service.
systemctl status mssql-server
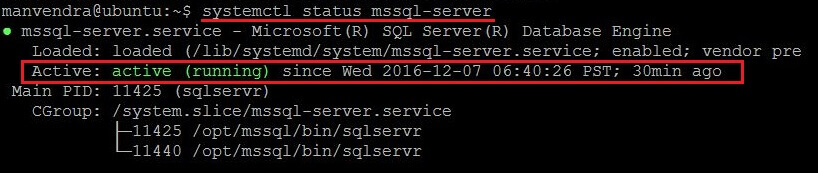
We can see the service status is showing enabled and active (running) which is highlighted in green. This means SQL Server is installed and running fine on this server.
Step 3: Next we will install the MSSQL tools on this server. The first step of installation is to import the public repository GPG keys as per Microsoft's documentation, so we will run the below command to import the GPG keys. GPG keys also provide cryptographic privacy and authentication.
#import the public repository GPG keys
curl https://packages.microsoft.com/keys/microsoft.asc | sudo apt-key add -
You can see that command has been executed successfully in the below screenshot.

Step 4: Now we will run a curl command to register the Microsoft Ubuntu repository. This repository will be used to install the MSSQL tools on this machine. The downloaded file will be saved in location /etc/apt/sources.list.d/ as mentioned in the command line.
#Download Ubuntu installation configuration file.
curl https://packages.microsoft.com/config/ubuntu/16.04/prod.list | sudo tee /etc/apt/sources.list.d/msprod.list
We can see the progress, time and details of the downloaded configuration file in the below picture.

Now we can check the location /etc/apt/sources.list.d/ to verify whether the above file is saved in this location. Run ls -lrt command to display all of the files present in that folder.
#list all files/folders inside the /etc/apt/sources.list.d/ folder.
ls -lrt /etc/apt/sources.list.d/
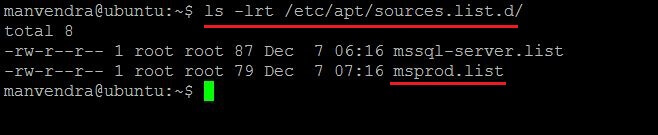
You can see our target file msprod.list file is there in this location in the above picture.
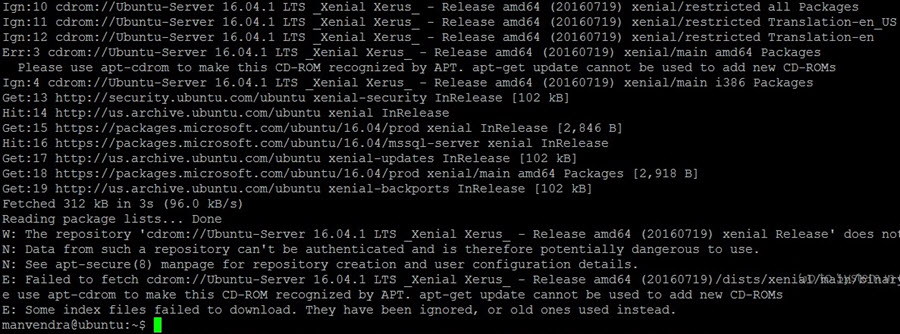
Step 5: Now our next step is to install MSSQL tools on this box with the help of this package. But before going ahead, we will run the below command to update the sources list on this Ubuntu server.
#update the sources list
sudo apt-get update

Once you execute this command, a series of updates will be displayed on your screen. This execution will also display the size of updates for any respective packages.
Step 6: Once the above command executes successfully we will run the below command to install the MSSQL tools on this machine.
#Install MSSQL tools
sudo apt-get install mssql-tools
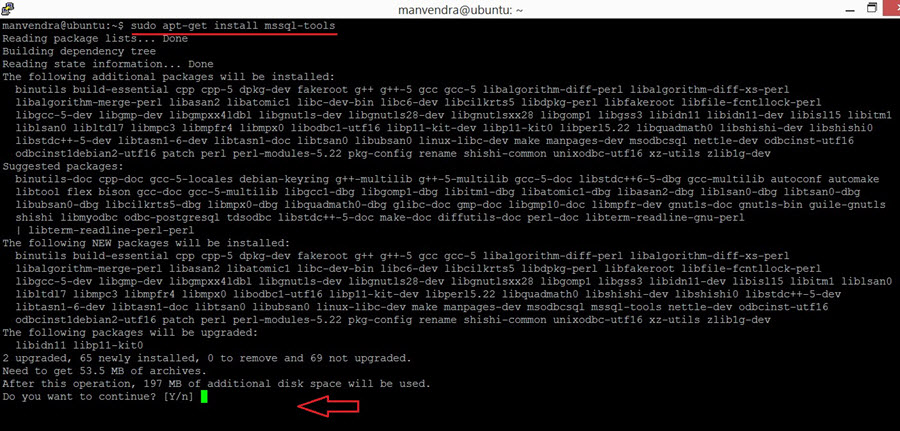
Once execution starts, it will read the package list followed by checking dependencies. It will display the name of the target packages which will be installed along with this installation. Now it will ask you to choose yes or no to proceed with the installation. Type y to choose yes. Once you press enter after typing y, the download process for all required packages will start as shown in the below picture.

You can see the progress for a particular package which is in process as shown below.

Every package will ask you to enter YES to accept the license terms during installation as shown in the below screenshot. You will get the below screen to accept the license terms. Choose YES and press enter to proceed.
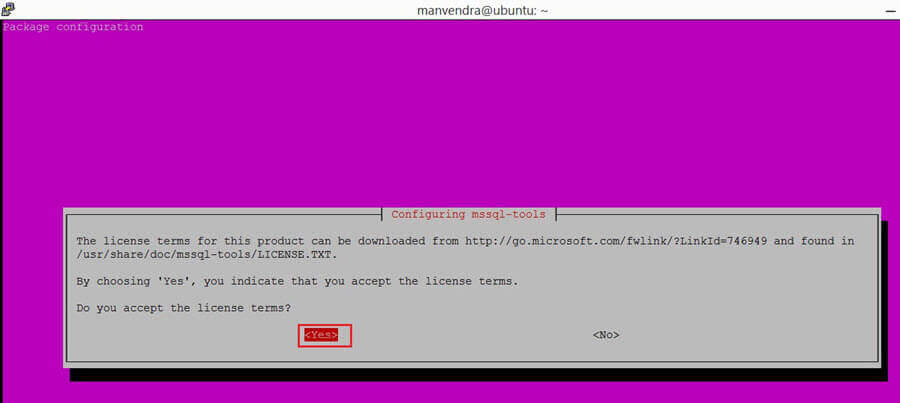
Once you press enter, again execution will be resumed in the PuTTY terminal.

The next window is to accept the license terms for the msodbcsql package similar to the above screenshot.
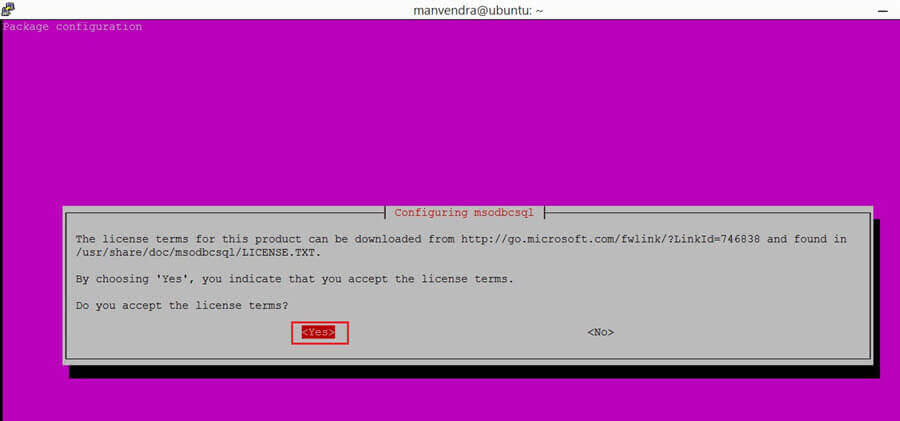
Again processing, things will resume in the PuTTY terminal as shown in the below picture.
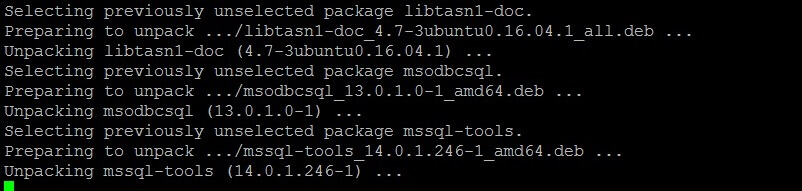
Let them proceed as shown in the above picture. When done, execution will stop and the MSSQL tools will be installed on your Ubuntu server.

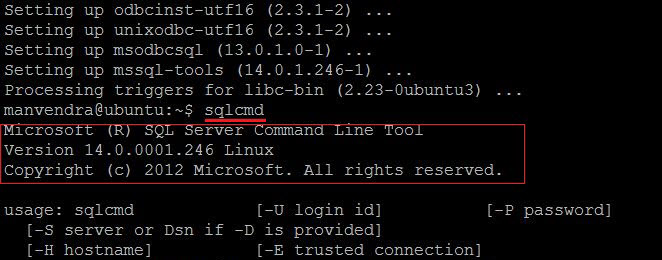
Step 7: Now we will check and verify whether sqlcmd utility is installed on this machine. Type sqlcmd and press enter to check the details of this utility.
#check sqlcmd utility.
sqlcmd
We can see that sqlcmd is recognized by Ubuntu and the output of this command is shows that sqlcmd is installed and ready to use.
Next we will validate sqlcmd by making a database connection from Ubuntu server on the PuTTY terminal. Run the below command to connect to database engine from the Ubuntu server.
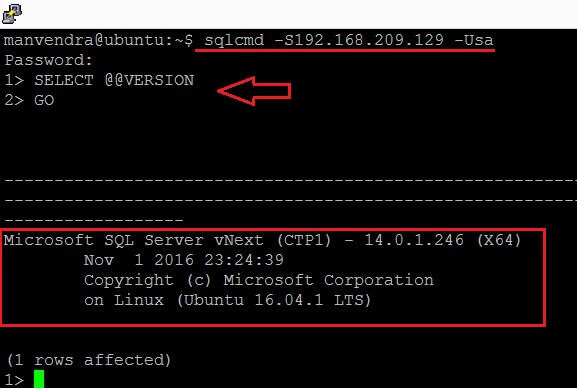
#Run sqlcmd to make database connection.
#You need to pass server name/IP address with -S, user name with -U. Enter the password of sa account once you get the Password prompt.
sqlcmd -S192.168.209.129 -Usa
Once you execute the above command, a SQL Server prompt will appear with cursor 1>. I executed "SELECT @@VERSION", the T-SQL command to check the installed version of SQL Server.
#I executed SELECT @@VERSION to get version details of SQL Server. I got below output:
Microsoft SQL Server vNext (CTP1) - 14.0.1.246 (X64)
 Nov 1 2016 23:24:39
 Copyright (c) Microsoft Corporation
 on Linux (Ubuntu 16.04.1 LTS)
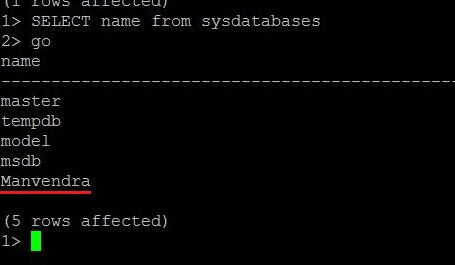
Step 8: I created a new database "Manvendra" in my last tip to validate the SQL Server installation on the Ubuntu server, so I will check the database names in the sysdatabases system table by running the following query.
#Check database name in sysdatabases system table.
#Run this command on sqlcmd prompt only.
SELECT name from sysdatabases
GO
We can see we have 5 databases, including database "Manvendra".
Step 9: Now we will create a new database from this prompt on the Ubuntu server and validate it by running the below SQL command.
#Create a new db named MSSQLTIPS and Check database name in sysdatabases system table.
#Run this command on sqlcmd prompt only.
CREATE DATABASE MSSQLTIPS
GO
SELECT name from sysdatabases
GO
We can see the commands executed successfully and a new database MSSQLTIPS is showing along with the other databases.

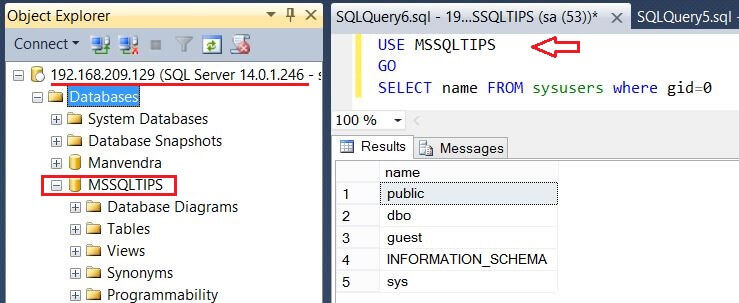
Now we will validate whether this newly created database is accessible through SSMS on a Windows box. Launch SQL Server Management Studio on your Windows machine and connect to the Ubuntu server using your IP address. You can use the sa login and password to make a database connection. Once you make a database connection, run the below command to check the user details for database MSSQLTIPS.
#check the details of users in MSSQLTIPS db in SSMS.
USE MSSQLTIPS
GO
SELECT name from sysusers where gid=0
GO
Now we have validated that we can connect to the SQL Server vNext database engine using sqlcmd on the Ubuntu server.
Next Steps
- Go ahead and make database connections on the Ubuntu server and get more exposure on this new version of SQL Server.
- Stay tuned for my next tips based on SQL Server on Linux.
- Explore more knowledge with these SQL Server Database Administration Tips


About the author
 Manvendra Singh has over 5 years of experience with SQL Server and has focused on Database Mirroring, Replication, Log Shipping, etc.
This author pledges the content of this article is based on professional experience and not AI generated.
View all my tips
