By: Manvendra Singh | Comments | Related: > Availability Groups
Problem
In the last tip, I explained how to remove Availability Group databases from an AlwaysON Availability Group (AOAG) configuration. In this tip, I will explain how to add a secondary database to an existing AOAG using both SQL Server Management Studio (SSMS) and T-SQL commands.Solution
In this tip, I will explain how to join a secondary database to existing AOAG configuration. There are multiple reasons that you need to join a secondary database to an AOAG configuration. If your AOAG configuration failed to join the database to AOAG on the secondary replica, then you can fix the issue that was causing the database not to join the AOAG followed by adding the database to the AOAG configuration.
Availability Groups support a set of read-write primary databases and one to eight sets of corresponding secondary databases. Here we have an AOAG configuration between two replicas with three availability databases. One database is added to the AOAG, but two databases are not part of the AOAG indicated by the red and yellow warning sign on the secondary replica. Here we will add both databases to the AOAG configuration on the secondary replica in order for them to have a green status indicating a healthy state.
I am assuming you have prepared the secondary database with a full backup and a transaction log backup of the primary database and tried to add it to the AOAG. If you have not done that you can run a full backup and immediately issue a transaction log backup then restore these backups on a secondary replica with the NORECOVERY option.
NOTE: BE SURE TO TEST THIS SOLUTION IN LOWER LIFE CYCLE FIRST. DO NOT MAKE ANY CHANGES IN PRODUCTION WITHOUT PROPER TESTING IN LOWER LIFE CYCLE ENVIRNOMENTS.
Join Secondary Database to AlwaysON Availability Group using SQL Server Management Studio
Step 1: Our very first step is to check and validate the existing AlwaysON Availability Group configuration by launching the SSMS dashboard report. Right click on the Availability Group name and choose "Show Dashboard" to display the AlwaysON dashboard report for this configuration.
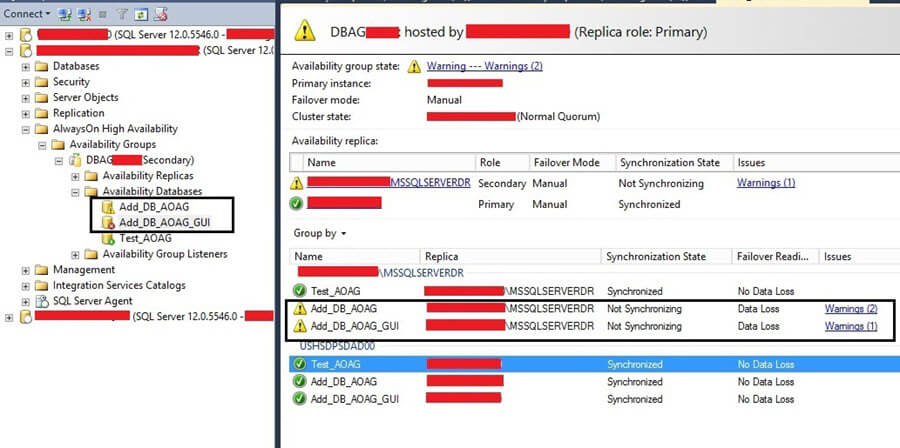
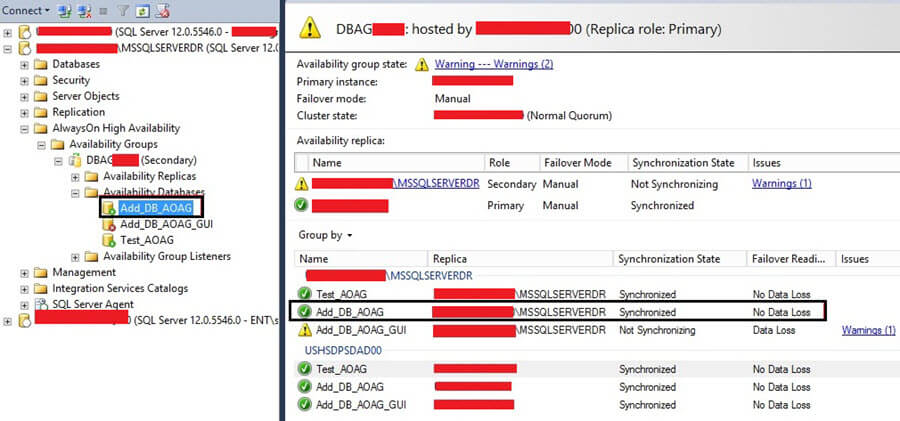
The dashboard report for this Availability Group will be displayed in the right pane of SSMS once you click on the "Show Dashboard" option as shown in the above screenshot. We can see two databases are displaying a warning sign on the secondary replica. The synchronization status is shown as "Not Synchronizing". Now we need to add these databases to the AOAG configuration because they haven't been added properly to this configuration.
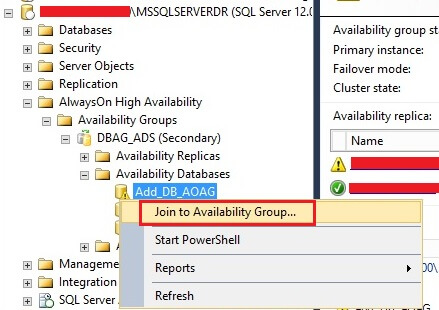
Step 2: In SSMS, now expand the folder "AlwaysON High Availability" on the Secondary Replica followed by expanding folder "Availability Databases" under the AOAG name. You can see the status of these two databases "Add_DB_AOAG" and "Add_DB_AOAG_GUI" in the left pane of the above screenshot. We will add the "Add_DB_AOAG" database using SSMS and "Add_DB_AOAG_GUI" using T-SQL in the next part of the tip. Now right click on the database "Add_DB_AOAG" which you want to join to the existing AOAG configuration and click on "Join to Availability Group..." option as shown in the below screenshot.
Step 3: Once you click on "Join to Availability Group..." another window named "Join Database to Availability Group 'DBAG'" will appear. You can see the name of the identified secondary database that needs to be added to the AOAG configuration.
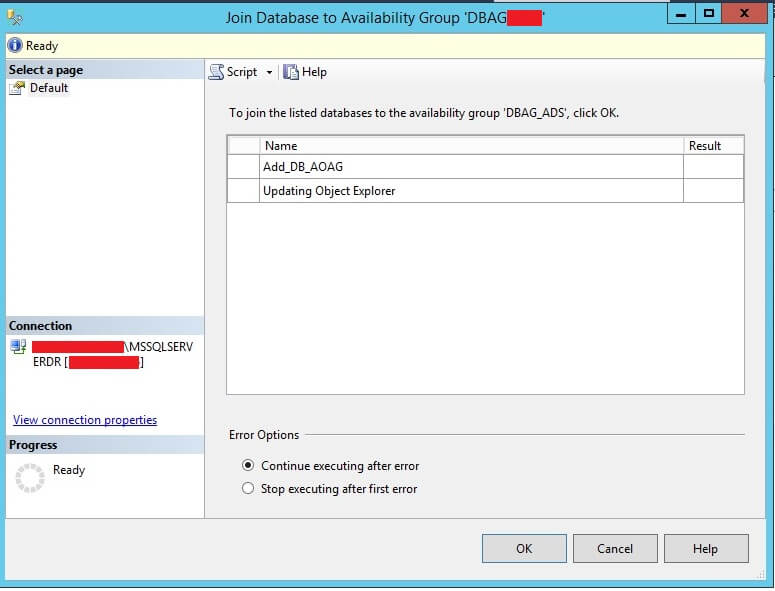
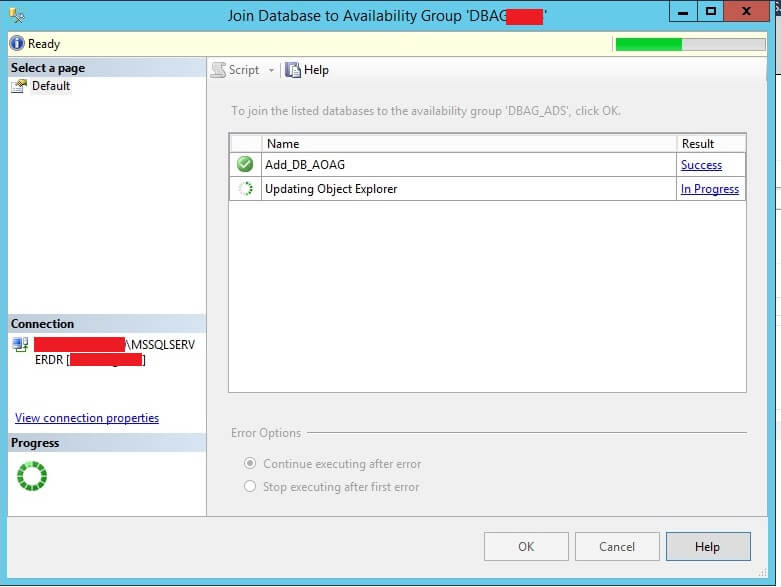
Step 4: Check the details on this page and click the "OK" button to proceed. Once you click OK it will indicate it is processing for few seconds and then this window will disappear from the screen if this database has been joined the AOAG. The screen will not disappear if there are any issues during this process.
Step 5: Now launch the dashboard report again to validate the changes. We can see that the "Add_DB_AOAG" database is now showing a green icon and in a healthy state in the dashboard report and the AOAG has two databases now.
Join Secondary Database to AlwaysON Availability Group using T-SQL
We have added a secondary database to the AOAG in the above section using SSMS above. Now we will add another database "Add_DB_AOAG_GUI" to the same AOAG. Sometimes you need to run T-SQL commands, so this technique is valuable to know.
Step 1: You can see the status of this database is showing a warning and the status is not synchronizing in the above dashboard screenshot.
Step 2: Now connect to the secondary replica of the AlwaysON Availability Group configuration and launch a new query window. Run the below command to join your secondary database to the existing AOAG configuration.
--Join Secondary DB to AOAG
ALTER DATABASE DBNAME SET HADR AVAILABILITY GROUP = AOAG_Name ;
GO
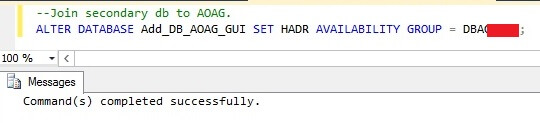
Once the command executes successfully you are done with the secondary database addition to the AOAG.
Step 3: Now we will check and validate whether this secondary database has been added to this AG or not. Launch the SSMS dashboard report of this Availability Group to check these details.
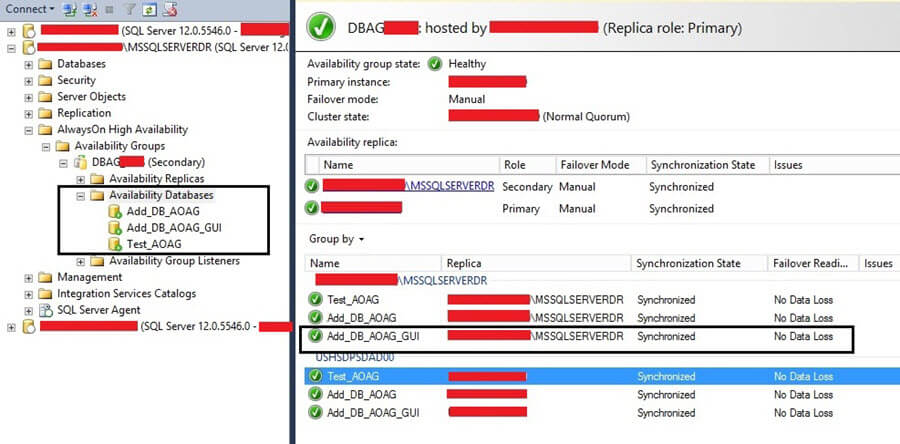
WWe can see all databases are part of the AOAG configuration now and show a green status. Now your AOAG configuration is healthy and databases are fully synchronized.
Next Steps
- Go and check error logs, alerts on all replicas for any unusual events/logs.
- Explore more knowledge on SQL Server Database Administration Tips.


About the author
 Manvendra Singh has over 5 years of experience with SQL Server and has focused on Database Mirroring, Replication, Log Shipping, etc.
This author pledges the content of this article is based on professional experience and not AI generated.
View all my tips
