By: Nisarg Upadhyay | Comments | Related: More > Integration Services Excel
Problem
I have a SQL Server table and I need to export the data to different Excel worksheets based on some conditions of the data. How can this be done with SQL Server Integration Services (SSIS)?
Solution
In this article, I explain how can we divide and export data from a SQL Server table into multiple worksheets for an Excel file by using a SSIS Conditional Split transformation.
What is a Conditional Split Transformation in SSIS
The Conditional Split transformation can route data rows to different outputs depending on the content of the data. The implementation of the Conditional Split transformation is like a CASE decision structure in a programming language. The transformation evaluates expressions, and based on the results, directs the data row to the specified output. This transformation also provides a default output, so that if a row matches no expression it is directed to the default output. This article explains how the Conditional Split Transformation works.
Moreover, I am going to show how to use a conditional split transformation to divide data retrieved from a table in a SQL Server database and save it to multiple worksheets of an Excel file.
For this demo, I will use ‘WideWorldImportors’ database. I will export data from the [Application].[Countries] table to Excel. I have created an Excel sheet named ‘WorldWide_Importors.xls’ with two worksheets named ‘High Population’ and ‘Low Population’. Data will be divided based on the value of total population column. I have generated an average population by using the below query.
select AVG(LatestRecordedPopulation) from Application.Countries
If the value of LatestRecordedPopulation is less than the average of the LatestRecordedPopulation than it will be stored in the ‘Less Population’ worksheet and if the value of LatestRecordedPopulation is greater than the average of LatestRecordedPopulation then it will be stored in the ‘High Population’ worksheet.
In this demo, I will perform the below tasks.
- Create an SSIS package and create OLEDB as well as Excel connections for the SSIS Package.
- Create a data flow task, which has:
- SQL Database as a source
- Conditional Split transformation to split the data
- Excel file as a destination
- Test the SSIS package.
Create SSIS package and Connection Manager
For this demo, I am using SQL Server Data Tools 2015.
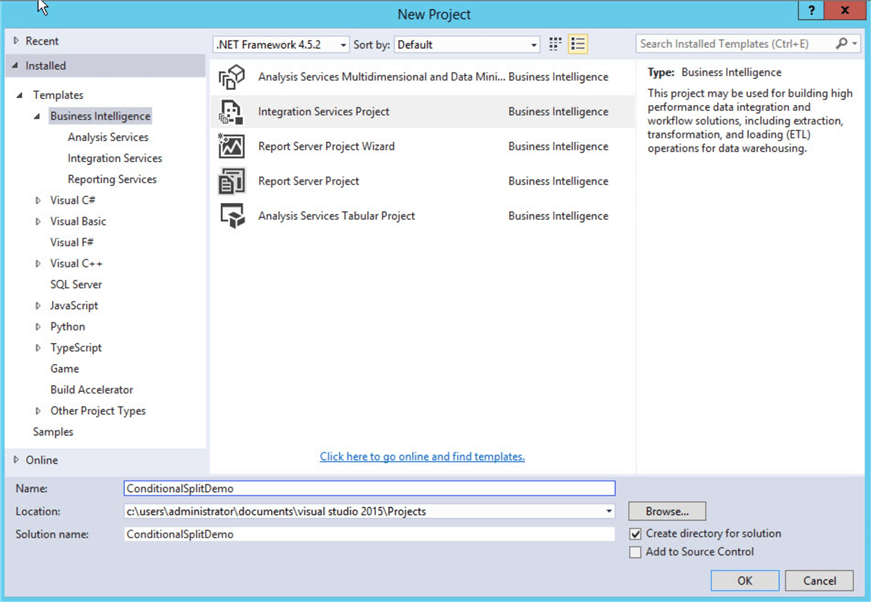
First, I will create a new Integration Services project named “ConditionalSplitDemo”.
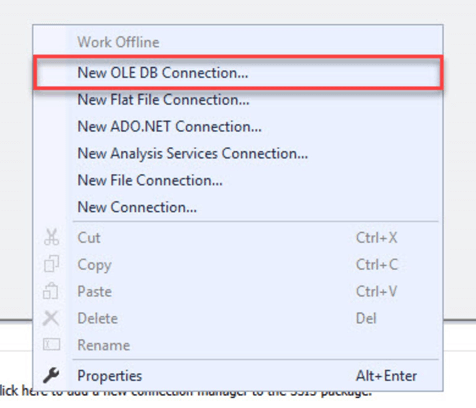
After creating the SSIS project, I am going to create SQL Connection Manager and Excel Connection Manager. To do this, right click the Connection Managers window and then click New OLEDB Connection as shown below.
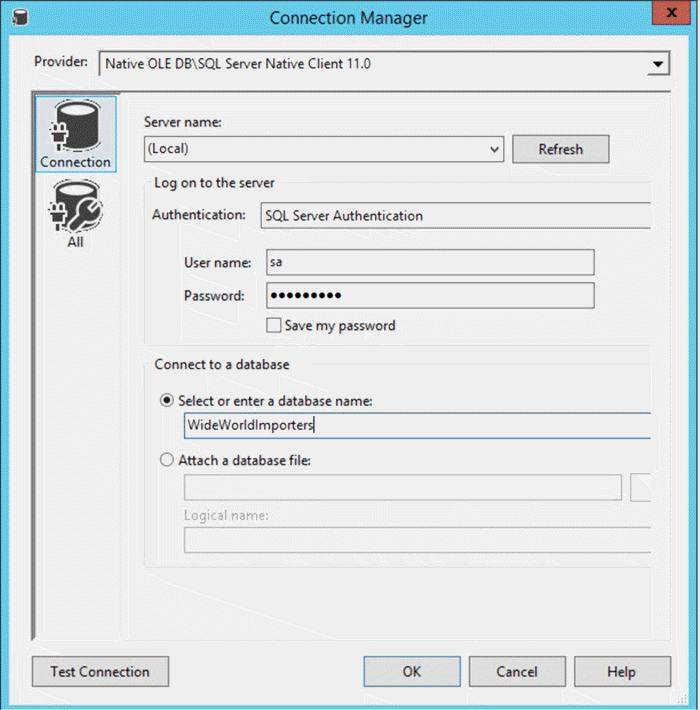
After clicking on it, the Configure Connection manager dialogue box will appear. In the Server Name, select the name of the SQL Server instance that hosts the database which contains the data you want to use. Then configure the appropriate authentication type. Finally, in the connect to a database drop down, select the database which you want to use. In this demo, I am connecting to SQL instance which is installed on my local machine, so the Server Name is “Local” (you can use hostname OR IP address). Using Windows Authentication as my authentication type and connecting to the “WideWorldImportors” database, as shown below.
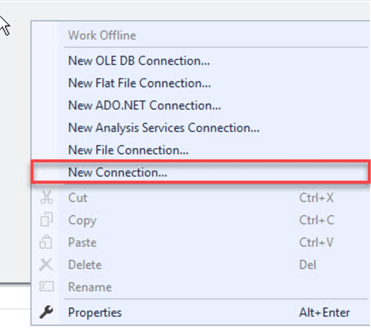
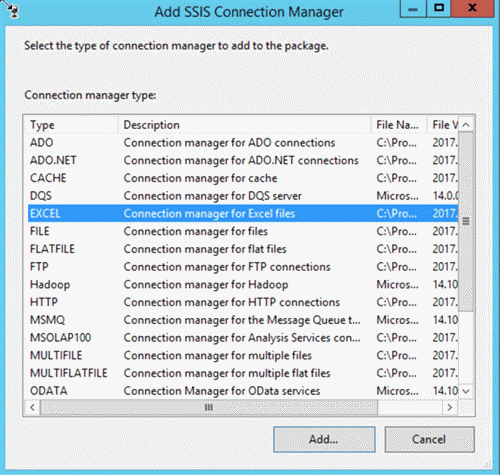
Now, as a destination, we are going to use an Excel file, so you must create an Excel connection manager. For that, right click on connection manager and select New Connection as shown in the below image.
A dialog box with all connection managers will open as shown in the below image. Select Excel Connection Manager and click Add.
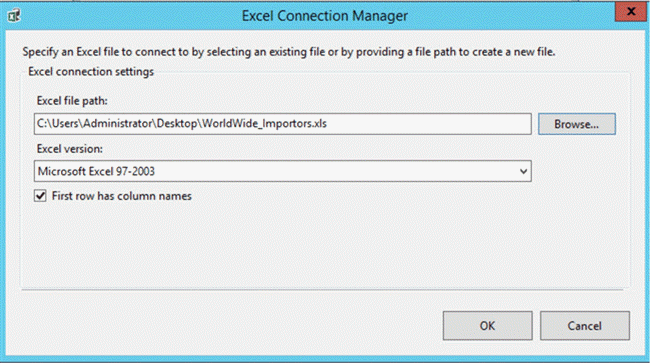
After adding the Excel Connection Manager, a dialog box will open. In that you should provide the path of Excel file where you want to save the data. I already created an Excel file “WorldWide_Importors.xls” on my desktop which I am going to use for this demo.
Configure SSIS Data Flow Task
Configure OLEDB Connection
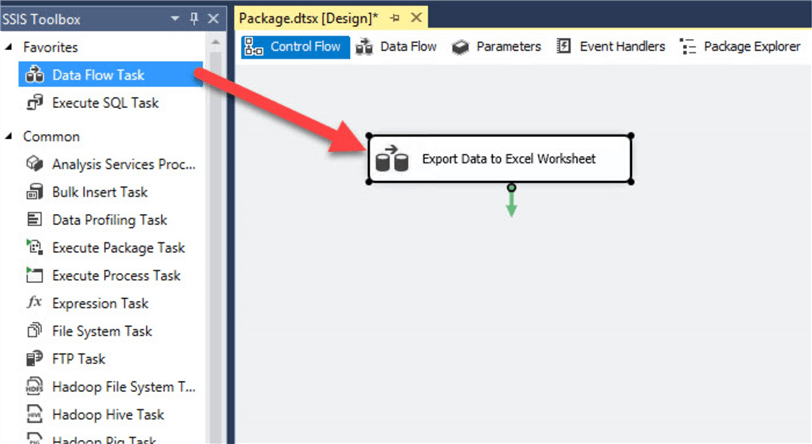
As I have created the Connection Managers in the SSIS Package, we can setup our Data Flow to retrieve data from the [Application].[Countries] table and divide it into multiple sets and store it into different worksheets. To do that, we should add a Data Flow task in our Control Flow. Drag the Data Flow Task from Favorites to the Control Flow and rename it to “Export Data to Excel Worksheet”, as shown in the below image.
After you have added the Data Flow task, you should configure the OLEDB Source. To do that double click the component to open the OLE DB Source Editor. As we have already created an OLE DB connection manager, it will be the default value for the OLE DB Connection Manager drop down list. We are going to use SQL Command to access the data in the table, so select SQL Command and write the below query in the SQL Command Text box as shown in the below image.
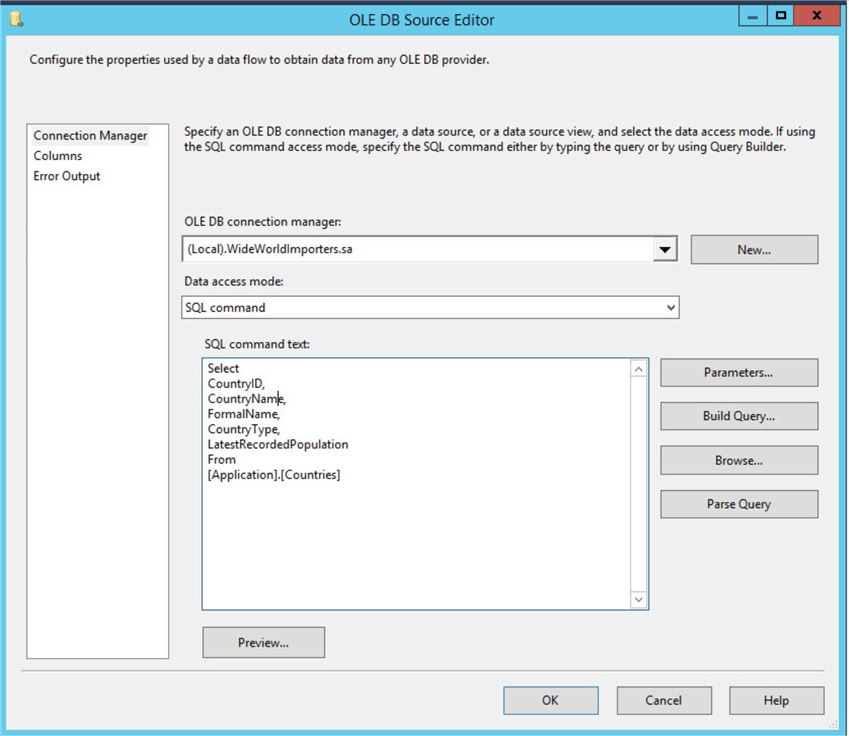
The query we will use is:
select CountryID, CountryName, FormalName, CountryType, LatestRecordedPopulation
from [Application].[Countries]
Configure Conditional Split
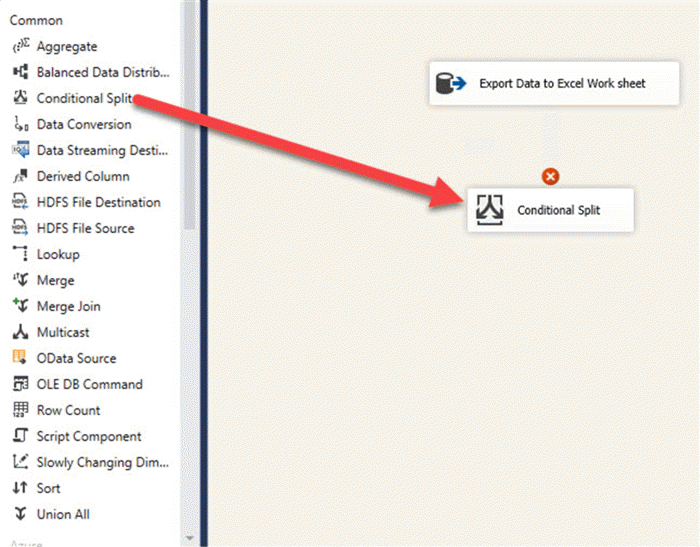
Now we will add the Conditional Split transformation to the Data Flow. To do so, drag the Conditional Split from the Common section as shown in the below image.
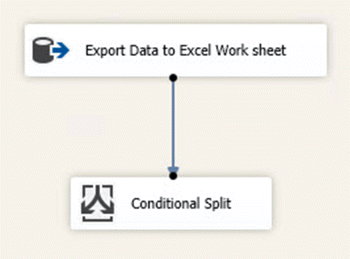
Now we need to connect OLEDB source to the Conditional Split transformation. Click on the blue arrow at the bottom of ‘Export Data to Excel Work Sheet’ and drag it to the Conditional Split transformation as shown below.
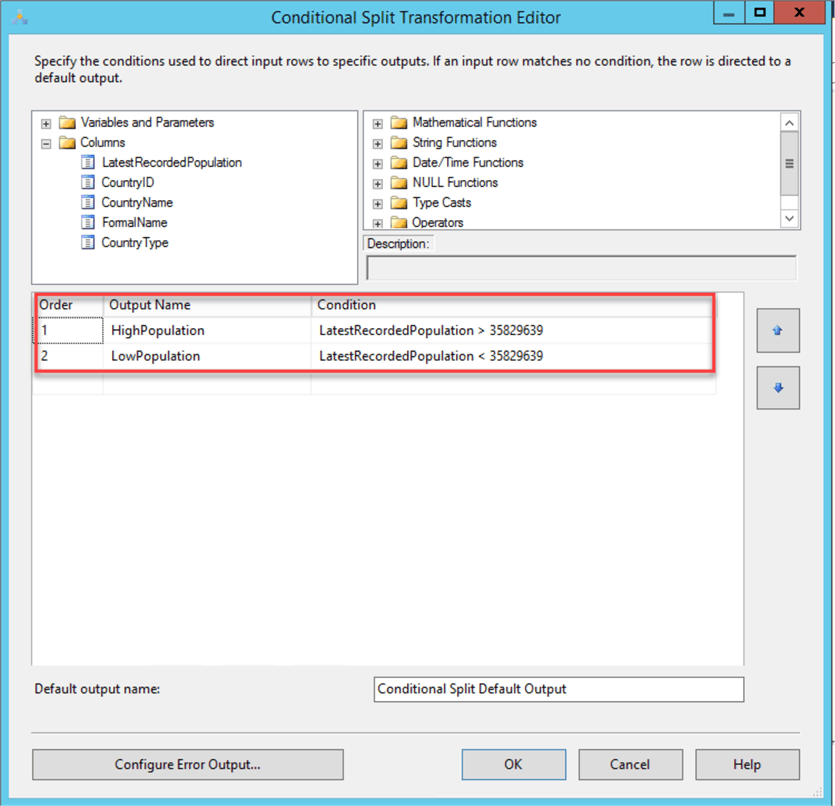
Now I will configure the Conditional Split transformation. As I mentioned previously, I will divide data from the [Application].[Countries] table based on the average value of ‘LatestRecordedPopulation’ column and store them in different worksheets. To do this, double-click on Conditional Split transformation and a dialogue box will open as shown below.
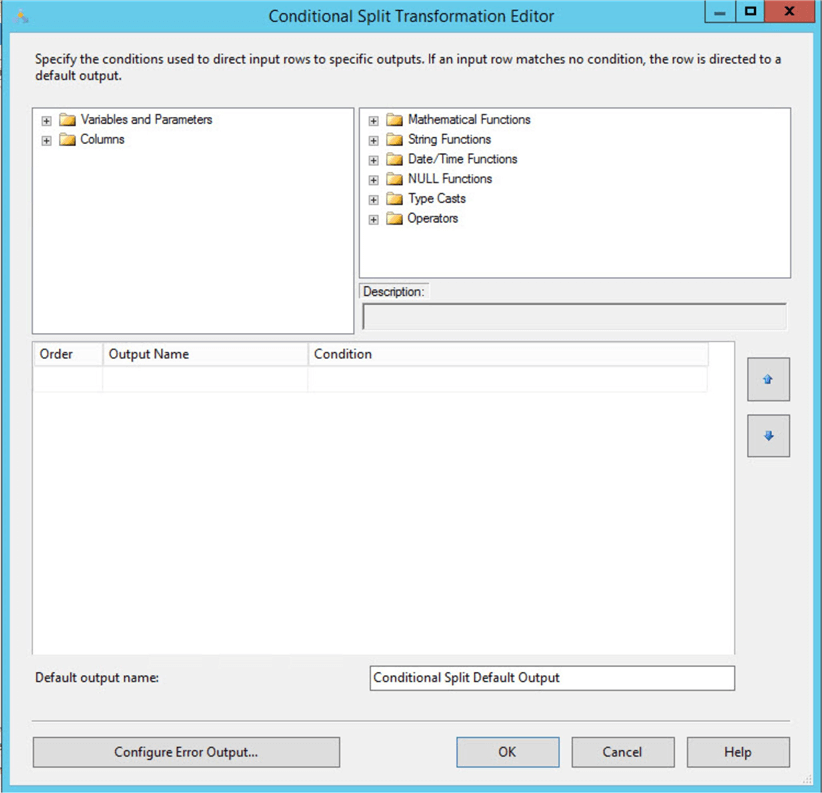
The Conditional Split transformation editor will provide the below functionality to define how to split the data.
- Columns and variables
- Functions
- Conditions
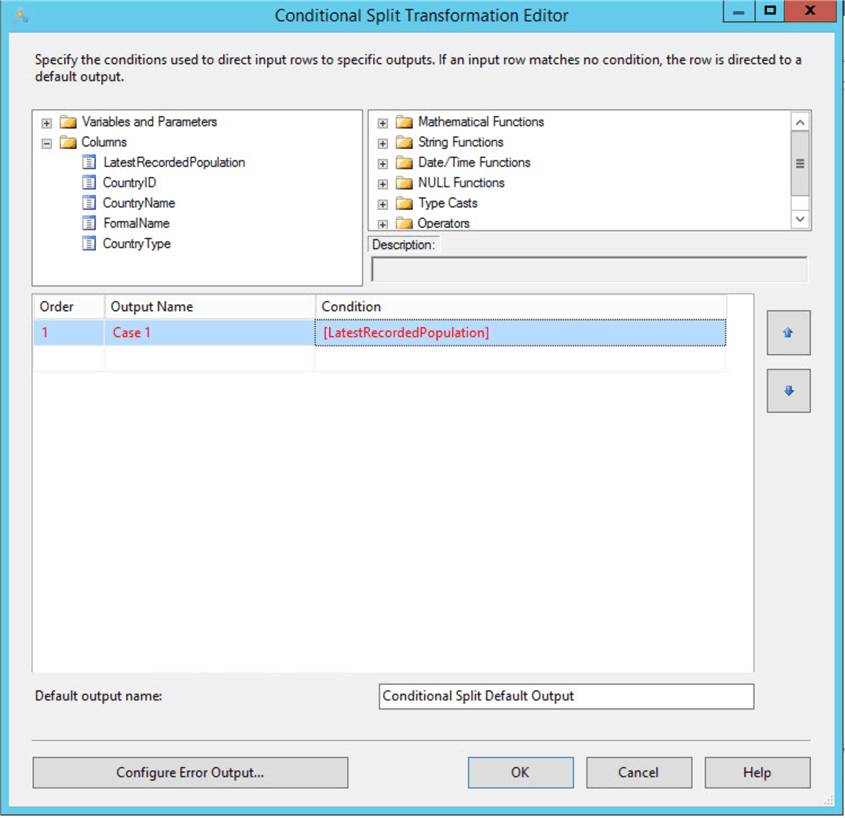
For this example, we’ll define our condition based on the ‘LatestRecordedPopulation’ column. So first expand the Columns node and drag the ‘LatestRecordedPopulation’ column and drop it in the bottom section. The column text will remain red until you define the condition. Please refer to the below image.
As I mentioned at the beginning of the article, if ‘latestrecordedpopulation’ column is greater than the average of ‘Latestrecordedpopulation’ column which is 35829639, than it will be considered as High Population else it will be considered as low population. Based on that condition, we are going to add this logic into the Conditional Split transformation as shown below.
Configure Excel Destination
Now that we have split the data flow into multiple path, we are going to add a destination for each path. In the beginning we configured the Excel destination and we are going to export the data to multiple Excel worksheets, so we should create two Excel destinations. Now we will drag and drop two Destination Assistants as shown below.
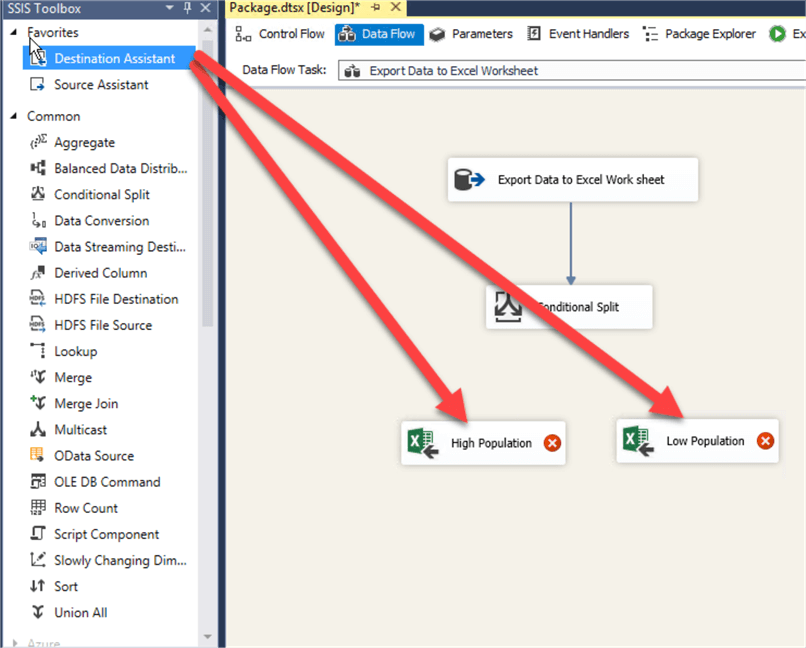
Now I am going to configure the data path. To do that drag the blue data path arrow from the Conditional Split transformation to the High Population Excel destination. When you connect the data path to the Excel destination, a dialog box will appear, which will let us choose the output we want to direct toward the selected destination. The dialog box will look like the below image.
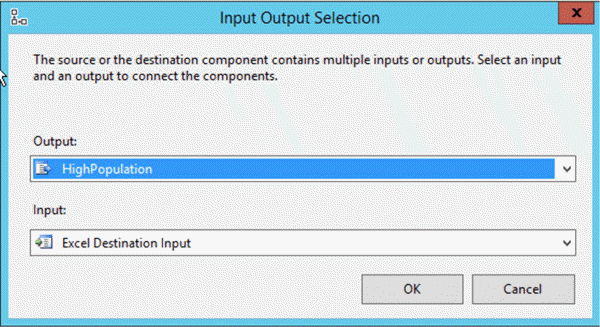
The dialog box includes all outputs in the drop down list, which is available from the Conditional Split transformation. In this case the drop down list will include two options.
- HighPopulation
- LowPopulation
For the first Excel destination, right click the High Population Excel destination and click on edit. A dialog box will open as shown in the below image.
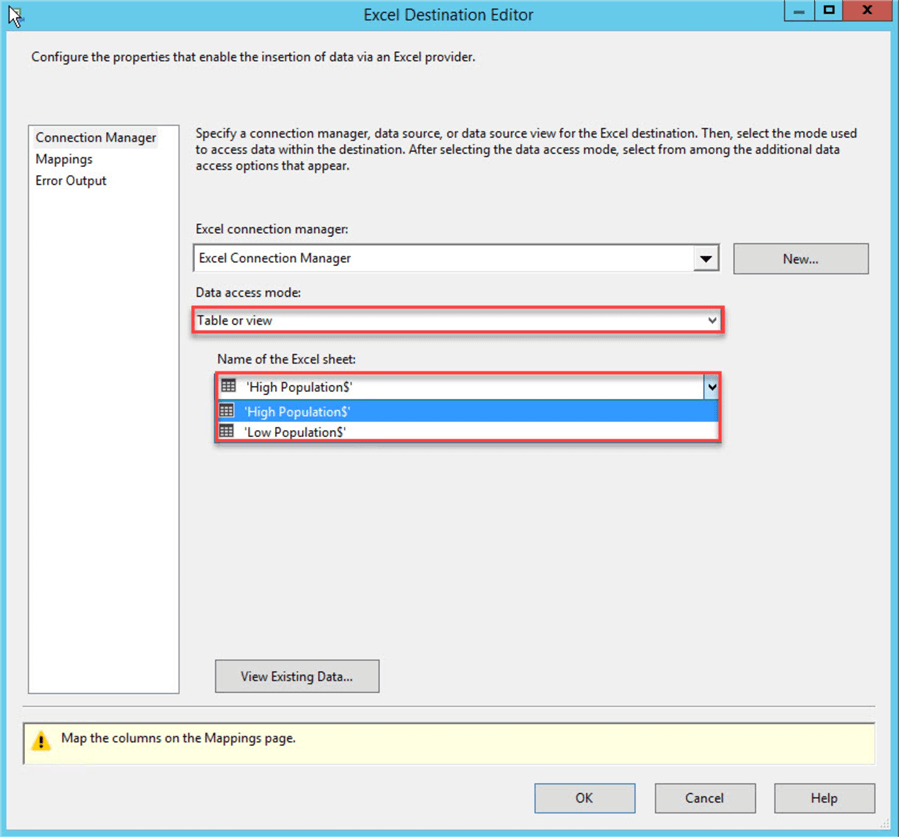
We have already configured the Excel connection manager, so the default Excel connection manager will be selected. The data access mode will be table or view. As I mentioned in the beginning of the article, the Excel file has two worksheets named High Population and Low Population. I will select ‘HighPopulation$’ for the Name of Excel sheet.
Now, I will map the table columns with the Excel worksheet column. To do that click on Mappings on the left side of the Excel Destination Editor as shown below.
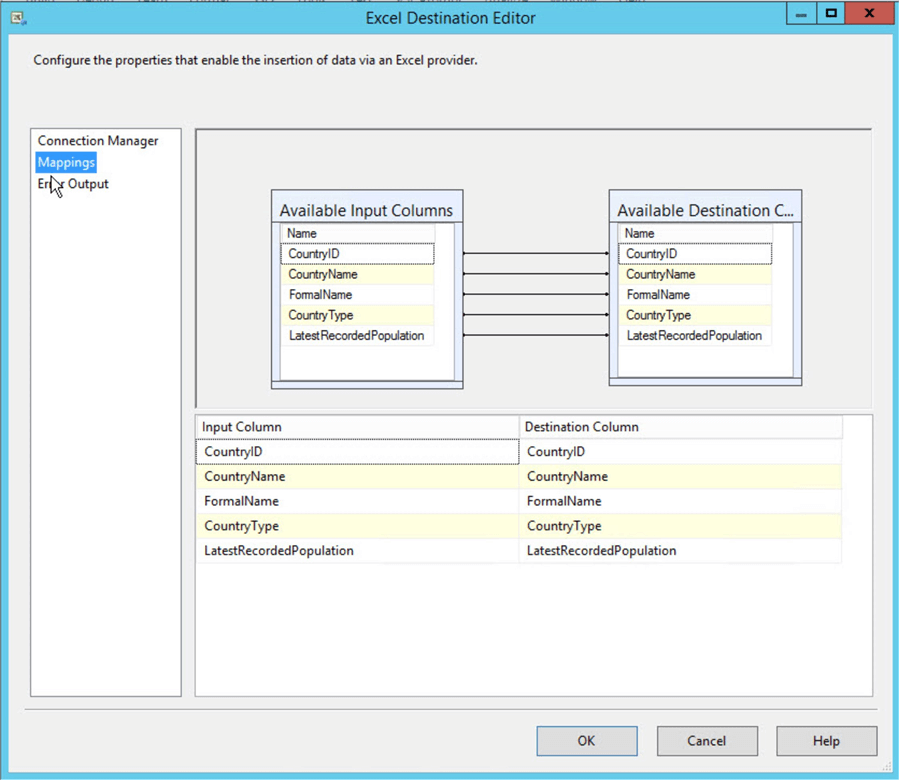
In the above image, the Input column is the column name of the SQL table and the destination column will be the Excel sheet’s column. In this demo, the column name for the SQL table and Excel file are the same, so the Excel Destination Editor will automatically map the input and output columns.
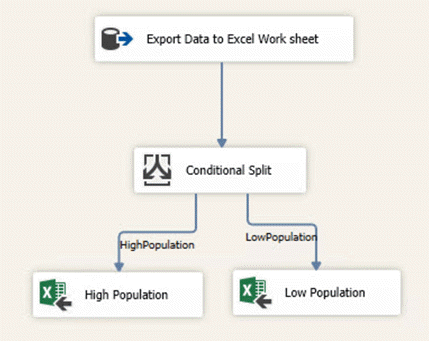
We now need to do the same things for the ‘LowPopulation’ data path. Once finished, the SSIS package will look like the below image.
SSIS Package Testing
Now let’s run the package and see how it works. To do that click on Start button on the menu bar. If the package completes the execution will be successful as it is below.
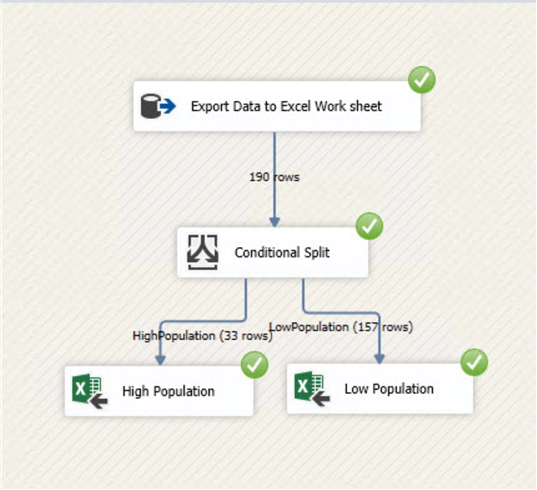
In the above image, the package inserted 33 records into the High Population worksheet and 157 records into the Low Population worksheet.
Next Steps
- In this article, we created an SSIS package with a single data flow. We added a Conditional Split transformation to the data flow to split the data into multiple paths and then we directed each of these data paths to a different Excel worksheet. Try it out for yourself.
- Check out the SQL Server Business Intelligence tips.


About the author
 Nisarg Upadhyay is a SQL Server Database Administrator and Microsoft certified professional with more than 5 years of experience.
This author pledges the content of this article is based on professional experience and not AI generated.
View all my tips
