By: Joe Gavin | Comments (1) | Related: > Azure
Problem
You have a request to automate a file delivery from a data provider for import into a SQL Server database. Simple enough, but in this case the provider does not support retrieving the file from them and will only supports delivery via email attachment(s) or SFTP. The first thought was to provide an external facing SFTP server on our network or even a small possibly Linux VM where it already has a native SFTP server, but we really couldn't justify it for just one feed. Next, we thought, would a cloud service work for us?
Solution
The answer is yes, a cloud service could work for this. So, let's build an Azure Logic App.
First, here are the pieces we'll be working with:
- On-premises data gateway for Azure Logic Apps
- The gateway works as an encrypted conduit between the cloud and your OnPrem server's file system
- Microsoft 365 email
- We're using a dedicated email address for the file drops
- Azure Login App
- Azure cloud service used to automate the process
- File system
- Simply a directory on an On-Premises Windows server
On-premises data gateway for Azure Logic Apps
We'll presume you don't already have an on-premises data gateway installed so we'll step through the process. If you have an existing gateway you can skip to the Creating the Logic App section.
The Microsoft Docs install document I followed can be found here: Install on-premises data gateway for Azure Logic Apps
- Download and the installer from here: Download on-premises data gateway
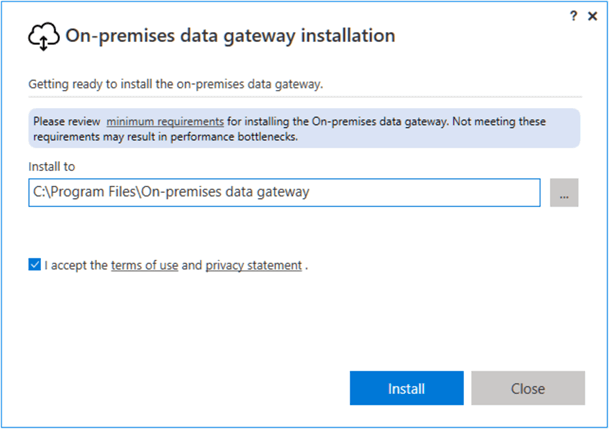
- Run GatewayInstall.exe as an administrator on the machine you're installing it on
- Confirm or change install directory
- Accept terms of use
- Install
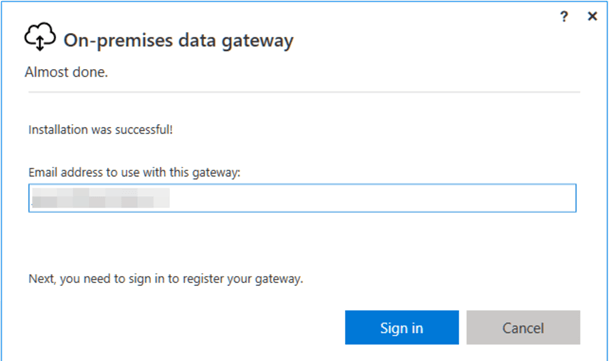
- Enter email to associate with gateway
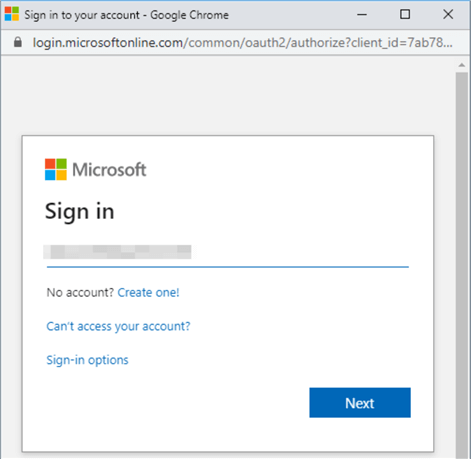
- Sign In
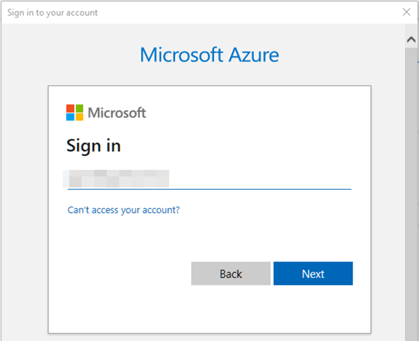
- Enter email
- Next
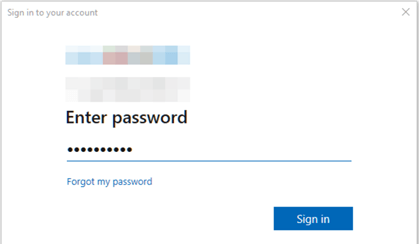
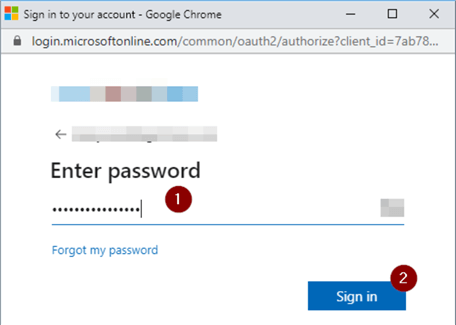
- Enter password
- Sign in
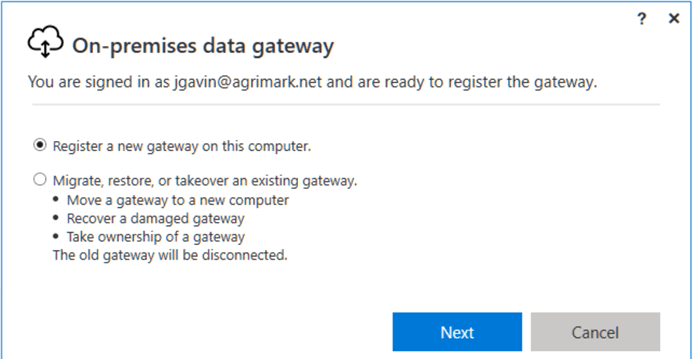
- Select Register a new gateway on this computer radio button
- Next
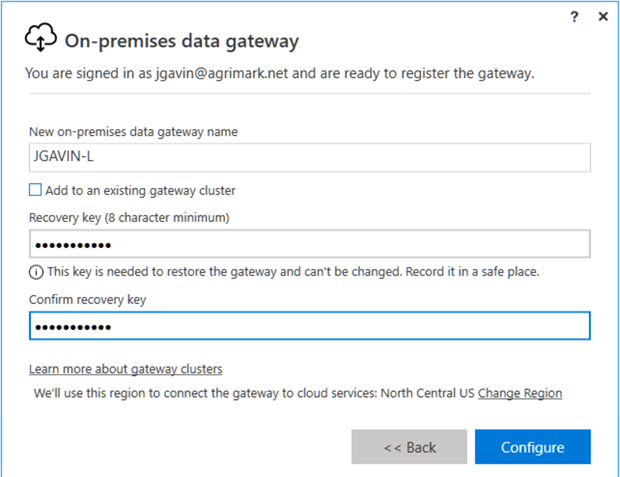
- Name gateway
- Enter and confirm recovery key
- Store recovery key in your password manager in case you need to change the location, move, recover, or take over a gateway installation
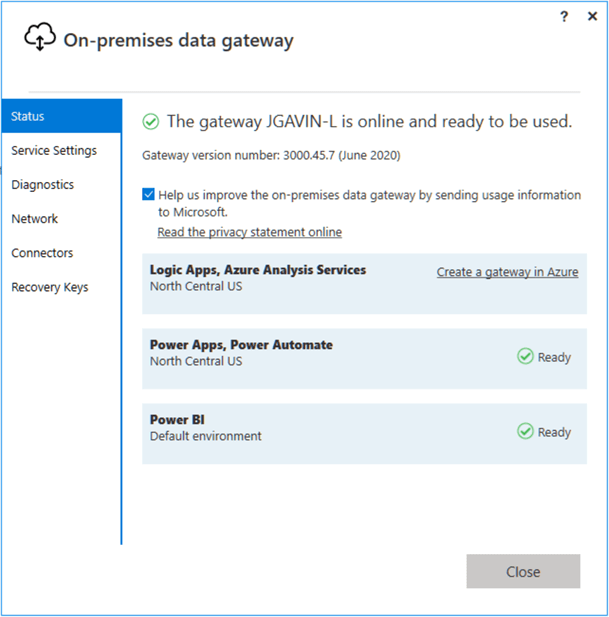
- Close
Creating the Logic App
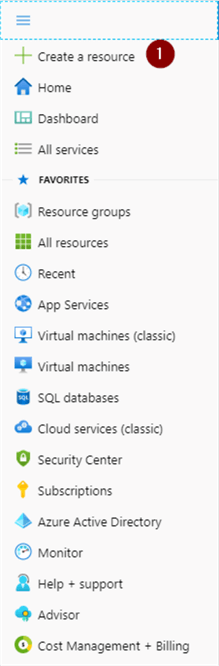
Log in to the Azure Portal.
- Create a resource
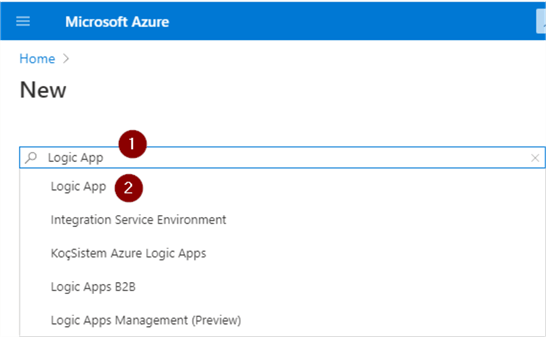
- Enter Logic App in search box
- Choose Logic App
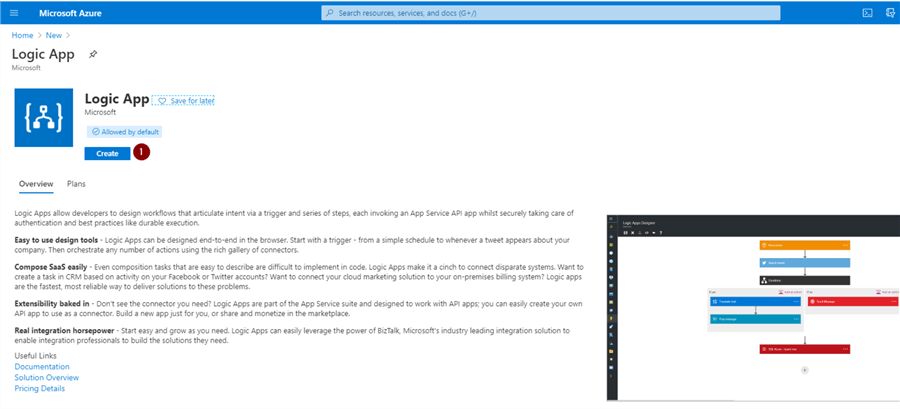
- Create
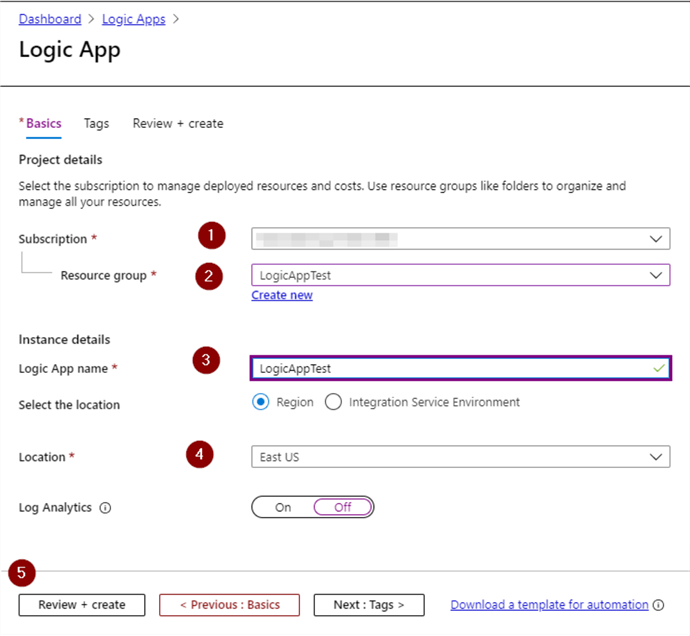
- Choose Subscription
- Choose Resource Group – or create new
- Give it a name
- Choose Location
- Review and Create
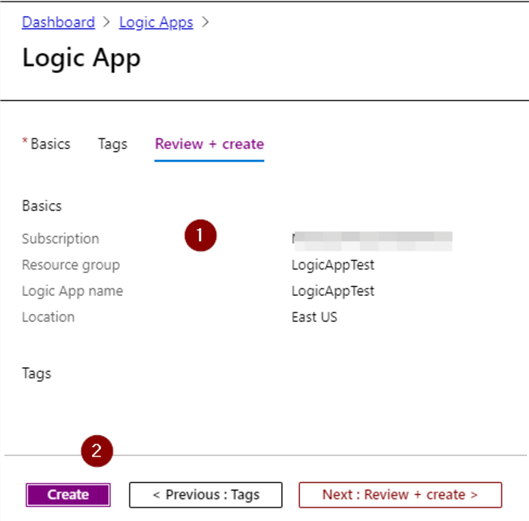
- Review
- Create
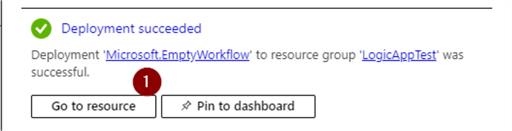
- Click Go to resource
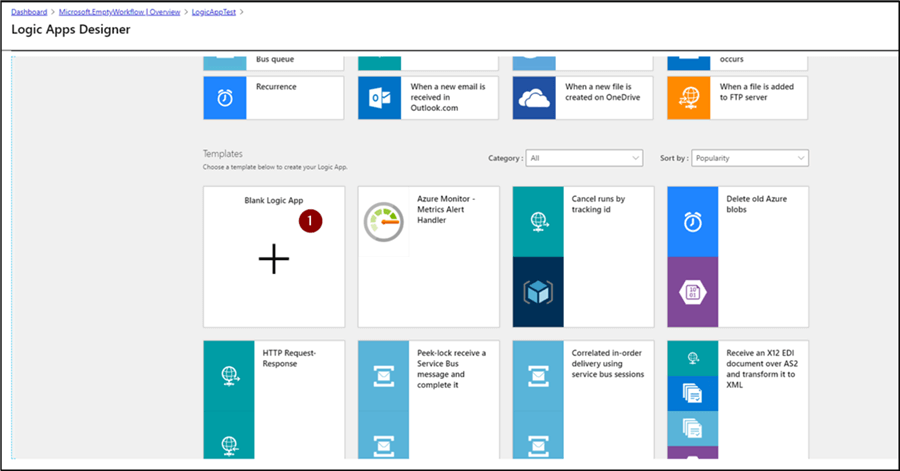
- Scroll down to Blank Logic App template
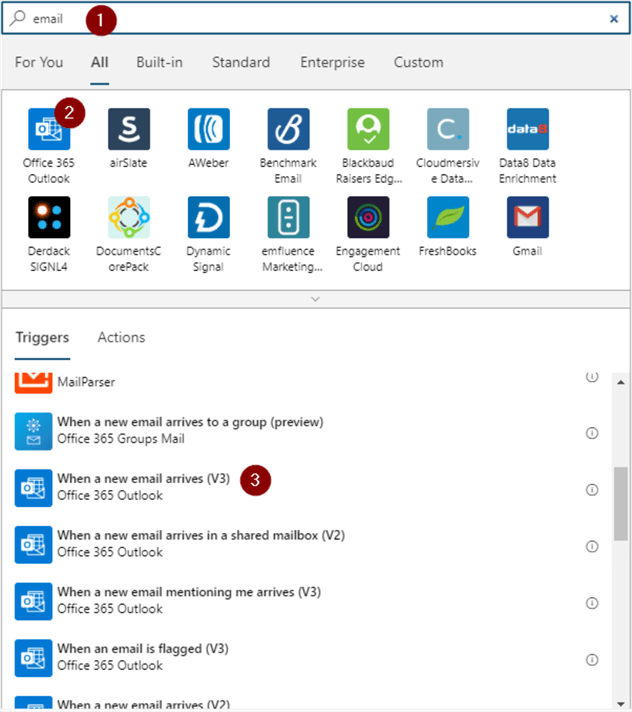
- Enter email in search box
- Office 365 Outlook
- When a new email arrives (V3) (latest as of this writing)
- Sign in
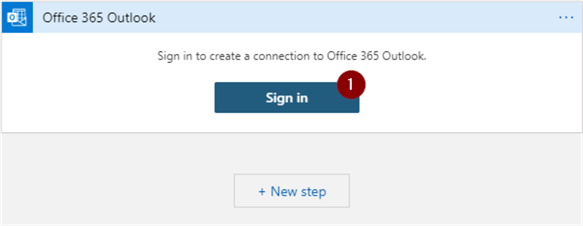
- Connect with email account you're monitoring
- Password
- Sign in
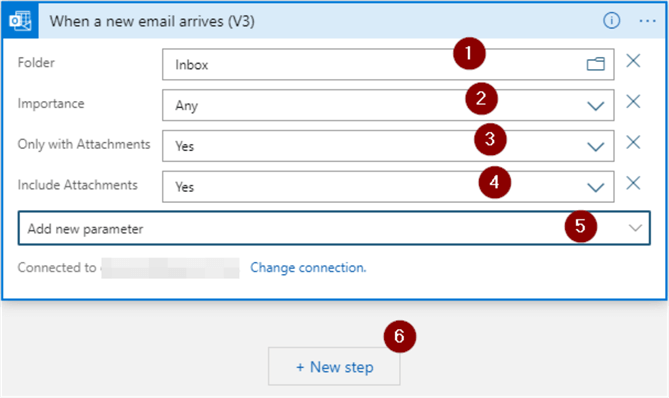
- Folder = Inbox
- Importance = Any
- Only with Attachments
- Include Attachments = Yes (why process if no attachments(s)
- Any additional filters under 'Add new parameter' dropdown
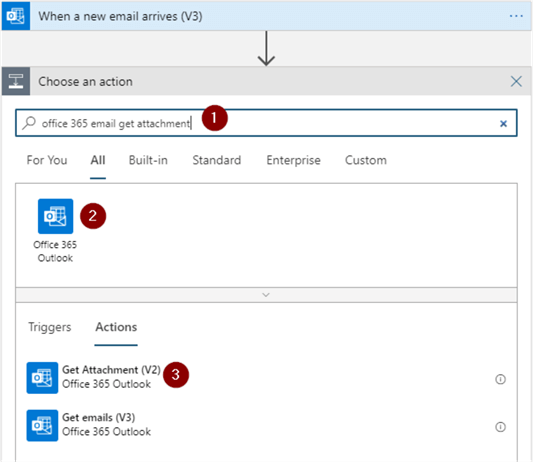
- New step
- 'Office 365 email get attachment' in the search box
- Office 365 Outlook
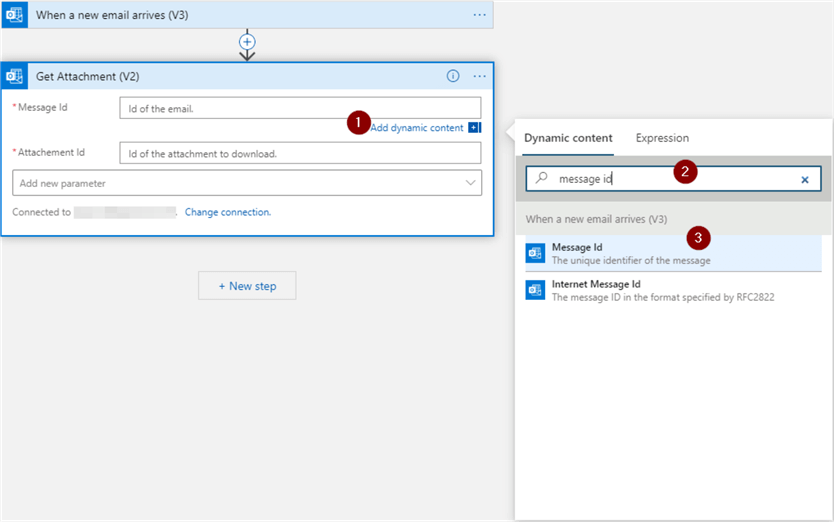
- Get Attachment (V2)
- Add dynamic content
- Message id in the search box
- Message Id
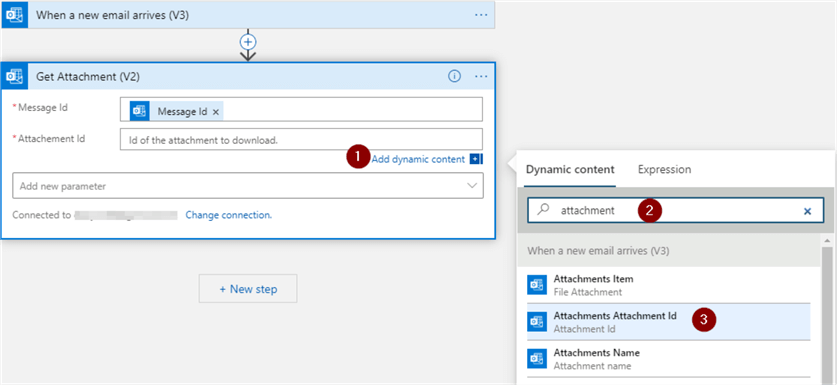
- Add dynamic content
- Attachment in the search box
- Attachments Attachment Id
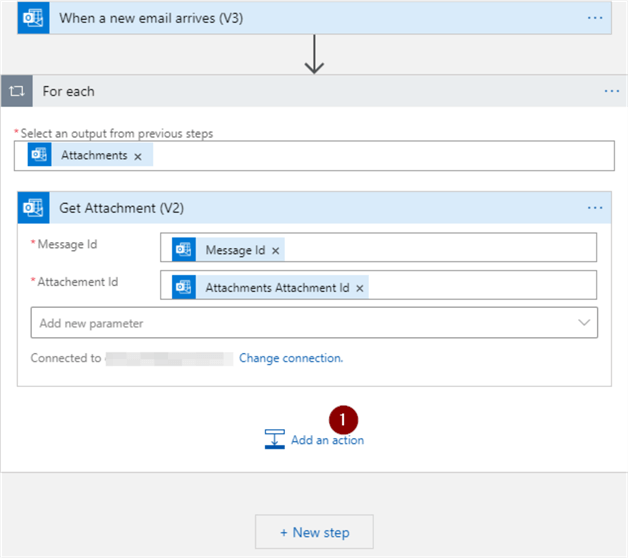
- New step
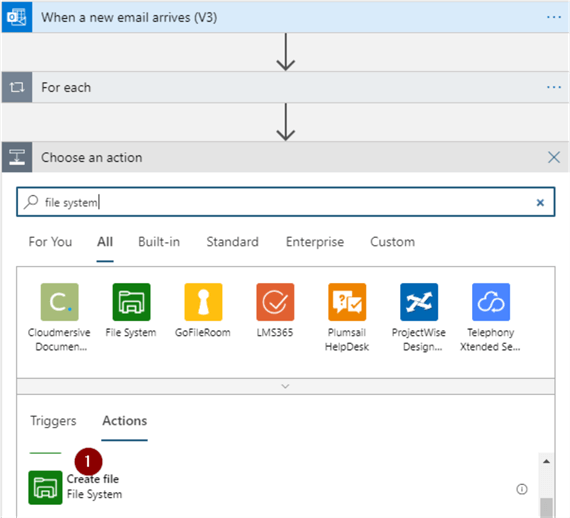
- Add an action
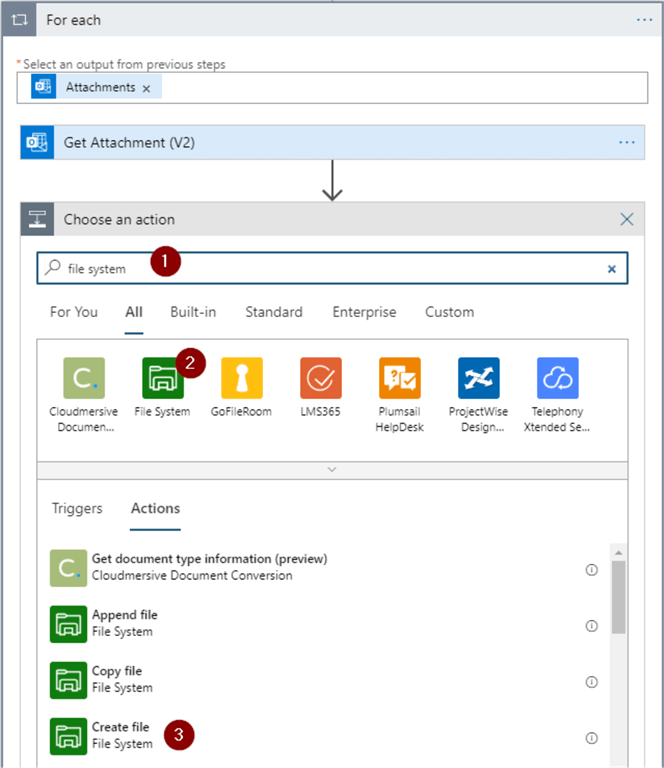
- Enter file system in the search box
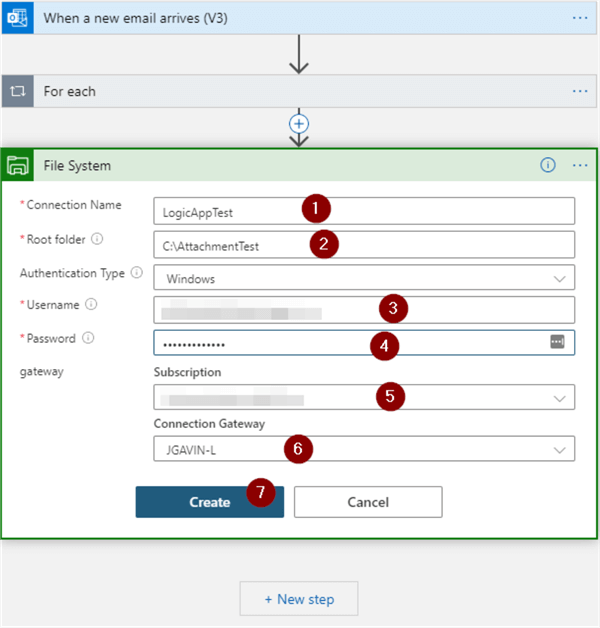
- File System
- Create file
- Name Connection
- Root folder
- DOMAIN\account for Windows account that has write permissions on C:\AttachmentTest
- Password
- Subscription
- Use the On-premises Data Gateway we created
- Create
- Folder path - \ is root of C:\AttachmentTest
- Add dynamic content
- Search for attachment
- Attachments Name
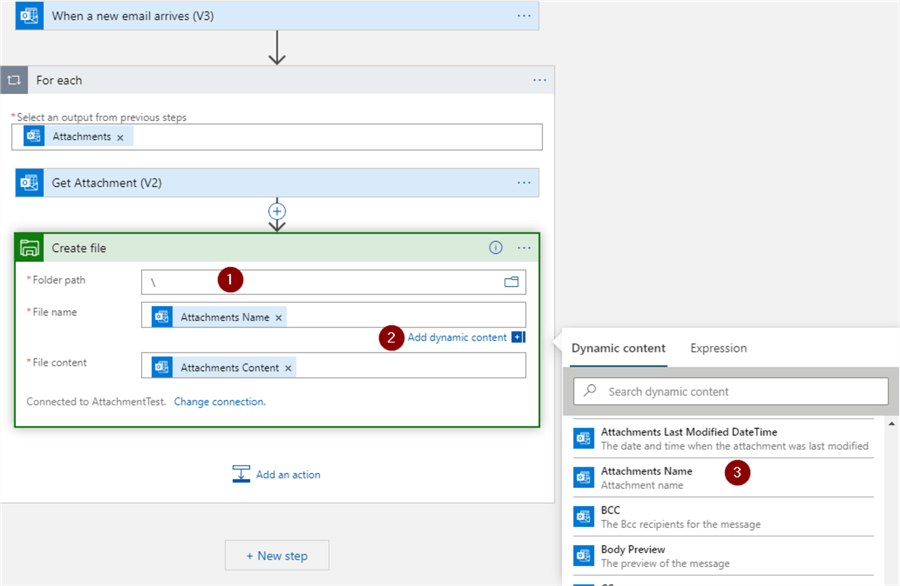
- Add dynamic content
- Attachments Name

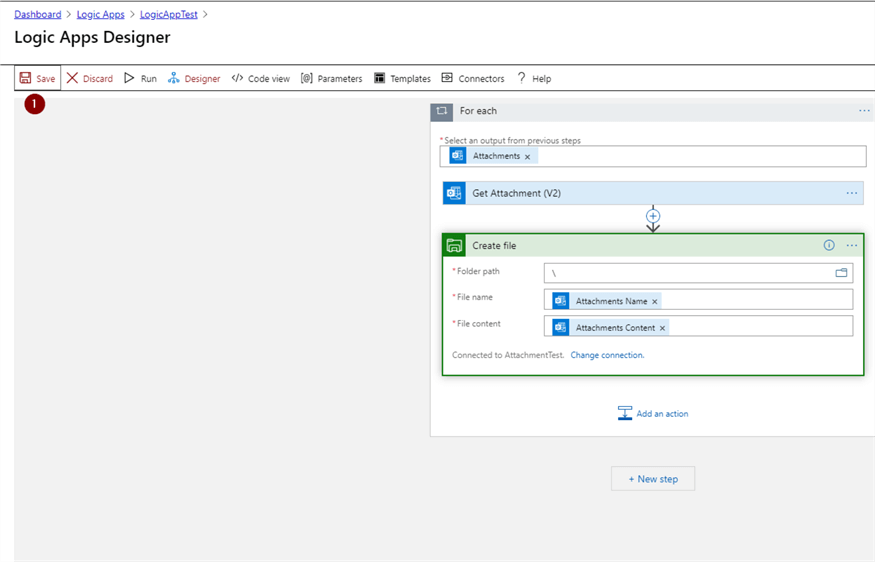
- Save
I'm testing this with 2 .csv files, C:\temp\sample1.csv and C:\temp\sample2.csv.
The following PowerShell is helpful for testing the Logic App. Especially, if you need to do some debugging. Just configure the variables and run it.
$PSEmailServer='smtp.myserver.com'                            # smtp server, presuming credentials aren't needed to connect
$Attachments = @("c:\temp\sample1.csv","c:\temp\sample2.csv") # if testing with more than 1 file, use array as shown
$From = "[email protected]"                                   # sender - just needs to be in the form [email protected]
$To = "name @mydomain.com"                                    # email to send to
$Subject = "test"                                             # subject

Send-MailMessage -From $From -To $To -Subject $Subject -Attachments $Attachments
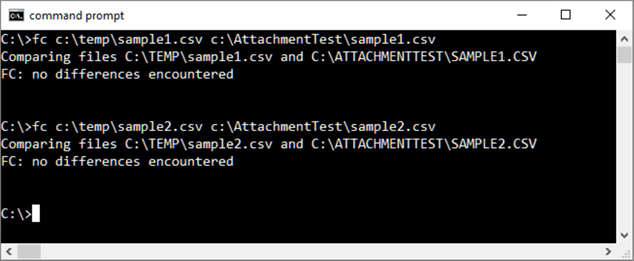
And here are our files.
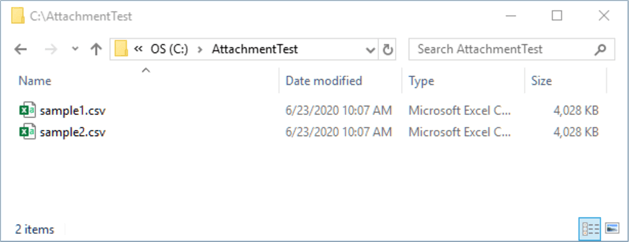
I was skeptical that there could be slight differences in the files where I had to create and populate them rather than a simple copy but file compares between the source and target files show they're the same.
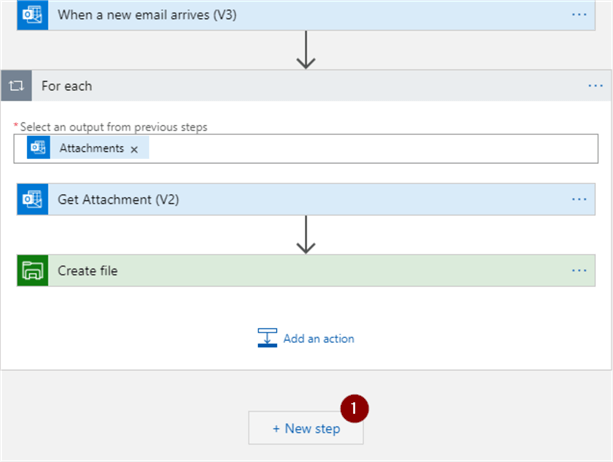
Add functionality to create a 'trigger' file
Now that we've built our initial Logic App it's easy to add on to. We had an additional requirement to deliver an empty file named transfer.done that will be used as the trigger for the custom import.
- New Step
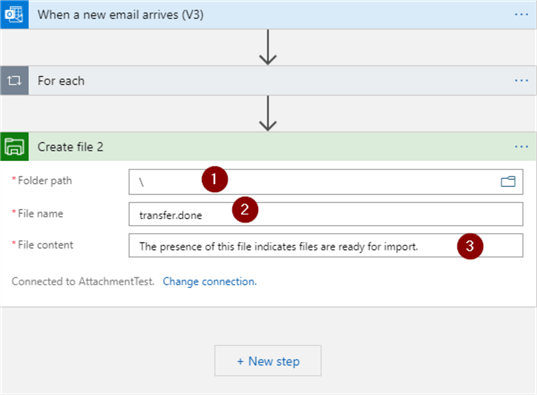
- Create file
- Folder path
- File name
- Added a string with a comment on the file's purpose in case someone should open it out of curiosity just because it's a required field.
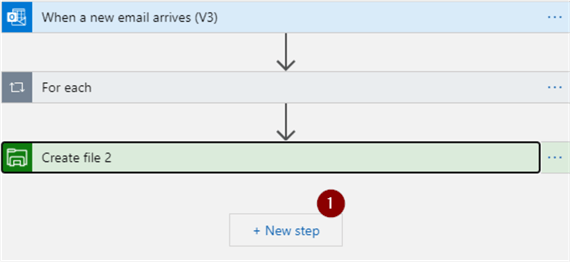
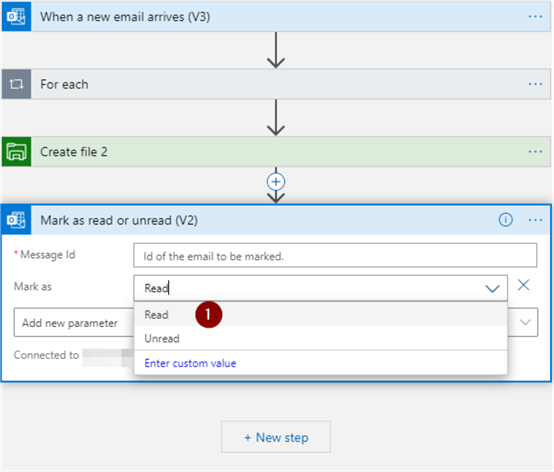
Mark email as read
And finally, I thought it would make sense to mark the email as read after the process completed. As the mailbox will be used exclusively to receive file attachments it would be helpful if troubleshooting the logic flow. An email still marked as unread would indicate the processing did not complete successfully or did not meet the from or attachment criteria.
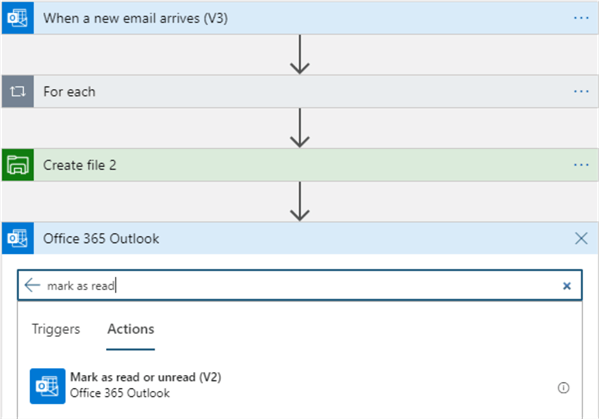
- New step
- Mark as read in the search box
- Mark as read or unread (V2)
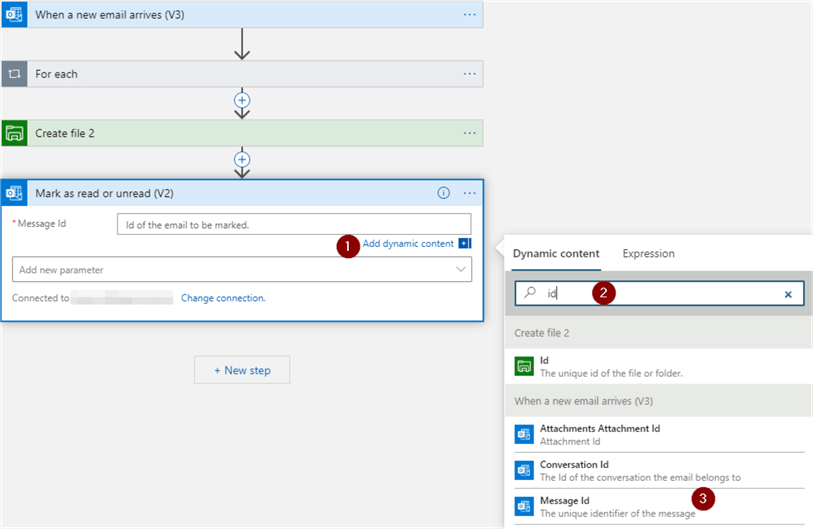
- Add dynamic content
- Id in search box
- Message Id
- Add new parameter dropdown
- Mark as
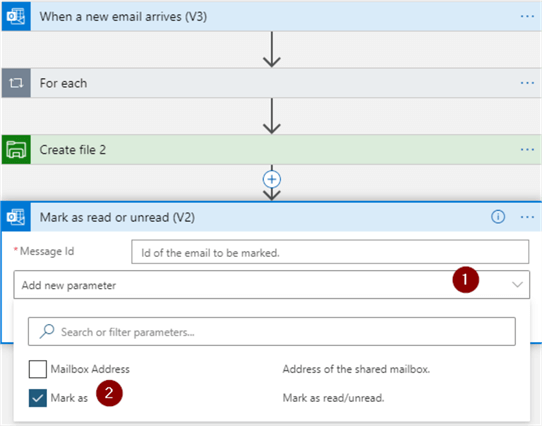
- Read
Next Steps
I hope you find Azure Logic Apps as interesting and useful as I do. Here are some more tips on uses of and how to use Azure Logic Apps:
- Synchronously Refreshing a Power BI Dataset using Azure Logic Apps
- Workflow Orchestration with Azure Logic Apps to Move Data
- Azure Data Factory Pipeline Email Notification – Part 1
- Send Notifications from an Azure Data Factory Pipeline – Part 2
- Transfer Files from SharePoint To Blob Storage with Azure Logic Apps
- How To Call Logic App Synchronously From Azure Data Factory
- Start an Azure Logic App Workflow on Demand or by an Event


About the author
 Joe Gavin is from the Greater Boston area. He started working with SQL Server and Sybase in 1998 in the financial services industry and has been a SQL Server Database Administrator for a dairy cooperative since 2011. He graduated from Northeastern University in Boston with a Bachelor of Science in Engineering Technology (BSET) degree in Computer Technology. Joe has spoken at the Boston and Providence SQL Saturday events.
 This author pledges the content of this article is based on professional experience and not AI generated.
View all my tips
