By: Vitor Montalvao | Comments | Related: > Azure
Problem
During the development process, my team and I need to deploy several VMs. However, we often lose time creating and deploying these VMs in different moments of the project. How can we accelerate this process?
Solution
In this article, we are going to look at how to create Azure VMs from VHD templates to reduce deployment time for new Azure VMs.
Exercise
An Azure virtual machine has one or more virtual hard disks (VHD) where the main VHD hosts the operating system. When we create an Azure VM image, we are creating a template that contains the virtual machine preconfigured operating system. The image can include more than the operating system, for example, a SQL Server instance and the necessary tools can be used as a starting point to create new VMs for your organization.
Generalize a VM
For this exercise, you’ll need to have an Azure VM already created. You can use one with just the operating system (Windows or Linux) or you can have more software or services installed on the VM such as SQL Server, IIS, Apache or other tools that you use regularly.
If you are new to the creation of Azure VMs, please follow these instructions to create a new Azure VM.
IMPORTANT NOTE: The following step will make your VM inoperable and you won’t be able to use it again. If you didn’t create a new VM for this exercise, please perform a backup of your VM before continuing.
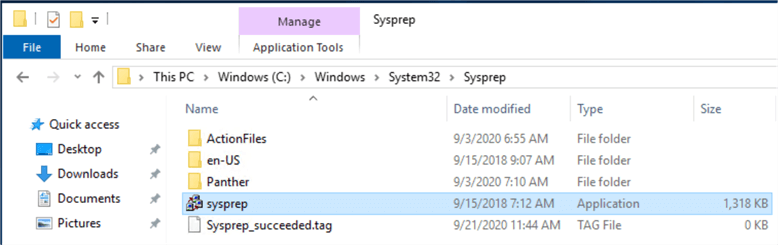
If you are using a Windows VM, log into your VM and go to C:\windows\system32\sysprep and run sysprep.exe:
In the popup window, be sure to select the same options as seen in the below image
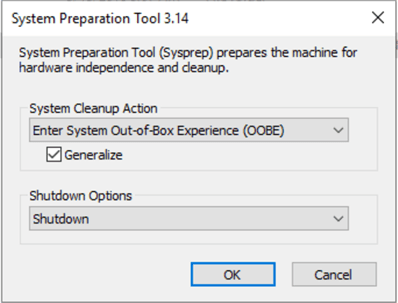
- System Cleanup Action: Enter System Out-of-Box Experience (OOBE)
- Generalize: Check
- Shutdown Options: Shutdown
Let the generalization process end and allow the VM to shut down.
For Linux users, the above operation is achieved by running the following command. Then, you should disconnect from the Azure Linux VM.
- waagent -deprovision+user
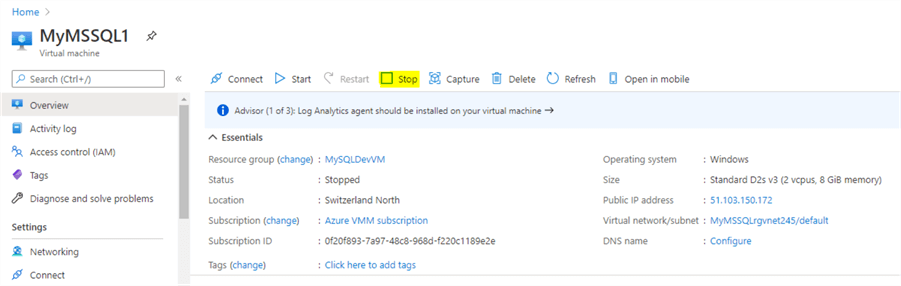
You must now deallocate the Azure VM. In the Azure Portal, go to the respective VM and click on the Stop option:
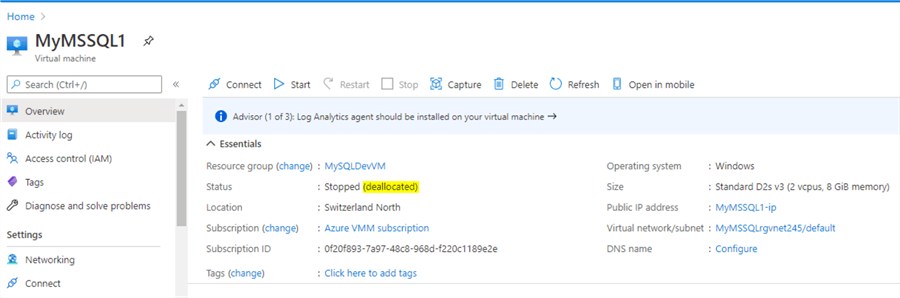
Wait for the operation to end and check the VM status to confirm that it’s deallocated:
Create the image
You can now create the VM image by clicking on the Capture button:

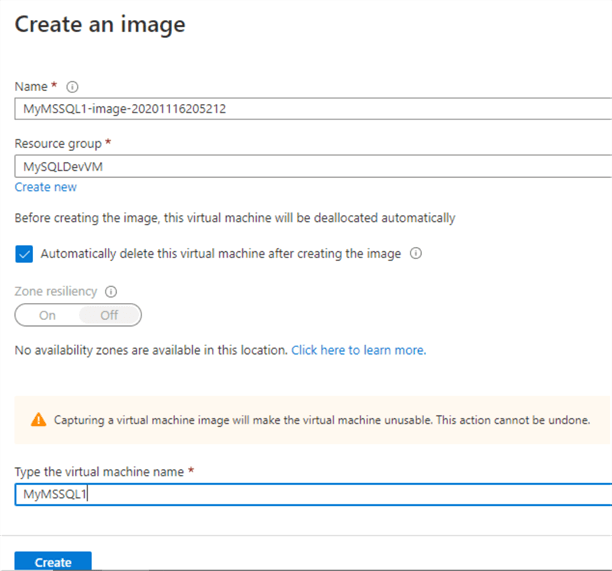
In the following screen, provide a name for the Image and specify which Resource Group you want to store this new image in (you can choose to create a new resource group).
You can also choose to delete the VM after the image creation since after you Generalize a VM, it can’t be used anymore. (check the warning messaging alerting for this).
At the end of the screen, provide the VM name where you are creating the image from. You can now click Create to initialize the image creation process.
Confirm in the Resources that the new VM image is stored there:
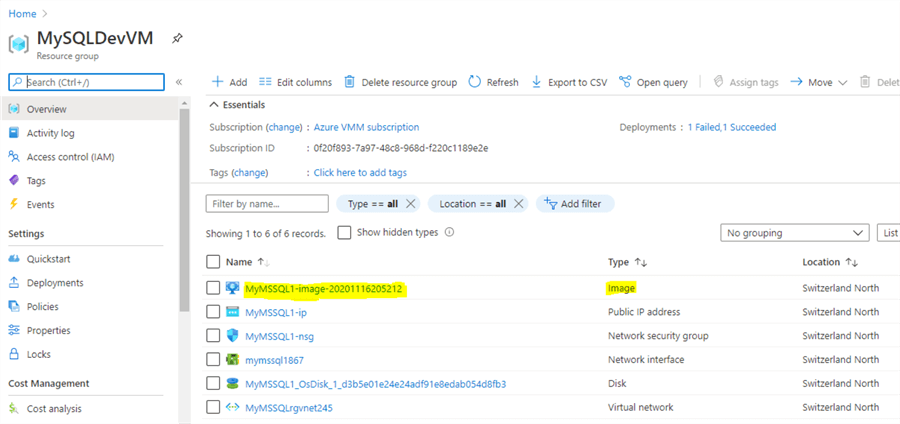
TIP: As you can see, deleting the VM doesn’t delete the related resources (Disk, Network, NSG, IP). I recommend deleting these resources to avoid incurring extra costs.
Create a VM from an Image
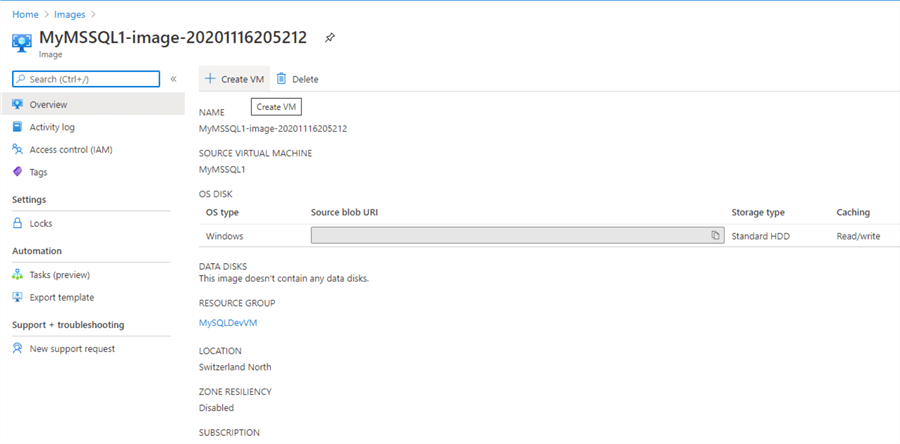
There are many ways to create an Azure VM from an image. In this exercise, I would exemplify the option to create a new VM from the Azure Portal. Go to your Images and select the Image where you want to create your new VM and click on the Create VM option:
This will bring you to the screen of the creation of a VM where the Image is selected (you could also have gone to the Virtual Machine option and have chosen to add a new VM and just select your Image):
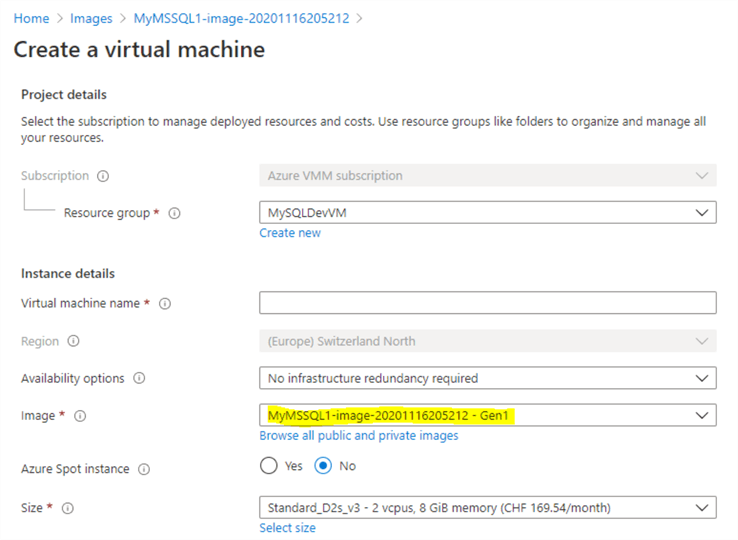
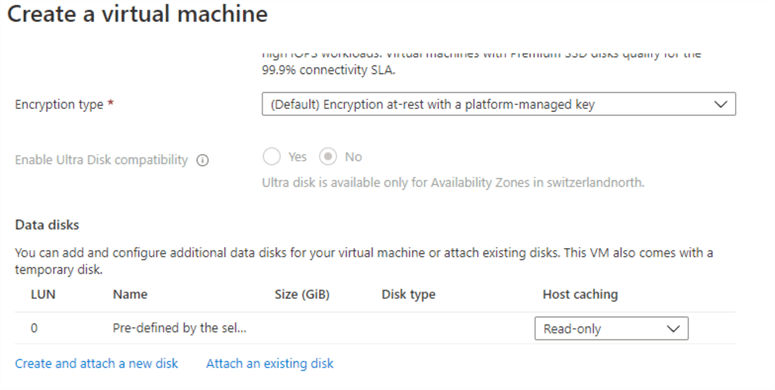
Review the predefined values and change any if necessary. You’ll see that the Virtual machine name and the Administrator account credentials need to be provided since they are required to proceed.
Important note: You cannot create the new VM in a Region different from the original image. This can be confirmed because the Region field is disabled.
If the VM has more than one virtual disk, you’ll see those disks and can add new disks to the new VM:
Summary
The image has been created and you can review the information you’ve provided.
You can now click Create when you are ready to deploy a new VM. The deployment will take some time to complete. After it completes, try to connect to your newly created VM and check if everything is working properly.
If later on you update your VMs (OS updates, tool updates as well as CPU, memory or disks changes), you can create a new image from the updated VM so that it can be used for the creation of new Azure VMs.
Next Steps
- Learn more about the Azure VM deployment best practices.
- Check out on how to reduce and optimize costs in Azure.


About the author
 Vitor Montalvão is a SQL Server engineer with 20 years of experience in SQL Server, specializing in performance & tuning, data modelling, migration and security.
This author pledges the content of this article is based on professional experience and not AI generated.
View all my tips
