By: Hristo Hristov | Comments | Related: > Power Apps
Problem
If you have had the chance to interact with SharePoint Online lists and libraries, you know that the default SharePoint Online list form may frequently fall short of providing you good customization options.
Solution
In this tip we will show how to customize the default SharePoint online list and library forms. For some context, we are looking into a scenario in which users fill in certain business KPIs into a SharePoint online list. This Power Apps form enhancement provides a plethora of options for beautification, business rules implementation as well as integration with outside data sources, such as SQL server. The same modifications could be applied to document library forms too. This is part 1 of 2 of this tip mini-series in which we will focus on forms.
Scenario overview
We start with the following columns and data types:
| Column name | Data type |
|---|---|
| Title | Single line of text |
| KPI 1 Achieved? | Yes/No |
| KPI 1 Value | Number |
| KPI 2 Achieved? | Yes/No |
| KPI 2 Value | Number |
| KPI 3 Achieved? | Yes/No |
| KPI 3 Value | Number |
| Reference Period Start | Date and Time |
| Reference Period End | Date and Time |
| Comments | Multiple lines of text |
This simple data model will allow us to showcase various options for form enhancement that Power Apps in SharePoint Online provides.
Requirement’s overview
The following requirements have been given to us:
- All users mut be able to create items
- Only certain users can edit existing items
- Title column is not needed at all
- All columns are required but if any of the KPI Achieved? Yes/No columns has value "No", the corresponding KPI Value column is not required
- Start of reference period must always be in 1st of the current month
- End of the reference period must be in the end of the current month
- Comments must be high and wide enough for multiple lines of input as well provide an automatic scroll.
Solution Overview
We will start building our form by following the inherent structural hierarchy we have in SharePoint Online.
Forms
First and foremost, here comes the form. Every SharePoint list form has three sub-forms, depending on what you are doing:
- New Form – used every time a new item is created,
- Edit Form – used every time an existing item is edited,
- View Form – used every time an item is view (e.g. double-click on an item from the list view)
It is critical to plan your form development for each form in case there will be differences in the set of requirements among them. In our example we will keep the business rules the same, but we will lock the Edit form for certain users thus disabling editing of existing items. In real-life implementations remember to couple this with removing the Quick Edit button as well.
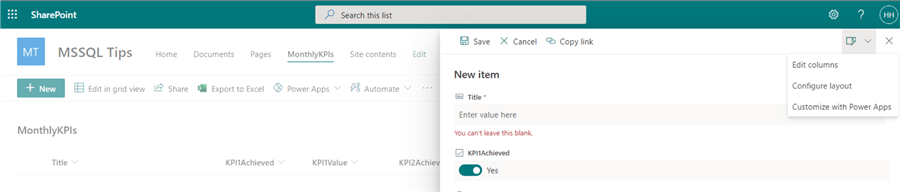
To start editing your list form with PowerApps, click New from the main list view. Then in the top-right corner find the edit icon, click it and select Customize with PowerApps:
A few instances later, you will be presented with the Power Apps studio. Pay special attention to the SharePoint integration control and the contextual dropdown above it:
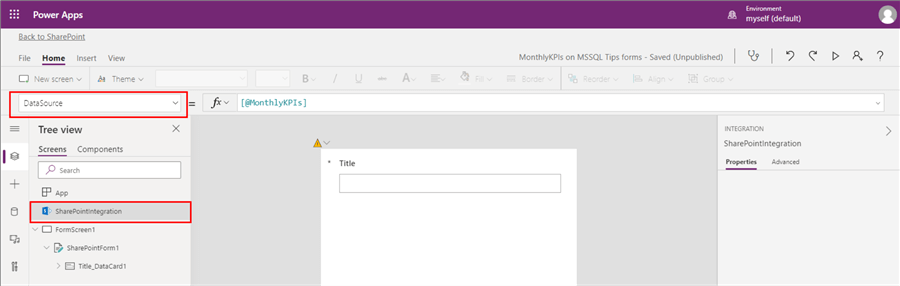
The dropdown contains the following options:
- DataSource: your SharePoint Online list name.
- OnCancel: behavior to execute when a user selects Cancel on the form
- OnEdit: behavior to execute when a user edits an item
- OnNew: behavior to execute when a user creates an item
- OnSave: behavior to execute when the form is saved
- OnView: behavior to execute when a user views an item, typically when an item is double-clicked from the list view.
At this point, by default you are editing the NewForm. If you check the formula behind OnNew, you will see:
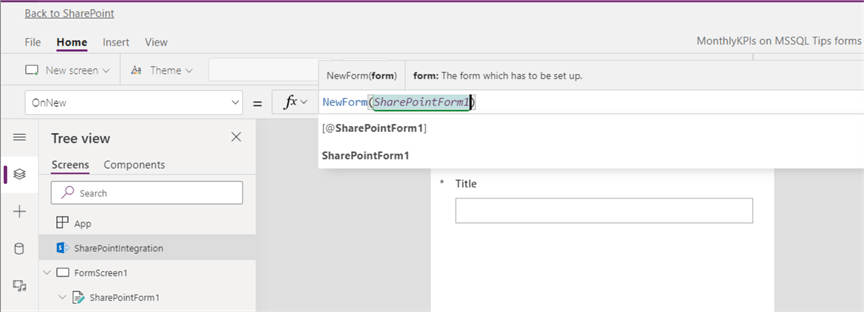
NewForm is the Power Apps function that is invoked when a new item is being created. The function accepts one sole argument, which is the name of the form control you want use as a NewForm. In this case this is SharePointForm1. It is a good practice to rename the form controls accordingly as it will be shown later.
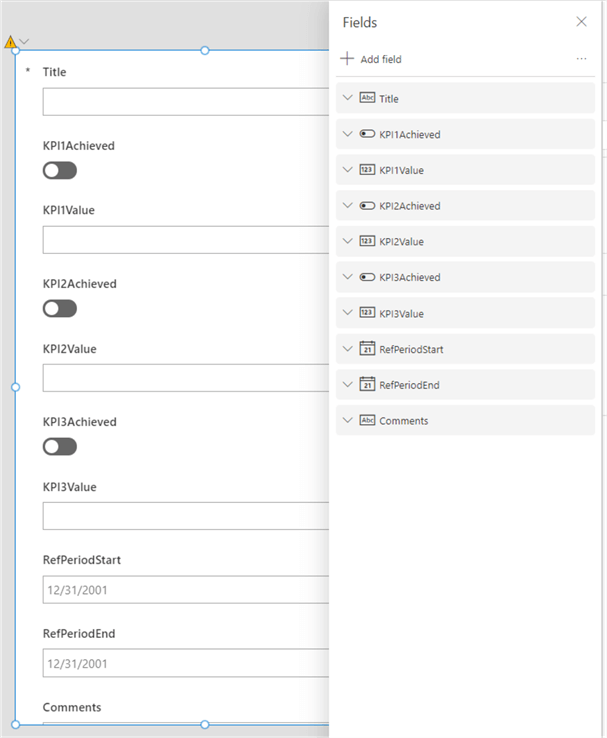
Add fields to a form
Before we continue configuring our forms, let’s make sure all relevant fields are added to the form. Select the SharePointForm1 control and click on edit fields.
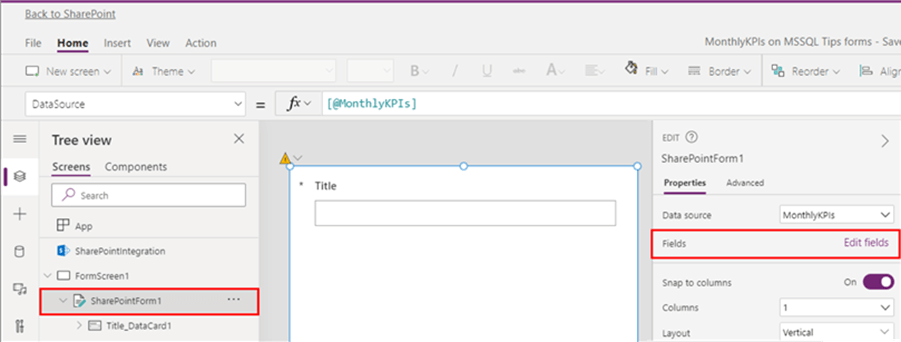
In the resulting pane, click Add field and add the relevant fields needed for data input:
Saving your work
It is not a bad idea to already start saving your work. Click on File in the top-left corner of the Power Apps studio, then Save and the Save button. When the form is saved, you will see:
- Publish to SharePoint: if you click it, your form will override the default SharePoint form. You may save multiple times, but I recommend you publish your changes once, only after all forms are configured and users are notified of the change.
- See all versions: takes you to a separate screen where you can see all version of your edits. You can restore a previous version if needed. This is the so-called "simple" application lifecycle management that is built into every Power App.
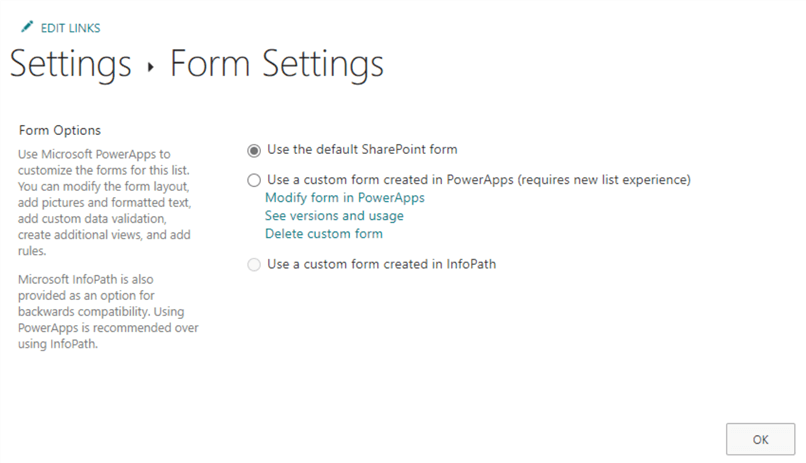
If you publish by mistake or want to remove your custom form without deleting the whole list, then go to List settings, then Form Settings. Form there you can restore the default form. However, you will lose your customized form! For now, the Power Apps SharePoint integration does not offer form export.
Configure default form mode
Now let us investigate replicating your form and properly configuring behavior for OnNew, OnEdit, Onview, OnSave and OnCancel properties of the SharePoint integration control.
First, duplicate your current default screen twice. You can do this by clicking the three dots next to the screen control and clicking Duplicate. After duplicating, rename your screen and form controls properly by double-clicking on their name:
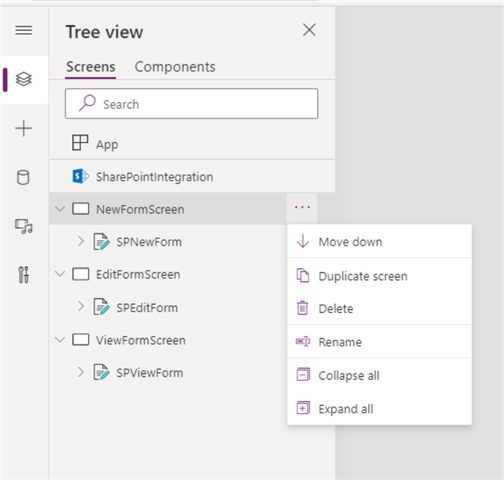
Rename one of the forms SPEditForm and the other SPViewForm. Select the SPViewForm form control, find the DefaultMode property in the contextual dropdown and change it to View:

This setting switches the form mode of the View form from New to View mode, which means every time the ViewForm opens, it will only allow viewing but not inputting data. Additionally, according to our requirements, we must not allow certain users to edit existing items. This means that we could:
- either set the SPEditForm control to View as well: go to DefaultMode for SPEditForm and type in:
If(
    User().Email <> "Admin's email",
    FormMode.View,
    FormMode.Edit
)
This formula will instruct this form to check for a certain name and enable editing
accordingly. The User() object is built into Power Apps and offers
three attributes: Email, FullName and
Image.
- or, for more visual flavor put every single field into Disabled mode by editing its own DisplayMode property.
The latter we will see in a next tip as we now focus on the form, not the fields. As to our SPNewForm, its DefaultMode is by default set to New.
Map the form controls to the events
Our forms are mostly ready so now comes the most important part. You must properly configure the SharePointIntegration control events so users are served with the correct forms every time. Configure the properties as shown below:
| SharePointIntegration Property | Formula | Explanation |
|---|---|---|
| OnNew |
Set(
    SharePointFormMode,
    "CreateForm"
);
NewForm(SPNewForm);
Navigate(
    NewFormScreen,
    ScreenTransition.None
)
|
We are setting a helper variable
SharePointFormModewhich will track the state
of the form. Then we are using the NewForm
function to (in a way) create an instance our of our
SPNewForm. Finally, Power Apps must direct us
to the correct screen NewFormScreen. |
| OnEdit |
Set(
    SharePointFormMode,
    "EditForm"
);
EditForm(SPEditForm);
Navigate(
    EditFormScreen,
    ScreenTransition.None
)
|
We are setting the helper variable to the relevant value "EditForm". Then we are creating an instance of our SPEditForm. Finally, Power Apps must direct us to the correct screen EditFormScreen. |
| OnView |
Set(
    SharePointFormMode,
    "ShowForm"
);
ViewForm(SPViewForm);
Navigate(
    ViewFormScreen,
    ScreenTransition.None
)
|
We are setting the helper variable to the relevant value "ShowForm". Then we are creating an instance our of our SPViewForm. Finally, Power Apps must direct us to the correct screen ViewFormScreen. |
| OnSave |
If(
    SharePointFormMode = "CreateForm",
    SubmitForm(SPNewForm),
    If(
        SharePointFormMode = "EditForm",
        SubmitForm(SPEditForm)
    )
)
|
We perform two checks so we can submit the correct form to the integration control for saving with the SubmitForm function. |
| OnCancel |
If(
    SharePointFormMode = "CreateForm",
    ResetForm(SPNewForm),
    If(
        SharePointFormMode = "EditForm",
        ResetForm(SPEditForm)
    )
)
|
Similarly to OnSave, we perform two checks so we can reset the correct form with the ResetForm function. |
Note the order of the properties is logical, not alphabetical. By using the Power Apps formula language (recently also called "Power Fx"), we have successfully configured the behavior of each of the SharePoint list forms.
Integration with SQL
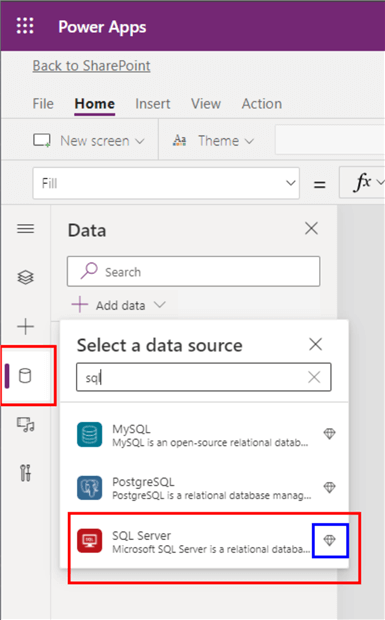
What if you need SQL data from a 3rd party system in the form? That can be arranged with the SQL Server connector. You can find it by going to the database icon on the left in the Power Apps studio. Then click on Add data and search for SQL. Keep in mind this is a premium connector requiring a per-app or per-user license for everyone that will interact with the SQL data, meaning not only you the developer but also all end users.
The connector will prompt you to connect to a database:
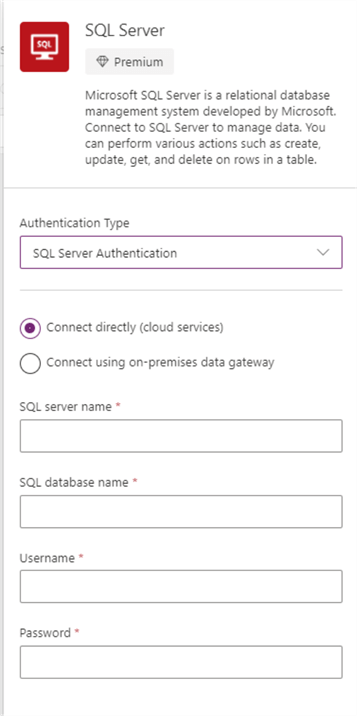
Once you do that, the connector will prompt you to choose one or more tables. Once you confirm your configuration, the table(s) will appear in the list of data sources to the left in the Power Apps studio. You will be able to reference each table by its name in formulas you place within the app.
Stay tuned for part two of this tip in which we will configure the business rules for the different fields according to the requirements.
Next Steps


About the author
 Hristo Hristov is a Data Scientist and Power Platform engineer with more than 12 years of experience. Between 2009 and 2016 he was a web engineering consultant working on projects for local and international clients. Since 2017, he has been working for Atlas Copco Airpower in Flanders, Belgium where he has tackled successfully multiple end-to-end digital transformation challenges. His focus is delivering advanced solutions in the analytics domain with predominantly Azure cloud technologies and Python. Hristo's real passion is predictive analytics and statistical analysis. He holds a masters degree in Data Science and multiple Microsoft certifications covering SQL Server, Power BI, Azure Data Factory and related technologies.
This author pledges the content of this article is based on professional experience and not AI generated.
View all my tips
