By: Levi Masonde | Updated: 2022-08-11 | Comments (1) | Related: > Python
Problem
In this tutorial, we will look at how to load data to a SQL Server database using Python and an API. Then we will show how to build a simple Power BI report using this imported data.
Solution
In this step-by-step tutorial, you will be provided with access to an API that anyone can use, this will ensure that you can follow along with this tutorial.
Prerequisites
- SQL Server
- Power BI
- Visual Studio
Consuming API Data
For this tutorial, you will use mock API endpoint data provided by JSONPlaceholder. We will be using Python to fetch the data and load it to a SQL Server database.
JSONPlaceholder comes with a set of 6 common resources as shown below. These are the endpoints you can consume, for this tutorial we will consume the "users" endpoint.
| /posts | 100 posts |
| /comments | 500 comments |
| /albums | 100 albums |
| /photos | 5000 photos |
| /todos | 200 todos |
| /users | 10 users |
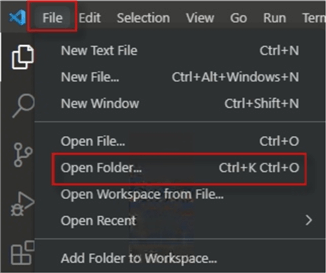
Open Visual Studio click File > Open Folder as shown below.
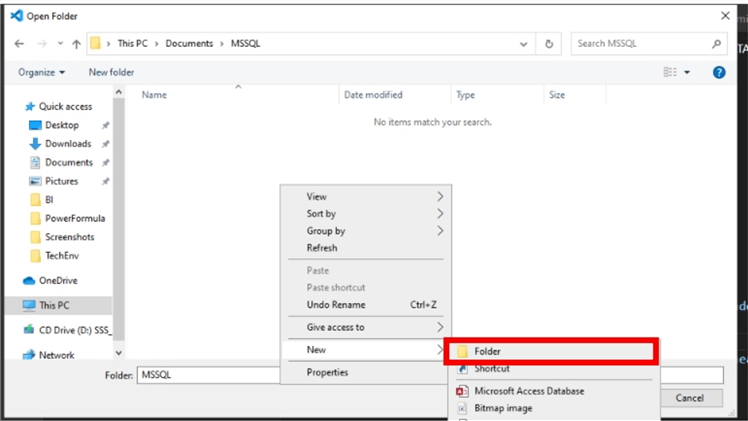
Find the folder destination you desire or right-click on empty space to create a new folder as shown below.
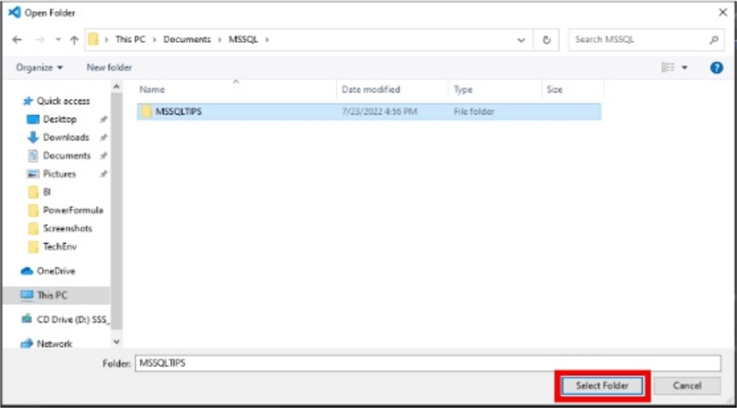
Name the folder and click Select Folder as shown below.
Once your folder is open, add a new file to your project/folder by clicking on the new file icon as shown below.

Name the file API-DATA_Users.py, ensure the file name has the .py extension to indicate it is a Python file.
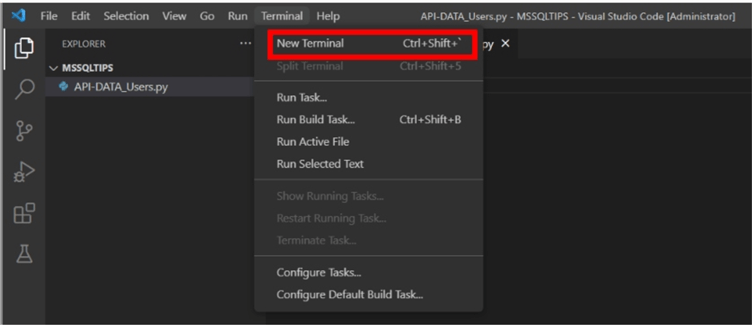
Open a terminal window by clicking Terminal > New Terminal.
Before we start coding, we need to add a few Python modules that will be used, the Requests module and the Pandas module.
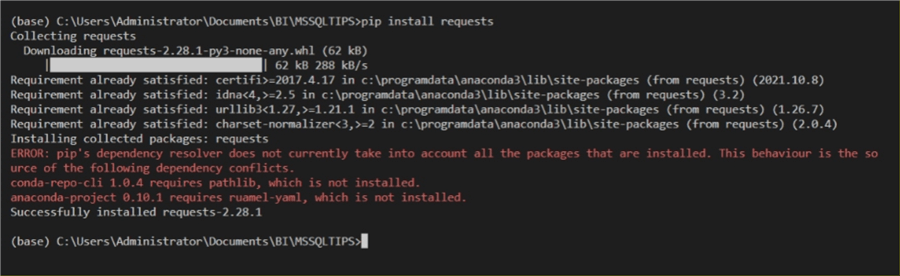
In the terminal window, enter the code below and run.
pip install requests
The output should be as shown below.
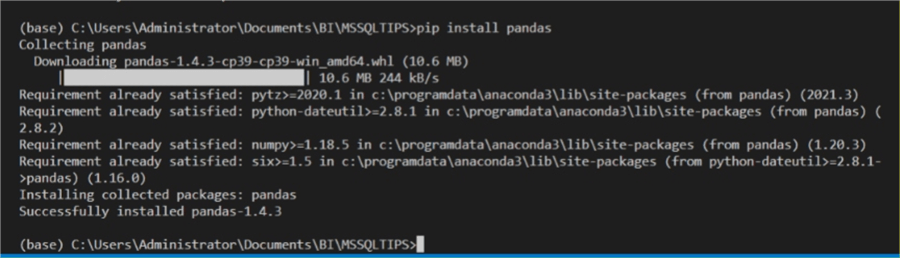
In the terminal window, enter the code below and run.
pip install pandas
The output should be as shown below.
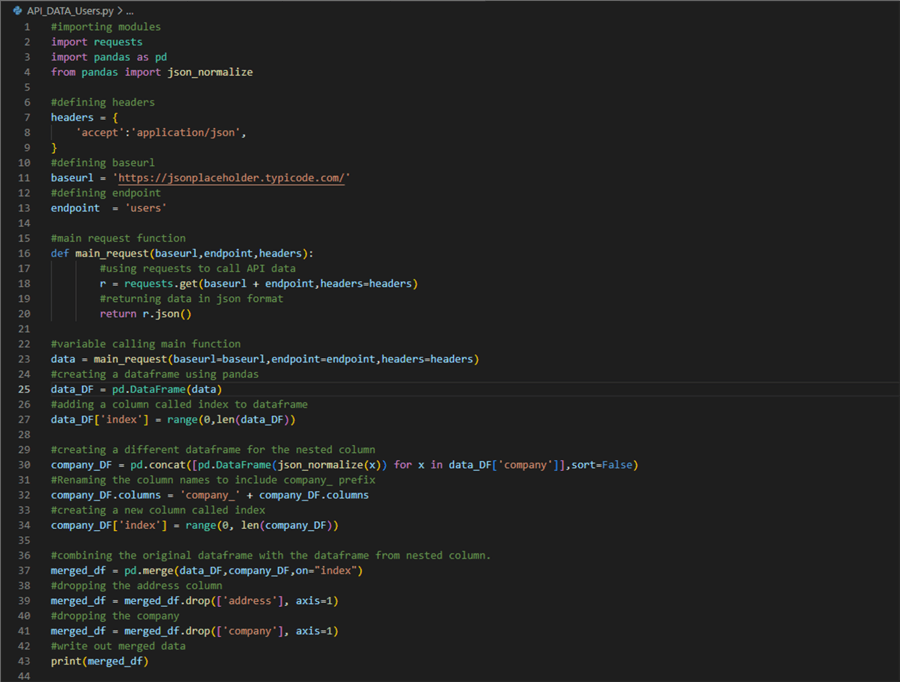
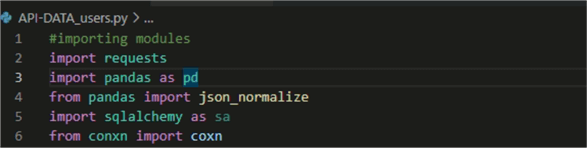
We will then use the requests and pandas modules in the API-DATA_Users.py file as shown below. Note: the full set of code is at the end of this article.
 .
.
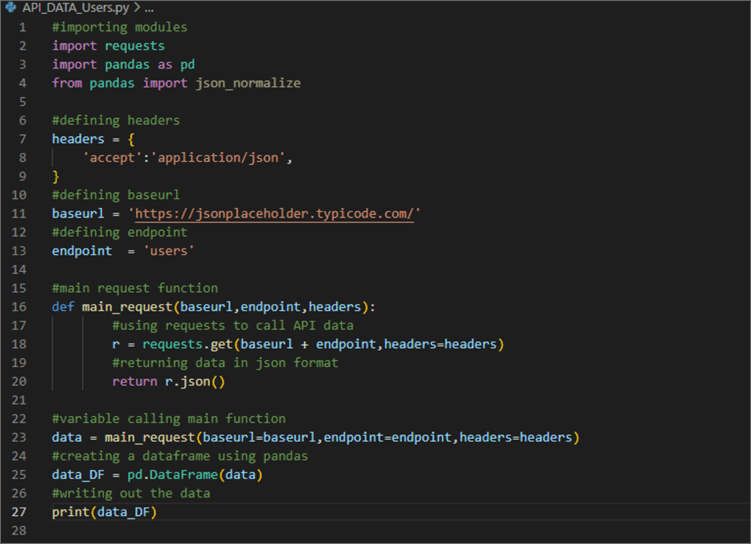
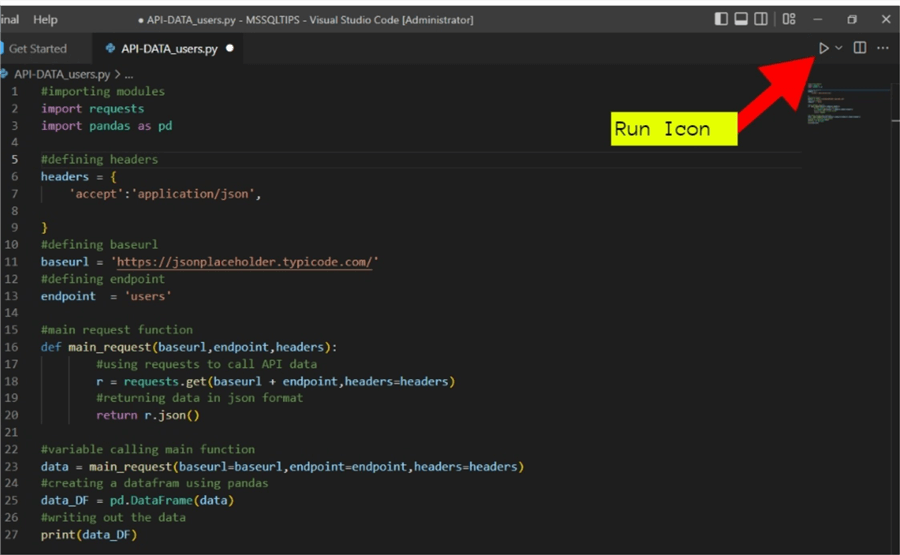
This is what the code looks like to consume the "users" information from the API.
We then save the code using CTRL+S and run the code by clicking the run icon in the top right of Visual Studio.
You will see the output of the execution in your terminal.
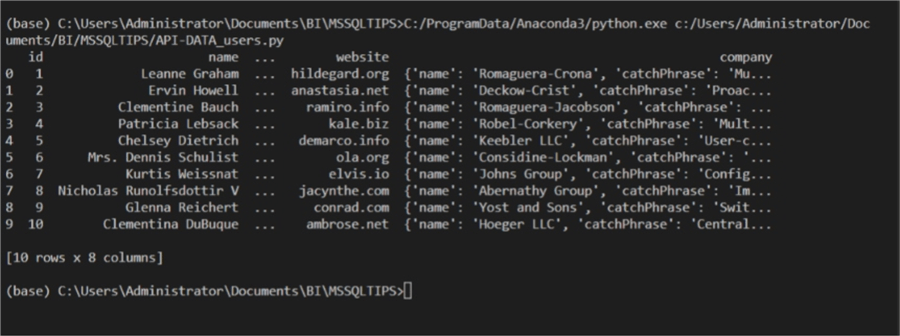
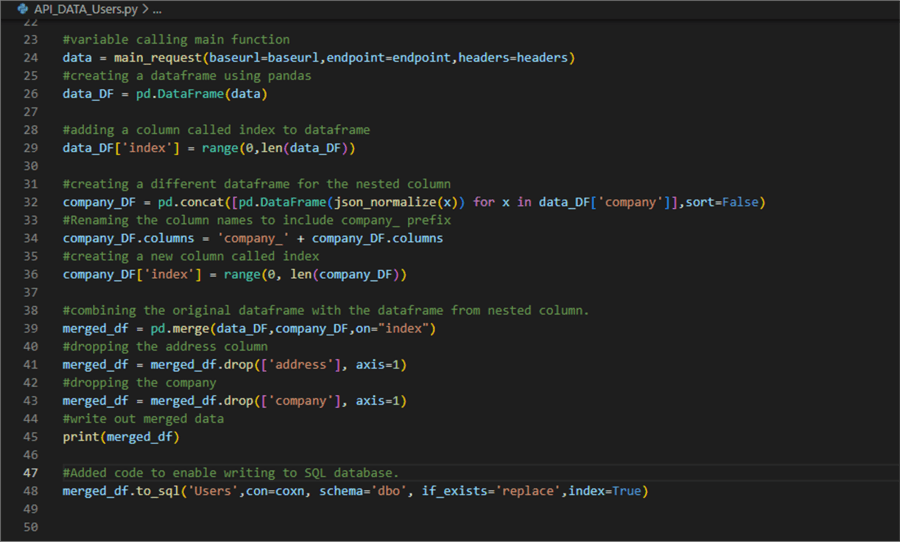
The API consumption is successful, however, notice that the data is not presented as straight followed as you would like, there is a nested JSON structure. It is difficult and sometimes impossible to work with data in this state, so we have to break it down. To do this, we add the code below to the script.
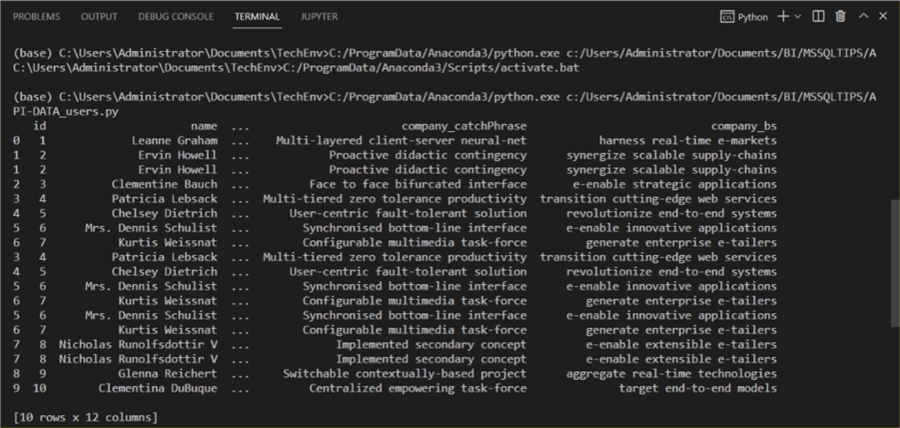
Here is the output. The output looks much better now.
Creating a SQL Database
One of the best reasons to use SQL as a database is that it allows you to create a direct query access as a Power BI data source, direct query enables you to schedule automatic data refreshes to your reports. Follow these links if you need to install SQL Server or SQL Server Management Studio.
To begin, open SQL Server Management Studio and connect to the server and right click on Databases and select New Database to create a new database.

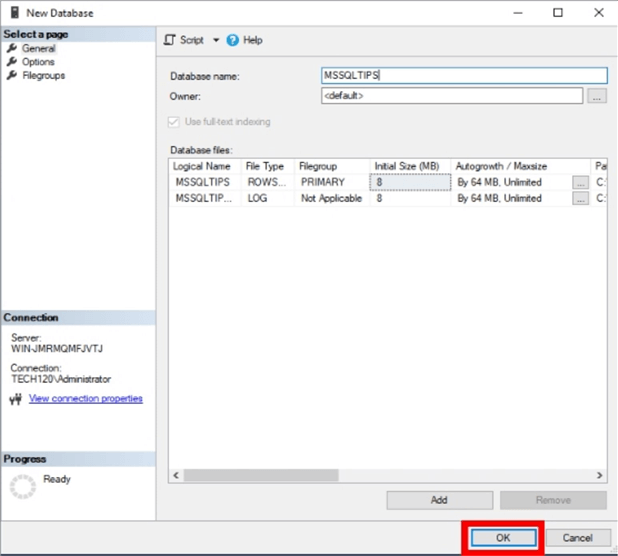
Enter a database name and click OK to create the database. We will name the database MSSQLTIPS_DB.
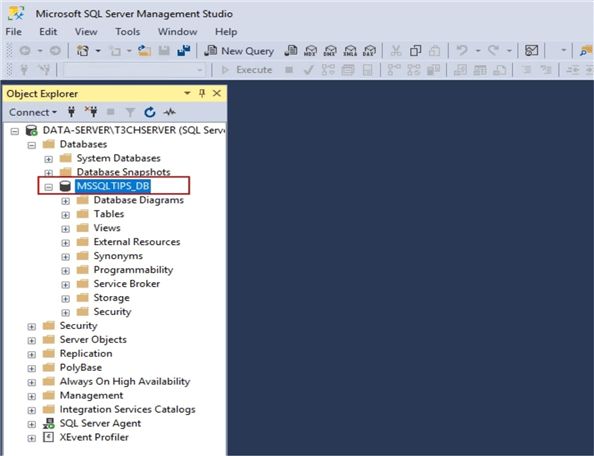
If you refresh the Databases in SSMS, you should see the new database.
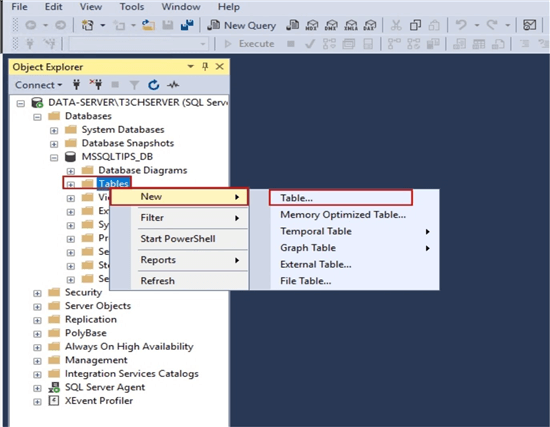
To create a new table, right-click Tables and select New > Table.
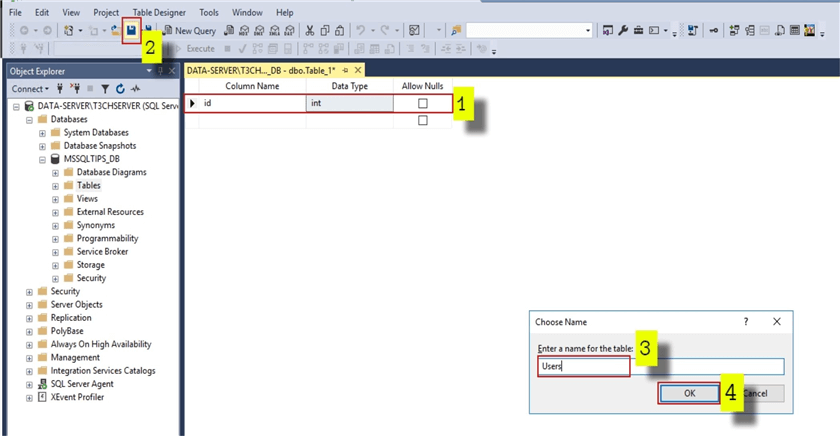
Create a column named id and uncheck Allow Nulls box (1). Click the Save icon (2) and this will prompt you to choose a table name (3), enter "Users" and click OK (4) to save the new table.
Great. You are done setting up the database. Note: you only need to create one column because Python’s dataframe is set up as a table and the rest of the columns will be added automatically from the dataframe. This can save you a lot of time when working will massive datasets.
Writing to SQL Database with Python
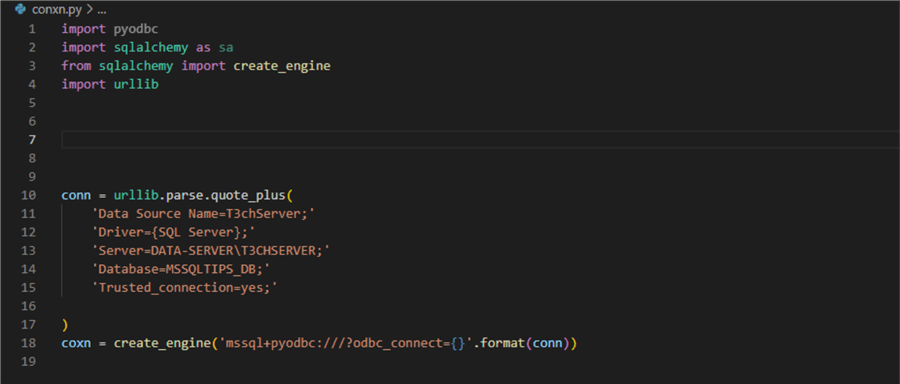
Open Visual Studio and create a connection file called conxn.py and specify your data source attributes.
In the terminal window, we need to install some additional Python libraries.
In the terminal window, enter the code below and run.
pip install pyodbc
In the terminal window, enter the code below and run.
pip install sqlalchemy
We then use these in the connection file as shown below along with the connection string info to connect to SQL Server.
In the API-DATA_Users.py file we need to add a reference to this code as follows.
To write the API data to the database we need to add the following code to the bottom of the API-DATA_Users.py file.
Connecting SQL to Power BI
In this last section, we will create a simple Power BI report for this data using a direct query connection.
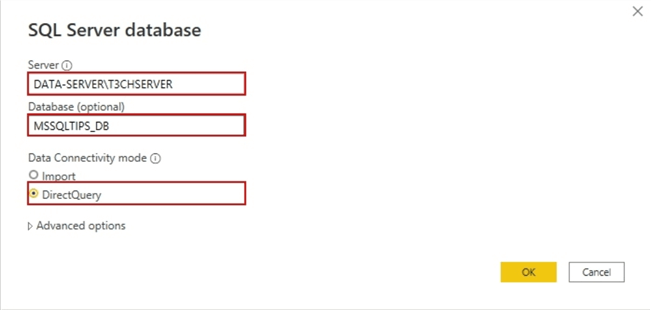
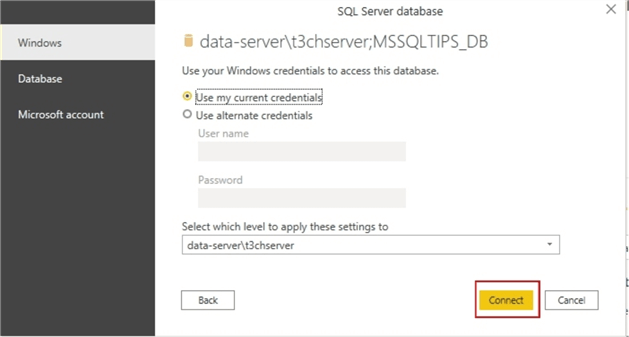
Open Power BI. Click Get data and select SQL Server.

You will see a prompt, enter Server, Database and select DirectQuery for Data Connectivity mode.
On the next dialog window, click Connect to proceed. By default, Power BI will make all the tables in your data source available as models as you will see in the next step.
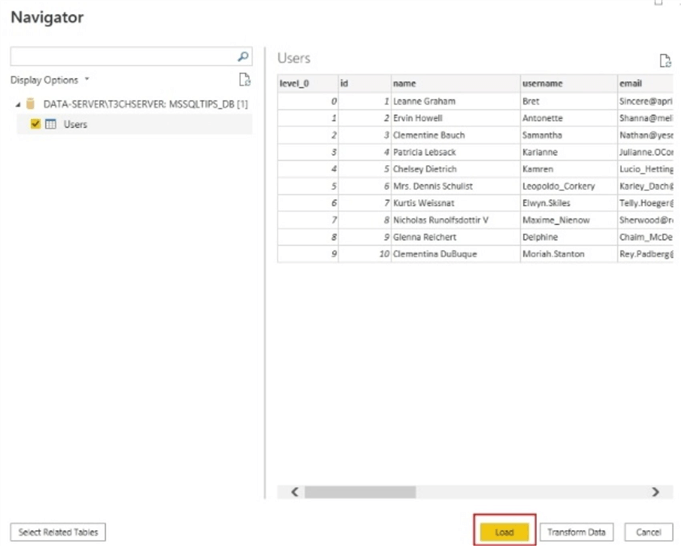
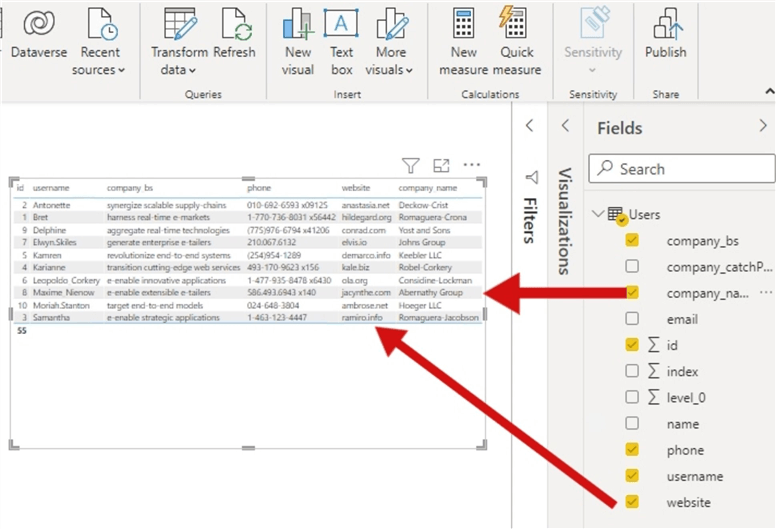
Power BI automatically lists tables available from the data source. Check the checkbox next to the table you want and click Load to load your SQL data to Power BI.
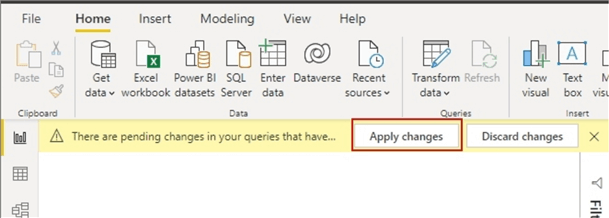
Click Apply Changes to proceed.
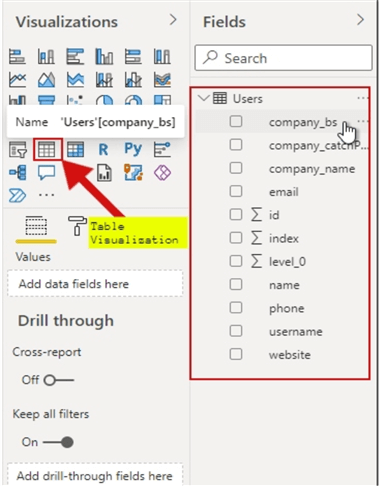
The columns from the table will be visible under the Fields pane. Now to visualize the data, add a simple Table Visualization to the report.
An empty table visual will appear on the page.
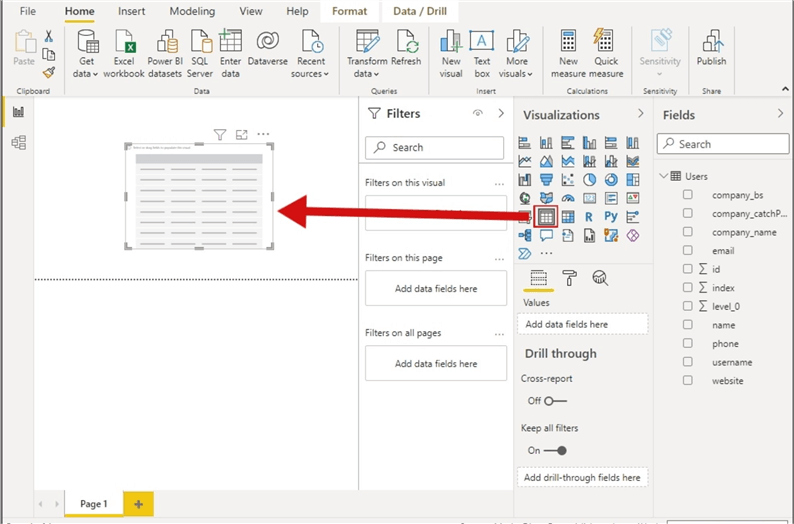
Tick the boxes next to each column you want to include in the report visual.
Summary
Congratulations! You can now consume API data, create a SQL database, write data to the database using Python, and use a SQL database as a DirectQuery data source for Power BI. Hopefully this gives you an idea of how to do this for your project.
Complete Set of Python Code
Here is a complete set of the code for both files.
API-DATA_Users.py full code:
#importing modules import requests
import pandas as pd
from pandas import json_normalize
from conxn import coxn

#defining headers
headers = {
    'accept':'application/json',
}
#defining baseurl
baseurl = 'https://jsonplaceholder.typicode.com/'
#defining endpoint
endpoint  = 'users'

#main request function
def main_request(baseurl,endpoint,headers):
        #using requests to call API data
        r = requests.get(baseurl + endpoint,headers=headers)
        #returning data in json format
        return r.json()

#variable calling main function
data = main_request(baseurl=baseurl,endpoint=endpoint,headers=headers)
#creating a dataframe using pandas
data_DF = pd.DataFrame(data)

#adding a column called index to dataframe
data_DF['index'] = range(0,len(data_DF))

#creating a different dataframe for the nested column
company_DF = pd.concat([pd.DataFrame(json_normalize(x)) for x in data_DF['company']],sort=False)
#Renaming the column names to include company_ prefix
company_DF.columns = 'company_' + company_DF.columns
#creating a new column called index
company_DF['index'] = range(0, len(company_DF))

#combining the original dataframe with the dataframe from nested column.
merged_df = pd.merge(data_DF,company_DF,on="index")
#dropping the address column
merged_df = merged_df.drop(['address'], axis=1)
#dropping the company
merged_df = merged_df.drop(['company'], axis=1)
#write out merged data
print(merged_df)

#Added code to enable writing to SQL database.
memerged_df.to_sql('Users',con=coxn, schema='dbo', if_exists='replace',index=True)
Conxn.py full code:
import pyodbc import sqlalchemy as sa
from sqlalchemy import create_engine
import urllib


conn = urllib.parse.quote_plus(
    'Data Source Name=T3chServer;'
    'Driver={SQL Server};'
    'Server=DATA-SERVER\T3CHSERVER;'
    'Database=MSSQLTIPS_DB;'
    'Trusted_connection=yes;'

)
coxn = create_engine('mssql+pyodbc:///?odbc_connect={}'.format(conn))
Next Steps
- Check out these other Python articles.


About the author
 Levi Masonde is a developer passionate about analyzing large datasets and creating useful information from these data. He is proficient in Python, ReactJS, and Power Platform applications. He is responsible for creating applications and managing databases as well as a lifetime student of programming and enjoys learning new technologies and how to utilize and share what he learns.
This author pledges the content of this article is based on professional experience and not AI generated.
View all my tips
Article Last Updated: 2022-08-11
