By: Manvendra Singh | Comments | Related: 1 | 2 | 3 | 4 | More > Database Administration
Problem
In this tip I will demonstrate how to rename the physical database files with the detach and attach method using SQL Server Management Studio. Whenever you need to rename physical database files, you can use this tip if you prefer the detach and attach method.
Solution
As you may know, a SQL Server database has both logical and physical file names. The physical file name is the name of the actual file which is created in Windows during the database creation process. There are multiple ways to rename your physical database files of your database. You can bring your database offline then you can execute ALTER T-SQL statements which renames the actual files as I have explained in my last tip.
Another option is the detach and attach method to rename these files. There are two ways to execute the detach and attach method. One is the Graphical User Interface (GUI) method which I will explain in this tip and the other option is using T-SQL code which I will explain in another tip. In this tip I will show you the step by step method to rename any physical database file for any database using the detach and attach method using SQL Server Management Studio.
NOTE: BE SURE TO TAKE A FULL BACKUP OF THE DATABASE BEFORE MAKING ANY CHANGES. DO NOT MAKE ANY CHANGES IN PRODUCTION WITHOUT PROPER TESTINGS IN LOWER-LIFE CYCLE ENVIRNOMENTS.
Rename the Physical Database File Name of a SQL Server Database
Step 1 - Check Current Physical File Names
We created a database in our last tip named Manvendra which we will use for this demonstration.
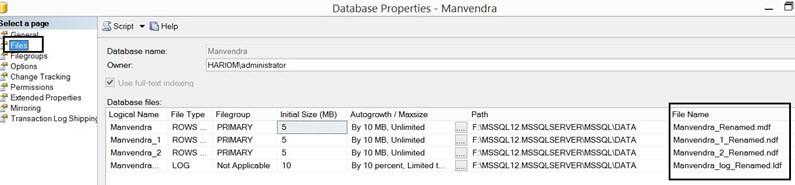
Open SQL Server Management Studio and right click on the database we want to change and select Properties. Choose the "Files" tab from the left pane. The below screen will appear where you can see the current physical file names along with other details.
Step 2 - Detach Database
As I mentioned, before making changes make sure you have a good database backup before proceeding.
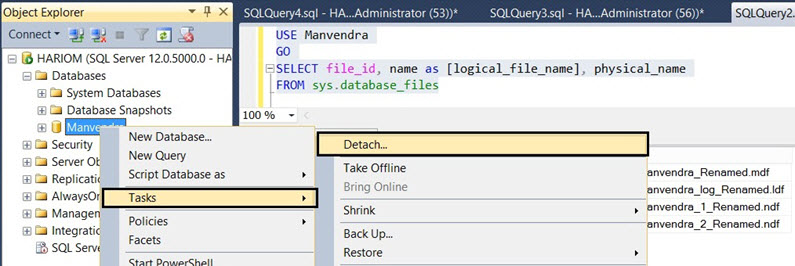
Now we will go ahead and detach the database. Right click on the database in SQL Server Management Studio, select "Tasks" and then choose the "Detach..." option as shown in the below screenshot.
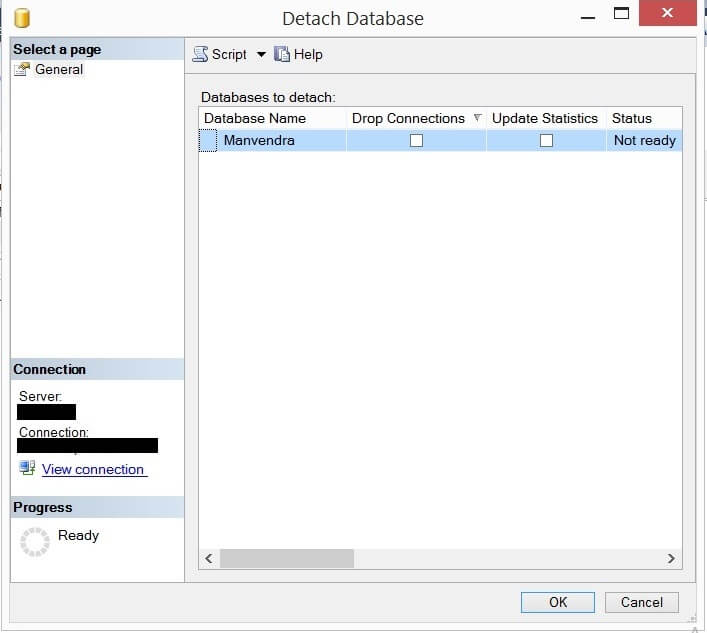
Once you click on "Detach...", a window will open named "Detach Database" which will look like the below screenshot.
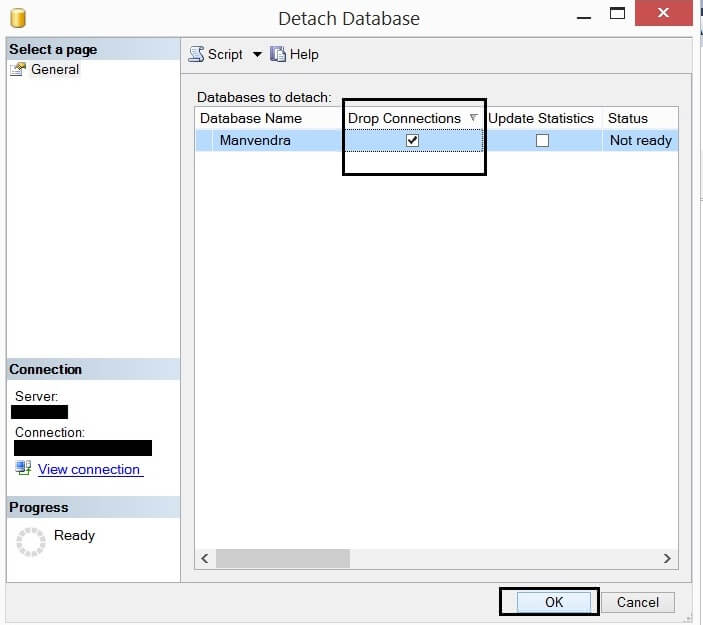
Click on the check box under "Drop Connections" to close all existing connections before detaching the database. If we do not tick this option then the database will not detached if the database has any active transactions.
Then click on the "OK" button to proceed. If there are any critical transactions running it's recommended to let them complete before moving forward.
Step 3 - Validate Database Was Detached
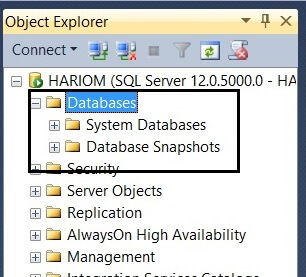
You can validate whether the database is detached by refreshing the database folder in SQL Server Management Studio. You can see the database is not showing in this folder in the below screenshot.
Step 4 - Rename Physical Files
Now our target database has been detached. Our next step is to rename the physical database files that you want to rename. Go to the location of your database files in Windows and rename the files as needed. You can find the location of the files as shown in Step 1. I renamed all database file names and added "_GUI" to all of the file names as shown in the below screenshot.

Step 5 - Attach Database
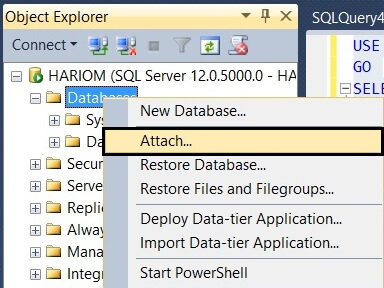
Now we will attach this database with the modified file names. In SQL Server Management Studio right click on the Database folder and choose the "Attach..." option as shown in the below screenshot.
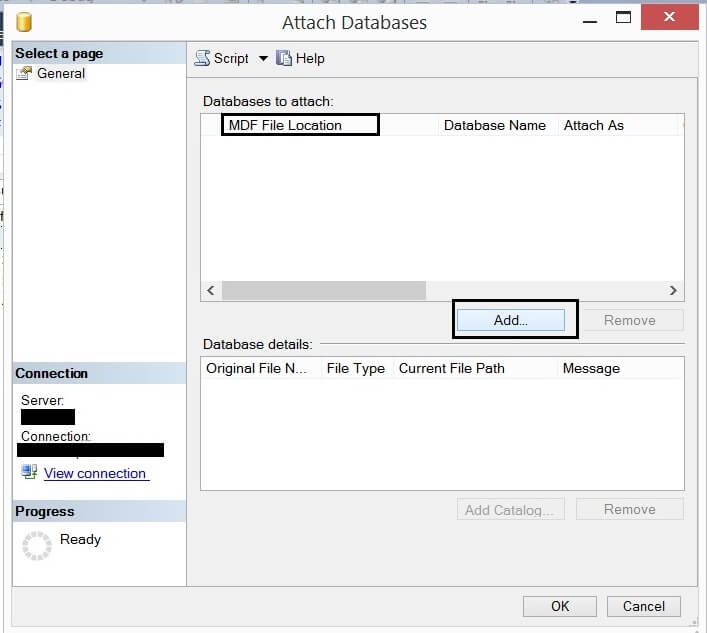
Once you click on "Attach..." a new window "Attach Databases" will open. Click on the "Add..." button to add the primary data file (mdf file).
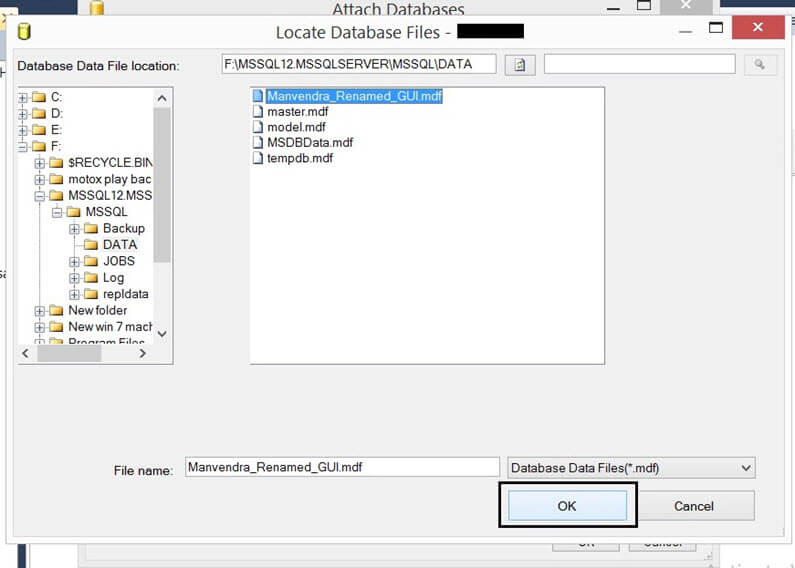
Once you click on the "Add..." button, navigate to the appropriate folder and a list of mdf files will appear in a separate window as shown in the below screenshot. Choose the necessary data file and click the OK button to proceed.
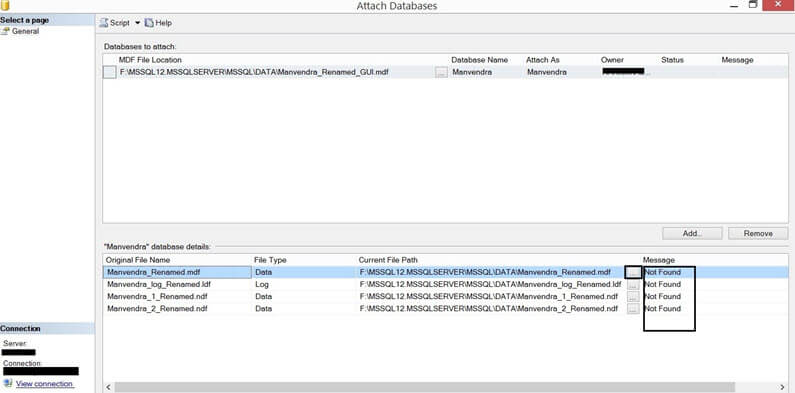
Once you attach the primary data file as we did in the above screenshot, the interface will show the corresponding secondary data files and log files for the database as shown below.
One thing you might notice in the below screenshot is last column "Message" shows that the files are "Not Found" for each database file. This is because the system catalog is not updated in SQL Server, so when you select a mdf file it will show all of the associated files for the attached mdf file. That is why when we choose the mdf file it shows the older database file names.
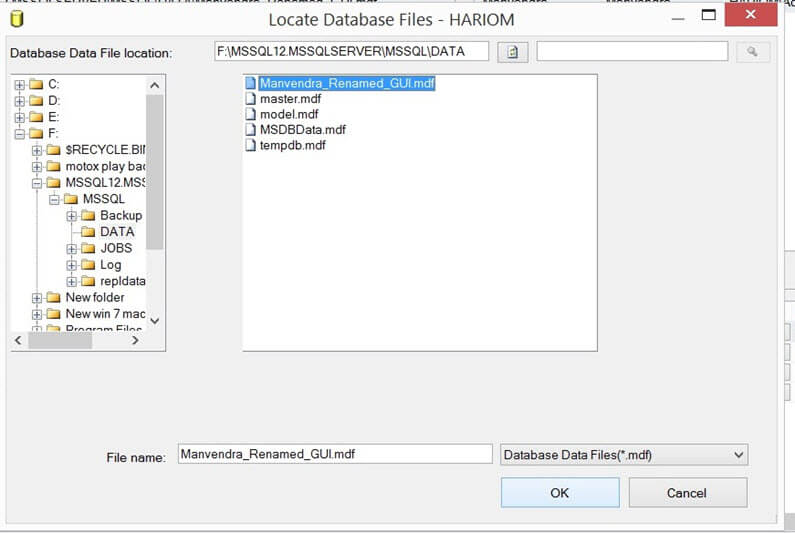
Now we need to manually select each database file and choose the correct file for each one we renamed. You can click on ellipsis (three dots) next to each database file to select the correct file name. This will open a window as shown below where we can select the correct file.
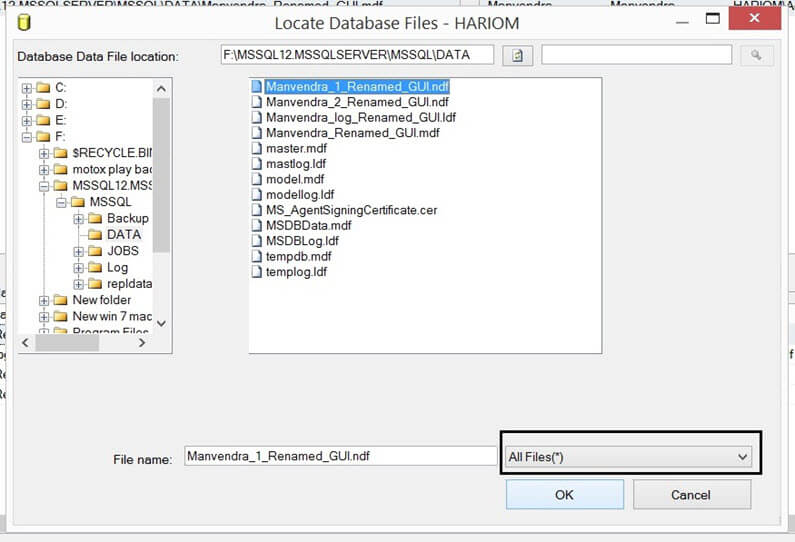
One thing you will notice in the above screenshot is that you are not able to see the secondary database files. To choose secondary database files you should select "All Files" just above the "OK" button as shown in the below screenshot. Once you select this option all database files will be shown. Select each database file for each given row and then click the OK button.
Once you will select the correct database files, the "Not Found" value in the "Message" column should disappear. Now you can click the OK button to complete attaching database.

Step 6 - Validate Database Changes
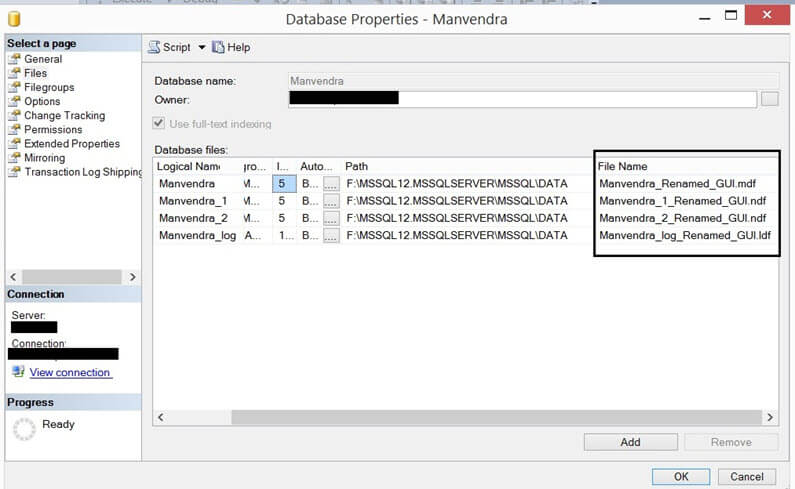
Once the database is attached in the above step. You can refresh your database folder in SQL Server Management Studio to see the database. I validated the changes by opening the Properties window as shown in the below screenshot where we can see the new names for each database file. You can compare this screenshot with the from Step 1 to see the differences.
Next Steps
- Follow the proper change control process while implementing this change for your databases.
- Do not change the physical database file names of your production databases until it is required or needed.
- Be sure to test this process in a lower life cycle environment and then replicate the change in production once approved.
- Explore more knowledge on SQL Server Database Administration Tips.


About the author
 Manvendra Singh has over 5 years of experience with SQL Server and has focused on Database Mirroring, Replication, Log Shipping, etc.
This author pledges the content of this article is based on professional experience and not AI generated.
View all my tips
