By: Manvendra Singh | Comments | Related: > SQL Server Management Studio
Problem
Microsoft has provided a very useful tool, SQL Server Management Studio, to manage SQL Server and Azure SQL databases. Here, I will show you the step by step process to install SQL Server Management Studio.
Solution
Follow the steps in this tip to install SQL Server Management Studio (SSMS).
Installation is very straight forward and this step by step process is relevant for all versions of the product. Microsoft releases new versions of this tool quite frequently based on new features being introduced in their other products such as SQL Server, Azure SQL, or SQL Data Warehouse.
Download SSMS for Install
The first step is to download the setup file of SQL Server Management Studio from Microsoft’s website.
You can download the latest version of SQL Server Management Studio.
You can also access previous release versions from the same link at the bottom of that page.
SSMS Step by Step Installation
You should have already downloaded the setup file for SQL Server Management Studio.
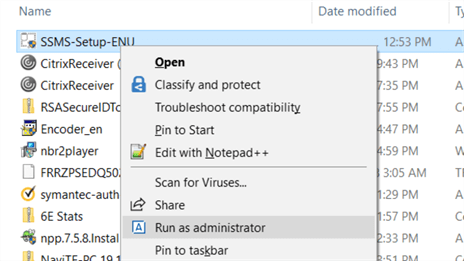
The downloaded setup file is shown below. Right click on the setup file and select "Run as administrator" as shown in the screenshot below.
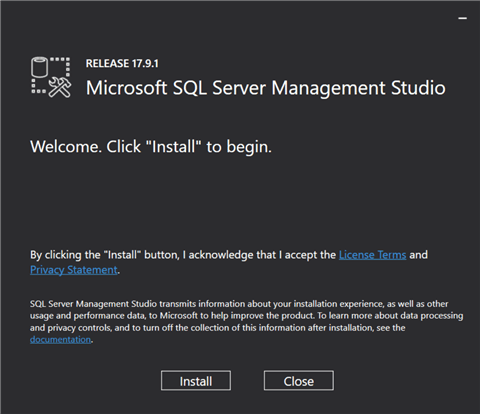
After selecting "Run as administrator", a screen will appear to confirm the version you are installing. You can read the license terms as shown in the installation window. Select "Install" to proceed with the installation.
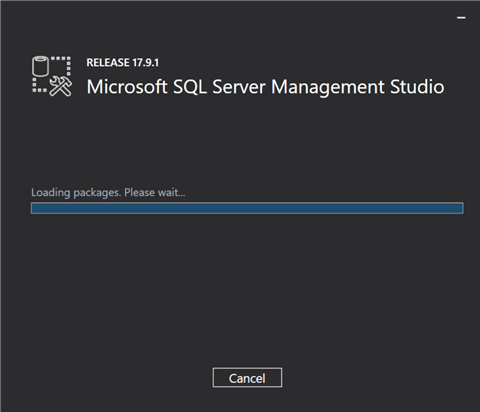
The installation of SQL Server Management Studio has begun. Package loading has started as part of this installation. You can see the completion progress bar in the installation window as shown below. You can cancel this installation at any time by selecting "Cancel".
Note: There is nothing you need to do during the installation.
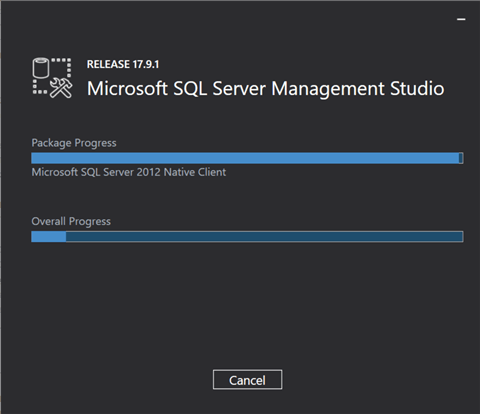
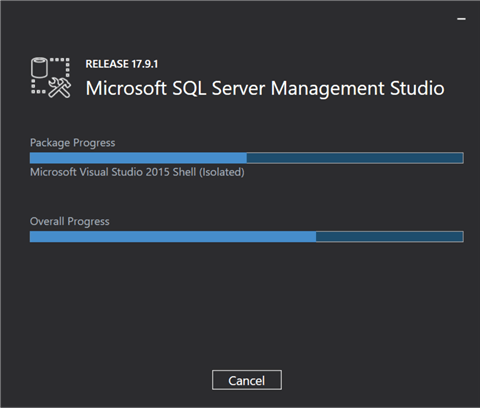
You can see which parts and components are being installed as seen in the image below. Below, Microsoft SQL Server 2012 Native Client package is being installed. An additional progress bar, "Overall Progress", shows you the overall completion of the installation.
As the installation progresses, we can see that Microsoft Visual Studio is being installed. I am not capturing all the packages that are being installed, I just a select few to help you understand the setup. You can see by the progress bar below that the installation is more than 50% complete.
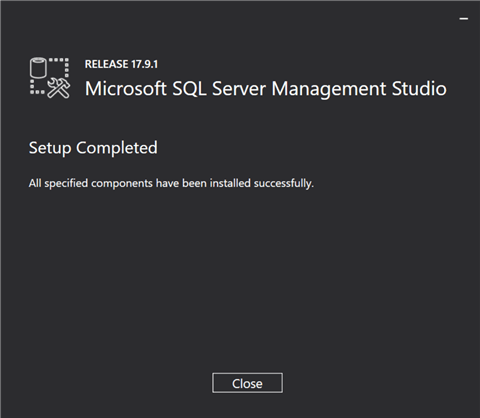
Once the Overall Progress reaches the end and all packages have been installed, the installation should be successful. If installation of any packages fail, setup will quit.
We can see below that the setup was completed successfully. Select "Close" to close this window.
Open SSMS and Connect to SQL Server Instance
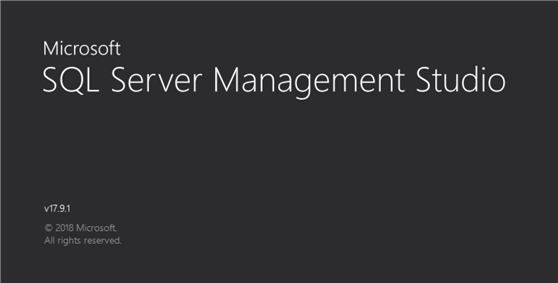
Now let's open SQL Server Management Studio and connect to a SQL Server database instance. Click on the SSMS icon on your desktop or select SQL Server Management Studio from the start menu.
Once it is launched you will first see the image below.
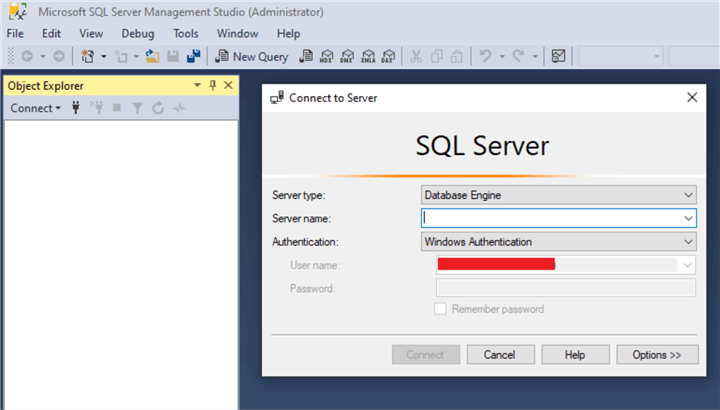
SSMS will open as shown in the image below.
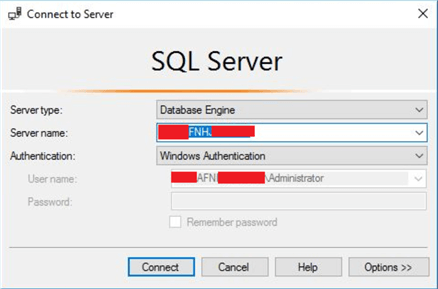
In the Connect to Server window do the following:
- Server type - this should be Database Engine (the other options are covered below)
- Server name - enter the SQL Server instance name
- if you are on the same machine where SQL Server is installed you can use . or (local)
- if you are connecting to another computer use the name of the computer
- if you are connecting to a named instance of SQL Server enter the computer\instanceName
- Authentication
- Windows Authentication - this will use your Windows credentials
- SQL Server Authentication - this will use a SQL
Server login
- User name - enter your SQL login name
- Password - enter your SQL password
After you fill in these items, the Connect button will be active, so click that to connect to SQL Server.
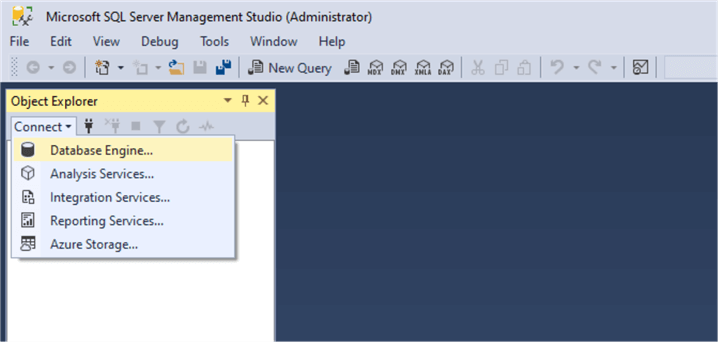
If the "Connect to Server" window seen above does not pop up, select the "Connect" tab shown in the image below.
As you can see below, there are several options that SSMS has to manage the Database Engine, Analysis Services, Integration Services, Reporting Services and Azure Storage.
For this example, we want to use the Database Engine option.
This will then open the Connect to Server window as shown below that has the options we covered above.
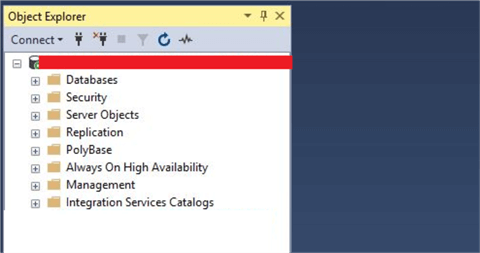
Once the SQL Server instance is connected in SQL Server Management Studio your instance will be visible in the Object Explorer as seen below. You can then expand the folders to see the components in each section.
Checking Version of SSMS
In the top menu bar, select Help > About and the about window will open and provide in-depth information about the product and version installed.

SSMS New Query
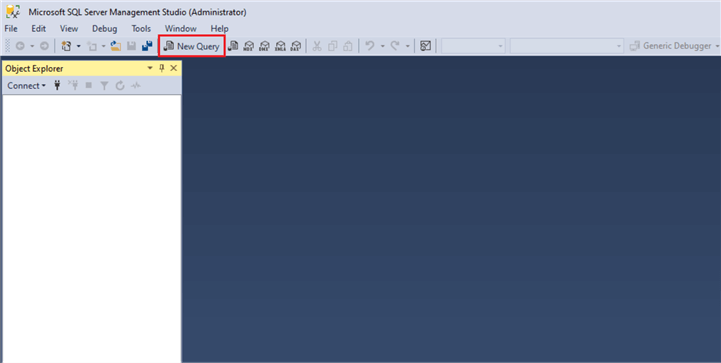
SQL Server Management Studio is a very rich, popular and powerful tool to manage, configure and administer all components of SQL Server, Azure SQL and SQL Data Warehouse. It enables SQL Server DBAs and developers to access graphic tools to manage and run scripts on databases through its script editor. You can easily access its script editor by selecting the "New Query" option at the top of SQL Server Management Studio as shown below.
Once you select this option, you will be asked to enter the connection details with the "Connect to Server" window. If you have already established a database connection to any SQL Server instance, you will not be asked to enter connection details again. Instead, a new query window will be launched for your connected SQL Server instance.
SSMS Registered Servers
Registered Servers is a very useful feature in SSMS that allows you to deploy or run any script on a set of instances in one shot.
To launch Registered Servers, select View from the top menus and then select Registered Servers as shown below.
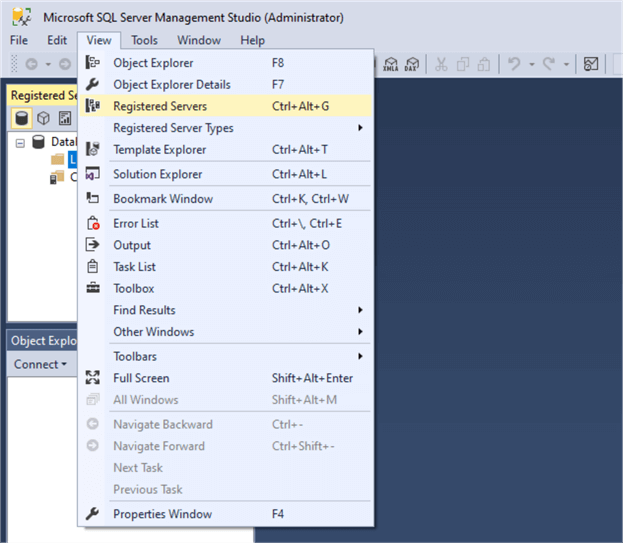
Once you select "Registered Servers", another window in SSMS will appear as shown in the image below. Check out this article to learn more about how to setup Registered Servers.
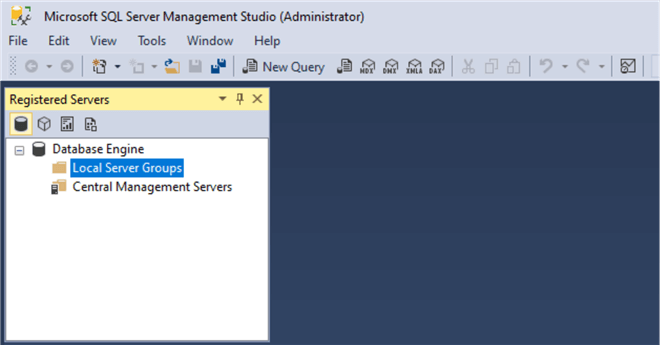
SSMS Local Server Groups
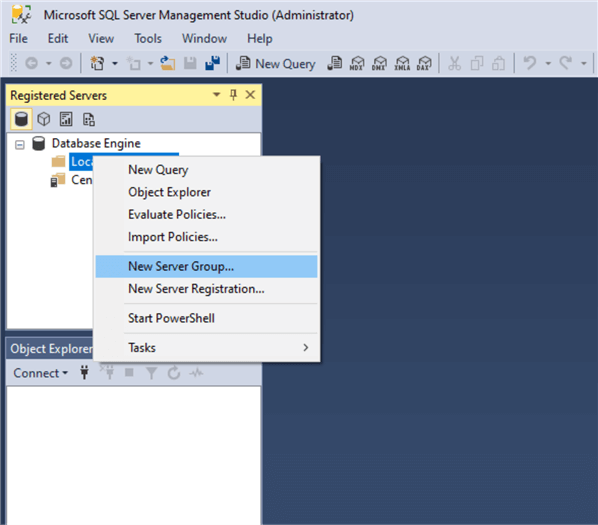
Local Groups allows you to group your SQL Server instances together such as (Test, Prod, Dev) or (East Coast, West Coast), etc. By setting up groups you can run the same query against all of the instances in that group and all results are returned to you. The local groups option stores the data locally for your SSMS installation on your desktop.
If we right click on "Local Server Groups", we can see the different options below. We can create a New Server Group and then add each instance to the group. We can also use the New Query option to open a new query window and execute against all of the instances in that group.
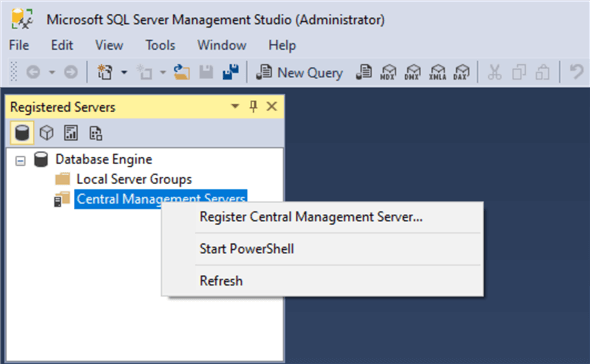
SSMS Central Management Servers
You can also use Central Management Servers to setup a central repository for your instances. This way you can do this one time and use the central repository from any installation of SSMS. This allows you to keep things consistent as well as saves time so you don't have do this over and over again.
Next Steps
- Now you can launch SQL Server Management Studio and connect to SQL Server database instances to access databases, execute queries, or to deploy any configurations on any of the accessible instance as needed. You can also go ahead and do any configuration changes, script execution, analysis, monitor activity, and run various reports to analyze database transactions and loads.
- This tool is beneficial for DBAs and developers. Enjoy managing and accessing the database instances using SQL Server Management Studio.
- Read more articles about SQL Server Database Administration and SQL Server Management Studio to build your skills.


About the author
 Manvendra Singh has over 5 years of experience with SQL Server and has focused on Database Mirroring, Replication, Log Shipping, etc.
This author pledges the content of this article is based on professional experience and not AI generated.
View all my tips
