By: Carla Abanes | Comments (1) | Related: 1 | 2 | > Azure
Problem
In a previous tip, Building SQL Server Cluster on Azure with Storage Spaces Direct - Part 1, we built a 2-node failover cluster service on Windows Server 2019 that is hosted on Azure virtual machines. How do we set up and configure MS SQL Server Failover Cluster Instance on Azure?
Solution
In Part 1 of this solution, we completed building a Windows failover cluster with 2 nodes, clustered shared volumes via Storage Spaces Direct (S2D), and a cloud witness on the Azure storage account.
In Part 2 of this solution, we will set up MS SQL failover cluster instance behind an Azure internal load balancer. We already created the Azure resources, including an internal load balancer inside a resource group, in Part 1 of this tip.
Install SQL Server 2017 Failover Cluster Instance
We will use SQL Server 2017 Standard Edition for this solution. To install SQL Server 2017 Failover Cluster Instance, here is a good link. When deciding on the SQL Server network name and internal IP, remember not to select the DHCP option and key in a static internal IP address. You will need to follow the wizard steps until you reach the part where you decide the Cluster Disk Selection. The wizard should look similar to the image below.
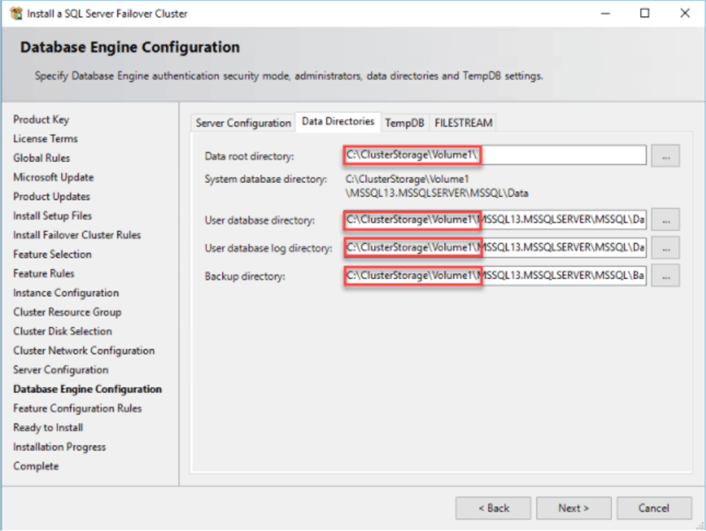
For the SQL data files, use the clustered shared volume we labeled with FriendlyName as 'Data'. For the log directory, use the clustered shared volume labeled as 'Log'.
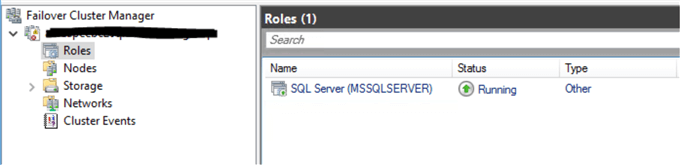
After you complete the wizard, the installation for the first node of our SQL Server 2017 should be successful. To validate that our SQL Server on the first node is running, you may go to the Failover Cluster Manager console and see the SQL service appear on the Role tab and window.

At this point, we can add a second node to our SQL Server failover cluster. Here is a good link to help you with this step.
After adding the second node to the SQL FCI, go back to the failover cluster manager console and test the moving of the SQL role to the primary and secondary node.
Azure Internal Load Balancer Configuration
In Part 1 of this solution, we provisioned an internal load balancer on the Azure portal. Now we will complete the configuration of its backend properties and rules so that load distribution will function as normal
In the Azure portal, go to the internal load balancer and select Backend Pools on the left side menu. Click the plus sign (Add) to open a new window to add the 2 nodes IP addresses of our SQL Servers.
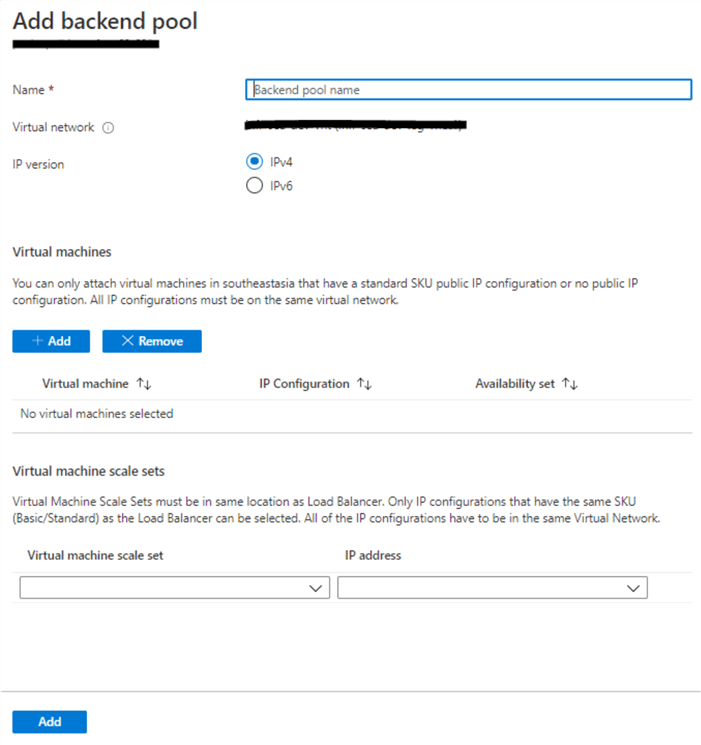
Prepare and key in a backend pool name. The Virtual network field will automatically fill with the current virtual network you are using. Under 'Virtual Machines', click on 'Add' to open another window with a list of the 2 SQL Servers we previously configured. Finally, at the bottom, click 'Add' to save your changes. After saving, you should be back at the previous load balancer window.
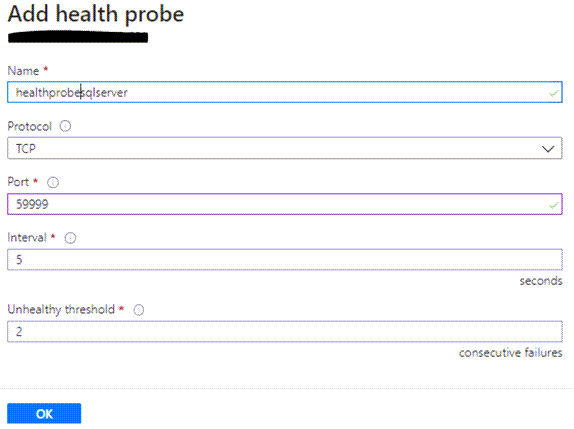
Next, we will configure the health probe. The health probe tells the load balancer which of the 2 nodes is healthy and ready to accept traffic or request. The important part in setting up the health probe is the port. Make sure you choose a high-end port number, a port that is not in use, and opened from the Windows Firewall Settings. For this example, we will use 59999.
Next, we will configure the load balancing rules. This is where we combine the health probe and the backend pools to create a rule. To create a new load balancer rule, click on Load Balancer Rules on the left menu to open a new window. Key in a name for the load balancer rule. For the front-end IP address, key in the SQL role IP we created in Part 1 of this solution. For both the Port and the Backend Port textbox, enter the default SQL port 1433. For the backend pool, select the backend pool created earlier from the dropdown list. For the health probe, select the health probe we created earlier from the dropdown list. Leave the rest of the settings in their default values. Click OK to save all the changes.
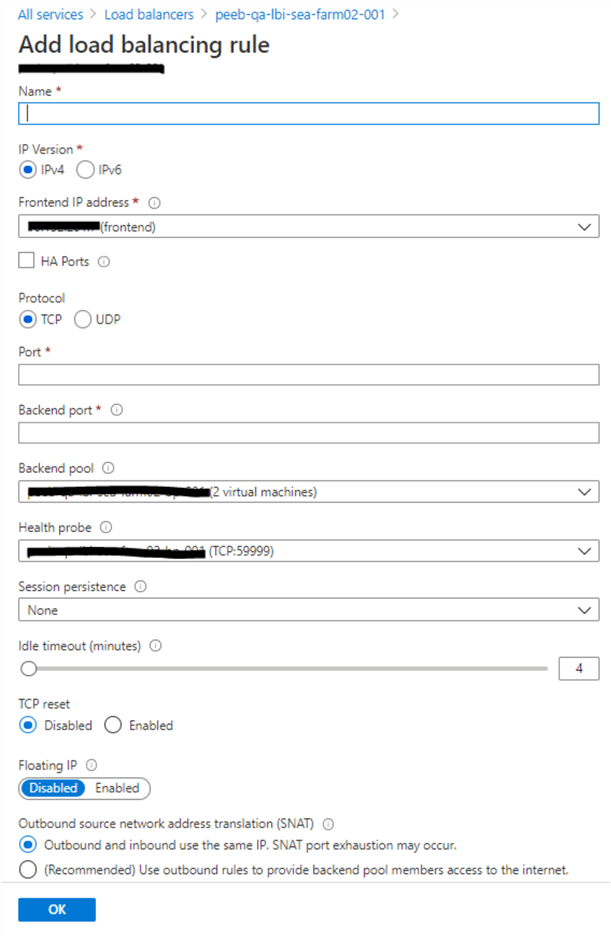
The Frontend IP configuration of the load balancer should automatically appear since we entered the value of the frontend IP address earlier. Remember, this IP address should be the same as the SQL role IP address of our windows failover cluster for all the resources to work properly.
Windows Cluster Probe
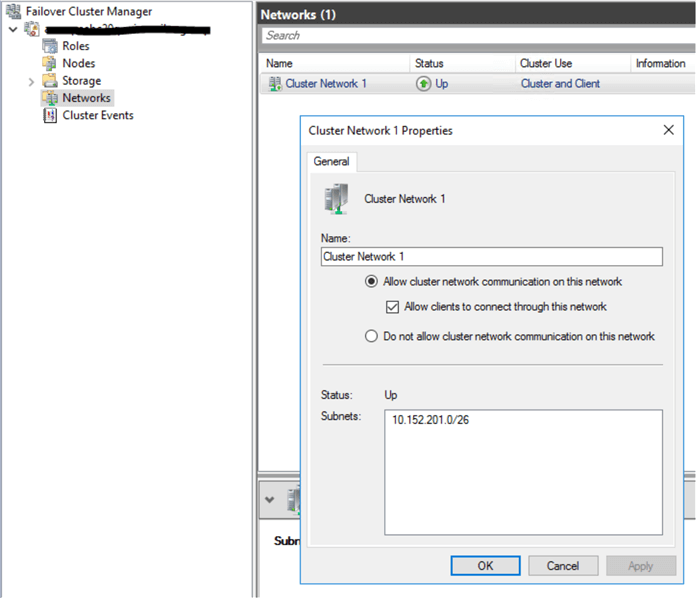
The next step is to set up the settings of our Azure load balancer and our windows failover cluster probe to listen on the same port 59999. To do this, RDP into the primary node server and open the Failover Cluster Manager. Retrieve the value for the cluster network name and the IP Resource name. This can be found on the windows Failover Cluster Manager.
Prepare the following variables and copy the below PowerShell script. Execute this script on the primary node server as an administrator.
$ClusterNetworkName = "Cluster Network 1"
$IPResourceName = "SQL IP Address 1"
$ILBIP = "10.0.0.0"  → should be the load balancer IP; same as sql role cluster IP
[int]$ProbePort = 59999 → the health probe port we used in the load balancer health probe set up
Import-Module FailoverClusters
Get-ClusterResource $IPResourceName | Set-ClusterParameter -Multiple @{"Address"="$ILBIP";"ProbePort"=$ProbePort;"SubnetMask"="255.255.255.255";"Network"="$ClusterNetworkName";"EnableDhcp"=0}
Get-ClusterResource $IPResourceName | Get-ClusterParameter
The last line in the above PowerShell script helps to validate that all the cluster settings we set are correct.
At this point, we have completed the setup of a Windows failover cluster with clustered shared volumes and installed SQL Server 2017 failover cluster instance on Azure.
The final step is to test connectivity on the SQL cluster name and make sure that when we create a test database, the data and log files are written to the clustered shared volume on both cluster nodes.
Client Connectivity
On your client machine or laptop, open a SQL Management Studio console. Open a new connection to the SQL role name we created in Part 1 of this solution. Try to create a new database and make sure the database data and log files point to the respective 'Data' and 'Log' clustered shared volumes.
Remember to delete and clean up all the Azure resources we used for this tip to avoid unnecessary charges to your Azure account.
Next Steps
- Review the Running MS SQL FCI on Azure VMs Part 1 of our solution.
- Check out
these amazing steps for running MS SQL on Azure
- SQL Server on Azure tips
- Azure HA and Disaster Recovery Options for MS SQL Server
- More tips on configuring MS SQL Clustering


About the author
 Carla Abanes is a certified Microsoft SQL Server Database Administrator with extensive experience in data architecture and supporting mission critical databases in production environments.
This author pledges the content of this article is based on professional experience and not AI generated.
View all my tips
