By: Joe Gavin | Updated: 2022-03-18 | Comments | Related: > SQL Server Management Studio
Problem
You're new to SQL Server and have seen how to install SQL Server Management Studio (SSMS) and connect to a SQL Server with it here: SSMS Download, Install and Configure with GUI and Command Line. Now you're ready to get started using this IDE for database administration and development.
Solution
SSMS is an extremely feature rich and powerful management tool for DBAs and Developers working on MS SQL Servers. The sheer number of features can easily be overwhelming, but don't be intimidated by that. In this tutorial, we'll look at some of the fundamental and commonly used functionality. The goal is to help you get started and build some familiarity before moving on.
We'll be using SSMS 18.11 running on an on-premises Windows Server 2019 operating system Virtual Machine and will connect to an SQL Server 2019 SQL Server which are all the latest versions as of the time of writing. You can use this version of SSMS to connect to older versions of SQL Server as well, so the information below should apply to SQL Server 2005 and later.
First thing we'll do is look at some options for connecting to a SQL Server.
Starting SSMS
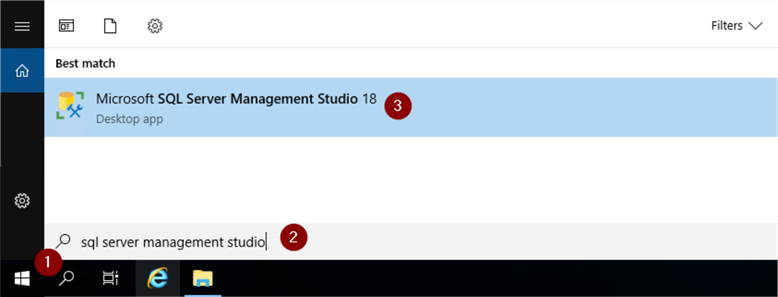
If you created a shortcut to ssms.exe you can click on that, or open it from the Start Menu, or:
- Go to Search Box
- Type in 'sql server management studio'
- Click Microsoft SQL Server Management Studio
Connect to the SQL Server Database Engine
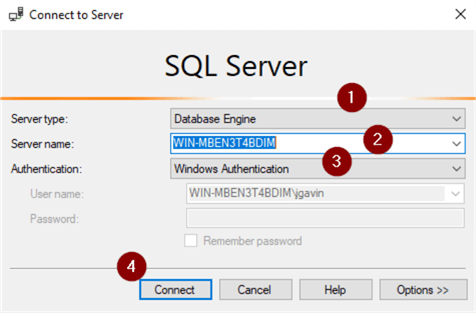
You'll first be prompted with the 'Connect to Server' window.
There are two ways to authenticate to a SQL Server instance. The first is with Windows Active Directory (AD). This is the preferred authentication method. It's more secure and is managed from Active Directory.
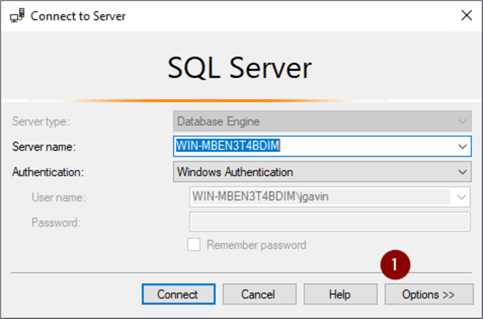
- Default Server type is Database Engine
- Enter the SQL Server name you're connecting to
- Default Authentication is Windows Authentication (Notice 'User name' is filled in and both 'User name' and Password are grayed out. This is because SSMS is using the AD credentials you're logged into your Windows machine as.)
- Connect
You're in and are now connected to the SQL Server using your Windows AD account credentials.
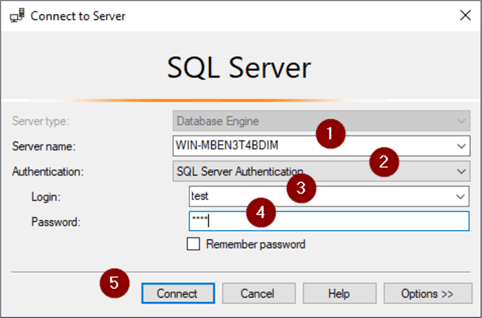
The other way to authenticate is with SQL Server Authentication (commonly called just SQL Auth). With SQL Auth, authentication is performed in and is managed directly on the SQL Server database. You may be using this method if your users aren't on a domain or possibly with a legacy application that doesn't support AD authentication.
- Connect
- Database Engine
- Server name
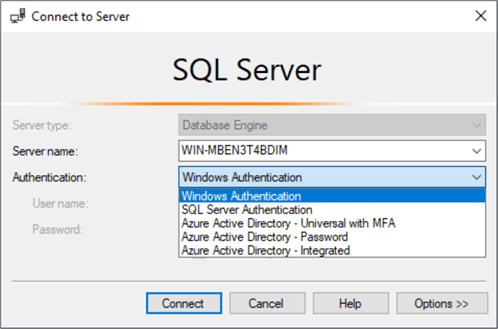
- Select SQL Server Authentication from the Authentication dropdown
- Enter SQL Server Authentication login
- Enter password
- Connect
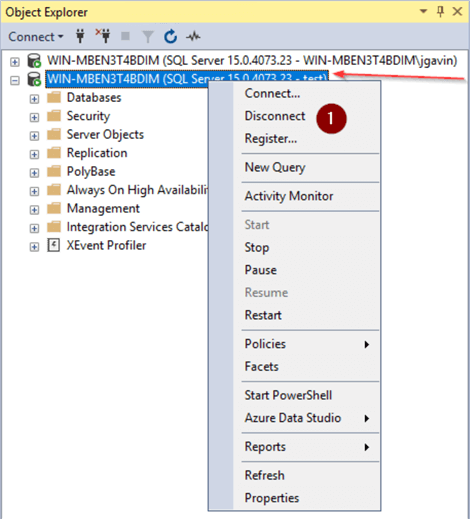
We are now logged in using SQL Auth and have a second connection to the SQL Server.
- Disconnect (we'll be using the Windows Authentication connection for the rest of the tip)
Other SSMS Connection Options
It's out of scope for this tutorial, but this is a good time to digress slightly and point out a few things you may have noticed and are curious.
First, the other three selections under the Authentication dropdown are different methods of authenticating to an Azure SQL Database.
- 'Azure Active Directory – Universal with MFA' – connecting with Azure Active Directory credentials and multi-factor authorization
- 'Azure Active Directory – Password' - connecting with Azure Active Directory credentials
- 'Azure Active Directory – Integrated' – connected with using Azure Active Directory credentials from a federated domain
And lastly for this section there are some less commonly used options are here.
- Options >>
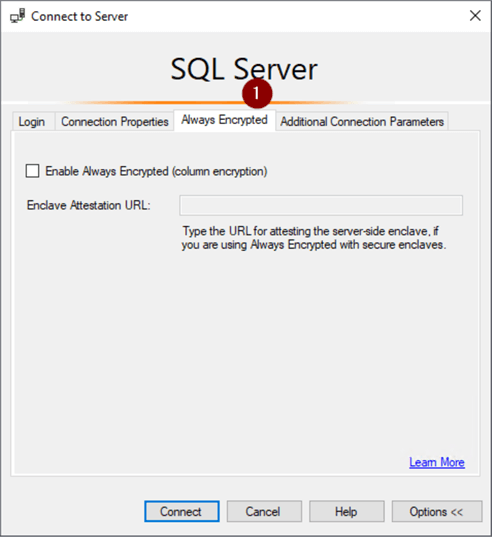
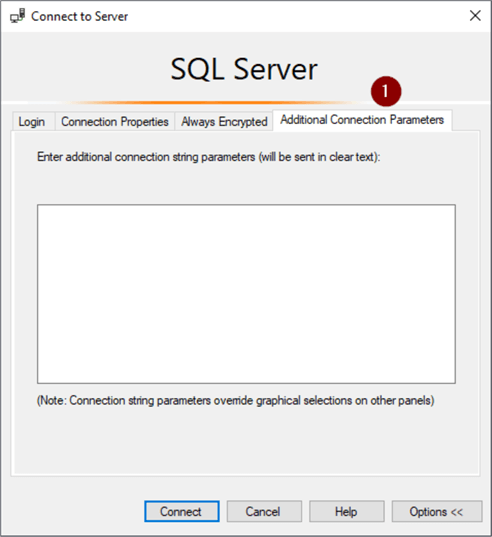
Here we can choose a database to connect directly to (used primarily for Azure SQL Database), change some network options, choose some encryption settings, and set some color options.
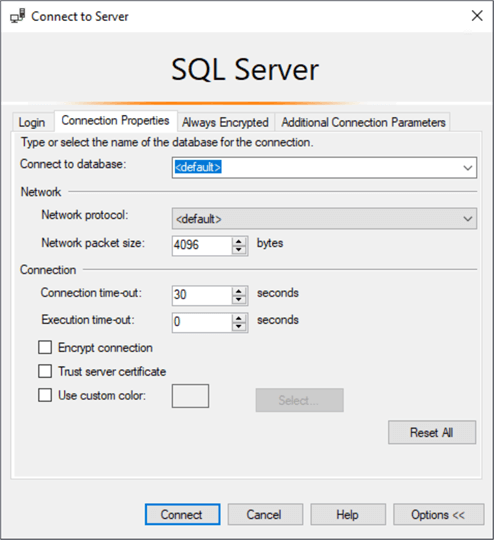
- Always Encrypted
- Additional Connection Parameters
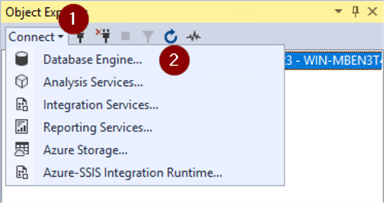
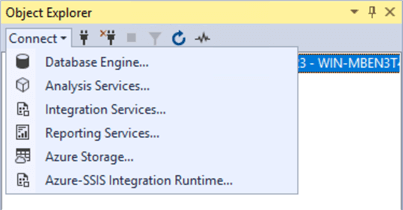
Lastly, those other Connect options are to connect to:
- Analysis Services (SSAS)
- Integration Services (SSIS)
- Reporting Services (SSRS)
- Azure Storage
- Azure-SSIS Integration Runtime
SSMS Functionality with the Database Engine
Let's get back to the where we were.
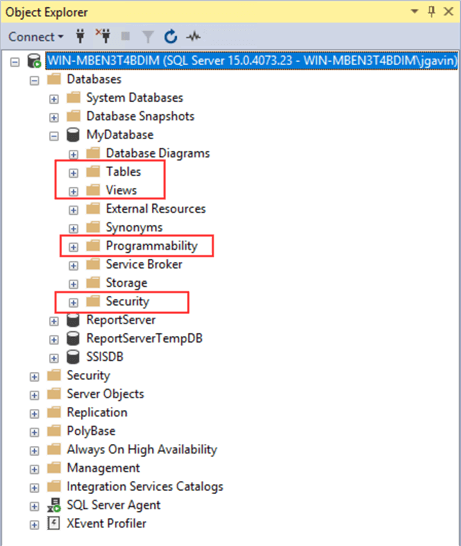
After you connect, the first place you'll generally start in is the Object Explorer to browse the database objects.
- Expand the server dropdown
- Expand the Databases dropdown
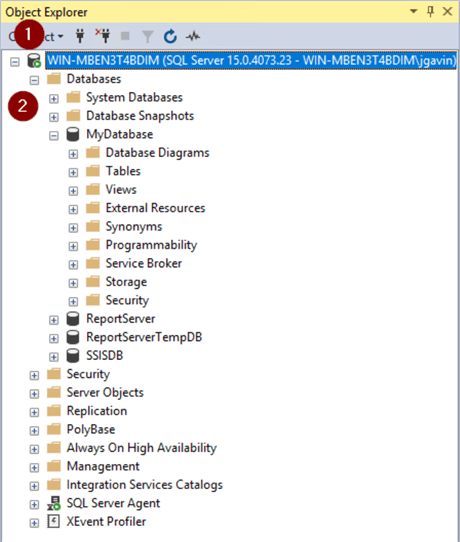
The more commonly used items under the Database dropdown are Tables, Views, Programmability, and Security.
- Tables and Views - manage Tables and Views
- Programmability - manage Stored Procedures, Functions, Triggers, etc.
- Security – manage permissions for Users, Roles, Schemas, etc. (database level)
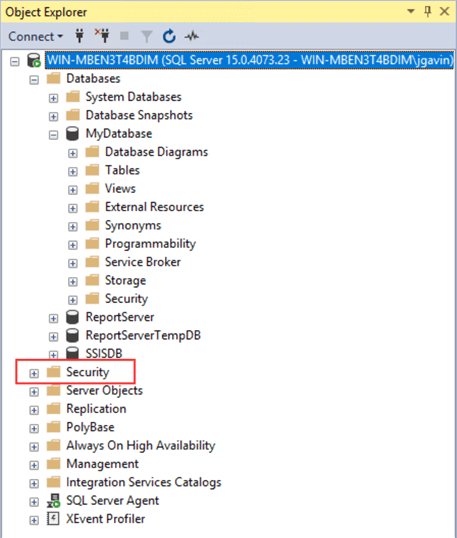
Under the Security folder dropdown under the Server (not to be confused with the Security folder under each database) is where you manage Logins, System, Roles, etc. Note, Logins give you access to the SQL Server and Users give you access to the Database.
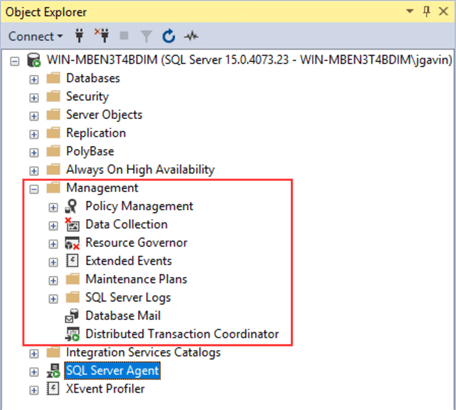
The Management folder is where Maintenance Plans, SQL Server Logs (one place to look), and Database Mail are managed.
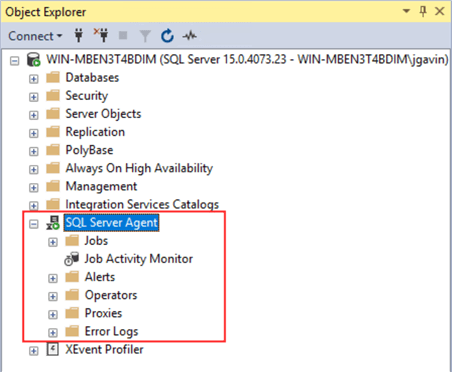
Under SQL Agent is where Agent Jobs, Alerts, Operators, Proxies are managed, and SQL Agent logs viewed.
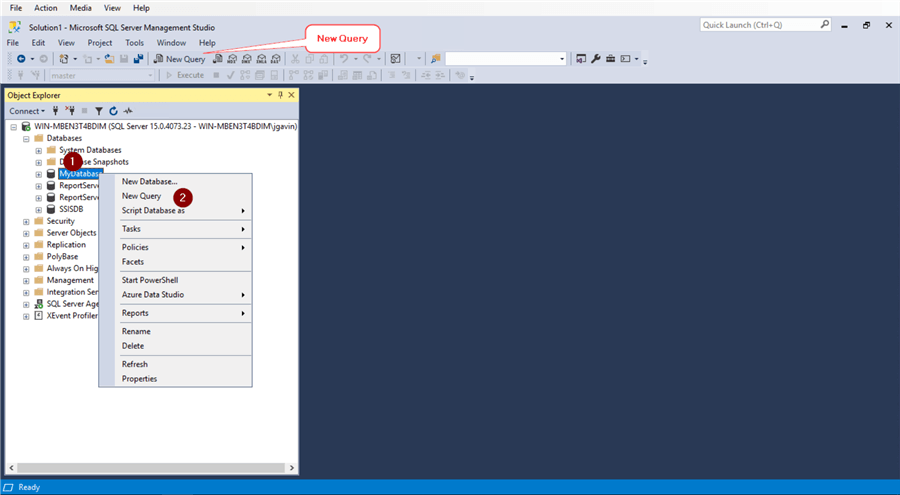
There are a couple of ways to open a Query Window.
Click the 'New Query' button or
- Right click on any Database (you'll be brought directly into the database you right click on)
- 'New Query'
The query window will open. Some points of interest are shown. You can select a Database from the dropdown in the ribbon. In the Query Window you can:
- Select zoom in or out on the text
- See your SQL Server name and version
- See who you're logged in as
- Get your database context
- Get the time it took a query to run
- See how many records the query returned
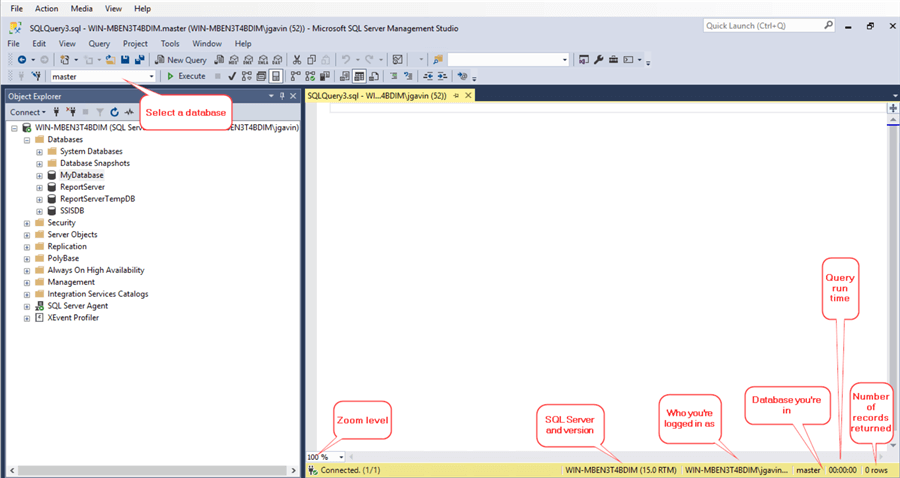
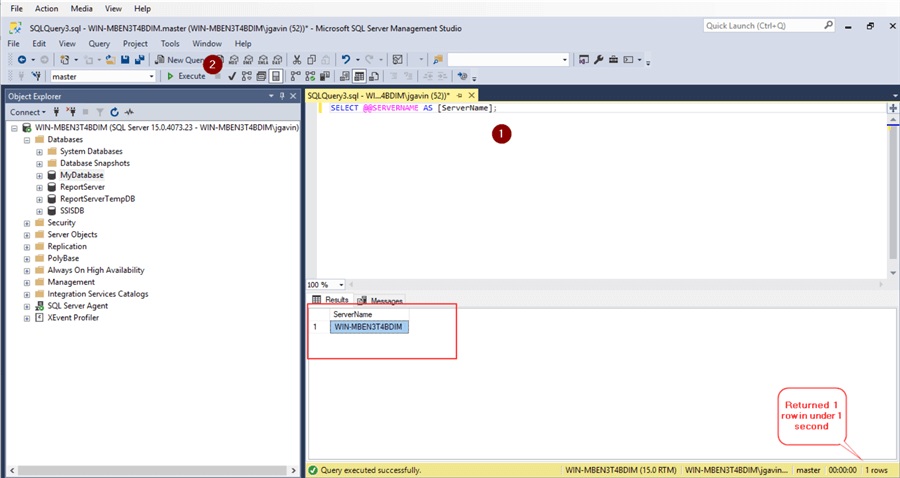
- Enter your Query in the window
- Execute (or hit F5)
The result set is returned.
Next Steps
You've taken the first steps to using SSMS. Now, here are just some of the SSMS Tips with more information you can find on MSSQLTips:
- SQL Server Management Studio Overview (SSMS)
- Download SQL Server Management Studio
- SQL Server Management Studio Tips
- SQL Server Management Studio Query Designer
- How to create a table using SQL Server Management Studio
- Debugging T-SQL Code in SQL Server Management Studio
- Managing SQL Server Extended Events in Management Studio
- Prevent Truncation of Dynamically Generated Results in SQL Server Management Studio
- How to Install SQL Server Management Studio on your Local Computer
- How to Upgrade SQL Server Management Studio and Azure Data Studio


About the author
 Joe Gavin is from the Greater Boston area. He started working with SQL Server and Sybase in 1998 in the financial services industry and has been a SQL Server Database Administrator for a dairy cooperative since 2011. He graduated from Northeastern University in Boston with a Bachelor of Science in Engineering Technology (BSET) degree in Computer Technology. Joe has spoken at the Boston and Providence SQL Saturday events.
 This author pledges the content of this article is based on professional experience and not AI generated.
View all my tips
Article Last Updated: 2022-03-18
