By: Jan Potgieter | Updated: 2022-04-15 | Comments | Related: More > Integration Services Development
Problem
You need to extract data from SQL Server and save it to a csv file on a daily schedule. Executing the SELECT statement from a SQL database where the data resides is easy and to copy the data and save it as a csv file is also easy, but if you need to do it regularly, you would prefer to do it with a SQL Server Integration Services (SSIS) package to minimize the possibility of making an error.
Solution
In this tutorial I am going to explain how to use SSIS to extract data from SQL Server and save it to a csv file.
Setting up the Environment
Open Visual Studio, in my case Visual Studio 2019, and create a New Project: Integration Services Project.
When the project opens up you should find a Package open in the designer area, in my case Package.dstx.
On the left side I have the SSIS Toolbox open and on the right side, the Solution Explorer.
Drag a Data Flow Task from the SSIS Toolbox onto the designer area as in the image below.
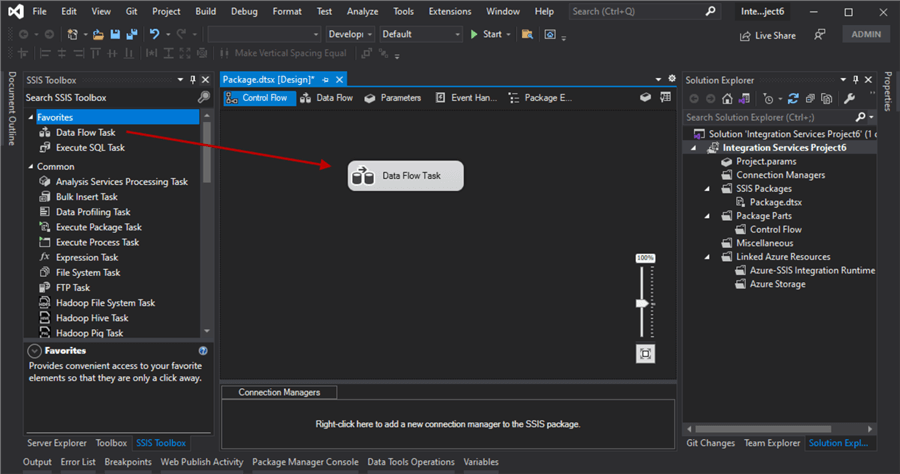
Double-click on the Data Flow Task icon to open up the Data Flow tab.
Drag an OLE DB Source onto the designer area as in the image below.
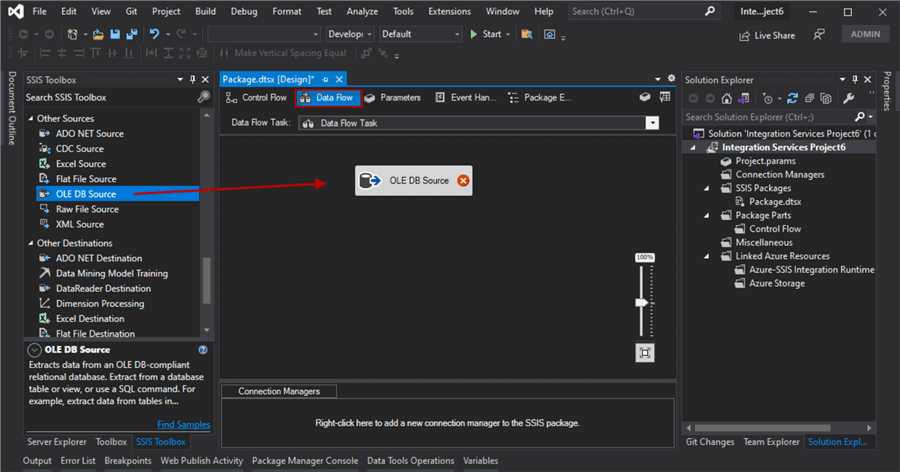
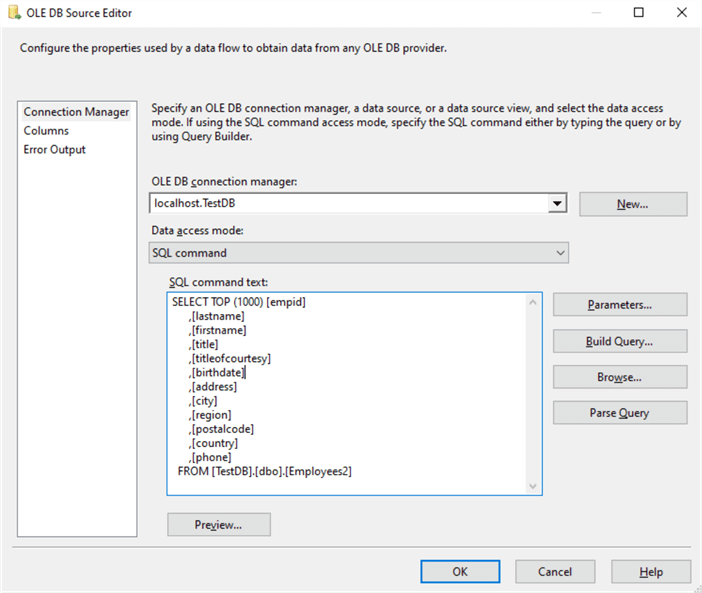
Double-click on the OLE DB Source icon to open the OLE DB Source Editor as in the image below.
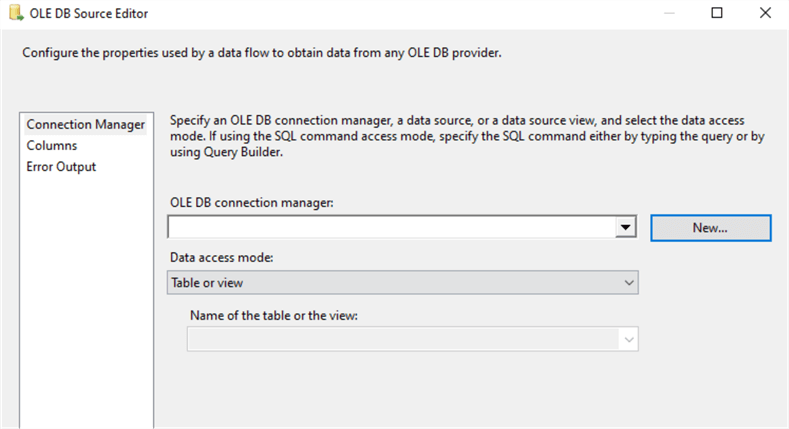
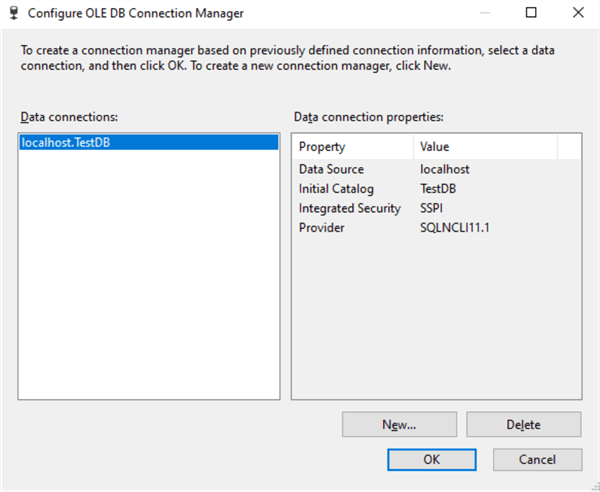
Click on the New button to create a new database connection. This will open up a Configure OLE DB Connection Manager as in the image below.
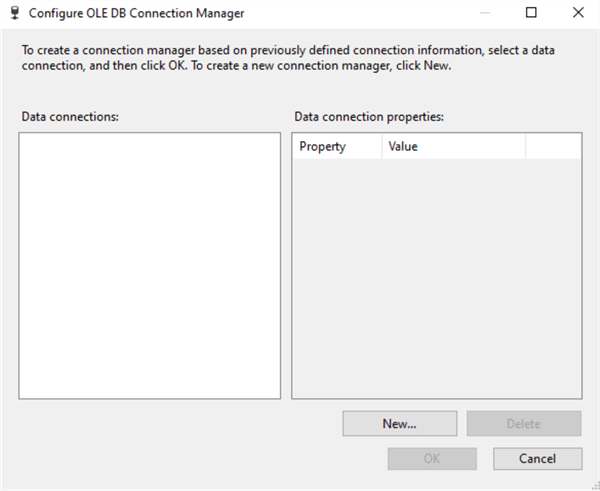
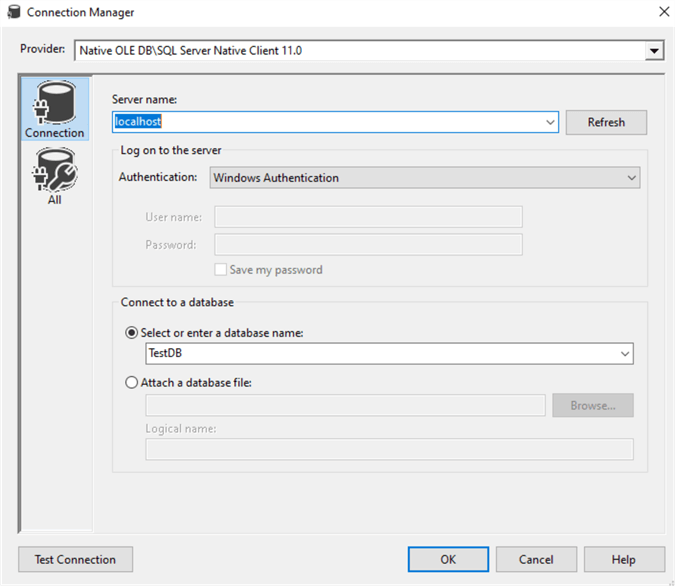
Again, click on the New button to open up the Connection Manager where you will create a new database connection to the SQL Server that you will be extracting the data from.
Type in the Server name, choose your Authentication and Select or enter a database name where you will extract the data from.
In this case, I will be using the localhost, Windows Authentication and the TestDB database as in the image below.
You can Test the connection to check if the connection is fine and then click on the OK button to create the database connection. See the image below.
On the OLE DB Connection Manager window, notice the Data connection created and then click on the OK button as well.
On the OLE DB Source Editor, select the Table or View where the data will be coming from or change the Data Access mode to SQL Command, whichever is preferable.
In this case, I will be using a SQL Command.
Type the SQL Command, click the Parse Query to check the syntax of the query, Preview the data if you want and eventually click the OK button.
You OLE DB Source has now been created.
SELECT [empid]
      ,[lastname]
      ,[firstname]
      ,[title]
      ,[titleofcourtesy]
      ,[birthdate]
      ,[address]
      ,[city]
      ,[region]
      ,[postalcode]
      ,[country]
      ,[phone]
FROM [TestDB].[dbo].[Employees2]
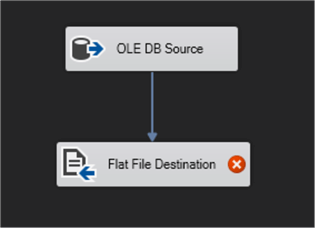
Next, drag a Flat File Destination onto the designer area as in the image below and click on the OLE DB Source icon to show the blue and red arrows.
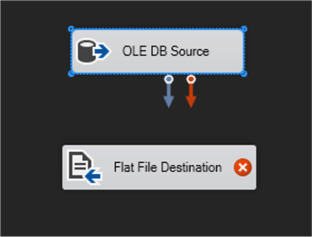
Select the blue arrow and connect it to the Flat File Destination.
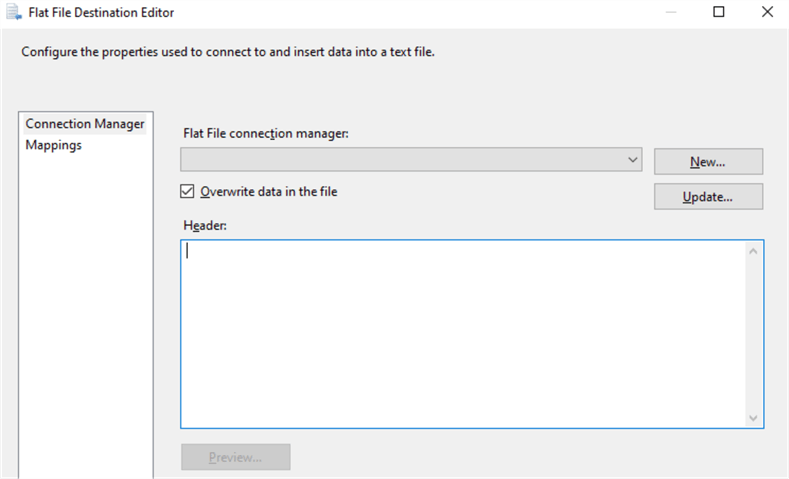
Double-click on the Flat File Destination icon to open the Flat File Destination Editor as in the window below.
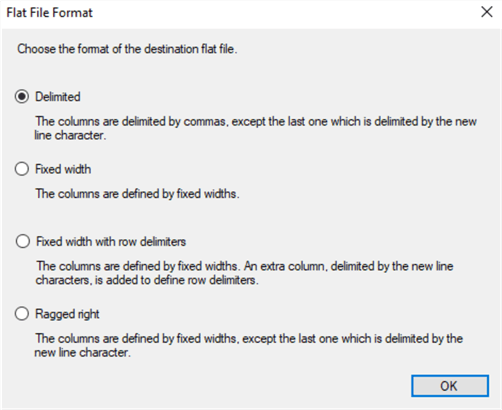
Click on the New button to open the Flat File Format window, select format of the destination file and click on OK button.
See the different Flat File formats that can be used:
- Delimited
- Fixed Width
- Fixed Width with row delimiters
- Ragged right
Next, the Flat File Connection Manager Editor will open up. Change the name and add a Description, type in the full path of the output file, example: C:\TMP\SSIS\Employees.csv, check the checkbox next to Column names in the first data row and then click the OK button.

Now you should click on the Mappings on the right side of the window for the mappings to be created.
Next, you can click the OK button on the Flat File Destination Editor to close it as well.

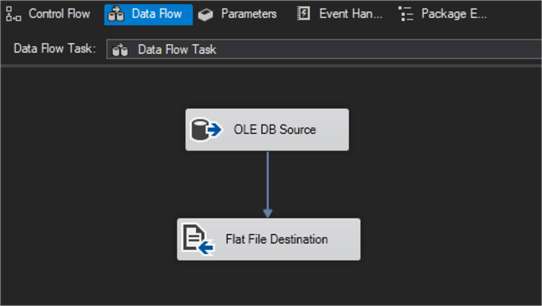
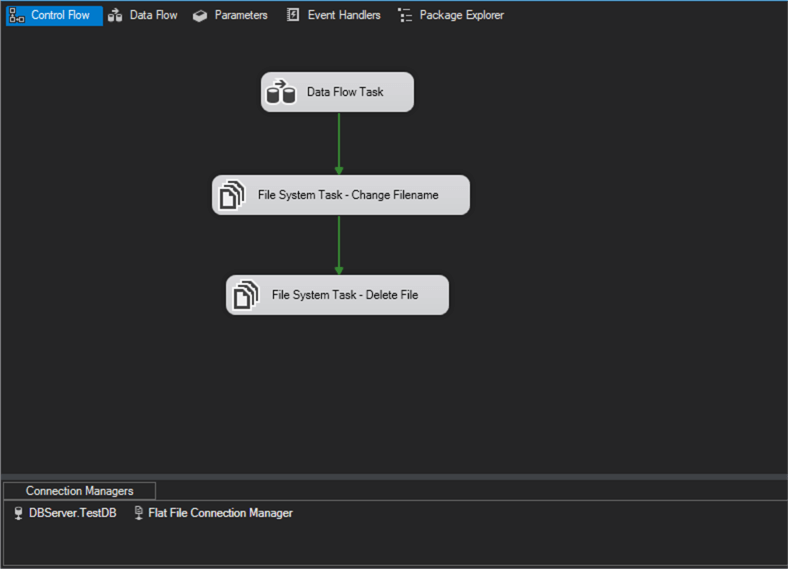
You are done now with the Data Flow tab and click on the Control Flow tab again.
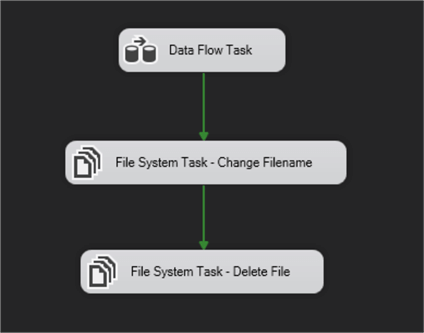
Now you will drag and drop 2 x File System Tasks onto the designer area as in the image below.
Name them appropriately for example as:
- Change Filename
- Delete File
Connect the Data Flow Task with the Change Filename and then the Change filename with the Delete File icon as in the image below.
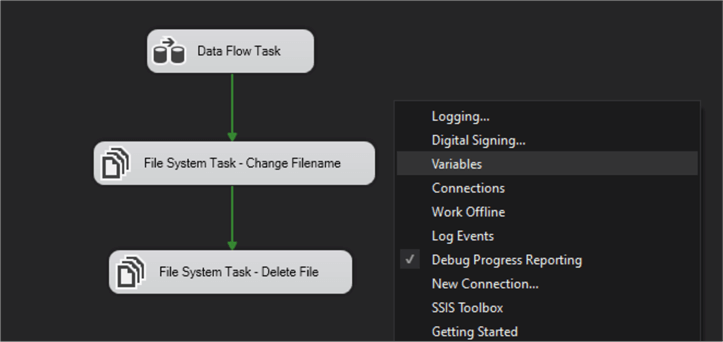
Next you will create the Variables that will be used.
Right-click on the back-end of the designer area and select Variables.
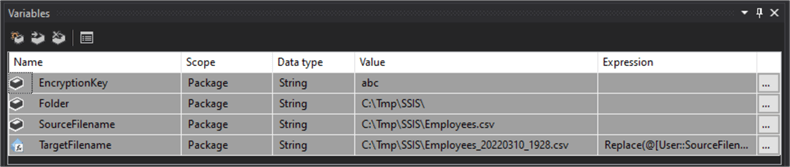
Create the 4 different Variables as in the image below. See the breakdown of the variables below the image.
- EncryptFilename: C:\Tmp\SSIS\Employees_ENCRYPTED.csv
- Folder: C:\Tmp\SSIS
- SourceFilename: C:\Tmp\SSIS\Employees.csv
- TargetFilename:
Replace(@[User::EncryptFilename],".csv","") +"_"+ Replace(Substring((DT_STR,50,1252)getdate(),1,10),"-","") + "_" + RIGHT("0" + (DT_WSTR,2)DATEPART("hh",GetDate()),2) + RIGHT("0" + (DT_WSTR,2)DATEPART("mi",GetDate()),2) + ".csv"
Example of what TargetFilename will look like: C:\Tmp\SSIS\Employees_ENCRYPTED_20220308_1456.csv
Next, double-click on the Change Filename task to open the editor and do the changes as in the image below.

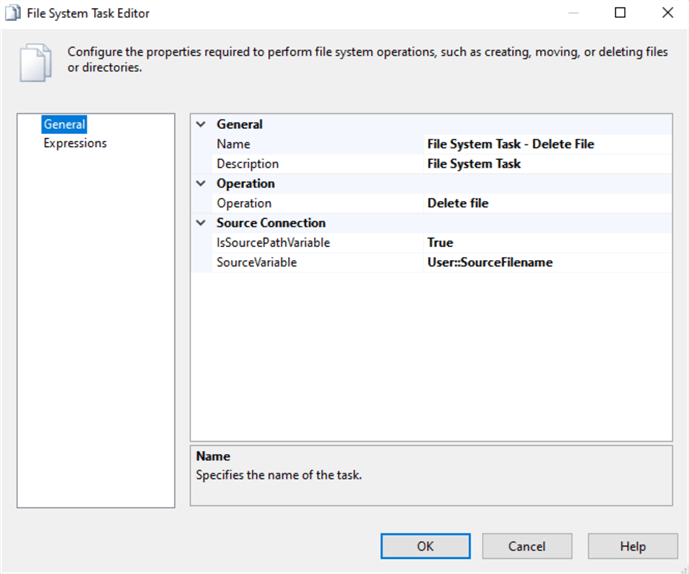
Also double-click on the Delete File task and do the changes as in the image below.
Your package in the Control Flow tab will now look as in the image below.
You are ready to execute the package now to see the result.
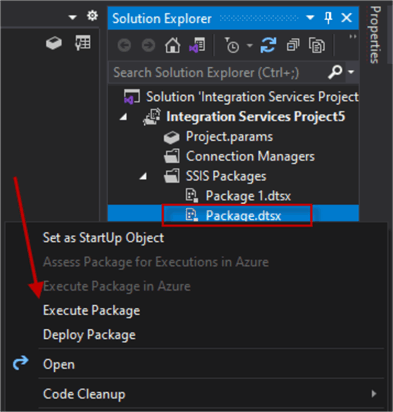
In the Solution Explorer, right-click the Package and select Execute Package to run the SSIS package.
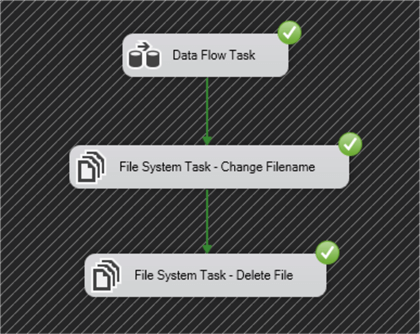
When the package runs successfully, it should look as in the image below.
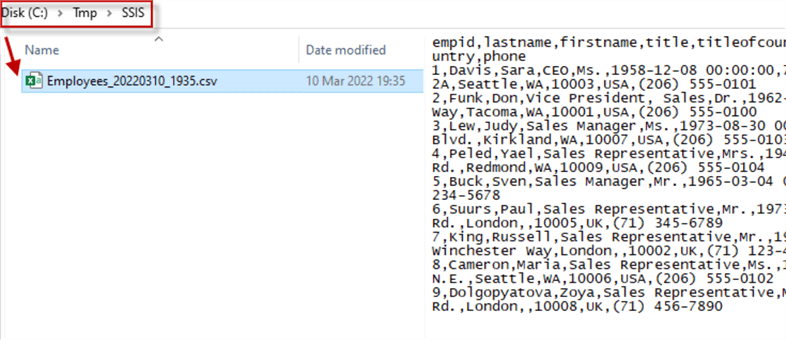
Open File Explorer with a Preview on the right-side and then right click on the file created to see the contents in the preview.
Next Steps
- Next, we will use the solution created in this tip, make a few changes and then encrypt the csv file.
- Check out the SQL Server Integration Services (SSIS) Tutorial on MSSQLTips.com
- Check out all the SSIS Tips on MSSQLTips.com


About the author
 Jan Potgieter has more than two decades of expertise in the database industry as a Certified Microsoft SQL Server Administrator and Database Developer.
This author pledges the content of this article is based on professional experience and not AI generated.
View all my tips
Article Last Updated: 2022-04-15
