By: Fikrat Azizov | Updated: 2022-04-21 | Comments | Related: 1 | 2 | 3 | 4 | 5 | 6 | 7 | 8 | 9 | 10 | 11 | 12 | 13 | 14 | 15 | 16 | 17 | > Azure Synapse Analytics
Problem
This tip is part of a series of posts dedicated to the building of end-to-end Lakehouse solutions leveraging Azure Synapse Analytics. In the previous post, Incremental Ingestion of Fact Tables on Lakehouse using Azure Synapse Analytics Mapping Data Flow - Part 1, we've explored the ways to build incremental data upload logic and created a mapping flow to fetch the data for two fact tables for a specified date range. In this tip, we'll create a data integration pipeline that divides historical data into smaller pieces based on certain time intervals and calls the mapping flow for each interval.
Solution
Data preparation
Our incremental logic will be based on ModifiedDate column, and because original data coming with the Adventure Works has single value, let's connect to Azure SQL DB and run below query, to introduce a date variations spanning a few weeks:
UPDATE [SalesLT].[SalesOrderHeader] SET ModifiedDate='2022-01-01' WHERE SalesOrderID<71831;
UPDATE [SalesLT].[SalesOrderHeader] SET ModifiedDate='2022-01-08' WHERE SalesOrderID between 71831 AND 71901
UPDATE [SalesLT].[SalesOrderHeader] SET ModifiedDate='2022-01-17' WHERE SalesOrderID between 71902 AND 71920
UPDATE [SalesLT].[SalesOrderHeader] SET ModifiedDate='2022-01-25' WHERE SalesOrderID >71920
Let's also run Azure SQL DB to Raw and Raw to Bronze layer pipelines we created in earlier posts to fetch the data to the Bronze layer. Next, run the following SQL script to ensure that the Bronze table has received the latest updates:
SELECT
    TOP 100 *
FROM
    OPENROWSET(
        BULK 'https://synstg.blob.core.windows.net/syn-fs/delta/bronze/SalesOrderHeader/',
        FORMAT = 'DELTA'
    ) AS [result]
order by modifieddate desc
Here's is the screenshot with the results:
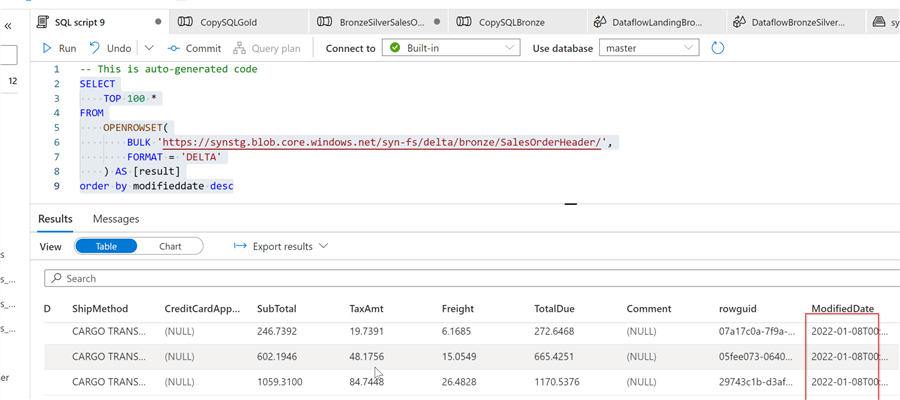
Figure 1
Data Integration Pipeline Design
Let's create a data integration pipeline and add two parameters of the string type- WindowStart and WindowEnd. These parameters needed to receive trigger window timestamps. Here's the pipeline with the parameters:
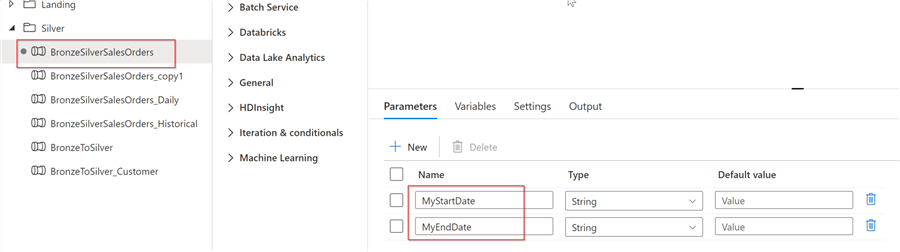
Figure 2
Next, add a data flow activity and point it to the data flow BronzeSilverSalesOrders created in the previous post:
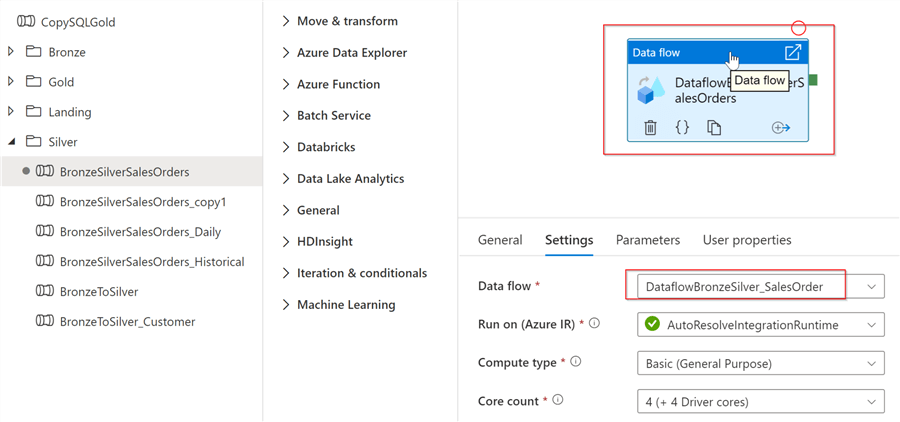
Figure 3
Next, navigate to the Parameters tab and provide the following pipeline expressions as the parameter values:
- WindowStart -@pipeline().parameters.MyStartDate
- WindowEnd - @pipeline().parameters.MyEndDate
These expressions will pass the pipeline parameters to the mapping data flow.
Here is the screenshot:
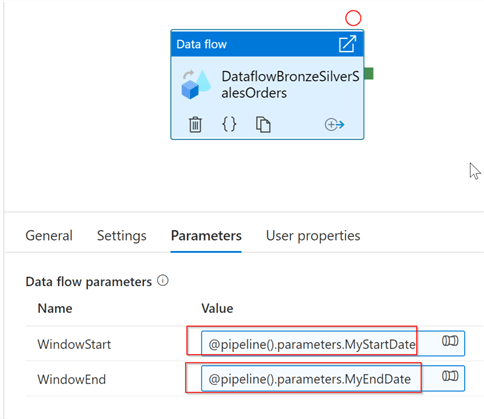
Figure 4
Pipeline Orchestration
As mentioned earlier, our purpose is to design the orchestration that could handle both historical and future time periods. Out of various of trigger types available in Azure Synapse Analytics only the tumbling triggers allow creating backdated window ranges. Because my historical data spans several weeks in January 2022, I'm going to create a weekly trigger starting at January 1, 2022.
So, let's create a trigger, as follows:
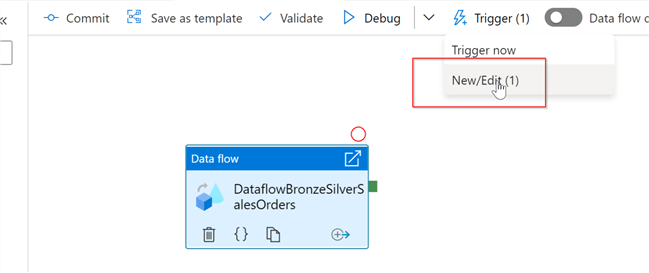
Figure 5
Select tumbling trigger type, set starting date as ‘01/01/2022', select hourly frequency, enter 168 hours and ensure that Start trigger on creation checkbox is selected, as follows:
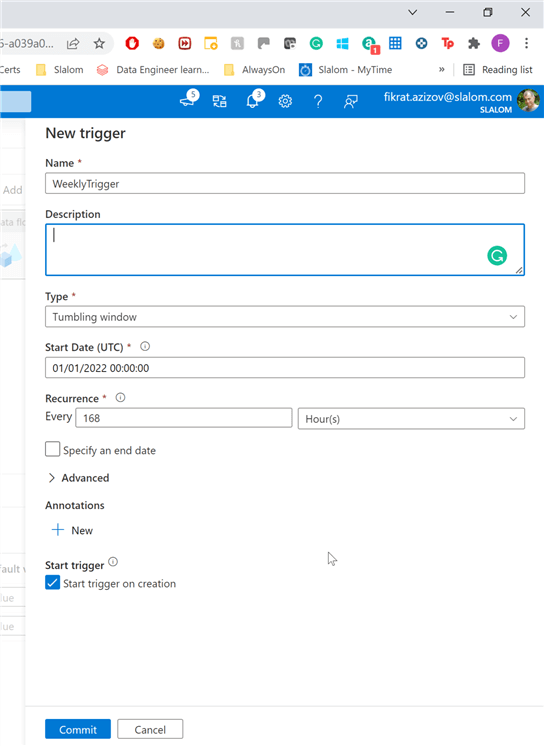
Figure 6
Expand the Advanced panel and limit the max concurrency setting to one- this will ensure that multiple instances pipeline does not run simultaneously. This is important because Delta Lake tables do not allow concurrent writes. Here's the screenshot:
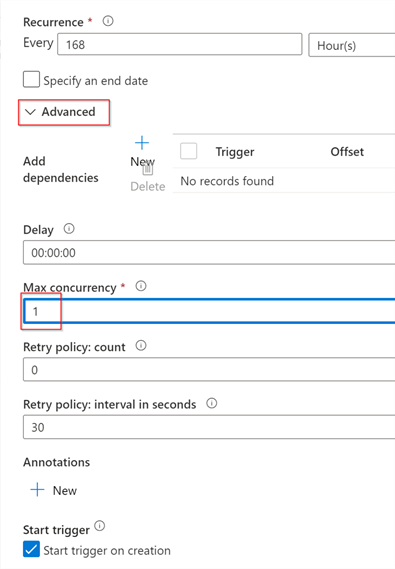
Figure 7
Confirm your changes, and move to the trigger parameters screen. Enter following expressions for the pipeline parameters:
- MyStartDate - @formatDateTime(trigger().outputs.windowStartTime,'yyyy-MM-dd')
- MyEndDate - @formatDateTime(trigger().outputs.windowEndTime,'yyyy-MM-dd')
These expressions convert the trigger's window boundaries into string values and assign them to the corresponding pipeline parameters. Save the trigger settings, commit and publish your changes.
Once the trigger is published, we can navigate to the Monitor page and find multiple instances of this pipeline running sequentially, as follows:
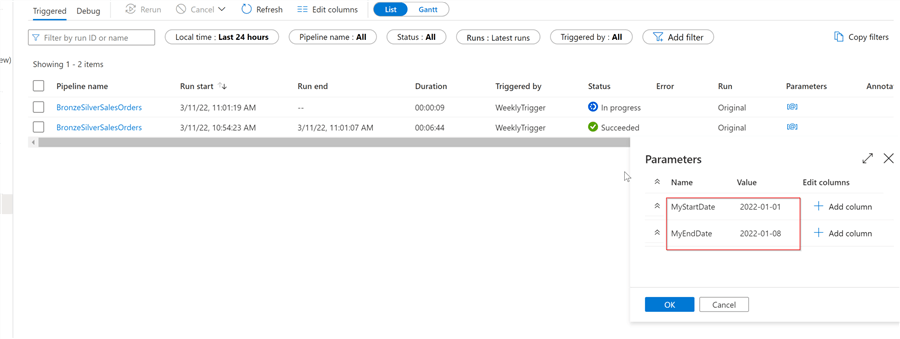
Figure 8
We can also see details of each execution, by opening the corresponding link and going into data flow details:
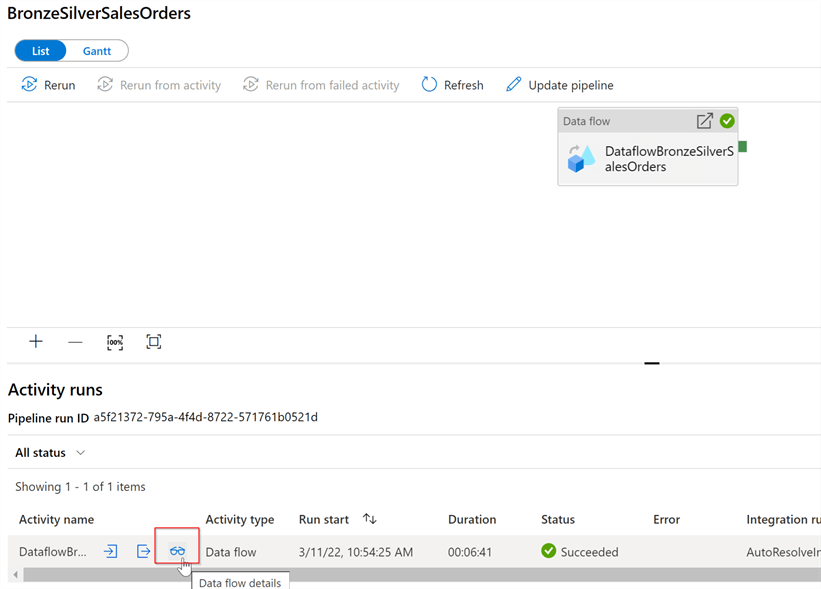
Figure 9
My data flow execution results for Jan 1 - Jan 8 window looks like this:
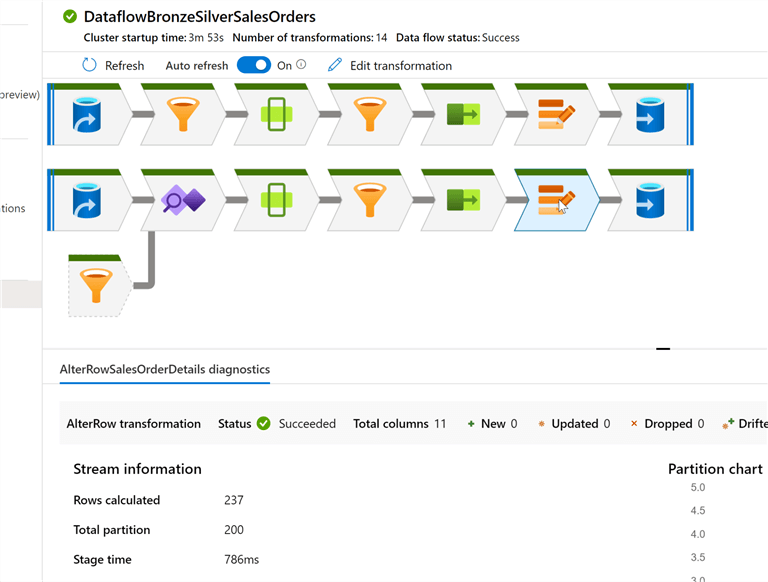
Figure 10
Finally, let's validate the data in the destination Delta table, by running following SQL script:
SELECT
    TOP 100 *
FROM
    OPENROWSET(
        BULK 'https://synstg.blob.core.windows.net/syn-fs/delta/silver/SalesOrderHeader/',
        FORMAT = 'DELTA'
    ) AS [result]
Here is the screenshot with the results:
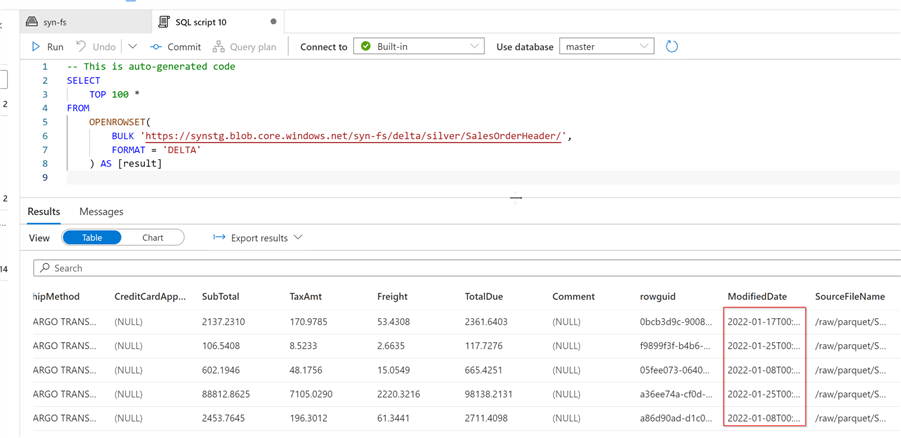
Figure 11
This concludes the data pipeline design to allow incremental ingestion of the historical data, and this trigger will also kick off on a weekly interval for future periods.
Next Steps
- Read: Common Data Warehouse Development Challenges
- Read: Create a trigger that runs a pipeline on a tumbling window
- Read: Mapping data flows in Azure Data Factory


About the author
 Fikrat Azizov has been working with SQL Server since 2002 and has earned two MCSE certifications. He’s currently working as a Solutions Architect at Slalom Canada.
This author pledges the content of this article is based on professional experience and not AI generated.
View all my tips
Article Last Updated: 2022-04-21
