Problem
Recently, we had a project to configure SQL Server AlwaysOn between three nodes that were hosted on a multi-subnet environment. A “multi-subnet” environment is when the OS cluster used as the backbone for AlwaysOn has server nodes that are located in multiple/different subnets. Deploying SQL Server AlwaysOn Availability Groups requires a Windows Server Failover Clustering (WSFC) cluster, and each availability replica of a given availability group must reside on a different node of the same WSFC cluster. I am assuming the readers of this post have basic knowledge about AlwaysOn and its components. This tip will help you in configuring an HA and DR solution for SQL Server AlwaysOn in multi-subnet networks.
Solution
As per SQL Server Books Online, “The AlwaysOn Availability Groups feature is a high-availability and disaster-recovery solution that provides an enterprise-level alternative to database mirroring. Introduced in SQL Server 2012, AlwaysOn Availability Groups maximizes the availability of a set of user databases for an enterprise. An availability group supports a failover environment for a discrete set of user databases, known as availability databases that fail over together. An availability group supports a set of read-write primary databases and one to eight sets of corresponding secondary databases. Optionally, secondary databases can be made available for read-only access and/or some backup operations.“
Configuration Scenario and Setup
In our scenario, we have three machines named PRI-DB1 ( IP: 10.X.3.XXX ), PRI-DB2 ( IP: 10.X.4.XXX ), and SEC-DB2 ( IP: 172.X.15.XXX ). The IPs of the machines reflect their subnet, which belongs to different series from each other. PRI-DB1 and PRI-DB2 are hosted in the corporate data center, whereas SEC-DB2 is hosted on the Amazon cloud platform. All three machines are running Windows Server 2012 R2 Enterprise Edition and SQL Server 2014 Enterprise Edition. PRI-DB1 will be the primary replica, and the remaining two nodes/machines will be the secondary replicas. Data replication between PRI-DB1 and PRI-DB2 will use synchronous-commit mode, and the failover mode will be Automatic with no data loss, which can be our HA in case the primary replica goes down. Data replication between PRI-DB1 and SEC-DB2 will use asynchronous mode, and the failover mode is Manual, which can cause some data loss in the case of a disaster.
Before going ahead, I created two databases, named DRTest and Test, using the FULL recovery model that will be added to the Availability Group. I took a full backup and a transaction log backup of both databases and restored them using the norecovery mode on both secondary replicas with the same database name to get ready for data synchronization using AlwaysOn.
This tip will not cover SQL Server installation and building a Windows Server Failover Cluster. I assume these steps will be complete prior to configuring SQL Server AlwaysOn Availability Group using this tip.
NOTE: MAKE SURE TO IMPLEMENT THIS SOLUTION IN LOWER LIFE CYCLE. DO NOT MAKE ANY CHANGES IN PRODUCTION WITHOUT PROPER TESTINGS IN LOWER-LIFE CYCLE ENVIRNOMENTS.
Configuring SQL Server AlwaysOn Availability Group in Multi-Subnet Cluster
Step 1: Our first step is to check and validate the Windows Server Failover Cluster (WSFC), which needs to be installed on all machines participating in AlwaysOn. Check the Failover Cluster Manager on each node. This will not be a failover cluster instance, but the WSFC feature needs to be enabled on each participating machine.
Step 2: Next, enable the SQL Server AlwaysOn feature on each instance of SQL Server to allow for SQL Server AlwaysOn Availability Group creation. Login to PRI-DB1 and open the SQL Server Configuration Manager. Right-click on the SQL Server service and select properties. Select the “AlwaysOn High Availability” tab, and check the box to enable it. You will see the Windows cluster name, which will be automatically fetched by this service in the “Windows failover cluster name” section. Click OK to save the changes and then stop and restart the SQL Service services to apply this change.

Repeat the same exercise on both replicas, PRI-DB2 and SEC-DB2, as well.
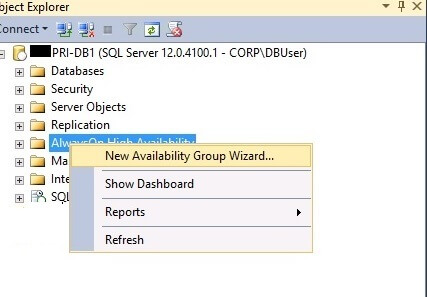
Step 3: Now launch SQL Server Management Studio and connect to PRI-DB1, which is our primary replica, which has two databases DRTest and Test, on this instance. Right-click on “AlwaysOn High Availability” and choose “New Availability Group Wizard…” as shown in the screenshot below.
A new window will open, “New Availability Group” to allow us to do the configuration. Click on the Next button to proceed.

Step 4: Here, we need to enter the name of the Availability Group. I have entered DBAG. DBAG stands for Database Availability Group. You can choose your name as needed. Click on the Next button to proceed.

Step 5: Here, we need to choose the databases that we want to add to this Availability Group. Click the checkbox near the database name if you want to include it in the Availability Group. After selecting, you can see the status of both databases shows “Meets Prerequisites,” which validates these databases are qualified for an AlwaysOn Availability Group. Click on the Next button to proceed.

Step 6: This is a very important step where we need to specify the secondary replicas along with configuring the Availability Group listener details. We can see there are four tabs in this window. Tabs 1 (Replicas) and 4 (Listener) are very important and need configuring. You can leave tabs 2 and 3 with the default values. Let’s start with tab 1, which is to configure the AlwaysOn replicas.
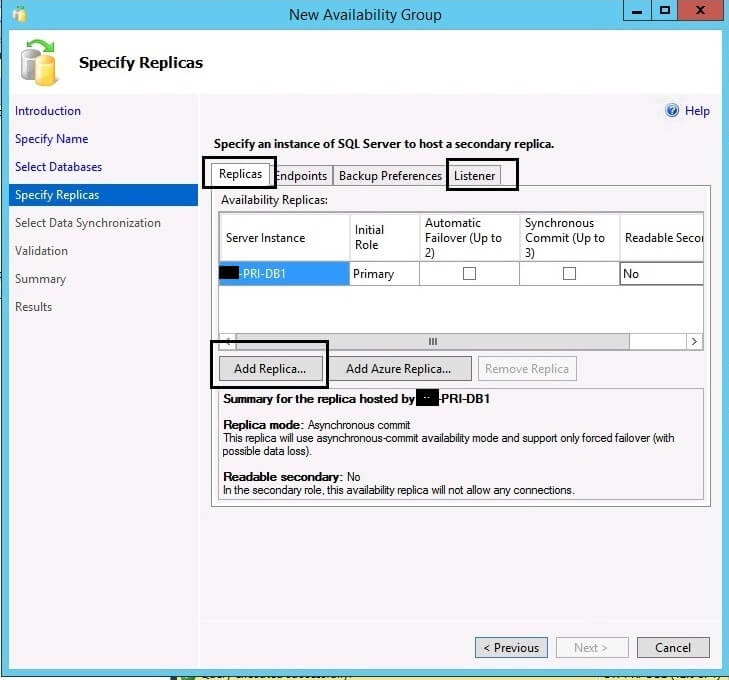
The primary replica details are captured. Now, click on the “Add Replica…” button to add both secondary replicas. Once both secondary replicas connect, they will appear in the window along with the primary replica, as shown in the screenshot below.

Now we can choose the failover mode and data replication mode by clicking on the check boxes shown in the above screenshot. As I mentioned earlier, we will keep automatic failover and synchronous-commit mode data transfer between PRI-DB1 and PRI-DB2, so I checked the boxes above for both machines. For SEC-DB2, we don’t want automatic failover and synchronous-commit mode, so do not check these. If you want to keep your secondary replicas readable, then you can choose the corresponding values as Yes.
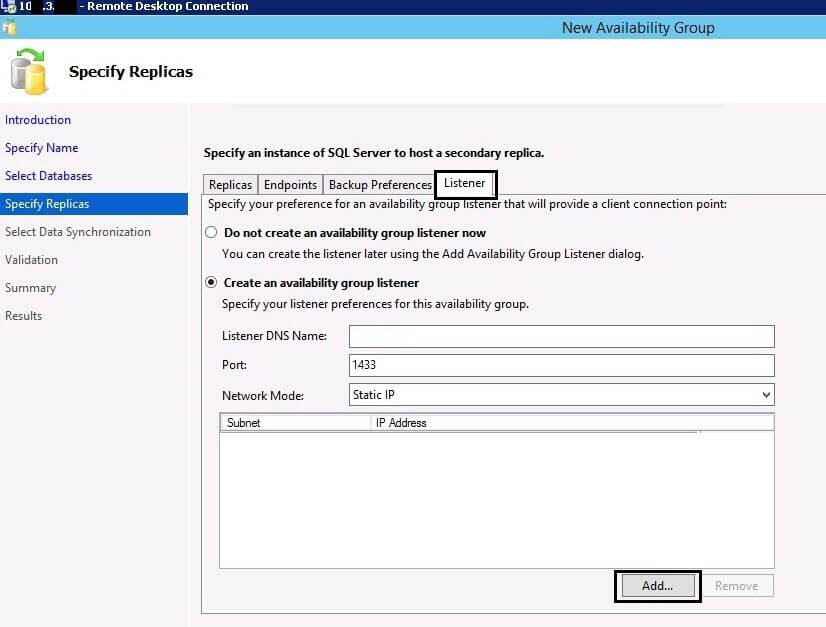
Step 7: Now, click on the Listener tab to configure the Listener for this Availability Group. A listener is an important component of a SQL Server Availability Group. It enables applications to connect to a DNS name, regardless of which Availability Group replica is the primary. Choose the “Create an availability group listener” option as shown in the picture below and enter the name of the listener along with the port number.
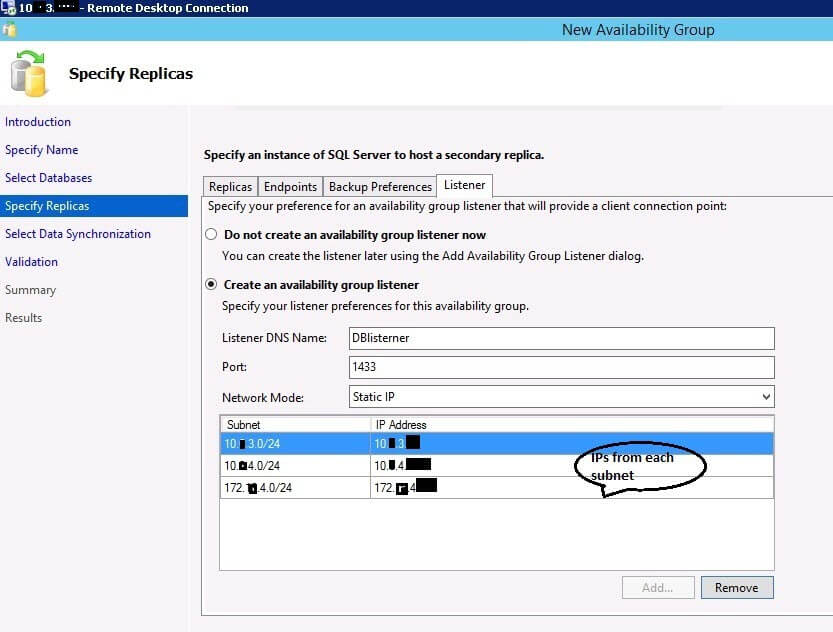
As we are configuring AlwaysOn between three different subnets, we need to assign three different virtual IPs (one from each subnet) to this listener. When the Availability Group Listener (AGL) is configured properly, it will have an IP address for each defined subnet and have an “OR” dependency on each of the IP addresses. When a client operating system (OS) needs to resolve the AGL name to an IP by querying the DNS server, the DNS server will return multiple IP addresses – one for each subnet. The listener IP address in the subnet currently hosting the Availability Group primary replica will be online. The other listener IP address(es) will be offline. Because not all of the IP addresses returned by DNS will be online. Now, click the “Add…” button to assign IP addresses to listener “DBlistener”. The screenshot below shows all three IPs from each subnet.
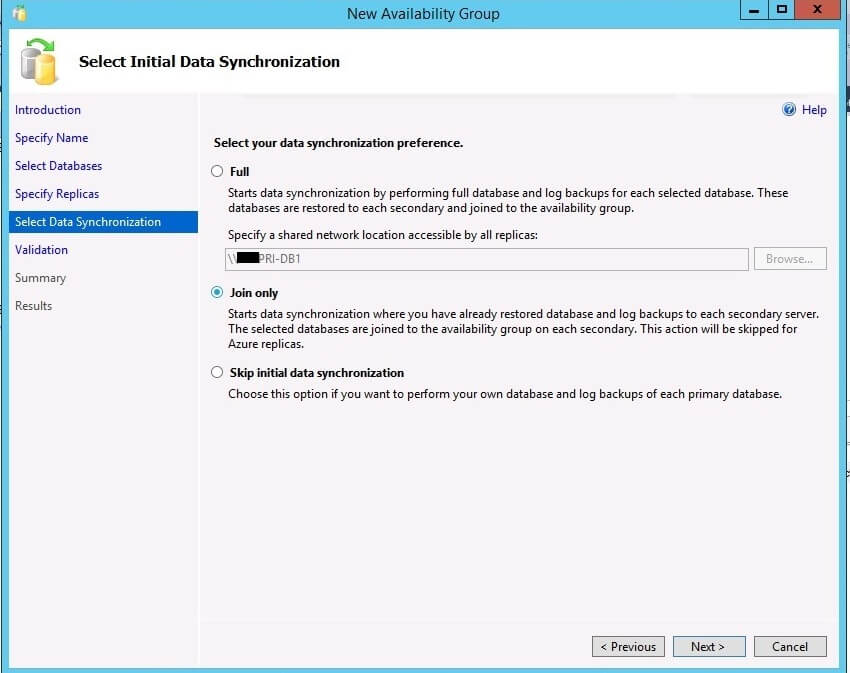
Step 8: After configuring the listener, click on the Next button to proceed. Now we need to select the appropriate option for data synchronization. There are three options:
- Full – is to start the synchronization after creating and restoring the backups
- Join only – is to start synchronization if you have already created backups and restored on all secondary replicas
- Skip initial data synchronization – this is if you still need to create a backup and restore to the replicas
I chose “Join only” because I already restored both databases to both secondary replicas as mentioned above.
Step 9: Now, validation will run to check all of the settings. All validation rules successfully pass as shown below.
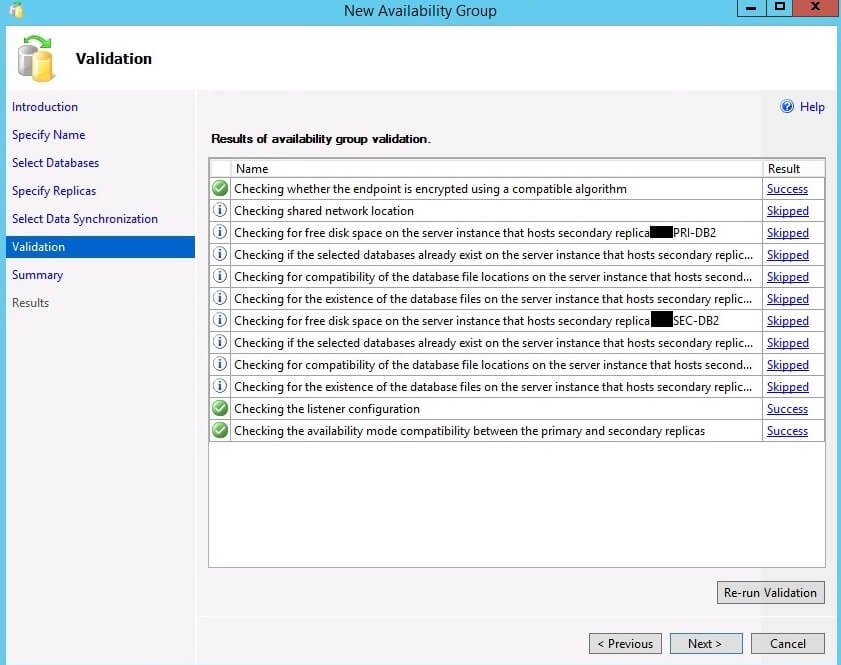
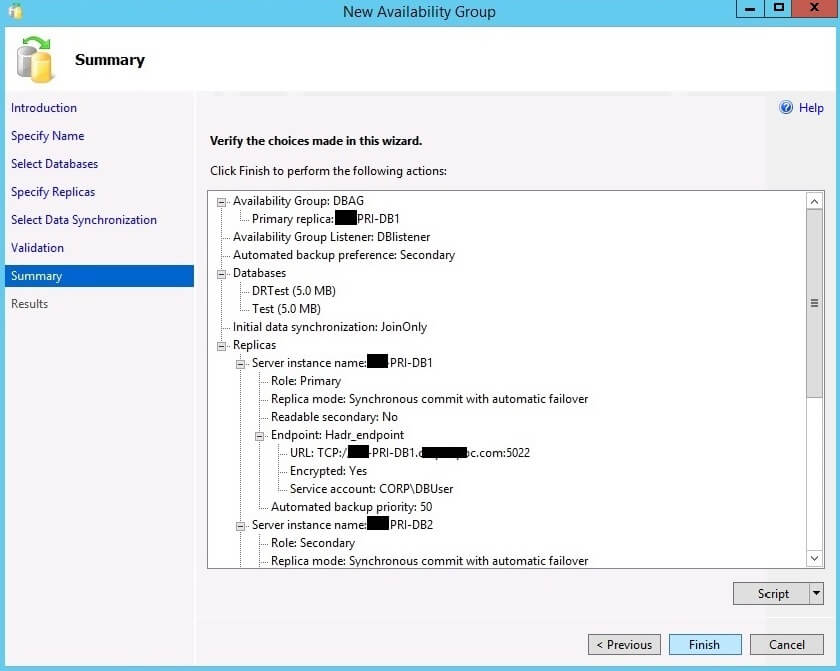
Now click Next to proceed to the final page of this configuration, which is a summary where you can re-check all of the details. Click on the Finish button to run this configuration.
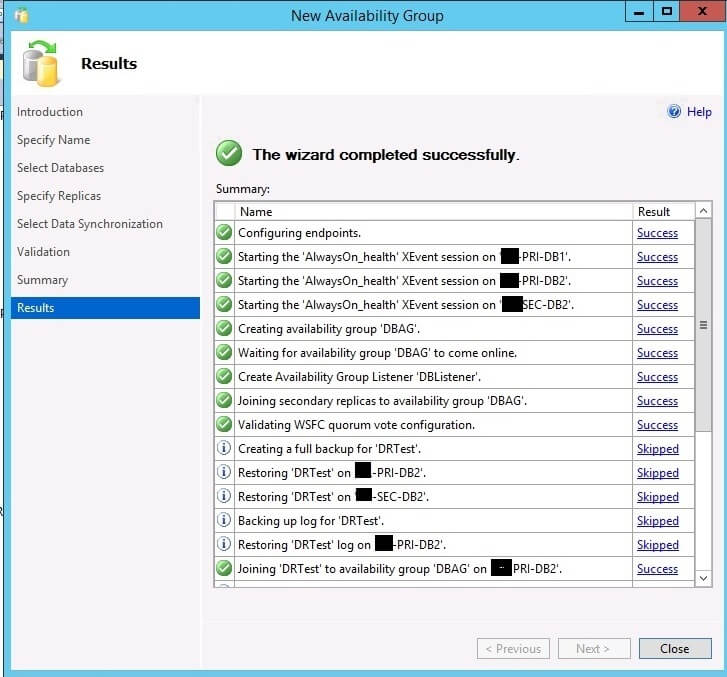
Step 10: After successfully creating the SQL Server AlwaysOn Availability Group, you will see the screen below with each rule and status.
Validation
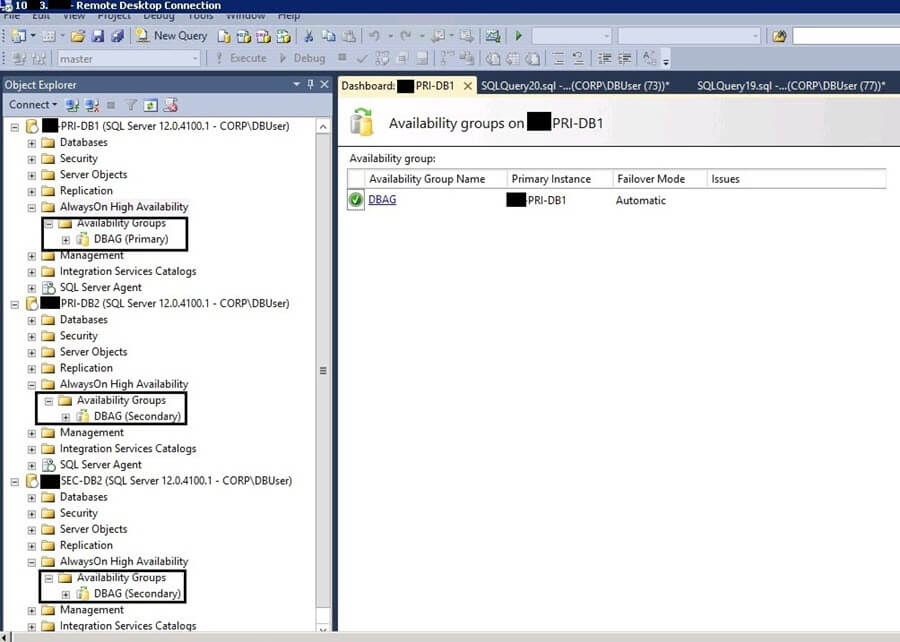
Once setup is complete, we can validate the AlwaysOn Availability Group in SSMS. You can see there is an icon with your Availability Group name, which will appear under the AlwaysOn High Availability folder as shown on the left below. The same icon will appear on all replicas with their current state, whether it’s a primary replica or a secondary replica.
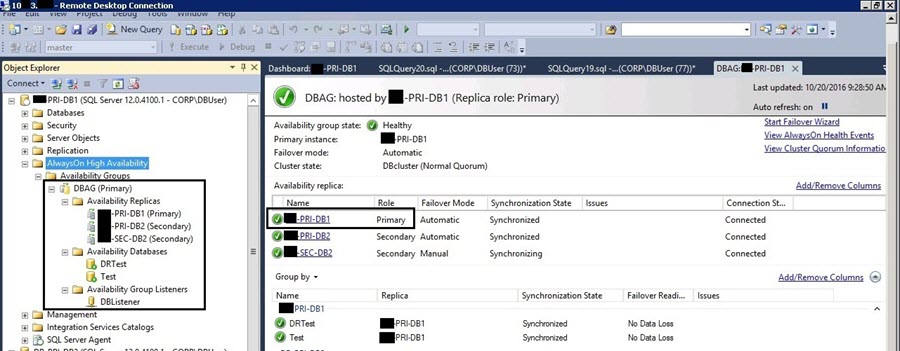
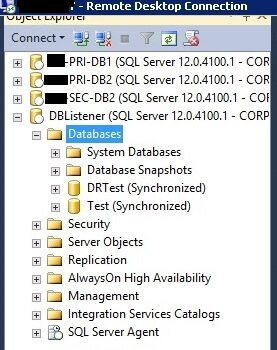
When you expand the folder for the Availability Group, you can see all replicas and their state along with all of the database names and listener name. We can also check all details in the dashboard. Right-click on the Availability Group name and choose “Show Dashboard”. We can see the dashboard of this configuration on the right side of the screenshot below.
We can also validate it using the Failover Cluster Manager. The new Availability Group name will be added as a role in the Failover Cluster Manager, as you can see in the picture below. The listener IP address for the subnet currently hosting the Availability Group primary replica is online, and the other two listener IP addresses show as offline.

SQL Server Availability Group Failover Testing
Now we will do failover testing and validate this configuration. As we can see, PRI-DB1 is the primary replica and PRI-DB2 is its secondary replica. Automatic failover is possible between PRI-DB1 and PRI-DB2, because of its configuration of automatic failover, so we will run the below command to failover to PRI-DB2. Connect to the server instance that hosts the target secondary replica, which is PRI-DB2 in our case, and run this command.
--Run on target secondary replica. Here our AG group name is DBAG so we used DBAG.
ALTER AVAILABILITY GROUP DBAG FAILOVER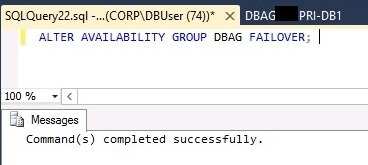
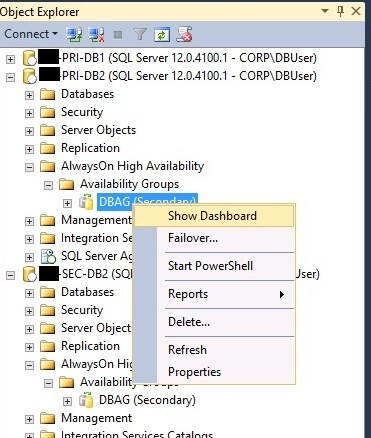
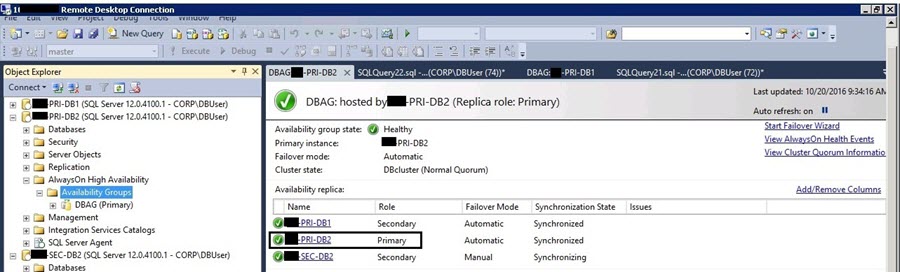
Now, check the dashboard by right-clicking on the Availability Group named DBAG and choosing Show Dashboard.
We can now see that the primary replica is PRI-DB2, and PRI-DB1 and SEC-DB2 are acting as secondary replicas.
Now we will test the listener connection post failover to make sure this configuration is working. Launch SSMS and connect using the Availability Group Listener name “DBlistener”. We can see we have made a successful database connection using the Availability Group listener.
Next Steps
- Explore more knowledge on SQL Server Database Administration tips.
- Read more AlwaysOn tips
