Problem
Microsoft Azure DevOps is the next generation of Visual Studio Team Services in the cloud. This product combines scrum project management tools, software version control, continuous integration and continuous deployment into one service. This means that the build and release process for a given database project is centralized within the cloud service. Unlike Visual Studio 2017, approval gateways can be used to guarantee that signoff is given before a given environment is updated.
How can we build and release pipelines to deploy our database project?
Solution
The Pipelines menu contains sub-menus for builds, releases, library, task groups and deployment groups. We will be focusing on the first two sub-menus.
A build pipeline defines the steps to take during build and the triggers that initiate a build. A release pipeline can be used to automate database deployments to one or more environments. Approvers can be added to guarantee that releases occur at the right time in the project schedule. Of course, logging of both types of pipelines allows the support staff to easily debug any issues that arise. Last but not least, releases can be initiated manually or automatically off a build.
Business Problem
Our boss has asked us to investigate how to manage continuous deployments using Azure DevOps. I will be continuing with the Adventure Works Data Warehouse sample that I have been using for this series of articles.
Configuring Azure DevOps
Many of the popular software deployment tools used with continuous integration and continuous deployment (CI/CD) are using the YAML language. YAML is a human-readable data serialization language which is similar to Python when it comes to indentation.
If you want to learn yet another language, then you are in luck. The default configuration of a new Azure Dev Ops account using the preview YAML experience for pipeline development. I rather use the provided menus to quickly create my simple database build and release pipelines. With that said, let’s work on restoring the menus.
The image below shows a sample YAML file named “azure-pipelines.yml”.

Please locate the user menu in Azure Dev Ops which is located at the top right-hand corner. Click the circle to initiate the drop-down menu. Select the preview features submenu so that we can configure the pipeline behavior.

The new pipeline creation experience is located at the very bottom of the preview features menu. Of course, this location can change in the future. Move the slider from “On” to “Off” to disable this new experience.

In a nutshell, YAML is a scripting language used by many third-party automation tools. Microsoft has decided to use YAML for pipeline creation. In this article, I will only be covering how to create pipelines using the available menus. Please turn off this preview experience.
Business Goal
The ultimate goal is to create both a build and release pipeline for the Adventure Works database. The image below shows a completed pipeline that builds our database.

In similar fashion, the image below shows a completed pipeline that releases our database to a target server.

Now that we know two tasks that we need to complete, let’s learn about creating a build pipeline.
New Pipeline (Build)
The Builds submenu shows a list of existing pipelines. Please see the correct image in the Business Goal section. Choose the new drop-down menu action. This drop down allows for the building of a brand-new pipeline or importing of an existing one. We want to build a brand-new pipeline.

This first step assumes that the developer has checked in a database project into the repository. There are many different version control systems that can be used with Azure DevOps. Select the default source which is Azure Repos Git. Find the correct team project, repository and branch within your account. Click the continue button to proceed.

The next step is to choose a template. The quickest way to create the pipeline is to use an empty job. Click the continue button.
Use the search box to find a given task. The first task is to use MS Build to convert the database files stored in the Repository into a DACPAC file. Click the add button to move this task type to our agent job.
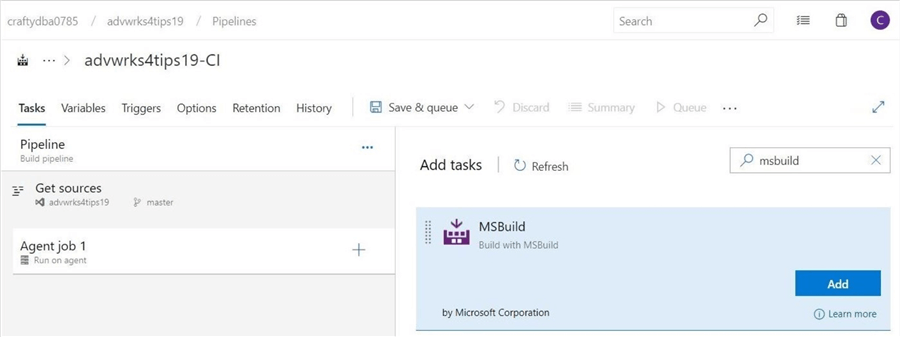
Under the details section of the first task, find the project in the master branch. The display name can be changed if you desire.

The second task is to copy the output files from the MS Build action to the artifacts staging directory. The screen shot below shows the search and addition of the task to the agent job.
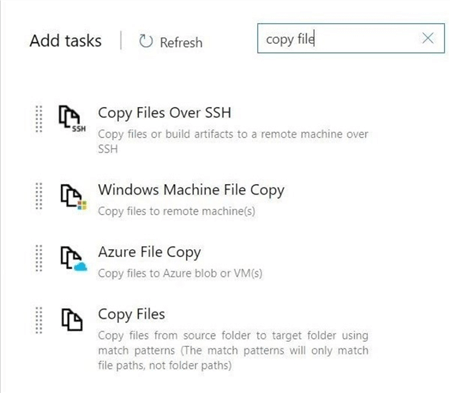
Use the tool tips hints to fill in the source and target folders for the copy operation.

The third task is to publish the build artifacts. These files will be used by the release process in the future. The image below shows the search and addition of this task to the agent job.

This task requires two key pieces of information: the path to artifact staging directory and the location to publish to. The display and artifact names are user defined. You can change them to your liking.

Now that agent job is complete, save the pipeline and queue it for execution.

The above image shows the save and queue dialog box. Do not enter any text in the commit box. It is actually a number given to the build and can be left blank.

The above screen shot shows the execution of the complete build pipeline. A hosted Visual Studio 2017 virtual machine is used to check out the source files from the repository, build the solution using MS Build, copy the output files and source files to a staging directory and publish the files in the staging directory as an artifact.
Clicking on the green succeeded or failed hyperlinks brings up a details window with line by line entries from the log file. Shown below are the steps of the MS Build task.

The artifact explorer can be used to browse the files published as a result of the build. Please see the build results image. This artifact explorer button is located at the top right of the window just under the title bar. Both the release and artifacts buttons are right next to each other. Make sure you click the correct one.
Looking in the bin/debug directory using the artifact explorer, the three files that are generated by Visual Studio 2017 during a normal build operation are now located in Azure DevOps after executing our “advwrks4tips19-CI” build pipeline. Please see image below.
This is not surprising news since Azure DevOps is using the same components that Visual Studio 2017 installed on a local machine. This is a fact since we can see that the “CoreCompile” entry in the image which has a file path including the words “Visual Studio 2017”.

To recap, the build pipeline is a four-step process. First, we need to check out the source files from the Git repository. Second, MS Build is used to compile and create our output files. Third we need to copy the output and source files to a staging directory. Last but not least, we need to publish the staged files as a named artifact. These artifacts will be used by the release process.
For future research, you should look into build triggers. You can have a build take place at a schedule time or have a build happen after code is checked in. I am not covering these topics today.
New Pipeline (Release)
The Release submenu shows a list of existing pipelines. Please see the correct image in the Business Goal section. Choose the new drop-down menu action. This drop down allows for the building of a brand-new pipeline or importing of an existing one. We want to build a brand-new pipeline.
Once again, we want to choose an empty job as our template.

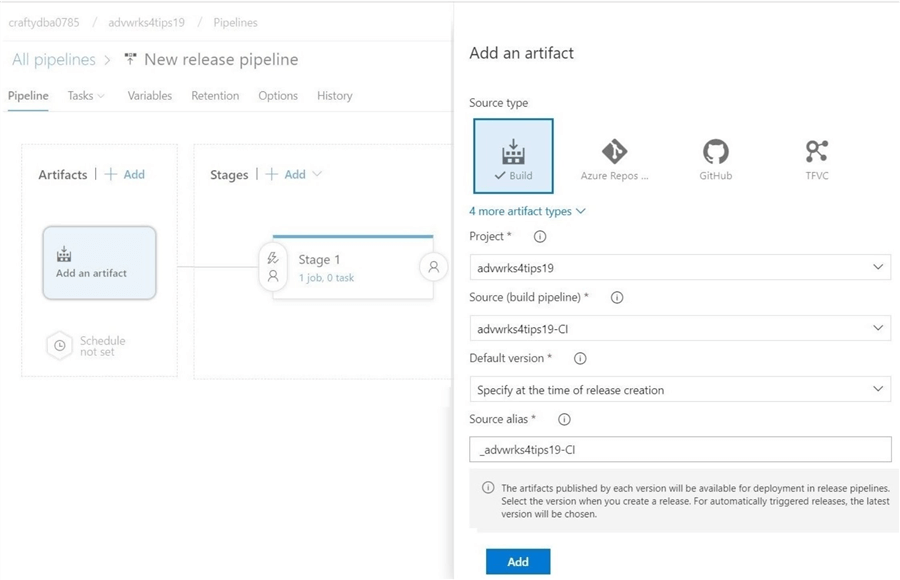
The first step in creating a new release pipeline is to choose our artifact. Select MS Build as the source type. Find the dev ops project and build pipeline. Click the add button to complete this task.
The second step in creating a release pipeline is to choose the deployment task. We can use the search button to look for all database related tasks. Select the Azure SQL Database deployment task. Click the add button to continue.

To configure this task, we need to add certain static information such as Azure subscription name, SQL server name and database name. We need to add both the login and password information. However, this information will be added to the log file. There must be a better way to configure this task?

We can overcome the potential security issue by using variables. The variable names will show in the log file instead of the secrets we are trying to protect. The image below shows that a sqluser and sqlpwd variable have been defined and set.
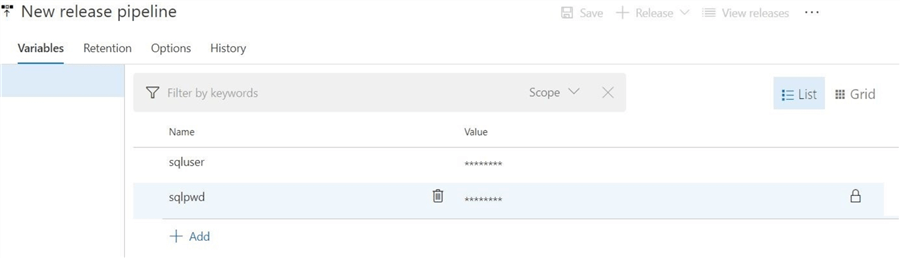
Going back to the Azure SQL (database deployment) Publish task, we can leverage the variables to complete the form. Make sure the variable name is enclosed with $() so that a look is performed instead of the literal characters being used.

If we take a look at the tasks under Stage 1, we see the one agent job executing an Azure SQL publish task.

To save the new release pipeline named advwrks4tips19-CD, we are prompted to provide a comment.

There are several options that we can choose for a release pipeline. First, we can schedule when the deployment happens. For instance, the development environment could get the latest development code on Saturday at 8 am. The lightning bolt without a checkmark indicates that a given step has a manual trigger.
Second, we can choose various pre-deployment conditions for Stage 1. Approvals and Gates will not be covered today. I leave these topics for you, the reader to research. What will trigger Stage 1 and execute the tasks associated with the agent job? It can happen right after the artifact is created or we can manually release Stage 1. Let’s choose the later to see what happens.

If we take a look at the release for this pipeline, we can see that no results are found.

In summary, there are two steps to create a release pipeline. First, we define the artifact that we want built. Second, we define the actions that will be performed by the agent job. In our case, we want to deploy the database project to an Azure SQL database. There are many options to configure for scheduling, approvals, gates, and trigging.
Testing a Release Pipeline
If we manually trigger the release pipeline, it will stop at stage one. This means we have to go into the release and confirm the deployment. The image below shows this situation. Manually deploying step 1 will continue the execution of the pipeline. In short, trigger types, approvals and gates can prevent an unintentional release from happening.

Just because code has been tested by the developer, checked into the repository, build by a pipeline and manually deployed, it does not mean that an error can’t occur.
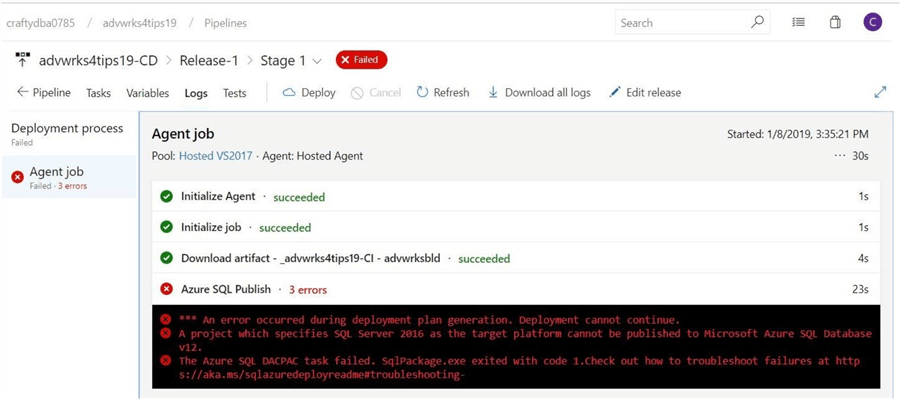
I left this bug in the build intentionally to prove this point. A database project has various settings including target platform. Right now, the target is set to SQL Server 2016. We need to change this setting to Azure SQL database.

Of course, this change needs to be committed both locally and remotely. The remote push of the code will update the repository in Azure Dev Ops.

We have new code in the repository but our artifact is from build number 8. We need to queue up a new build of the code. The image below shows the dialog box that is used to perform this task.

Build number 9 executed without any errors. That is great. Now we can use the release pipeline to deploy the project to the target database.

Use the create a release button on the release pipeline named advwrks4tips19 to start the process. The image below shows that a comment is required to start the release.
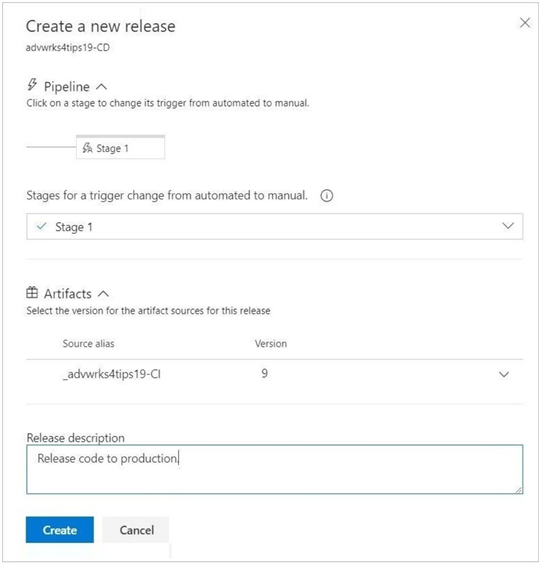
The release will stop at stage 1 since we have a manual, not automated trigger for this stage. Add another optional comment and click the deploy button.

It is always a good practice to verify the execution of new pipelines. We can see that the deployment was successful.

Before executing the release pipeline, the dbs4advwrksprd database located on server sqvr4tips19 was empty. After the release, the database has the schema defined in our database project.

The concept of a release pipeline can be summarized in a few words. The process takes an existing build artifact and deploys it to a target system.
Summary
Today, companies are creating agile teams in which members collaborate with each other, teams self-organize the work load, and cross functional skills sets of the members allow for rapid delivery of work items. It is not surprising that Microsoft Azure DevOps combines scrum project management tools, software version control, continuous integration and continuous deployment into one service.
The Pipelines menu is the main place to create both build and release pipelines.
A build pipeline defines the steps to take during build and the triggers that initiate a build. To build a database project, three simple tasks are used to complete the process. Build can be initiated manually, take place at a scheduled time or after code has been committed (continuous integration).
A release pipeline can be used to automate database deployments to one or more environments. Of course, logging of both types of pipelines allows the support staff to easily debug any issues that arise. A release can be initiated manually, take place at a scheduled time or after a built has completed (continuous deployment). Approvers and gates can be added to guarantee that releases occur at the right time in the project schedule.
If you are not using an automated build and release process, you should take a serious look at the Pipeline features in Azure Dev Ops. For more information, please see the MSDN documentation using this link.
Next Steps
- Leveraging pre-deployment and post deployment scripts
- Using Azure Test Plans for Quality Assurance
