Problem
In today’s world, you can get information about almost anything online. As a product developer, you want to control the quality of your product’s information and enhance user accessibility to your product’s manual and additional information. The best way to do this is by creating a knowledge base using a content management system to manage the data, where users and employees can seek information regarding your product. But when you accumulate a significantly number of articles, manuals, FAQ, and data, it becomes harder for users to find exactly what they need, sometimes even requiring data from different places on your knowledge base. Follow along to learn how to create a knowledgebase.
Solution
You can implement an AI solution for your knowledge base. It can browse all the data in your knowledge base based on the user’s query, then reply with a brief AI-generated response and a list of related knowledge base articles if the user wants to dive deeper into the subject.
In this tutorial, you will create a knowledge base using React Native for the GUI, Strapi Content Management System (CMS) to manage the content in the knowledge base created by a user (aka Marketer), and an AI search functionality to make the knowledge base effective.
Prerequisites
- Basic knowledge of React Native
- Node.js
- Visual studio code
- Basic knowledge of Strapi
- Knowledge of LangChain
- Basic knowledge of Python
Application Architecture
In this article, you will learn how to create a knowledge base using React Native and Strapi, and how to create a search functionality using AI. Given that we want to create an application that spans multiple applications, we should ideally have an architecture to guide us when building the application. So, let’s decouple all the applications that ultimately makeup our application and point out how they communicate.
Strapi API
This application will use Strapi’s API to expose the data stored by the user utilizing Strapi’s CMS. In our case, we will use local development but you can easily exchange the endpoints to suit your requirements.
Once a user/Marketer publishes items to Strapi’s server, Strapi creates custom APIs and exposes the items via its API. This API will serve our React Native application with article data published by the user and serves filtered and transformed data to a Flask + LangChain application. You will learn more about how Strapi works later in this article.
React Native App
Used to develop cross-platform mobile applications, we will use React Native to create the front-end application. This application needs to render Strapi’s API data on its user Interface which will be the main way users interact and access data served by the API.
This application also takes the user’s search input and sends it to the Flask + LangChain app where Flask will use it to route the request to LangChain’s similarity search and then render the response to the user.
Flask and LangChain App
This application uses LangChain, which is a framework to develop applications powered by Large Language Models, to retrieve data from Strapi and transform the data before it is stored in vector stores. It also retrieves data from the user’s input on the React Native App and uses similarity search and the chat model to give responses and refer to the original sources. Flask is used to add routing to LangChain and makes it possible for the other applications to communicate with LangChain reliably and fast.
Here is an overview of the application’s architecture:

Setting Up Strapi to Create a Knowledge Base
Before you create your Strapi application, ensure that you have the latest version of Strapi installed on your computer using the following command:
npm install -g strapi@latestTo start creating your Strapi application using NPM, open your VScode terminal and add the following code:
npx create-strapi-app@latest my-project
# 'npx' runs a command from an npm package
# 'create-strapi-app' is the Strapi package
# '@latest' indicates that the latest version of Strapi is used
# 'my-project' is the name of your Strapi project
On your installation process, you will have the following prompts:
| Prompt | Choose option | Explanation |
|---|---|---|
| Choose your installation type. | QuickStart | Quick installation with a default SQLite database |
| Please log in or sign up. | Skip | Not deploying to cloud. Development stage. |
When the installation is done, you will see this response on your terminal:

Strapi will also redirect you to a browser sign in page as an admin:

After logging in, follow the next steps to set up your backend.
Step 1: Create a Collection for Articles
Collections are a set of grouped content. Collections also create API endpoints for the content. Since we are creating a knowledge base, we will start by creating a collection for our articles.
- Navigate to Content Type Builder on the sidebar.
- Click Create new collection type.
- On the pop-up modal, add the collection name.
- Click Continue.

Next, you will get another modal to add content fields. First, select the field type:

Then, complete the following:
- Name
- Choose the type (Short or Long Text)
- Click Add another field to insert more fields:

Create a collection for the articles with the following content fields:
- Short Text: title
- Short Text: summary
- Rich Text (Blocks): body
- Media: cover
Once finished adding all the fields, your collection should look like this:

Step 2: Add Content to the Collection
Strapi enables non-technical users or marketers to seamlessly add content to the knowledge base without technical requirements.
To start adding article entries, navigate to Content Manager on the sidebar, choose the collection you want to use, and click Create new entry:

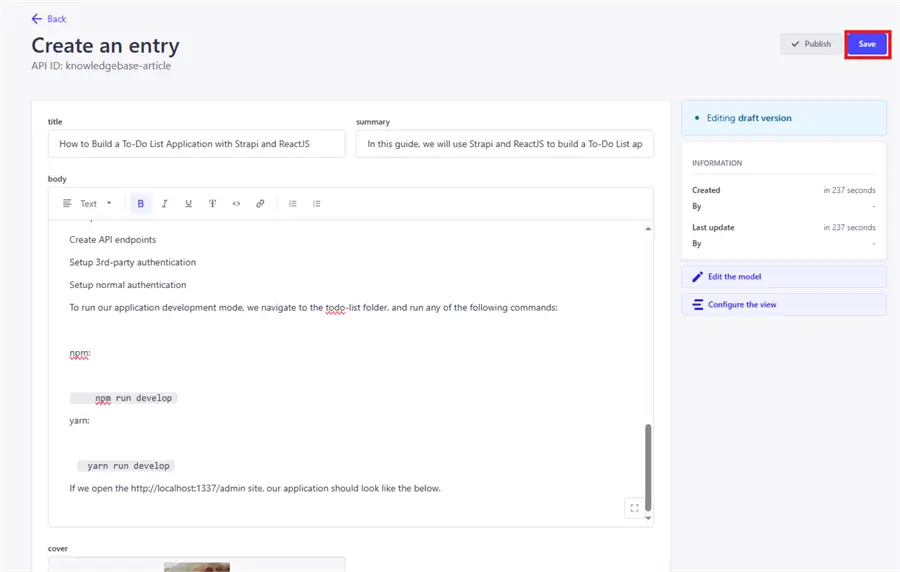
Here you can add entries to the selected collection. After adding the content, click Save:
To add more entries, click on Create new entry again and add content:

Step 3: Create the Strapi API
As mentioned previously in the architecture section, our application’s architecture includes having a Strapi API to expose the Strapi content. Before you add more entries, let’s test the API to see if it behaves the way we expected.
First, you need to generate an API key. To do this, Navigate to Settingson the sidebar, click on API Tokenson the settings menu, and click Add new API Token:

This will lead to a page where you can add your API name, duration, and type:

Setting Up the React Native App
To create your React Native application, open a different folder outside the Strapi root folder on the VScode terminal, and add the following command:
npx create-expo-app kb-react-native --template blank
Step 1: Create React Native Application
Install the following web and its dependencies on your application’s root folder to run the application on your web browser:
- React-DOM: This is a React package that serves as a bridge between React Native components.
npx expo install react-dom react-native-web @expo/metro-runtime- React-navigation/native and stack: This manages the application’s navigation.
npm install @react-navigation/native @react-navigation/stack- Axios: This package makes API requests using the HTTP/HTTPS protocol.
npm install axios- React Native Modal: This is an extension of the original React Native’s Modal.
npm i react-native-modalStep 2: Run the React Native Application
After all the installations, run the following code to run your application:
npx expo startThis will show the following page (http://localhost/8081) by default.
Step 3: Create the Main API File
Now that you have confirmed your expo React Native application is running, it’s time to do some editing. First, create a file named api.js on your root folder to handle your API calls:
// api.js
import axios from 'axios';

const API_URL = 'http://localhost:1337/api';
const API_KEY = '<your API key>';

const getArticles = async () => {
    try {
        const response = await axios.get(`${API_URL}/knowledgebase-articles?populate=*`, {
            headers: {
                Authorization: `Bearer ${API_KEY}`,
            },
        });
        return response.data;
    } catch (error) {
        console.error('Error fetching articles:', error);
        throw error;
    }
};

export { getArticles };
The code above is responsible for making the main API request from the Strapi API we created in the previous section. It uses Axios to make the request and returns the getArticles function which contains the API’s response.
Step 4: Create Components
Now, let’s create components that will be used as guides or templates to manage the individual application component’s state, data flow, and user interface.
On your root folder, create a folder named components, add the article_card.js file, and add the following code to it:
import React, { useState } from 'react';
import { View, Text, StyleSheet, Image, Pressable } from 'react-native';
import { useNavigation } from '@react-navigation/native';

const ArticleCard = ({ article }) => {
    const navigation = useNavigation();
    const API_URL = 'http://localhost:1337';
    return (
        <View style={styles.card}>

            <Pressable onPress={() => navigation.navigate('FullArticle', { article:article })}>
                <Text style={styles.title}>{article.attributes.title}</Text>
                    <Image
                        source={{ uri: API_URL + article.attributes.cover.data.attributes.formats.thumbnail.url }}
                        style={styles.cover}
                    />

                <Text style={styles.summary}>{article.attributes.summary}</Text>
            </Pressable>
        </View>
    );
};

const styles = StyleSheet.create({
    card: {
        padding: 20,
        flexGrow: 1,
        margin: 10,
        backgroundColor: '#fff',
        borderRadius: 10,
        shadowColor: '#000',
        shadowOffset: {
            width: 0,
            height: 2,
        },
        shadowOpacity: 0.25,
        shadowRadius: 3.84,
        elevation: 5,
        width: '40%',
        alignSelf:'center'

    },
    title: {
        fontSize: 18,
        fontWeight: 'bold',
        width: '90%',
        textAlign:'center'
    },
    summary:{
        fontSize: 14,
        width: '90%',
        padding:10,
        textAlign:'center'
    },

    cover: {
        width: 250,
        height:150,
        backgroundColor:'black',
        alignSelf:'center',
        margin:10

    }

});

export default ArticleCard;
The code above provides a structure for the article’s clickable modal, showing users the article’s important attributes and summary before they decide to open the full article.
Next, create another file named full_article.js under the components folder and add the following code:
// components/full_article.js
import React from 'react';
import { View, Text, ScrollView, StyleSheet, Image } from 'react-native';

const FullArticle = ({ route }) => {
    const { article } = route.params;
    const API_URL = 'http://localhost:1337';

    if (!article || !article.attributes) {
        return (
            <View style={styles.container}>
                <Text>Article details not available.</Text>
            </View>
        );
    }

    const { title, cover, body, summary } = article.attributes;

    const renderChildren = (children) => {
        return children.map((child, index) => {
            if (typeof child === 'string') {
                return <Text key={index} style={styles.body}>{child}</Text>;
            } else if (child.text) {
                return <Text key={index} style={styles.body}>{child.text}</Text>;
            }
            return null;
        });
    };

    const renderBody = (body) => {
        return body.map((element, index) => {
            switch (element.type) {
                case 'heading':
                    return (
                        <Text key={index} style={styles[`heading${element.level}`]}>
                            {renderChildren(element.children)}
                        </Text>
                    );
                case 'paragraph':
                    return (
                        <Text key={index} style={styles.body}>
                            {renderChildren(element.children)}
                        </Text>
                    );
                case 'list':
                    return (
                        <View key={index} style={styles.list}>
                            {element.children.map((listItem, listIndex) => (
                                <Text key={listIndex} style={styles.listItem}>
                                    - {renderChildren(listItem.children)}
                                </Text>
                            ))}
                        </View>
                    );
                default:
                    return null;
            }
        });
    };

    return (
        <ScrollView contentContainerStyle={styles.container}>
             <Text style={styles.title}>{title}</Text>
            <Image
                        source={{ uri: API_URL + cover.data.attributes.url }}
                        style={styles.cover}
                    />

            <Text style={styles.summary}>{summary}</Text>

            {renderBody(body)}
        </ScrollView>
    );
};

const styles = StyleSheet.create({
    container: {
        flexGrow: 1,
        backgroundColor: '#fff',
        padding: 15,
        width:'65%',
        textAlign:'center',
        alignSelf:'center',
        height:1500,
    },
    title: {
        fontSize: 44,
        fontWeight: 'bold',
        marginBottom: 16,
        textAlign:'center'
    },
    summary:{
        fontSize: 16,

        margin: 16,
        textAlign:'center'
    },
    cover: {
        width: '90%',
        height:500,
        borderRadius: 8,
        marginBottom: 16,
        textAlign:'center',
        alignSelf:'center'
    },
    heading1: {
        fontSize: 22,
        fontWeight: 'bold',
        marginBottom: 8,
    },
    heading2: {
        fontSize: 20,
        fontWeight: 'bold',
        marginBottom: 8,
    },
    heading3: {
        fontSize: 18,
        fontWeight: 'bold',
        marginBottom: 8,
    },
    heading4: {
        fontSize: 16,
        fontWeight: 'bold',
        marginBottom: 8,
    },
    heading5: {
        fontSize: 14,
        fontWeight: 'bold',
        marginBottom: 8,
    },
    heading6: {
        fontSize: 12,
        fontWeight: 'bold',
        marginBottom: 8,
    },
    body: {
        fontSize: 16,
        lineHeight: 24,
        marginBottom: 10,
    },
    list: {
        marginBottom: 10,
    },
    listItem: {
        fontSize: 16,
        lineHeight: 24,
        marginLeft: 20,
    },
});

export default FullArticle;
The code above creates a component that will render the full article for the user. This component is triggered by the user clicking on the article modal from the articleCard.js code. This trigger is accompanied by the route parameter which passes the selected article’s data.
Step 4: Create React Native Screens
After coding the components, you need to create the screens for your application. By default, React Native references its app.js file for the app’s screens. Go to the app.js file and add the following code:
// App.js
import React, { useEffect, useState } from 'react';
import { Button, View, FlatList, StyleSheet, ScrollView } from 'react-native';
import { NavigationContainer } from '@react-navigation/native';
import { createStackNavigator } from '@react-navigation/stack';
import { getArticles } from './api';
import ArticleCard from './components/article_card';
import FullArticle from './components/full_article';
import Modal from "react-native-modal";
import Searchbox from './components/search_box';

const Stack = createStackNavigator();

const ArticleList = () => {
    const [articles, setArticles] = useState([]);
    const [isModalVisible, setModalVisible] = useState(false);

    const toggleModal = () => {
      setModalVisible(!isModalVisible);
    };


    useEffect(() => {
        const fetchArticles = async () => {
            try {
                const data = await getArticles();
                setArticles(data.data);
                console.log(data);
            } catch (error) {
                console.error('Error fetching articles:', error);
            }
        };

        fetchArticles();
    }, []);

    return (
        <ScrollView style={styles.container}>
          <Button title="search the knowledgebase" onPress={toggleModal} style={styles.btn}  />
            <Modal isVisible={isModalVisible} hasBackdrop={true} backdropColor='white' backdropOpacity={0.94}>
              <View style={{ flex: 1 }}>
                <Searchbox article={articles} />

                <Button title="close" onPress={toggleModal} />
              </View>
            </Modal>
            <FlatList
                data={articles}
                renderItem={({ item }) => <ArticleCard article={item} />}
                keyExtractor={(item) => item.id.toString()}
            />
        </ScrollView>
    );
};

export default function App() {
    return (
        <NavigationContainer>
            <Stack.Navigator initialRouteName="ArticleList">
                <Stack.Screen name="ArticleList" component={ArticleList} options={{ title: 'Articles' }} />
                <Stack.Screen name="FullArticle" component={FullArticle} options={{ title: 'Full article'}} />
            </Stack.Navigator>
        </NavigationContainer>
    );
}

const styles = StyleSheet.create({
    container: {
        flexGrow: 1,
        backgroundColor: '#fff',
        paddingTop: 50,
        minHeight:1700
    },
    btn:{
      margin:20,
      width: 200
    }
});
The code above creates two screens for your application using createStackNavigator():
- ArticleList screen: Will render a list of the articles.
- FullArticle screen: Will render an entire article.
Great work! You have completed the core of the front-end code. Next, the search function and UI will be created.
Creating the Search Function and UI
In this section, you will use AI to search your knowledge base, using LangChain as the AI tool and Python to interact with the LLM model, which will use Faiss as the vector store. Then, we will build a UI component on our React Native application.
Python Backend
For the Python code, ensure you have the following installed or install them using pip:
pip install Flask[async]
pip install faiss-cpu
pip install flask-cors
pip install langchain_cohere
pip install langchain_community
After installing all the requirements, create a Python file named llm_backend.py and add the following code:
from flask import Flask, request, jsonify
from dotenv import load_dotenv
import os
from flask_cors import CORS
import requests
from langchain.indexes import VectorstoreIndexCreator
from langchain_community.docstore.document import Document
from langchain_cohere import CohereEmbeddings, CohereRagRetriever, ChatCohere
from langchain_text_splitters import CharacterTextSplitter
from langchain_community.vectorstores import FAISS
from langchain_community.document_loaders import TextLoader
from langchain_core.messages import HumanMessage, SystemMessage

load_dotenv()

app = Flask(__name__)
CORS(app)  # Allow CORS for all routes

cohere_api_key = os.getenv('COHERE_API_KEY')
API_KEY = '<strapi api key>'


if not cohere_api_key:
    raise ValueError("COHERE_API_KEY environment variable not set.")


# Function to fetch articles from API endpoint and map to Document objects
def fetch_articles_and_map_to_documents():
    try:
        api_url = 'http://localhost:1337/api/knowledgebase-articles?populate=*'
        headers = {'Authorization': f'Bearer {API_KEY}'}

        # Fetch data from API endpoint
        response = requests.get(api_url, headers=headers)
        data = response.json().get('data', [])

        # Map data to Document objects
        documents = []
        for item in data:
            document = Document(
                page_content=format_content(item.get('attributes', {}).get('body', [])),
                metadata={"source": item.get('attributes', {}).get('title', '')}
            )
            documents.append(document)

        return documents

    except Exception as e:
        print('Error fetching articles from API endpoint:', e)
        raise

# Function to format content from API response
def format_content(content):
    # Customize as per your content structure
    formatted_content = []
    for item in content:
        if item.get('type') == 'paragraph':
            formatted_content.append(item.get('children')[0].get('text'))
        elif item.get('type') == 'list':
            # Handle list formatting if needed
            pass
        # Add more conditions as per your content structure
    return '\n\n'.join(formatted_content)


embedding_function = CohereEmbeddings(cohere_api_key=cohere_api_key)

# Route to handle RAG QA queries
@app.route('/rag-qa', methods=['POST'])
async def rag_qa():
    data = request.get_json()
    user_query = data['question']
    chat_llm = ChatCohere(model="command-r")
    print(user_query)
    try:
        # Fetch articles from API endpoint and map to Document objects
        print("fetchting documents")
        documents = fetch_articles_and_map_to_documents()
        print("got the documents")

        print("Faissing documents")
        try:
            db = FAISS.from_documents(documents, embedding_function)
            print("similarity search")
            docs = db.similarity_search(user_query)
            # Query the vector store index for relevant documents
            results = docs[0].page_content

            results_metadata = docs[0].metadata['source']

            messages = [
                SystemMessage(content=f'please keep the response very short. {results}'),
                HumanMessage(content=user_query),
            ]
            llm_response = chat_llm.invoke(messages)
            print(f'llm_response: {llm_response}')
            print(results_metadata)
        except Exception as e:
            print(e)


        results = results[:200]
        return jsonify({'response': llm_response.content, 'metadata_title': results_metadata})

    except Exception as e:
        return jsonify({'error': str(e)}), 500


if __name__ == '__main__':
    app.run(debug=True)
The code above uses LangChain to store the Strapi data in a vector store as documents and responds to the user’s question by utilizing similarity searches against the vector store.
Once done, use the following code on your terminal to run the Python application:
python llm_backend.pyReact Native Search Box
To handle the search UI, let’s now create a React Native component. Create a file named search_box.js under your components folder and add the following code:
import React, { useState, useEffect } from 'react';
import { View, Text, TextInput, Button, StyleSheet, FlatList, ScrollView } from 'react-native';
import axios from 'axios';
import ArticleCard from './article_card';

const API_URL = 'http://localhost:5000';

const Searchbox = ({article}) => {
  const [question, setQuestion] = useState('');
  const [response, setResponse] = useState('');
  const [sourceTitle, setSourceTitle] = useState('');

  const handleQuery = async () => {
    try {
      const response = await axios.post(`${API_URL}/rag-qa`, { question: question,});
      console.log(response.data);
      setResponse(response.data.response);
      setSourceTitle(response.data.metadata_title);
      console.log(sourceTitle)
    } catch (error) {
      console.error('Error querying Cohere RAG QA:', error.message);
      setResponse('Error querying Cohere RAG QA');
    }
  };

  return (
    <View style={styles.container}>
      <Text style={styles.title}>Search with AI</Text>
      <TextInput
        style={styles.input}
        placeholder="Enter your question"
        value={question}
        onChangeText={text => setQuestion(text)}
      />
      <Button title="Ask" onPress={handleQuery} />


      {response ? (
        <View style={styles.responseContainer}>
          <Text style={styles.responseTitle}>AI Response:</Text>
          <Text style={styles.responseText}>{response}</Text>
          <Text style={styles.articlesTitle}>Source Articles:</Text>
          <FlatList
                data={article.filter(article => article.attributes.title === sourceTitle)}
                renderItem={({ item }) => <ArticleCard article={item} />}
                keyExtractor={(item) => item.id.toString()}
            />
        </View>
      ) : null}


    </View>
  );
};

const styles = StyleSheet.create({
  container: {
    flexGrow: 1,
    justifyContent: 'center',
    padding: 20,
    alignItems: 'center',
    fontSize:10
  },
  title: {
    fontSize: 24,
    fontWeight: 'bold',
    marginBottom: 20,
  },
  input: {
    borderWidth: 1,
    borderColor: '#ccc',
    padding: 10,
    marginBottom: 10,
    width: '100%',
  },
  articlesTitle: {
    fontSize: 18,
    fontWeight: 'bold',
    marginTop: 20,
    marginBottom: 10,
  },
  articleItem: {
    padding: 10,
    borderWidth: 1,
    borderColor: '#ccc',
    marginBottom: 10,
    width: '100%',
  },
  responseContainer: {
    marginTop: 20,
    alignItems: 'center',

  },
  responseTitle: {
    fontWeight: 'bold',
    marginBottom: 10,
  },
  responseText: {
    fontSize: 16,
  },
});

export default Searchbox;
The code above takes the user’s question with the Text Input attribute, and then runs the question using the axios.post() method as a parameter to the LLM’s server we initiated in the previous section using Flask. It successfully returns the AI answer, as well as the related article.
Results
To see the results, ensure all your servers are running and open http://localhost:8081/ on your browser. This is a demo of how the application works:

Here are the search results:

Conclusion
In this tutorial, we installed Strapi, added article sample content, and created an API to expose the content. Then, we created a mobile application user interface using React Native. We followed that with the creation of an AI-powered search function for the application using LangChain and Flask.
As you can see from the results above, Strapi enables you to create a headless CMS with API endpoints that make it easy to integrate your application with different software tools. As shown throughout this tutorial, Strapi connected to React Native and LangChain seamlessly.
The application first renders the main screen when opened. This screen rightly renders a list of the articles created on the Strapi backend by utilizing Strapi’s API. From here, the user can click on the article card to open the full article or click on the search button to query the LLM’s vector store.
The search function returns the LLMs response, along with the related article card for the user to open if they wish to dive deeper.
Next Steps
