Problem
As we aim to make our Microservice fault-proof from unforeseen situations, we need to follow the best versioning and code review process for our projects before making them production-ready. In this article, we cover how to build a CI / CD pipeline for Azure Functions with GitHub Actions.
Solution
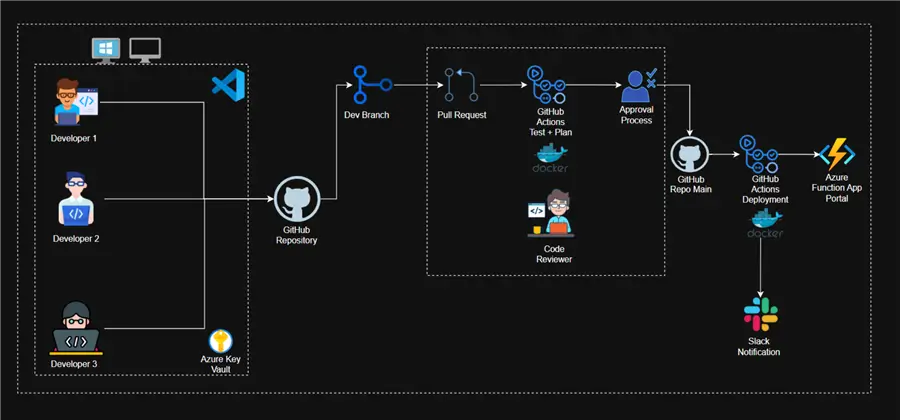
Organizations are beginning to incorporate software best practices into their solutions to collaborate more easily with different versions of their code before deployment. GitHub provides all developers a means to achieve this process by having a well-structured process before production. Below is the project architecture.
What are GitHub Actions?
GitHub Actions is an automation platform provided directly by GitHub. It enables workflow automation on your GitHub repository. Consider it as a method of executing a sequence of preset activities in response to events that occur in your repository (such as submitting code, opening a pull request, generating a release, etc.).
Workflow automation is at the heart of its main use cases, especially for Continuous Integration (CI) and Continuous Deployment (CD).
Section A: Create Necessary Resources and Blob Trigger
For this section, I will advise reading our previous article on Blob Trigger with Azure Function. This is a continuation of that article, as we plan to integrate with GitHub for the CICD process.
Step 1: Create a GitHub Repository
Let’s assume this is for an organization, meaning the repository will be created inside an organization, and it would be a private repository.
In your GitHub organization account, create a New repository, which takes you to another window, where the necessary information is required.
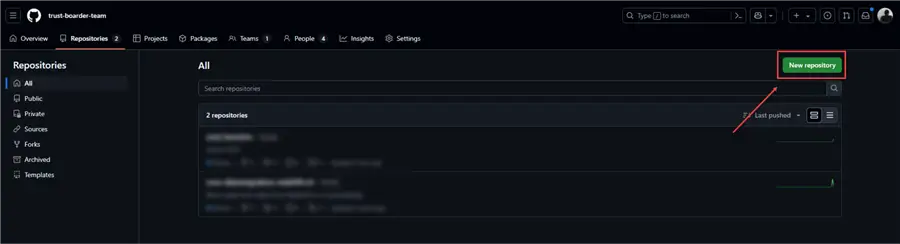
Again, this should be a private repository if it is for your organization. After successfully creating the repository, clone it to your local development environment.
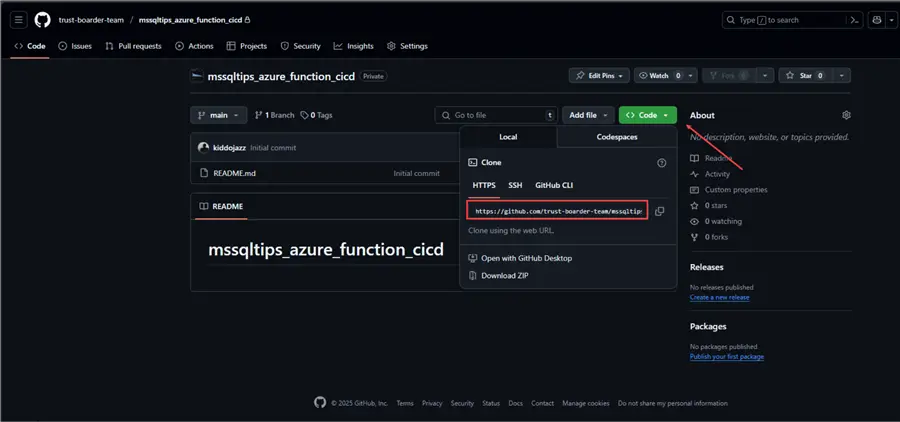
After successfully cloning the repository in your local environment, repeat the whole process of Blob Trigger with Azure Function. This will help us try to achieve a CI/CD process with Azure Functions.
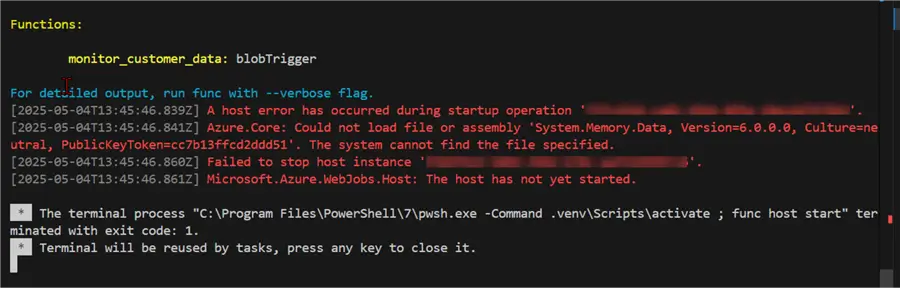
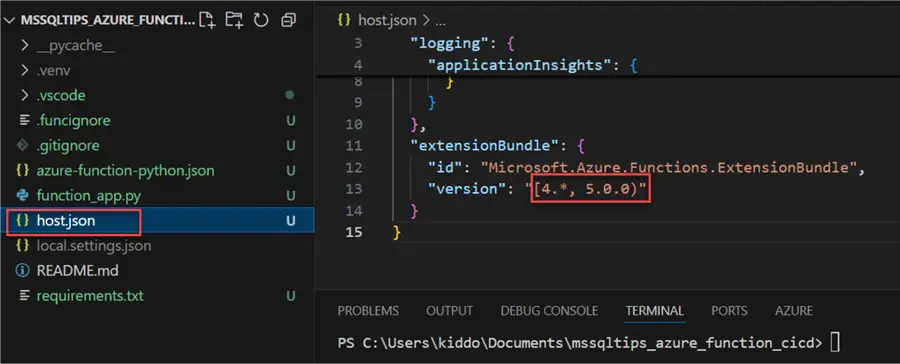
Step 2: Possible Error with Blob Trigger
Due to a system upgrade in the version, developers may encounter some issues when they run the code locally in their VS Code. In the host.json file, it is advised to reduce the version to “version”: “[3.*, 4.0.0)”.
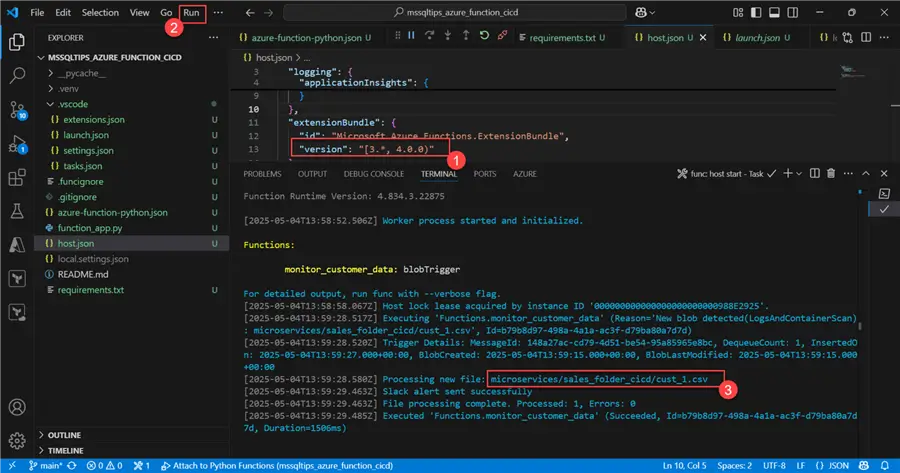
After reducing the version of the host.json, rerun the script to confirm that it works as expected.
Upload a new file to the Azure Storage account in the appropriate directory and confirm that it works as expected.
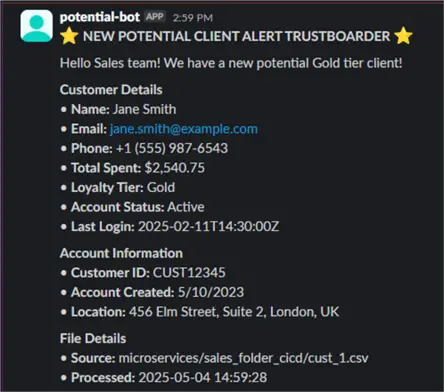
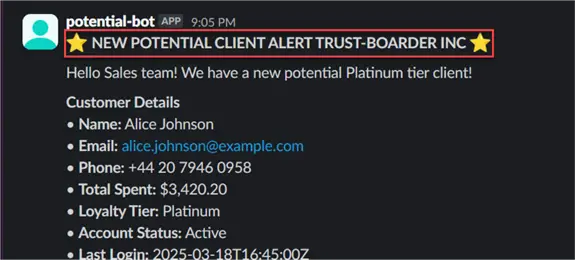
Confirm the message was also sent to the Slack channel for quick response.
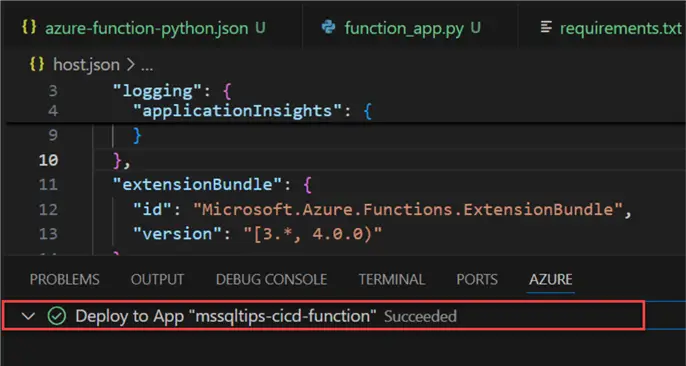
Step 3: Deploy Solution to Azure Function App
After successfully testing the solution, let’s deploy to the Azure Function App in our Azure Portal. It should take a couple of minutes to fully deploy.
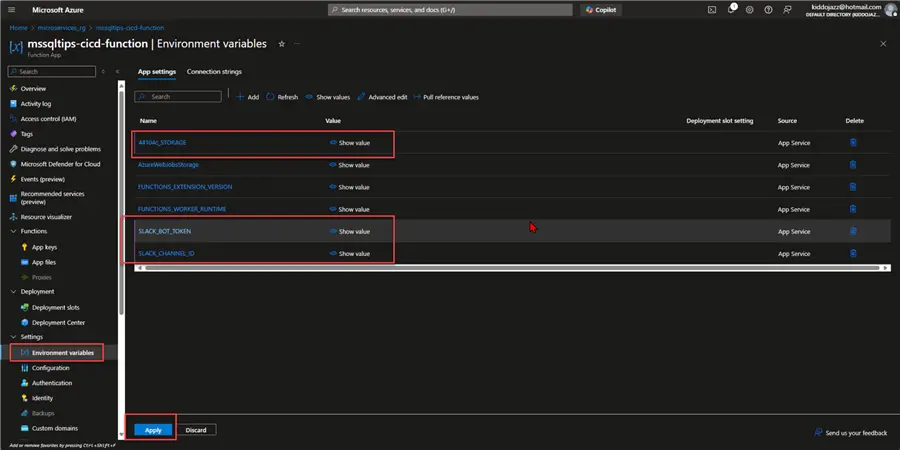
In your Azure Portal, select the Azure Function App and add the necessary Environment variables that were stored in your local development as local.settings.json.
Step 4: Confirm Azure Function After Deployment
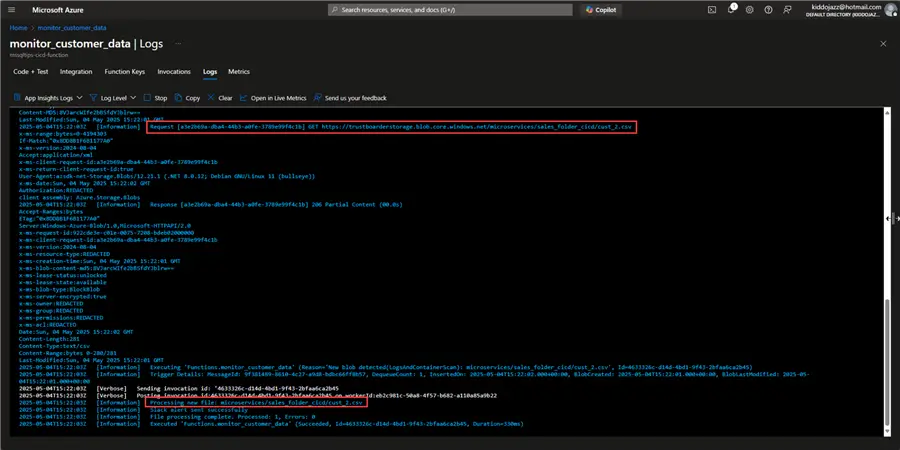
In your Azure Function App, check the log to see if the solution works as expected.
Section B: Build a CI CD Pipeline
To better improve our process, let’s first deploy our code to GitHub, where a Git Action helps push the code to the Azure Function App. In this approach, we will ensure code quality before merging the code to our main branch.
Step 1: Push Code to Dev Branch
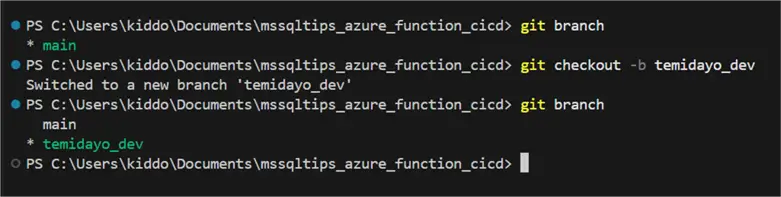
For a proper development scenario, let’s begin by creating a dev branch, where all development will be done. Create and switch to a new branch with this command:
git checkout -b temidayo_dev
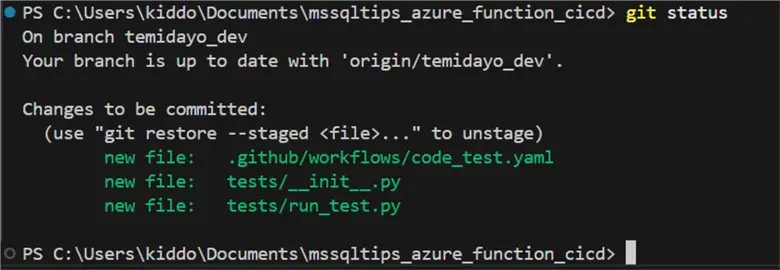
Stage all changes in the local directory with git add. This will add all new files to the staging area.

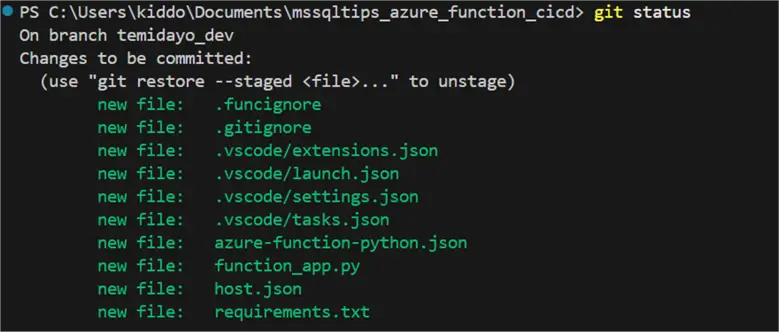
Use the git status command to show the current state of the Git working directory and the staging area. This is the primary tool for understanding what changes are pending.
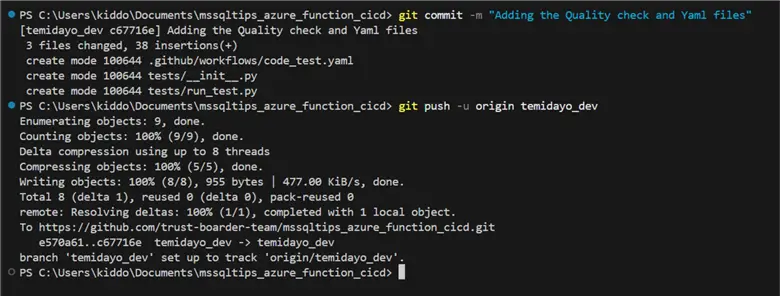
Use the git commit -m “<message>” command to take the changes that are currently in the staging area and save them as a new permanent snapshot in your project’s Git history. Each commit represents a point in time you can later refer to.
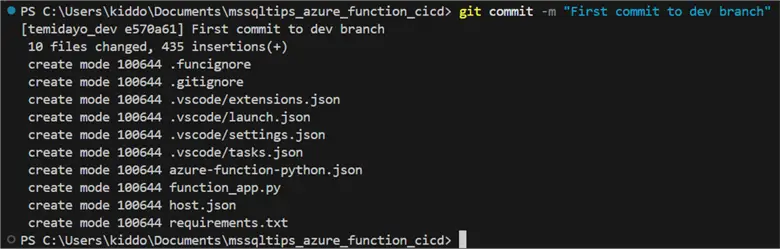
Use the git log –oneline command to display the history of commits in your repository, but in a very concise, single-line format.

Use the command git push -u origin temidayo_dev to send commits from your local repository to a remote repository.
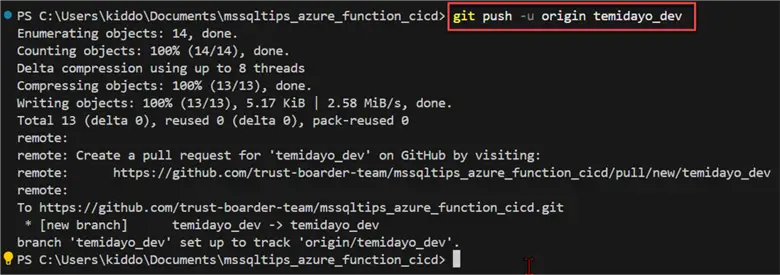
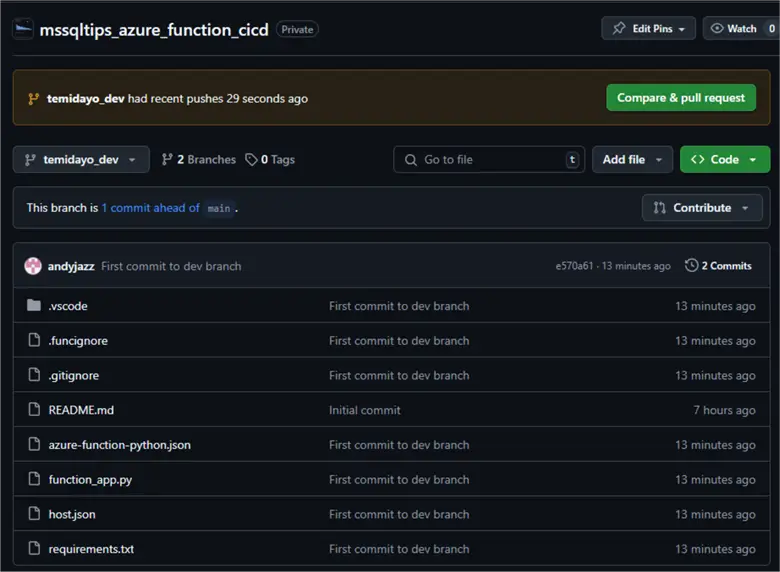
Confirm local code development was successfully pushed to the dev branch in GitHub.
Step 2: Create a Code Quality Check
To make the code production-ready and prevent any future breaks during deployment, we can do a code test when scripts are pushed to any of the other branches apart from the main branch, and when a pull request is also made.
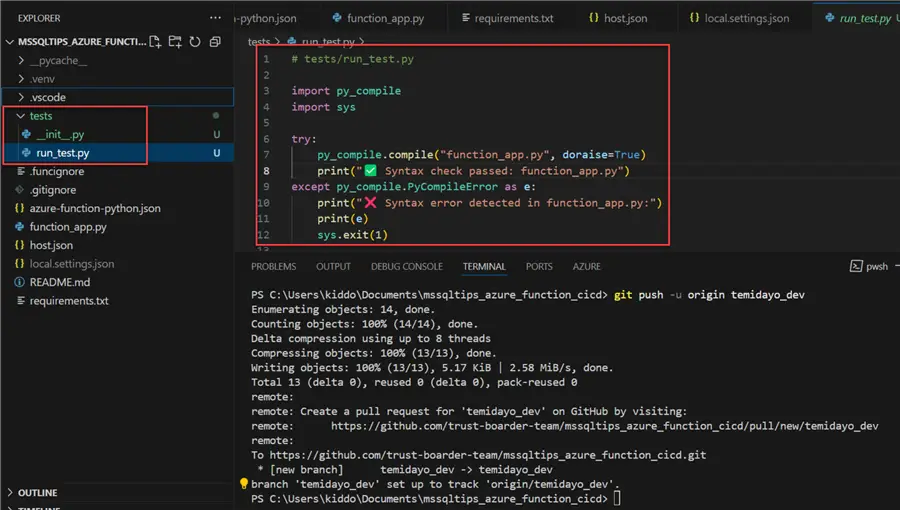
Let’s start by creating a tests folder in our root folder in VS Code and creating a Python script, run_test.py. This will be used to perform a syntax check by calling the function_app.py script.
Note: You can conduct further tests by using Libraries like PyTest and Flake8 for more advanced quality tests.
import py_compile
import sys

try:
    py_compile.compile("function_app.py", doraise=True)
    print("✅ Syntax check passed: function_app.py")
except py_compile.PyCompileError as e:
    print("❌ Syntax error detected in function_app.py:")
    print(e)
Step 3: Create GitHub Workflow
Now, we are going to create a workflow in the root directory that performs a syntax test whenever we push to any of the branches except the main branch.
Let’s start by creating a folder .github\workflows in the folder we will create a YAML file. This will be used to perform the action needed via Git Actions.
name: Python Code Quality Check

on:
  push:
    branches:
      - '**'        # Match all branches
      - '!main'     # Exclude the main branch
  pull_request:
    branches:
      - main

jobs:
  syntax-check:
    runs-on: ubuntu-latest

    steps:
      - name: Checkout code
        uses: actions/checkout@v3

      - name: Set up Python
        uses: actions/setup-python@v4
        with:
          python-version: '3.11'

      - name: Run syntax check
        run: python tests/run_test.py
The workflow is triggered automatically on two events:
- push: When code is pushed to any branch EXCEPT the main branch.
- pull_request: When a pull request is opened, synchronized, or updated, specifically when the pull request is targeting the main branch.
Let’s push all the new changes to the dev branch and confirm that the Git Action works as expected.
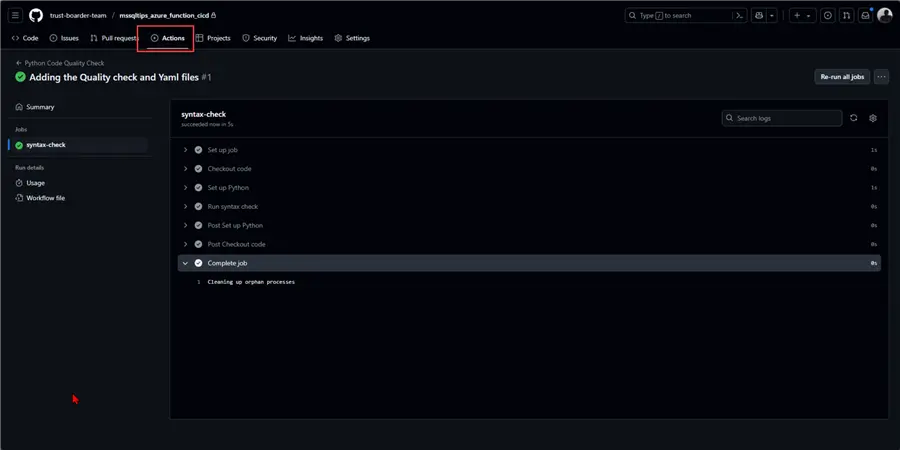
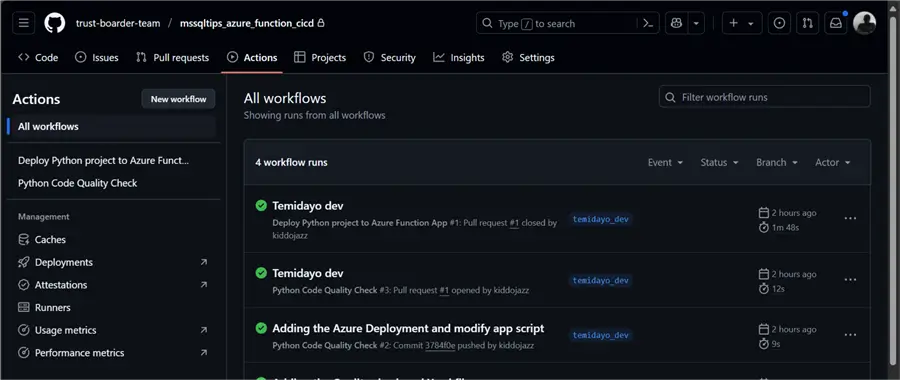
With the successful push to the dev branch, let’s confirm the syntax script ran as expected.
In our GitHub Actions, you will notice the syntax ran and worked as expected with no error.
Step 4: Create a Deployment YAML File
Let’s create a new workflow that will help deploy our Azure Function Local code to Azure Function App through GitHub actions. In this way, we will maintain high quality code.
Start by downloading the Publish profile in our Azure Function App.

Go to your GitHub repository and select settings. Add a secret downloaded from the Get publish profile.

In our Local Development environment, create a new YAML file to help push the deployment to the Azure Function app from GitHub actions.
The action gets triggered when a Pull Request (PR) gets merged and closed.
name: Deploy Python project to Azure Function App

on:
  pull_request:
    branches:
      - main
    types: [closed]

env:
  AZURE_FUNCTIONAPP_NAME: 'mssqltips-cicd-function'   # set this to your function app name on Azure
  AZURE_FUNCTIONAPP_PACKAGE_PATH: '.'        # set this to the path to your function app project, defaults to the repository root
  PYTHON_VERSION: '3.11'                     # set this to the python version to use (e.g. '3.6', '3.7', '3.8')

jobs:
  build-and-deploy:
    runs-on: ubuntu-latest
    environment: dev
    # Only run when the PR was merged (not just closed)
    if: github.event.pull_request.merged == true
    steps:
    - name: 'Checkout GitHub Action'
      uses: actions/checkout@v3

    - name: Setup Python ${{ env.PYTHON_VERSION }} Environment
      uses: actions/setup-python@v4
      with:
        python-version: ${{ env.PYTHON_VERSION }}

    - name: 'Resolve Project Dependencies Using Pip'
      shell: bash
      run: |
        pushd './${{ env.AZURE_FUNCTIONAPP_PACKAGE_PATH }}'
        python -m pip install --upgrade pip
        pip install -r requirements.txt --target=".python_packages/lib/site-packages"
        popd

    - name: 'Run Azure Functions Action'
      uses: Azure/functions-action@v1
      id: fa
      with:
        app-name: ${{ env.AZURE_FUNCTIONAPP_NAME }}
        package: ${{ env.AZURE_FUNCTIONAPP_PACKAGE_PATH }}
        publish-profile: ${{ secrets.AZURE_FUNCTIONAPP_PUBLISH_PROFILE }}
        scm-do-build-during-deployment: true
        enable-oryx-build: true
Step 5: Push Local Development to Azure Dev Branch and Test Logics
With the added workflow to our GitHub workflow, push the code to our developer branch. From the image below, you can see I also made some changes to the function_app.py script to test if it would work as expected.

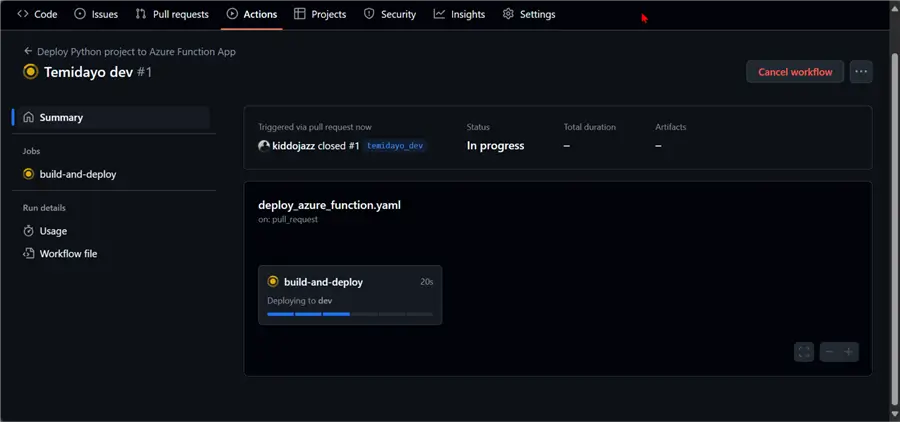
Merge the Pull Request and wait for the Azure Function deployment to kick off if the syntax is correct. This can take a couple of minutes. When complete, you will get all the icons.
Step 6: Test Deployment
Now, upload a new file to our folder directory in the Azure storage account to see if the Azure Function is triggered by the Blob. You will notice from the message that the title header is changing. All this was done from the GitHub Action without deploying directly from the development environment.
Conclusion
In this article, we covered the principle of how to build a CI / CD pipeline with GitHub, coupled with best practices before deploying your CI / CD pipeline. We also integrated Azure Function with GitHub Actions by testing on different branches, and different actions were carried out before deploying our Azure Functions to the Azure Portal via GitHub Workflow.
Next Steps
