By: Manvendra Singh | Comments (8) | Related: > Clustering
Problem
We have completed the prerequisites and required pre-checks including cluster validation in this previous tip. Now we will begin the installation of SQL Server 2014 on the two node cluster and this tip will explain the steps to install SQL Server.
Solution
The process of SQL Server cluster installation involves two stages, one is to install SQL Server on one node and once this installation is successful then you need to install SQL Server on the other nodes of the cluster by launching the SQL Server setup on the other nodes.
For our example, we have a two node cluster based on the Windows Server 2012 R2 operating system where we will be installing SQL Server 2014. The name of the nodes are SQL-NODE1 and SQL-NODE2. We need a unique and unused IP address and SQL Server Network Name to complete this installation. We will use MSSQLCLUSTER as the network name and the IP address 10.2XX.XX2.1X. (note: X represents a numeric value, I put X because I do not want to disclose my IP address due to security reasons). So let's start the SQL Server installation on node SQL-NODE1. Before we begin, make sure the cluster resources (like the shared drives) are accessible by SQL-NODE1.
SQL Server 2014 cluster Installation
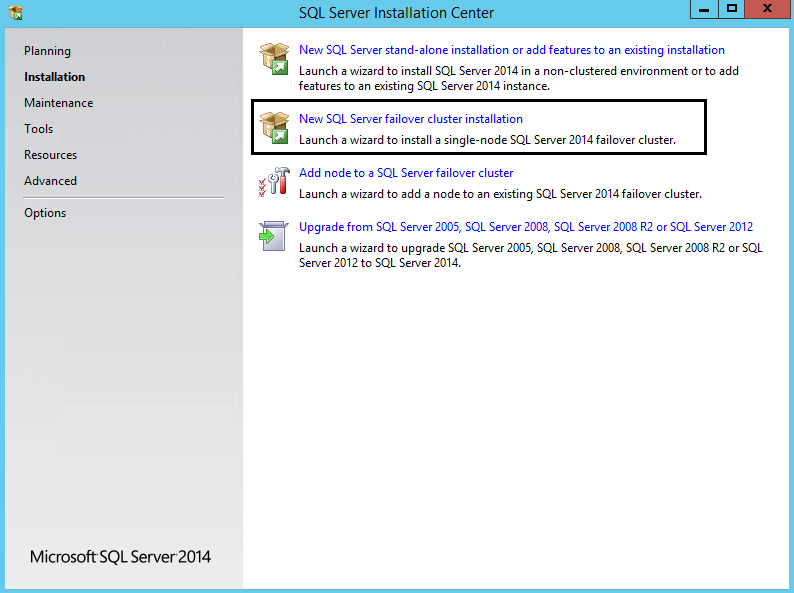
Step 1: Go to the SQL Server setup file location. Right click on setup.exe and choose "Run as administrator". The SQL Server Installation Center will appear on your screen as shown in the screenshot below. Select the "Installation" tab from the left pane and click on "New SQL Server failover cluster installation" from the right pane.
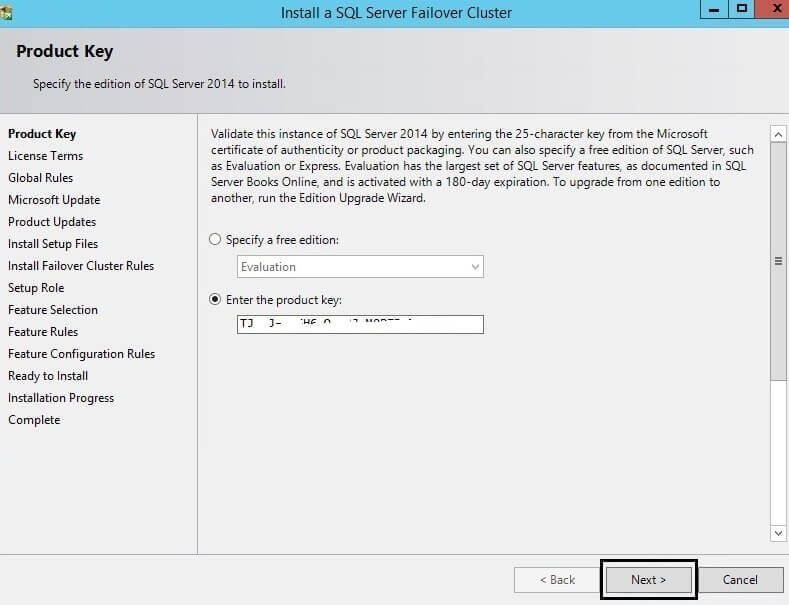
Step 2: Once you click on "New SQL Server failover cluster installation", the SQL Server installation window will appear and it will ask you to enter your product key for SQL Server. Enter the key or if it is an evaluation version choose the first option. Sometimes the product key option will be grayed out, so in that case you can just click the Next button.
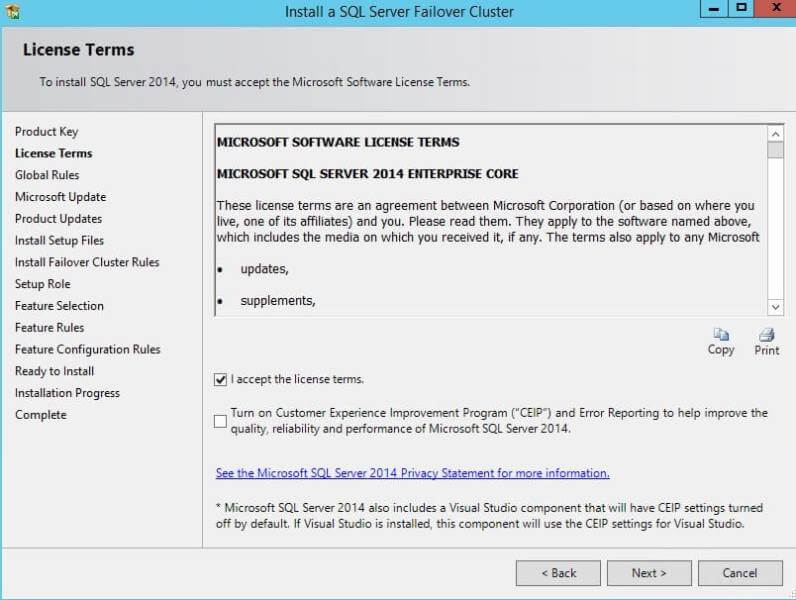
Once you click on Next, another window will load and ask you to click on the check box to accept the license terms and conditions for the SQL Server product. Click on the Next button after accepting the license terms.
Step 3: After accepting the license terms, SQL Server will start checking the global rules and display the status of all the rules. If any rule fails, setup will not proceed further and you need to first fix the issue. You can see below the rules are successful, so click on the Next button to proceed.

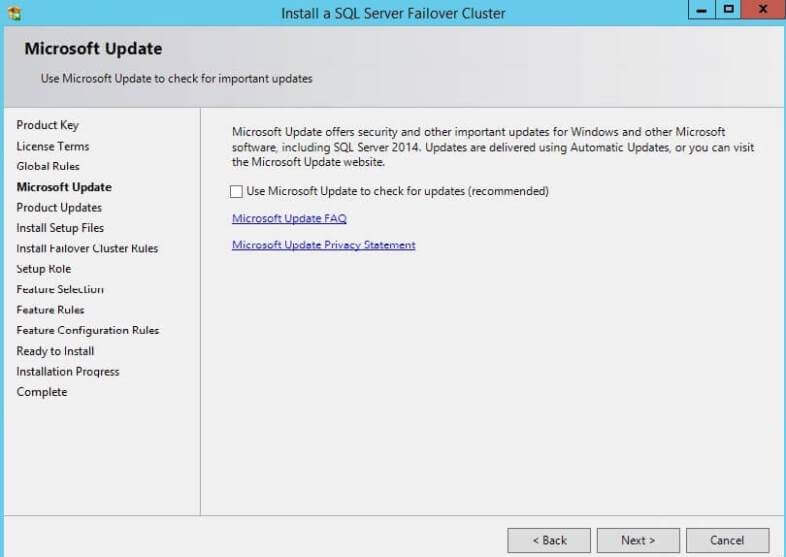
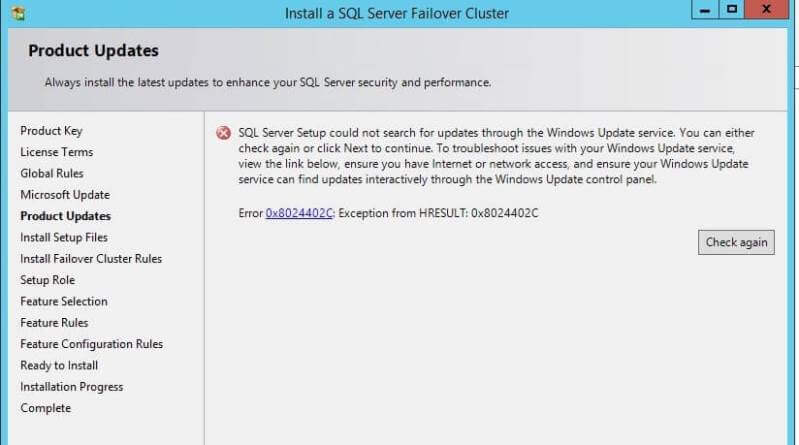
Step 4: The next window will ask you to check for Microsoft Updates for Windows and SQL Server 2014. I have not checked this option, but if you want to check for updates from Microsoft you can click on the check box in the below screenshot.
Once you click on the Next button of the above screen, the Product Update window will appear. As I have not chosen Microsoft updates in last window, the error is indicating that "SQL Server could not search for updates..." as shown in the below screenshot. Click on the Next button to proceed.
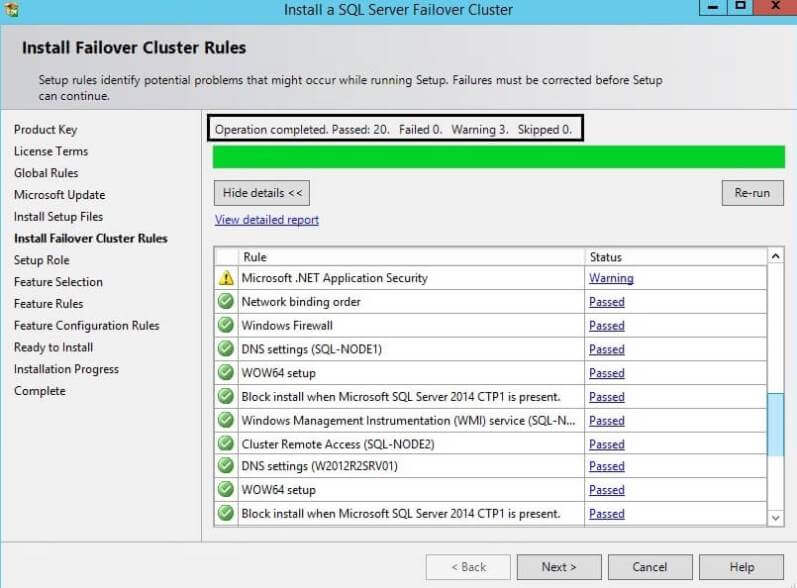
Step 5: The next window will check failover cluster rules. We can see all rules have been checked with both successful and warning results. We can skip warnings at this point in time as we can fix them post installation. Click on the Next button to proceed with the installation.
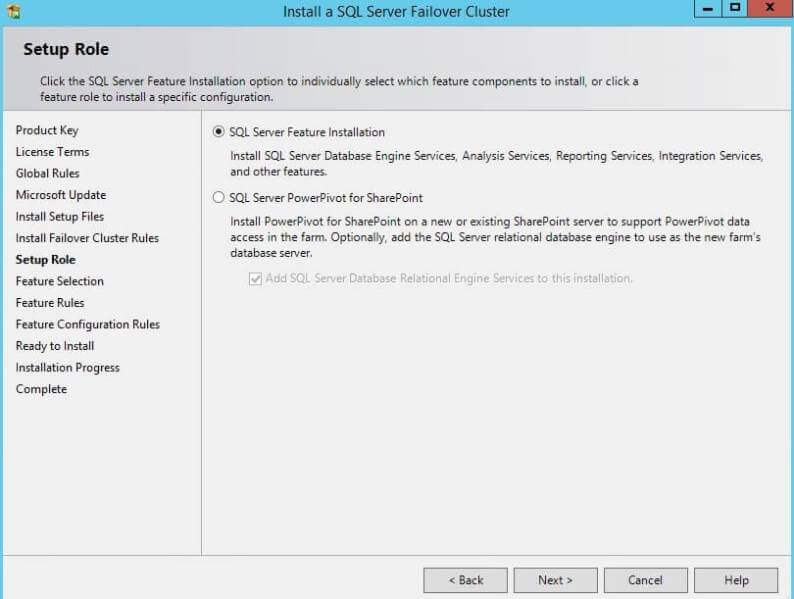
Step 6: The next interface is the setup role window, where you choose the installation features. You will find two options on this page. One is to configure SQL Server feature installation and another is to configure SQL Server PowerPivot for SharePoint. Since I have to install the SQL Server database engine, I will choose the first option. Once you choose your setup role, click on the Next button.
Step 7: The next step in the process is for feature selection. Choose the features you want to install on your cluster server. Do not select all features if you will not use them, as this will use server resources that could be used by the SQL Server database engine or Windows. I have selected the SQL Server Database Engine along with a few shared features as shown in the below screenshot. You can also change the root directory for each of the selected features and for the SQL Server binaries.
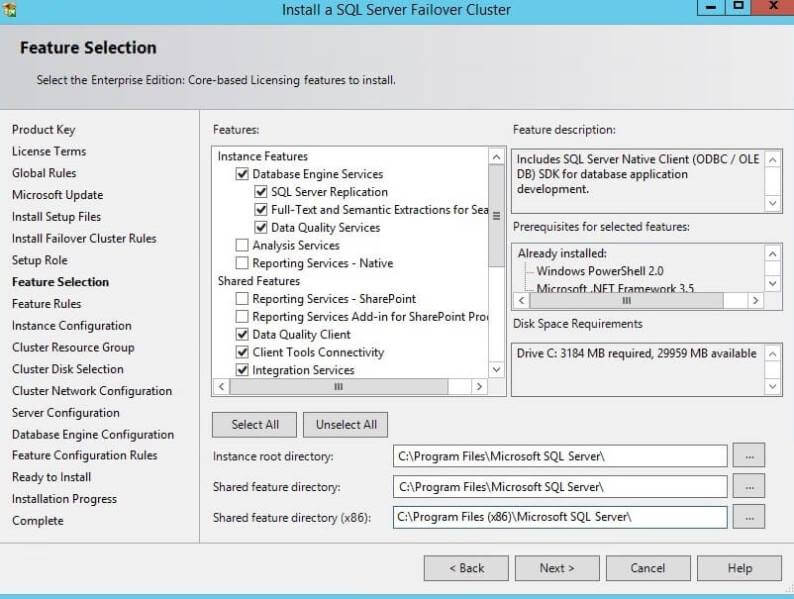
Click the Next button after selecting the features you want to install. Another window will check the feature rules. Once every rule is checked, you can proceed again by clicking on the Next button.
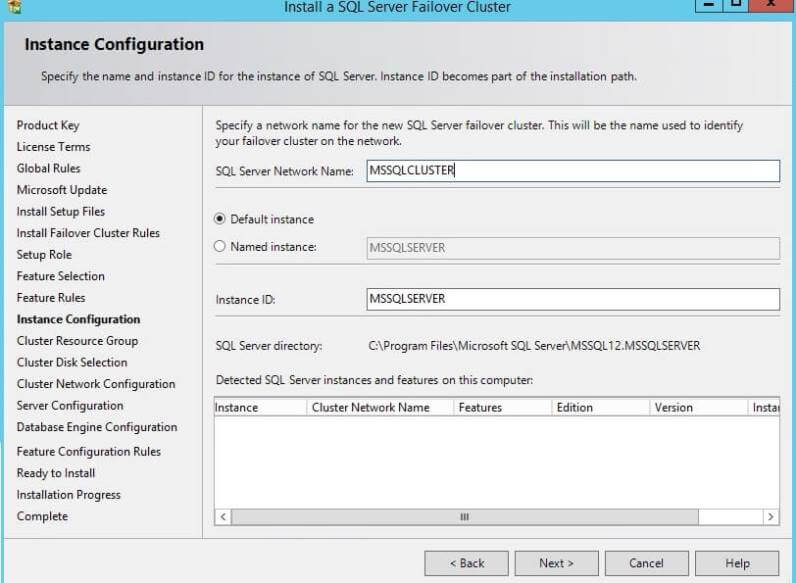
Step 8: Our next interface is the Instance Configuration window. This is an important step because in this step you enter the SQL Server Network Name along with the Instance ID. I have chosen "MSSQLCLUSTER" as network name and default instance (MSSQLSERVER) as the instance id. Now click on the Next button to go to the next window.
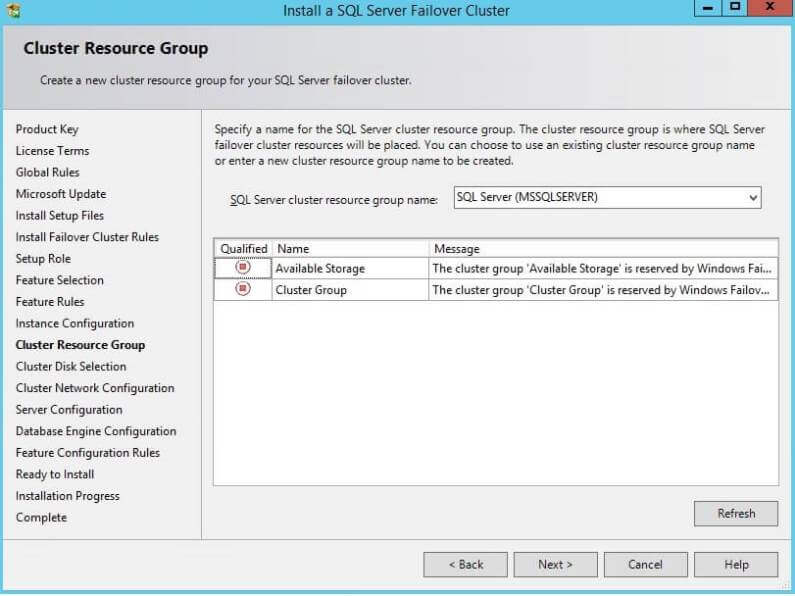
Step 9: Next window is for cluster resource group. You can change the cluster resource group name, but I have kept it as and clicked on the Next button to proceed.
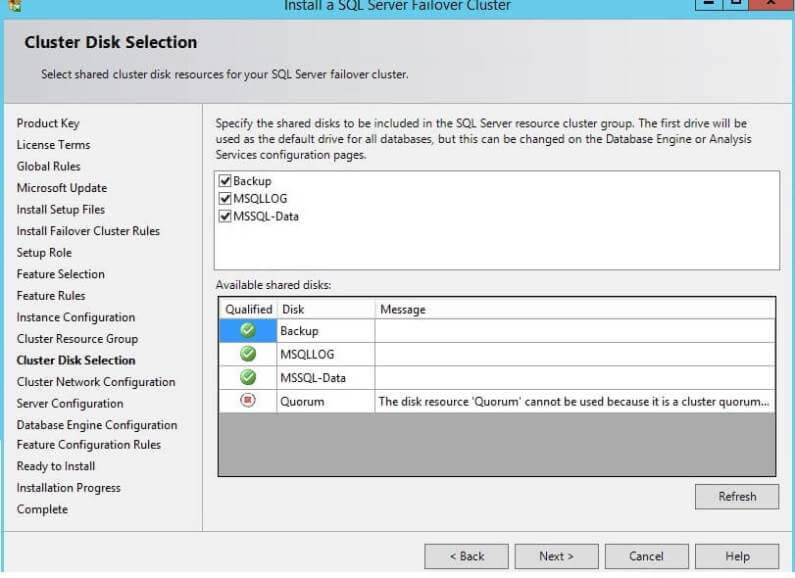
Step 10: The Cluster Disk Selection window is where you will see the list of all shared disks that you can include in the SQL Server cluster resource group. I have selected all three shared disks and clicked on the Next button to proceed. If you have multiple shared disks, make sure to select only those that will be part of this cluster.
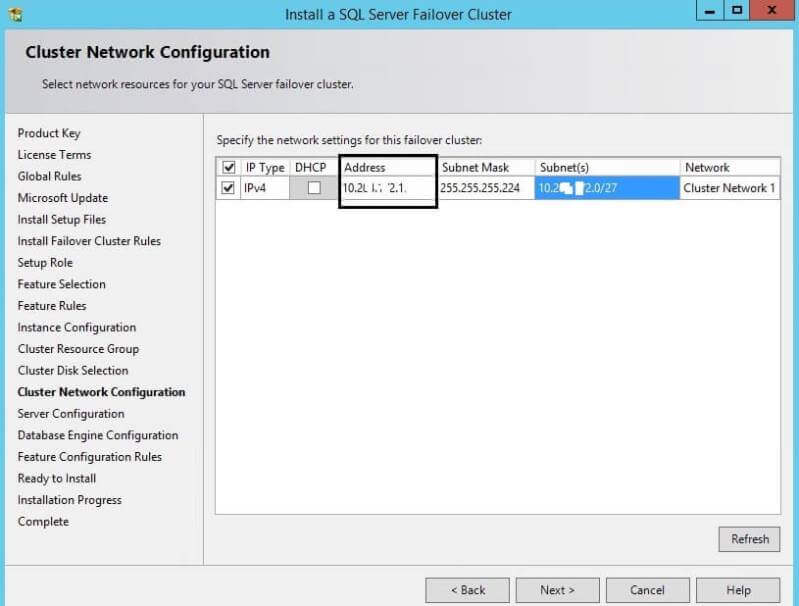
Step 11: Next window is to configure the cluster network. Here you need to enter your unique and unused IP address in the address column as shown in below screenshot. This is the same IP address which I talked about in the beginning of this tip. Enter the IP address and click on the Next button.
Step 12: Once you click Next in the above step, it will ask you to enter the SQL Server service accounts and their passwords to run the SQL Server services. I used two service accounts, one for SQL Server and another for SQL Server agent. Enter the credentials and click on the Next button to go to the database engine configuration page.

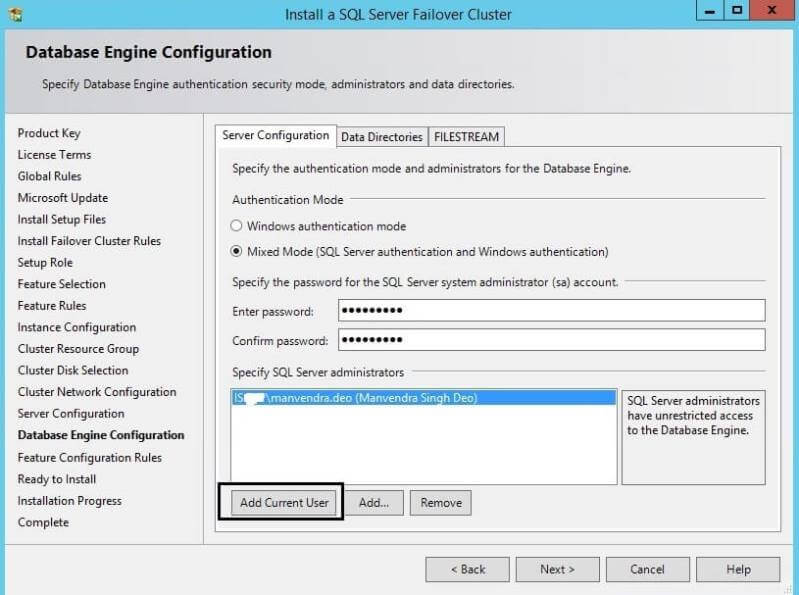
Step 13: Next window is very important and here setup will ask you to configure the SQL Server database engine. There are three tabs in this window. First is 'Server Configuration', second is 'Data Directories' and third is 'FILESTREAM'. We will start configuring with the first tab that is server configuration. The below screenshot explains this window. We need to select the authentication mode of the SQL Server. I have selected "Mixed Mode" and entered the sa password. Make sure to enter a complex password otherwise it will not allow you to proceed. Now click on "Add Current User" to add yourself as an administrator on SQL Server. You can add other accounts as well which should be admins in SQL Server.
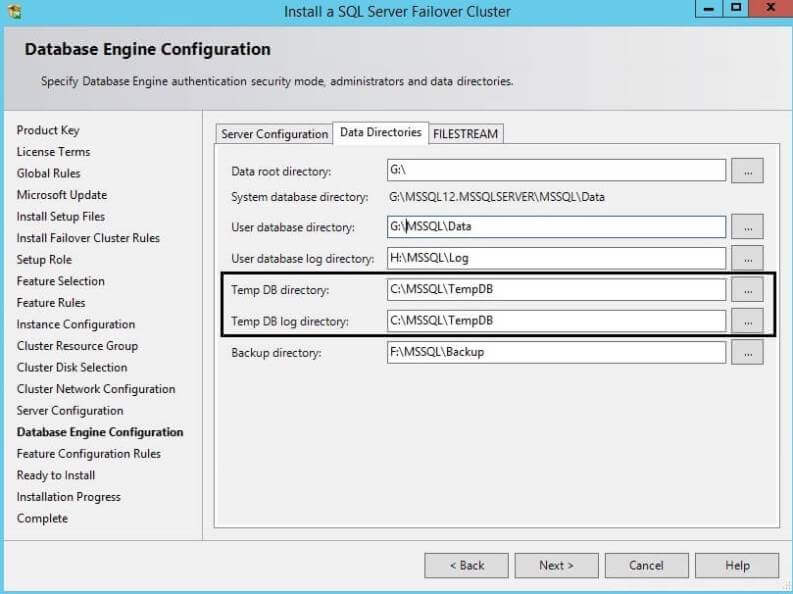
Now click on "Data Directories" to configure the data directories where the system and user databases along with backup files will be placed. I have placed system databases except TempDB, user databases and backups on shared disks, but left TempDB on a local drive (C drive).
SQL Server failover cluster installation supports Local Disk only for installing the TempDB files. Make sure that the path specified for the TempDB data and log files exists on all the cluster nodes. If the TempDB directories are not available on the failover target node during failover, the SQL Server resource will fail to come online. Another advantage of placing TempDB on a local disk is that it creates separate paths of traffic by having your data and log files on the SAN while TempDB is on the local disk.
I do not need FILESTREAM to be enabled, so I will not configure it and click Next to proceed. If you need FILESTREAM click on the third tab and follow the process to setup.
Once you click Next, the below screen will appear to have you confirm that you are putting TempDB files on local drives.
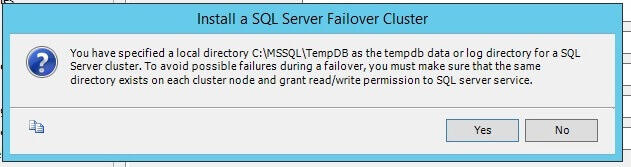
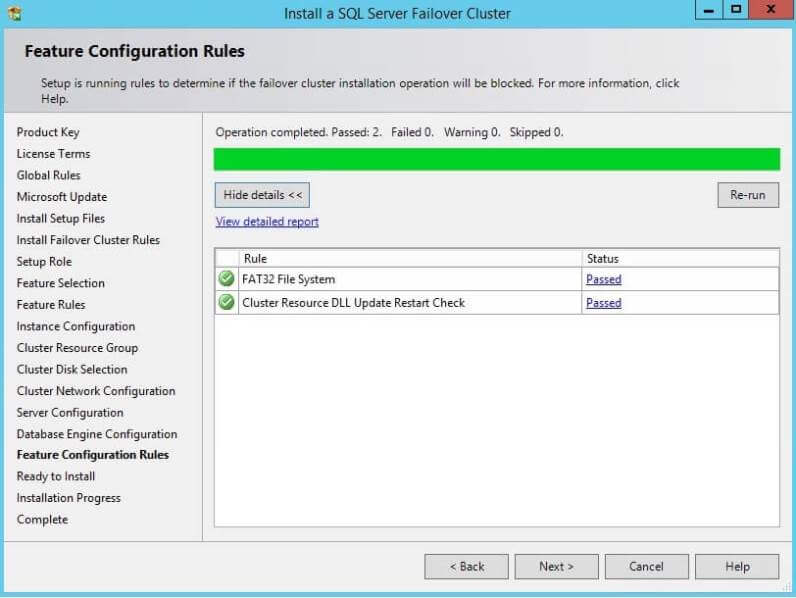
Click on Yes and it will check the configuration rules of this installations. Once all rules have passed, click on Next to reach the final installation screen.
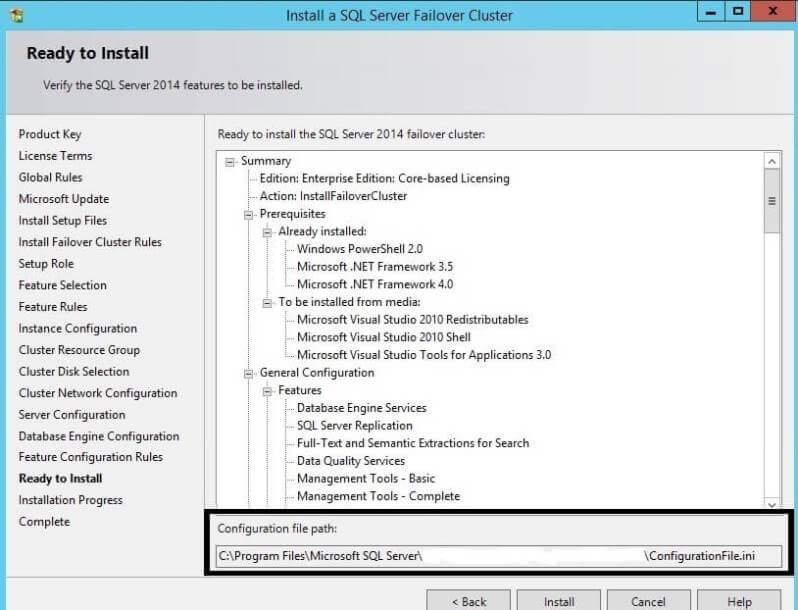
Step 14: Here you can check the features and configurations you have selected. You can also see the configurationFile.ini file in the highlighted area that will be used by the setup to install SQL Server.
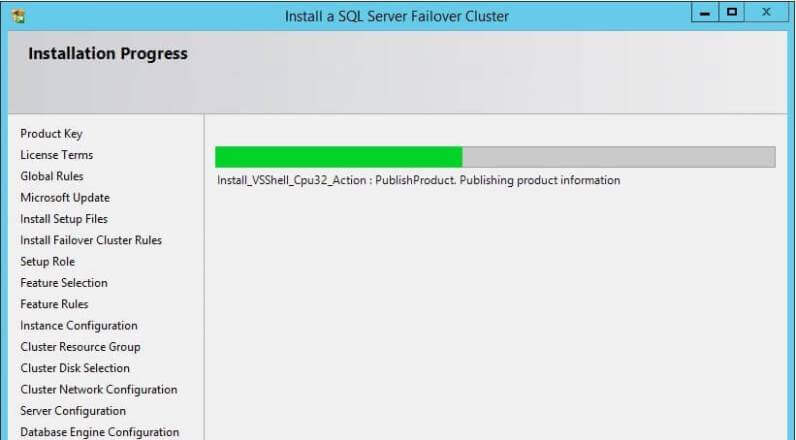
Now click on the Install button to start the installation process of SQL Server. You can see the installation is running based on the progress in the below screenshot.
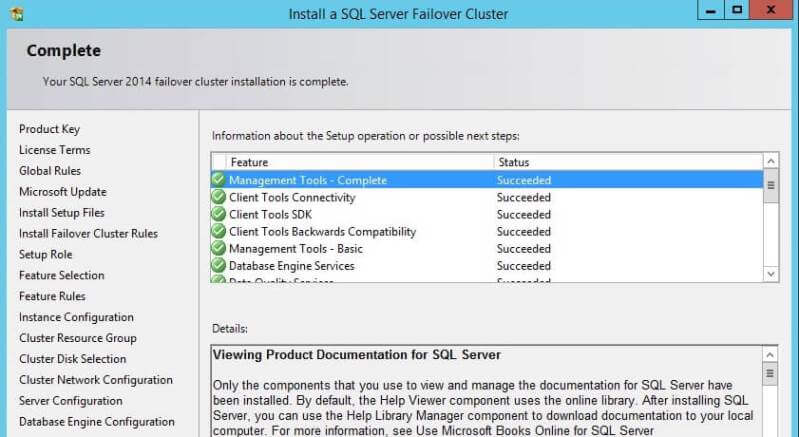
Once the installation successfully completes, you will get the below screen with confirmation that all the features you have selected are installed.
Validate the Installation
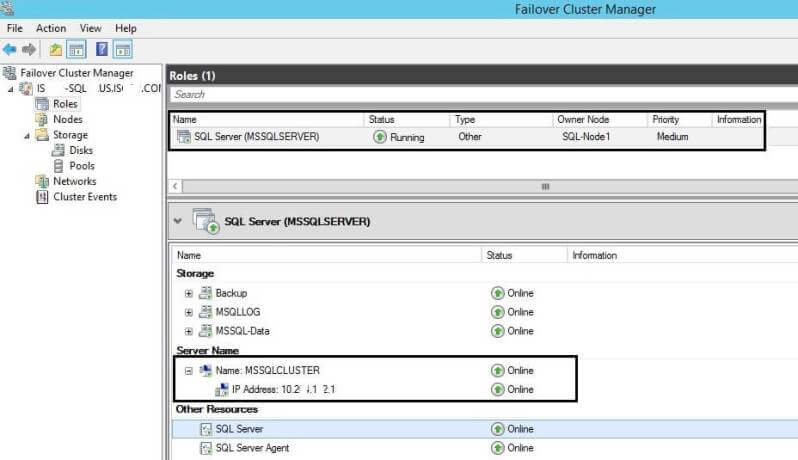
Now we have installed SQL Server 2014 on cluster node SQL-Node1. So let's validate that SQL Server has been successfully installed. You can open the SQL Server Failover Cluster Manager and click on Roles from the left pane. You will be able to see that the SQL Server default instance has been added. You can also see the SQL Server Network Name "MSSQLCLUSTER" along with the IP address in the right pane.
Next Steps
- We have successfully installed SQL Server 2014 on SQL-Node1, our next step is to add nodes to this cluster. SQL-Node2 is the second server in this cluster and we will cover how to add SQL Server to this cluster node in our next tip.
- Explore more knowledge on SQL Server Database Administration Tips.
- Be sure to checkout the first tip in the series - Validating a Windows Cluster Prior to Installing SQL Server 2014.


About the author
 Manvendra Singh has over 5 years of experience with SQL Server and has focused on Database Mirroring, Replication, Log Shipping, etc.
This author pledges the content of this article is based on professional experience and not AI generated.
View all my tips
