By: Manvendra Singh | Updated: 2021-11-17 | Comments (3) | Related: 1 | 2 | 3 | 4 | 5 | 6 | 7 | 8 | 9 | > Virtualization
Problem
In this series of tutorials, we have been working on getting the SQL Server 2019 database engine installed on a Red Hat Linux virtual machine. In this part we will install SQL Server now that the server is ready for this next step.
Solution
If you have not read the previous tutorials, I would recommend starting with this article and move through each of the components before starting the SQL Server 2019 installation process. This is 7th article in this series, follow the other articles to understand and configure SQL Server 2019 on RHEL 8.1 without any issues. You can skip the 5th article if you have new machine. I tried to cover all issues and challenges in the first articles to make your installation smooth and successful.
SQL Server 2019 Installation on RHEL 8.1
Prerequisites
First, I will explain the prerequisites needed to install SQL Server 2019 on a Linux operating system in a step-by-step manner:
- You must have a system running with RHEL 7.3 & above.
- Your VM must be registered with RHSM (Red Hat Subscription Management), this is required to install other perquisites like python2.
- Ensure you don’t have any old repository configured.
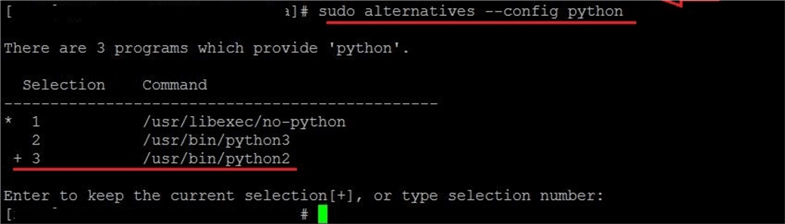
- Verify you have python2 installed on your target RHEL VM. RHEL 8 doesn’t comes with this module. You need to install it manually as part of prerequisites.
- I am using RHEL 8 to install SQL Server 2019, but if you are installing SQL Server 2019 on RHEL 7.x then change the directories in each command to /rhel/7 instead of /rhel/8.
Installation Steps
Launch PuTTY utility on your desktop and establish the connection to target RHEL system. You can see, I have connected to my target RHEL system using the IP address of the target system.
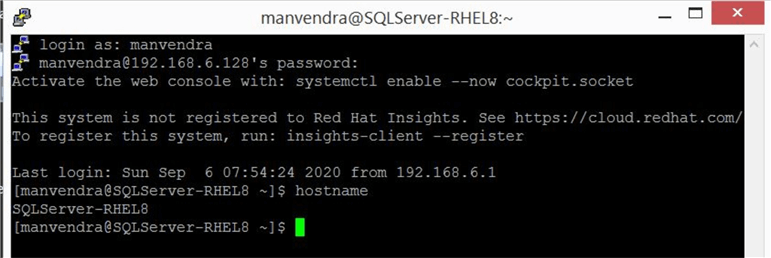
Now we have been connected to target RHEL system where we will install SQL Server 2019.
Next, we will check whether any version of SQL Server is already installed on this machine. We will run below command to check SQL Server service status on target server.
--Check SQL Server Status
systemctl status mssql-server
There is no SQL Server service installed on this server yet as per output shown below. If SQL Server is already installed with previous versions, then we need to upgrade it to SQL Server 2019. As there is no SQL Server service on this machine we will go ahead and start the installation.

Installing python2 is a mandatory prerequisite before installing SQL Server 2019. Below we are checking that it is installed.
Now, we will setup the SQL Server 2019 repository in order to install SQL Server 2019. Run the below command to check and configure this repository.
--Check the configured repositories
sudo ls /etc/yum.repos.d
I first checked the downloaded repository configuration files and can see only redhat.repo is there so next I will run the below command to download the Microsoft SQL Server 2019 Red Hat repository configuration file. If you are installing SQL Server 2019 on RHEL 7.x then change the path from /rhel/8/ to /rhel/7/ in the below URL.
--Run below command to configure repository
sudo curl -o /etc/yum.repos.d/mssql-server.repo https://packages.microsoft.com/config/rhel/8/mssql-server-2019.repo
We can see mssql-server.repo has been downloaded after running the above command. This has also been validated by checking configured repositories in below image.

Now we are ready to install SQL Server 2019 package.
--Install SQL Server 2019
sudo yum install -y mssql-server
Installation has started and shows all packages which will be installed as part of this installation.
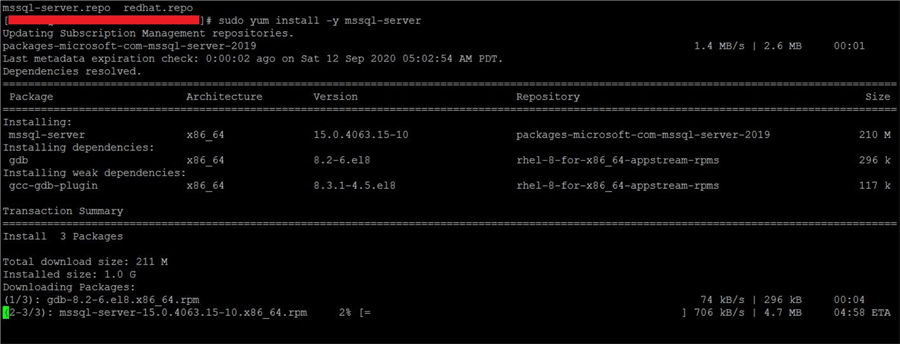
You can see the sequence of package downloads in the below image. Wait and let it perform all these operations.
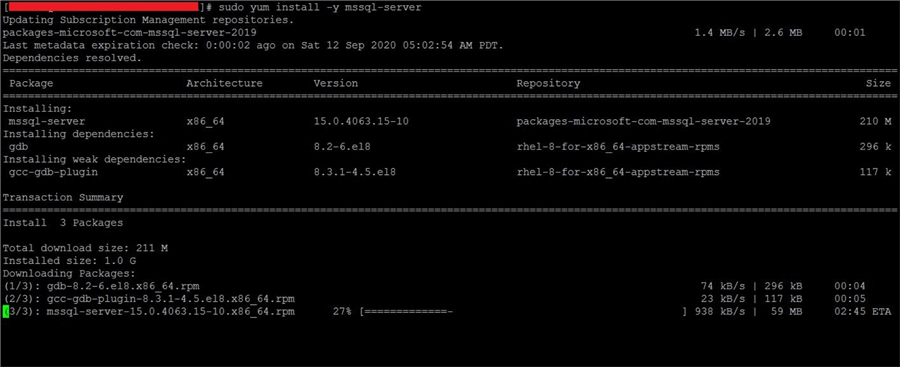
Once all packages are downloaded, installation will start. You can see all packages have been installed in the below screenshot.
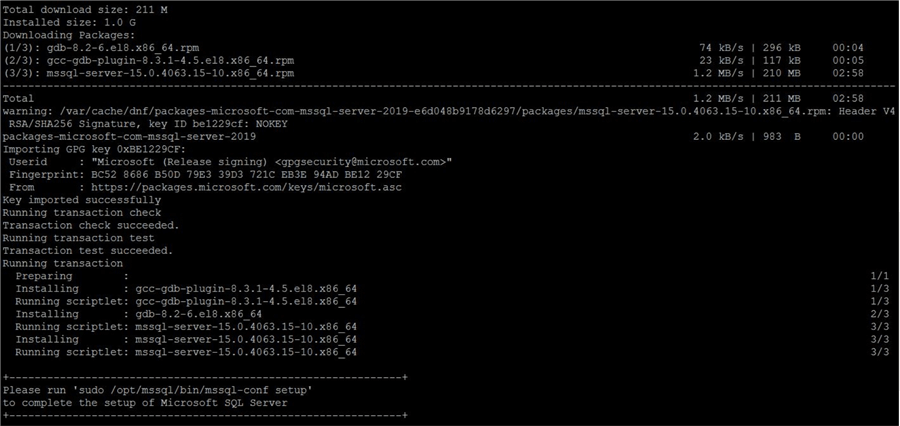
SQL Server 2019 has been installed on this machine as shown below. Now, the installer is telling us to run an additional command to setup SQL Server configuration. Next, we will execute this command to choose the SQL Server edition, set sa password and will accept license terms of this product.

You can copy the command from above screen during your installation, or you can directly copy from below section to execute this command.
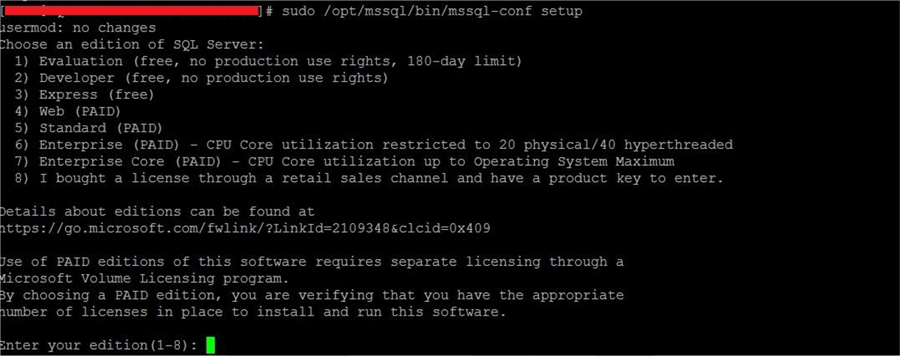
--Configure Edition, sa password and license terms of installed version of SQL Server 2019
sudo /opt/mssql/bin/mssql-conf setup
We can see execution process is asking to choose correct edition which we want to install on this machine.
I want to use the Developer edition for testing, so I chose 2.
Next, the installer will ask you to accept the license terms. You need to enter Yes to accept the license terms and No to reject the terms and conditions. I have entered Yes to accept the license terms of SQL Server. Once I pressed enter to proceed, I got another option to enter SQL Server system administrator password which we also call the "sa" account password. You can see this in the below image.
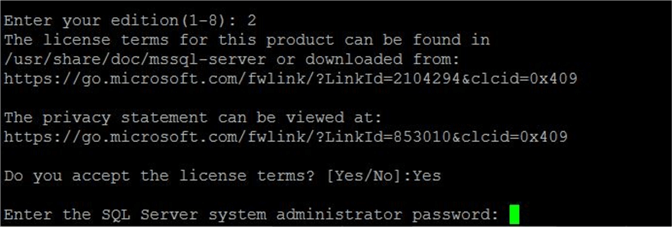
Enter a strong password for sa and press enter to proceed. The password must pass the password policy otherwise you will a get warning that your password does not meet the minimum requirement of the password policy.

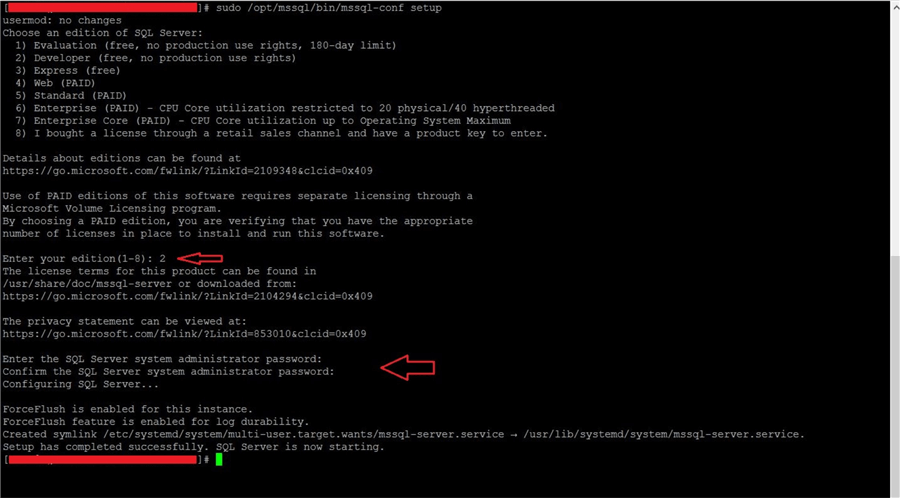
You can see SQL Server configuration is done using the above command where we have selected the SQL Server edition, accepted the license terms and we set the system administrator password. The below screen shows all of the database configuration options in one image. The last line is saying that SQL Server is now starting so next we will check the status of SQL Server whether it is active and running.
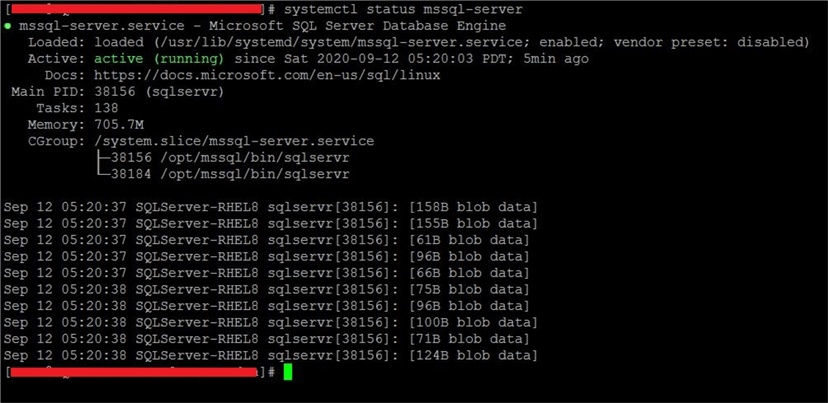
Run the below command to check the SQL Server service status.
--Check SQL Server Status
systemctl status mssql-server
We can see the service is showing active and running on the server now. Now this SQL Server instance is ready to do database related work. You can create databases as per your needs.
If you are facing any issues while establishing a database connection remotely then you need to open port 1433, because the default port for SQL Server is 1433. You can run the below commands to allow remote connections to the SQL Server instance.
--Allow Remote Connections by opening port 1433
sudo firewall-cmd --zone=public --add-port=1433/tcp --permanent
sudo firewall-cmd --reload

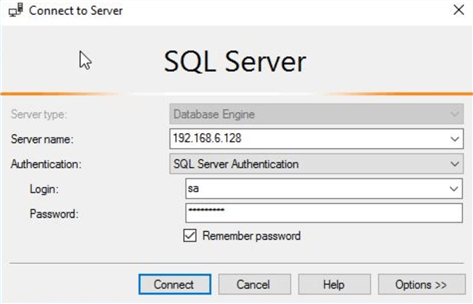
Now, your SQL Server 2019 instance is running on REHL 8.1 is ready for use. You can verify this by connecting to this instance using Microsoft SQL Server Management Studio (SSMS) or use Azure Data Studio to make a SQL Server database connection.
I have launched SQL Server Management Studio installed on one of my Windows VMs and entered the credentials of the new SQL Server. You can see I entered the IP and sa account details in the below image then hit Connect to establish the connection.
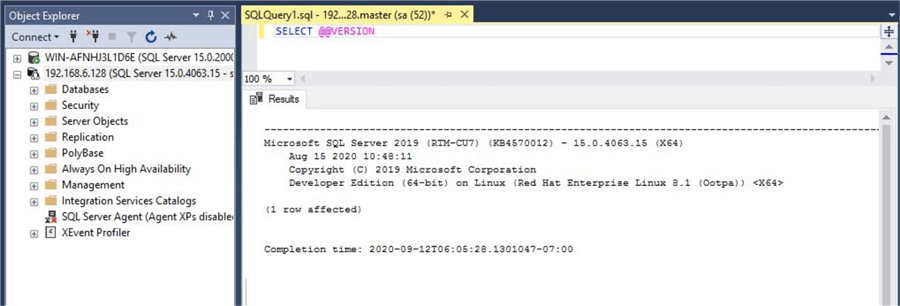
Below we can see that I am connected to this new SQL Server 2019 running on
Linux and I ran SELECT @@VERSION to check the information about SQL Server and
the OS including the server name, edition and version.
Next Steps
- SQL Server 2019 is installed on RHEL 8.1 and ready for use. In the next article we look at how to install the SQLCMD management tool.


About the author
 Manvendra Singh has over 5 years of experience with SQL Server and has focused on Database Mirroring, Replication, Log Shipping, etc.
This author pledges the content of this article is based on professional experience and not AI generated.
View all my tips
Article Last Updated: 2021-11-17
