By: Scott Murray
Overview
Up to this point in our tutorial series, we covered the basics of SSRS, the process of configuring SSRS, and selection and use of data sources. We continue our SSRS Tutorial series by reviewing Data sets and then move to covering Parameters in a subsequent tip. As an analogy, data sources are the pipe used to connect the report to the data whereas the data set is the actual fluid flowing through the pipe. The data set must use a data source to retrieve any data. Secondly, in a way very similar to data sources, data sets can actually be shared or embedded.
Data Sets
Data sets are the main way to provide data to a report and in most cases just about the only way to get data for a report; the exception is potentially a set of constants or some custom code.
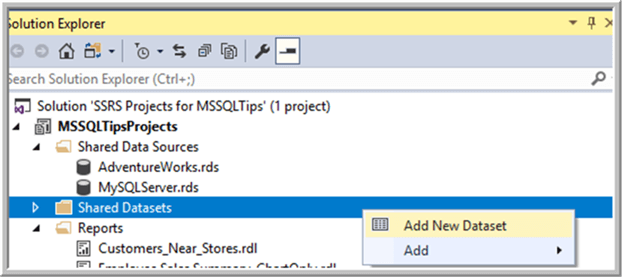
Creating a Data Set
To get started with the tutorial, we will assume Visual Studio—SSDT-BI is being used and has been opened to a new report, and finally that the data source(s) has been created. As previously mentioned one of the first steps after naming the data set is to decide whether the data set will be embedded or shared. The below two screen shots illustrate creating a new data set; the first illustration is an embedded data set while the second illustration is a shared data set. In either case, right clicking on the data set folder and selecting new data set starts the creation process. The process is basically the same for both alternatives.

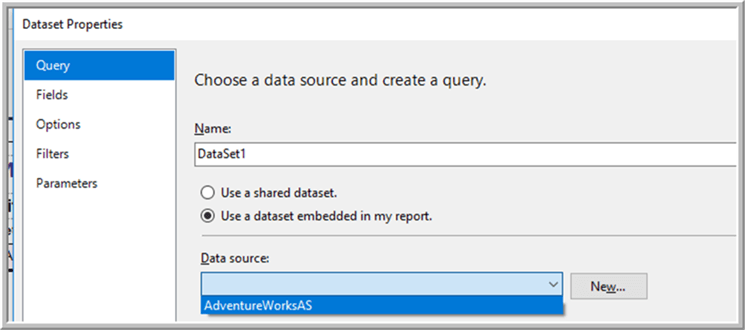
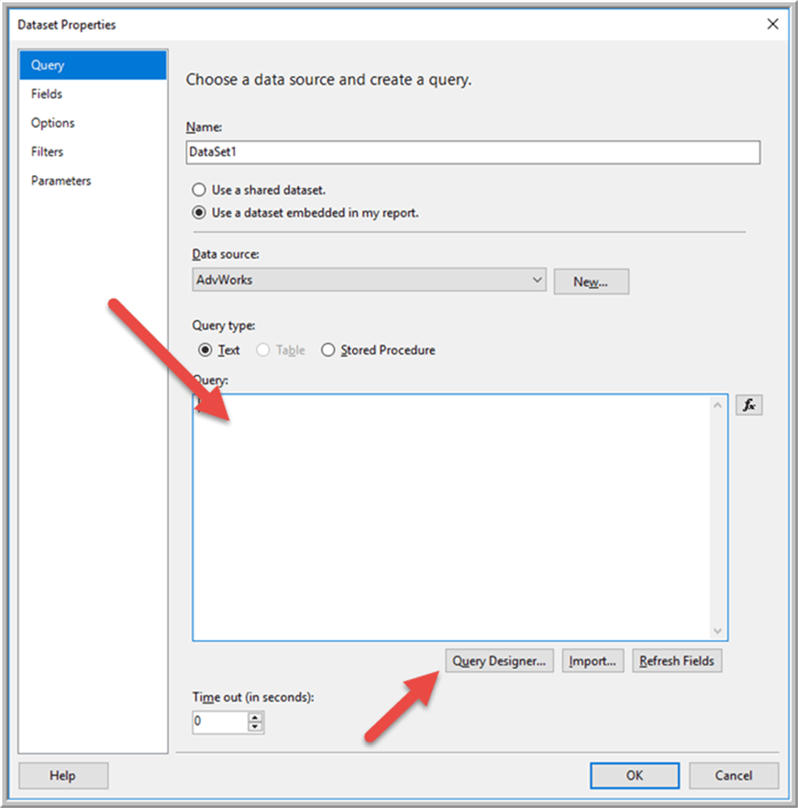
After selecting a new data set within an embedded data set, the next step is to select the name for the data set and then select whether the data set is shared or embedded.
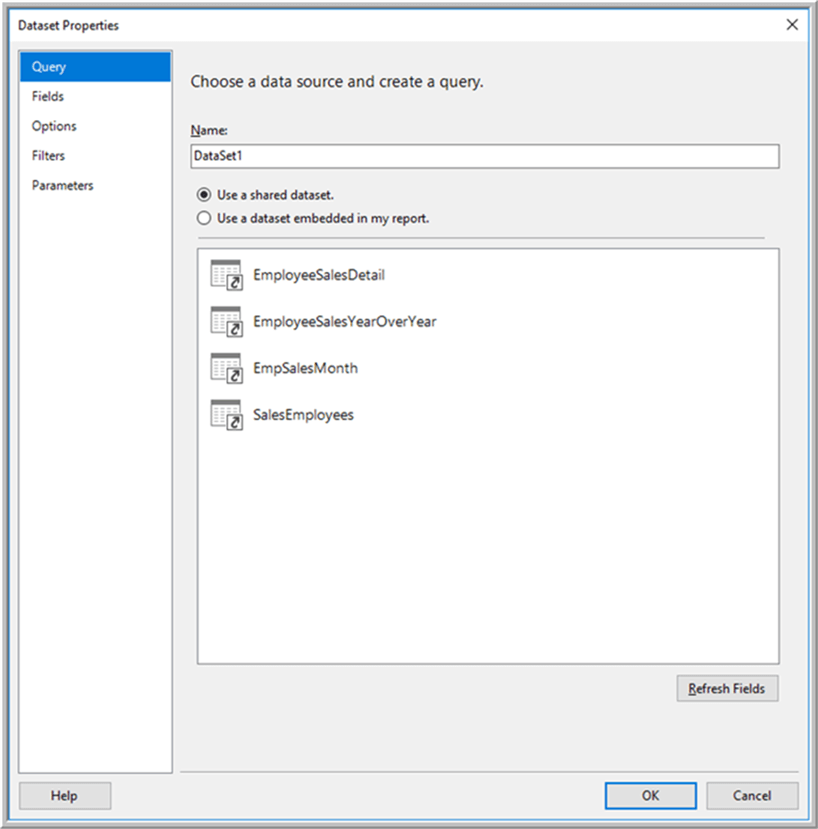
Next the data source must be selected; the data source list does not differentiate between embedded or shared.
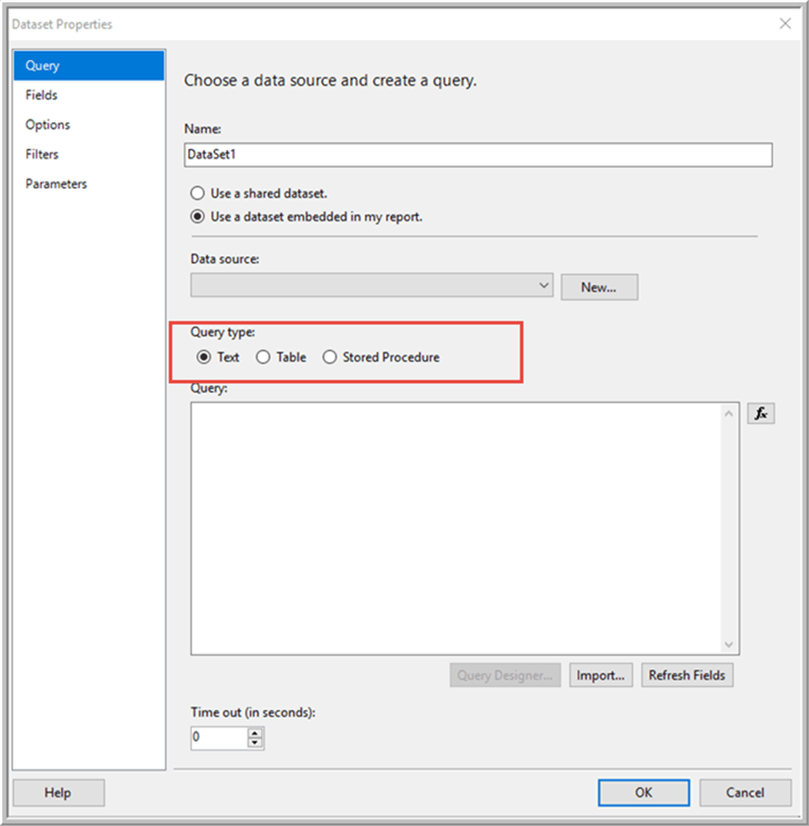
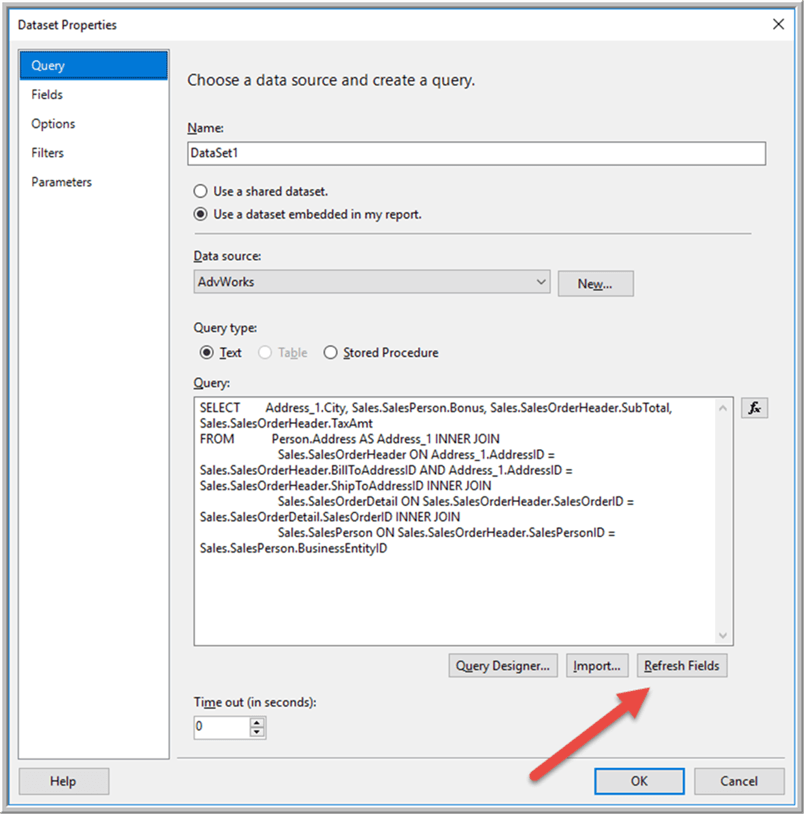
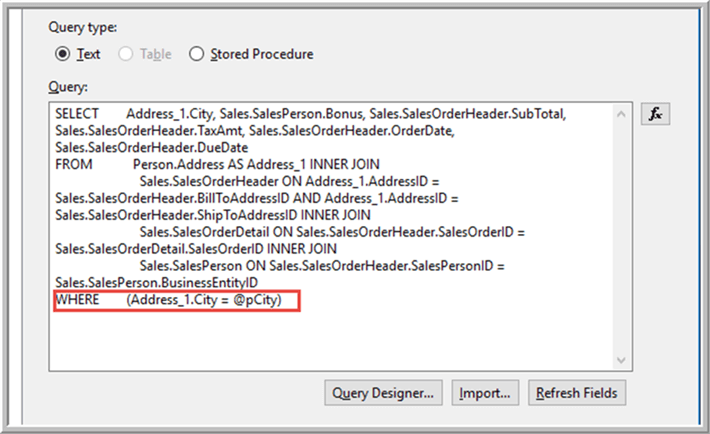
Once you select the data source, you will subsequently define the query that will be run to pull in the data. Three query types are available to choose from: text, table, or stored procedure. For the table and stored procedure options, a drop-down list is made available to select from; alternately, the name of the object can be entered manually. Also, note that some of the options may or may not be available depending on the data source.
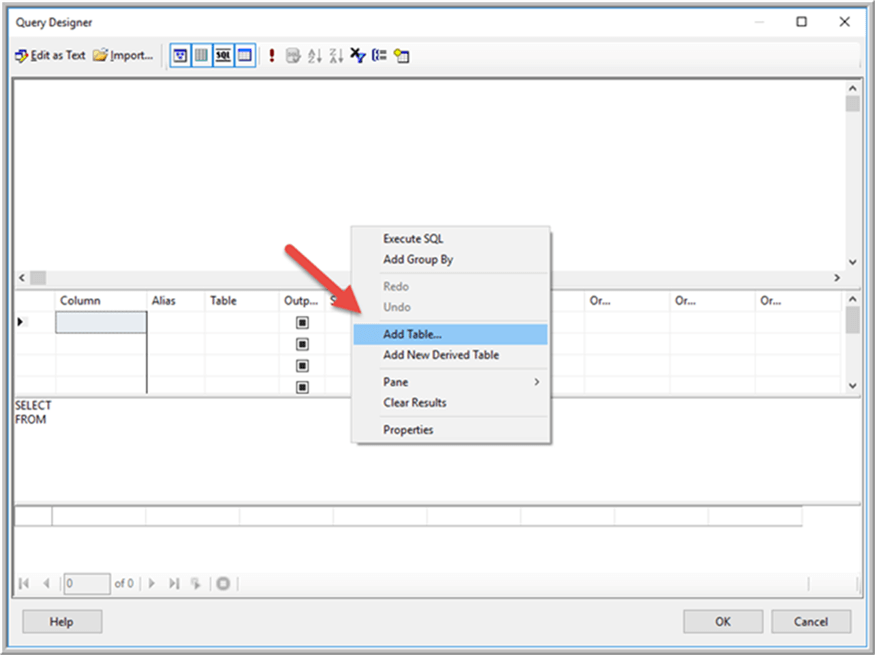
The other option is to craft by hand or copy it from another query tool such as Management Studio. Interchangeably, the Query Designer can be used to run through the query designer wizard in order to generate the needed query.
For those of you who have used the query designer in Management Studio, this screen will look very similar to that screen. The first step is to add the required tables.
Following that step, you will select the columns need, plus add any criterion, group by’s, or aggregations. Using the Run button (Exclamation Point) is a great way to make sure your query works before returning it in the query window.
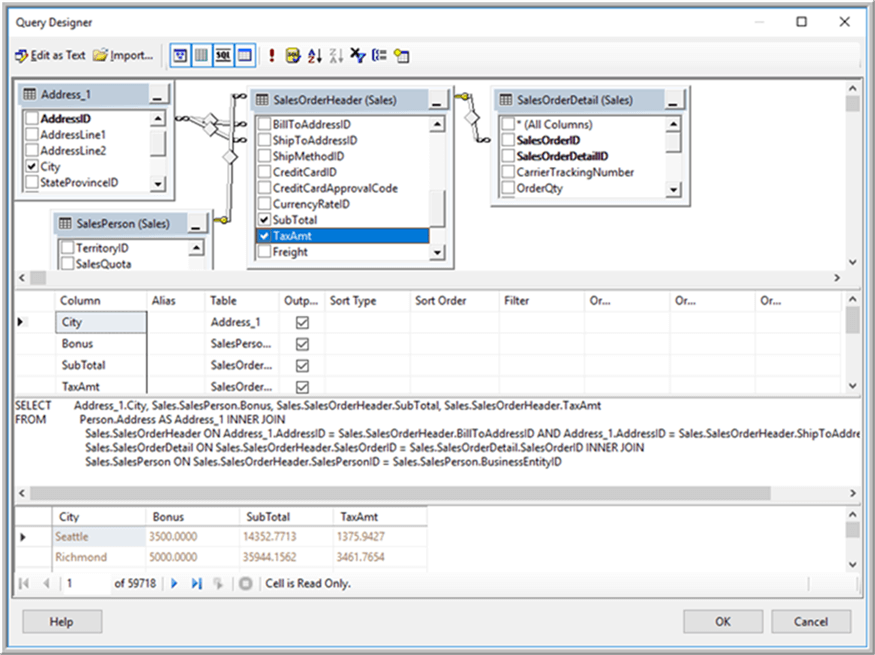
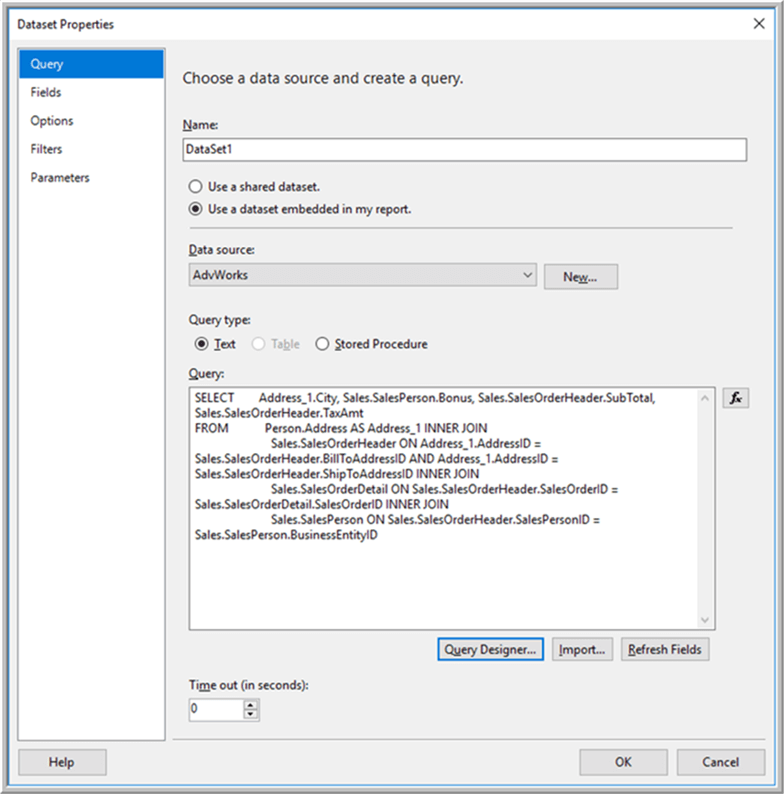
Clicking ok, sends the designed query to the main data set screen.
Sometimes hand writing the query is the only option that you will have available and you will have to craft the query outside of Visual Studio SSDT-BI and then just copy and paste back to SSDT-BI. For example, Teradata data sources do not provide / support a method to use the query designer. However, many other systems allow you to utilize the query designer to complete your query including SQL Server and Analysis Services.
From the main data set screen, you have several options that you can utilize from the left-hand menu. One of the first things that will happen when you add the query, either using the Query Designer or adding it straight into the query window, is that a field list will be generated. Note every field must have a unique name within the data set. That means you must be sure to define a column name for each field especially in the cases where you’re using a Windows function, an aggregation, or a case statement or something similar.
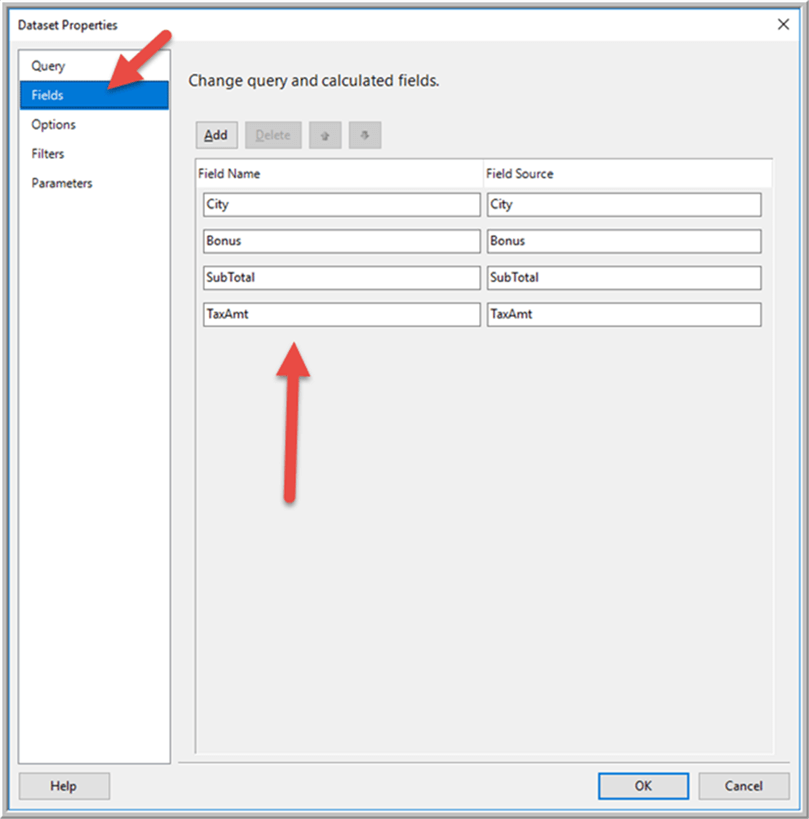
In addition to using fields that are available within the context of the queries themselves an alternative is to add calculated fields. A calculated field can use any other field within the data set.
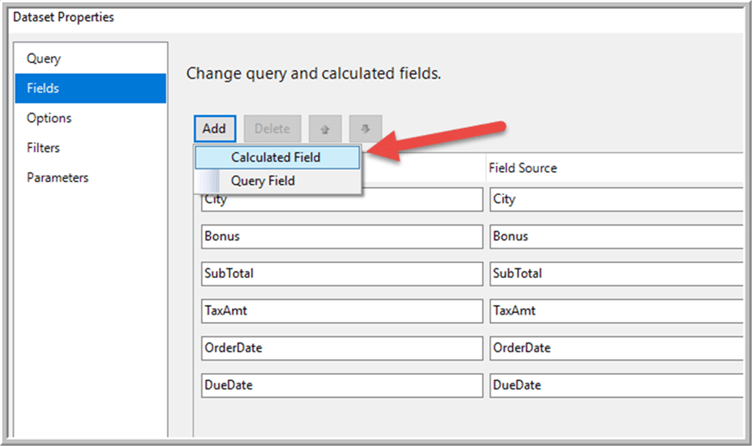
Upon clicking Add, a new field will be added. The field name is input into the left textbox. In the right-hand textbox, the expression for the calculated field is input.
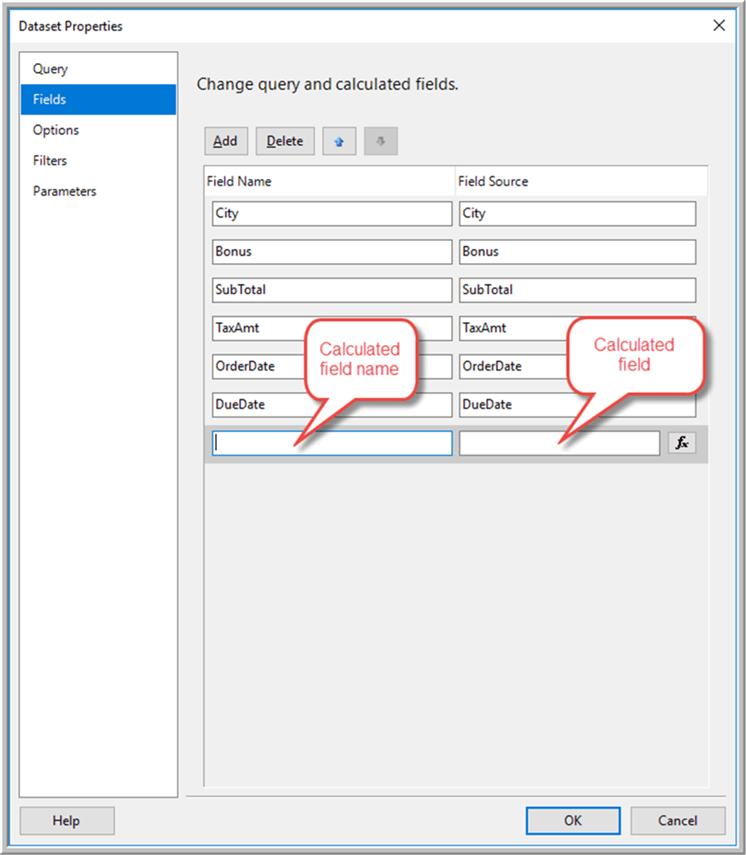
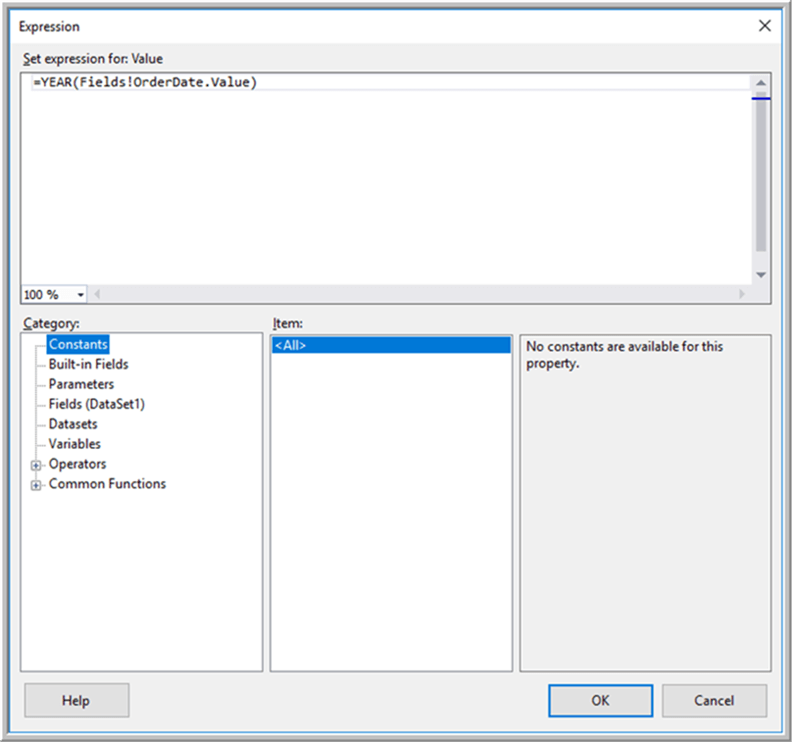
Instead of hand inputting the expression formula, the fx button can be selected which will open the Expression Builder. A calculated field uses Visual Basic SSRS functions within the expression. Below you will see a few examples of potential calculated fields that could be used within the data set.
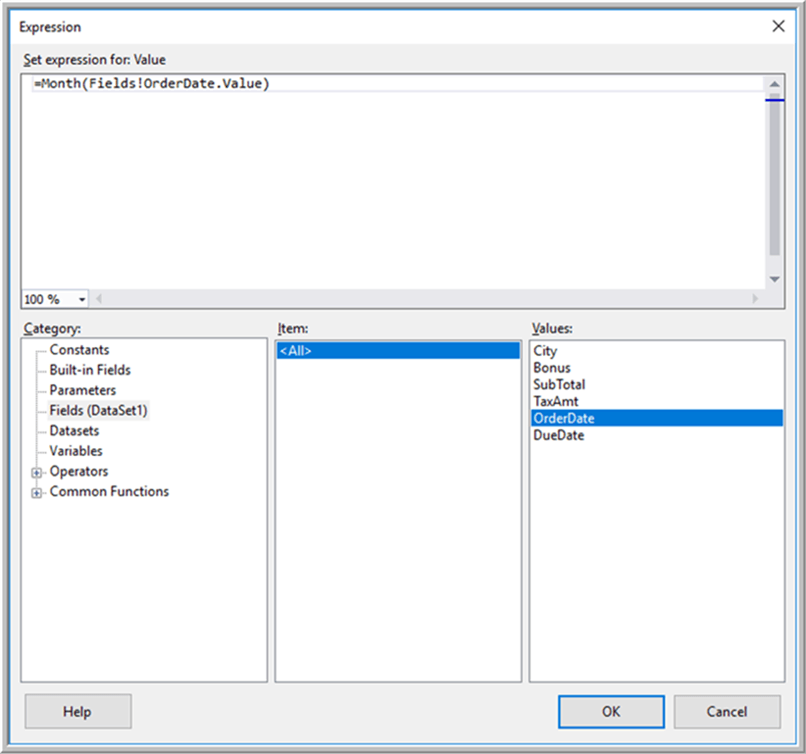
These calculated fields are often helpful in dealing with items such as dates, times, and concatenating various fields together.
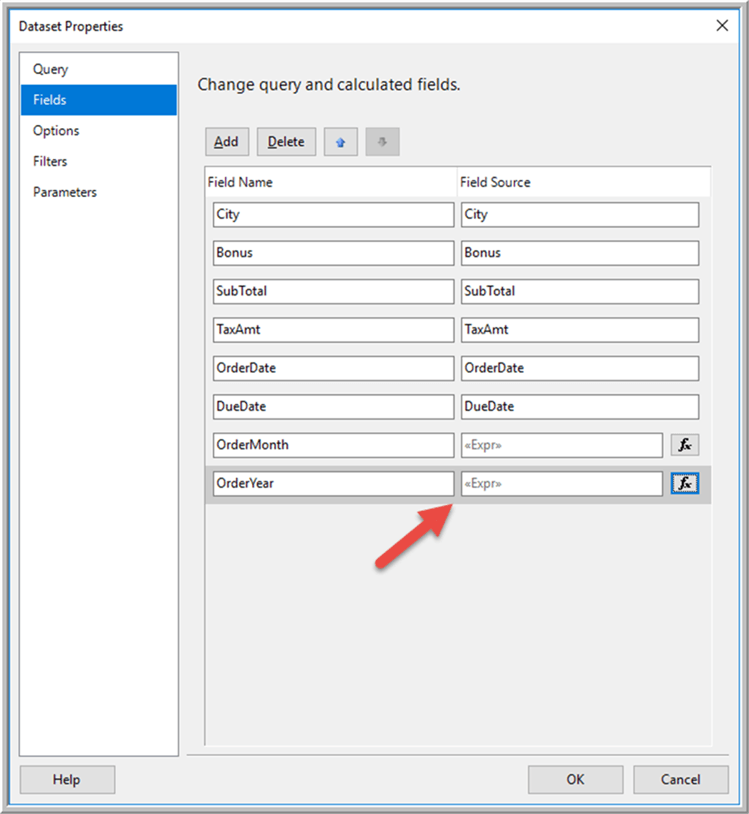
If you have made changes to your data set you can always click on the refresh field button in order to get the latest list of available fields.
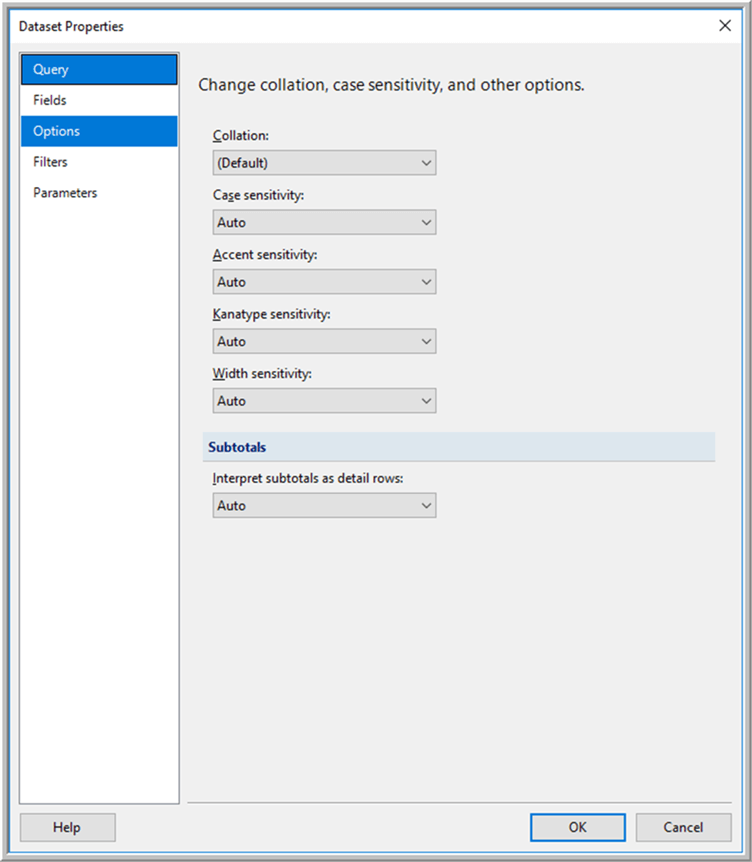
Specific Options are available to be changed for the data set related to collations, case sensitivity, and accents, as shown below. To be honest, I have only seen one instance in many years which required a change to any of these options.
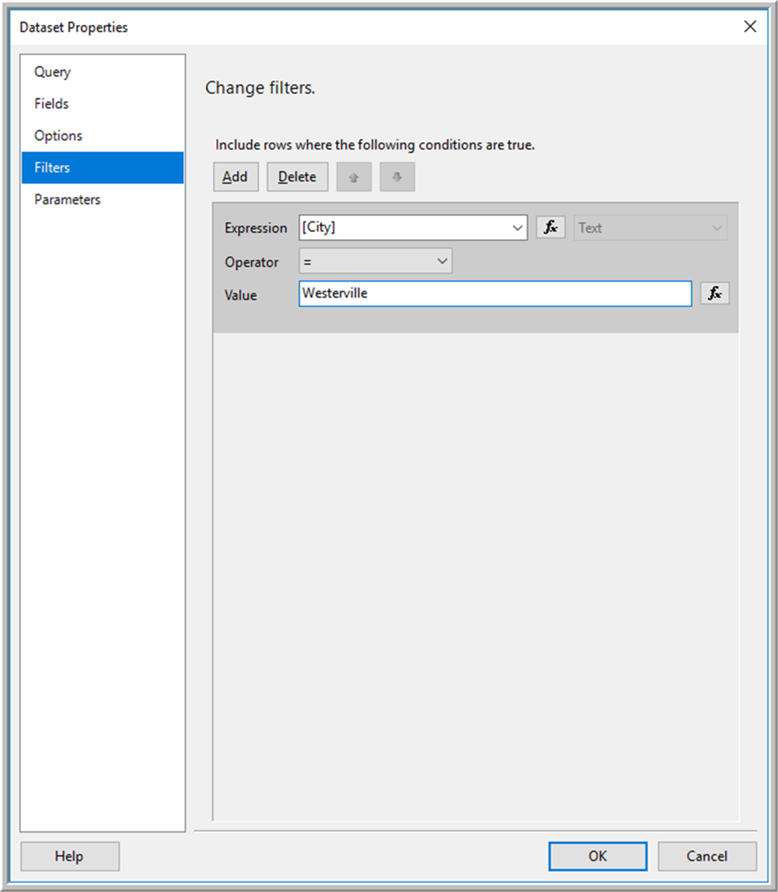
One additional property that is available is to add a filter to the data set. Note that the filter at the data set level of course will limit the data after the query has run but before sending the data to the report. The filter can be based off of a constant, a parameter, or even a user at run time. To be honest I prefer to put the filter at the query level if at all possible, but sometimes you will reuse a particular data set so it does make in some instances.
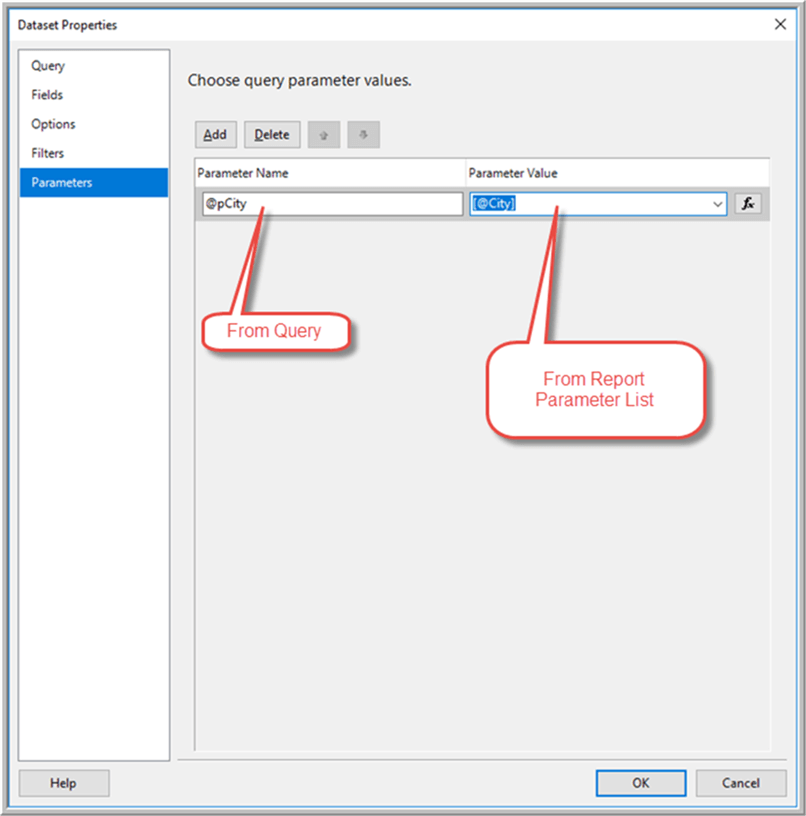
The final option centers around mapping parameters from the query to parameters used by the report (note we will cover report parameters in the next tutorial). The left textbox shows parameters embedded in the query or stored procedure. The right-hand textbox allows for the selection of report parameters.
Once you click OK on the data set pane, the data set has been added to the report. Please know that you will want to make sure to save the report just like any other document. If a data set that is embedded within the report, it will automatically be included with the report when it is deployed.
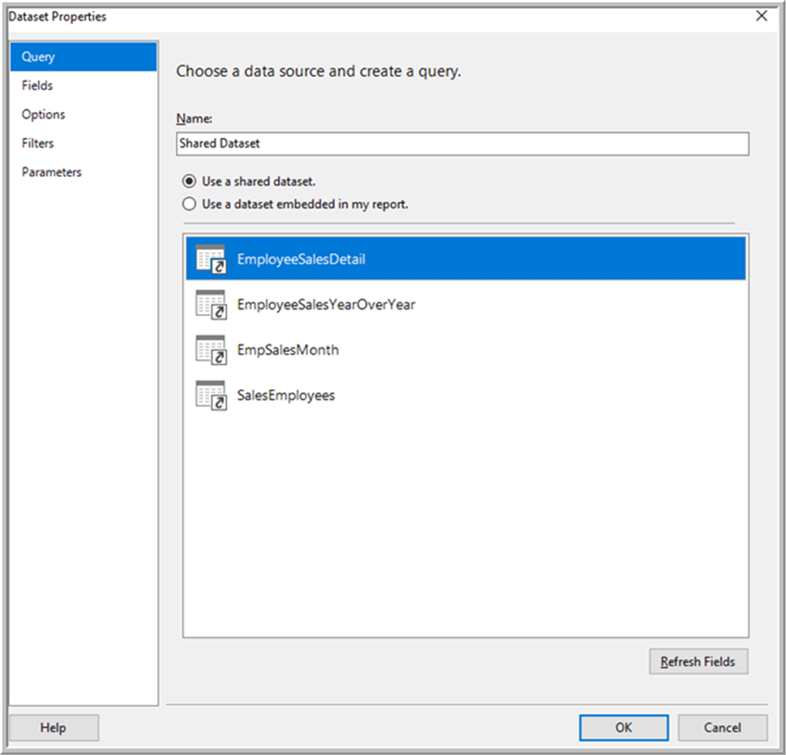
Instead of using an embedded data set, a shared data set can be utilized. Setting up a shared data set is shown below. For this process, you will need to only select a shared data set from the list of available data sets.
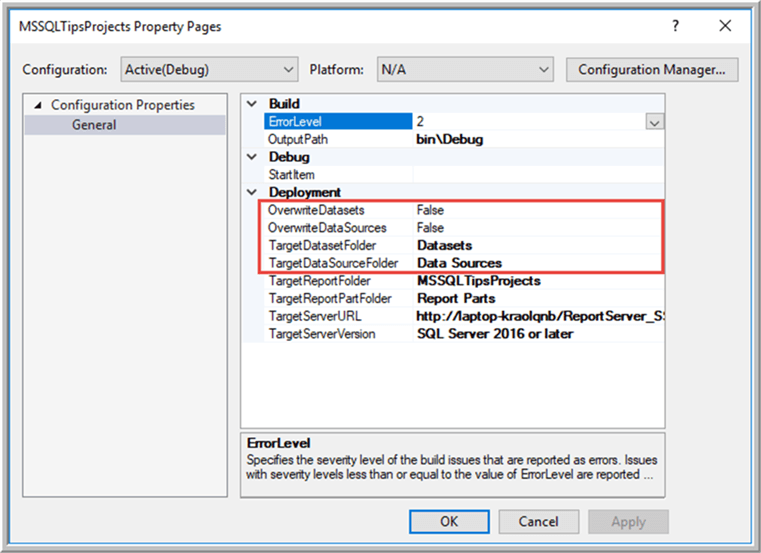
However, if the data set is to be shared it must first be deployed to the report server before it can be used in any report. As shown below we initially must tell the project where to deploy the data set, specifically the folder where to place the data set file. Please also note that you must specify whether or not to overwrite the data set if you are deploying it for a second or subsequent time
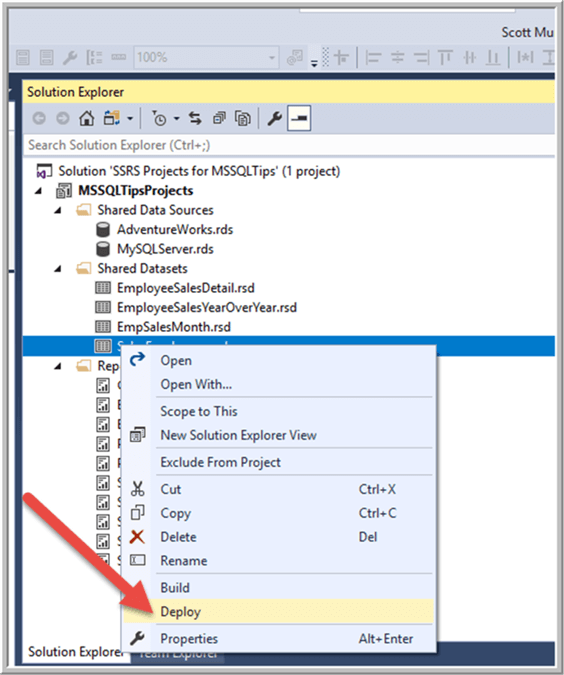
When using a shared data set and it is ready to deploy, it can be deployed from Solution Explorer or the file can be manually uploaded to the SSRS webserver.
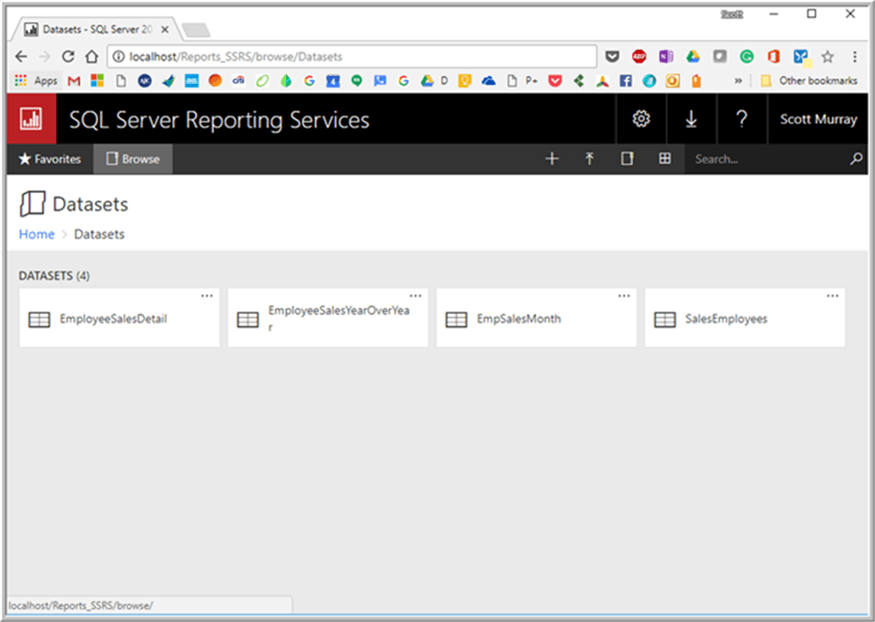
For our example, the shared data sets were deployed, appropriately to the data sets folder on the SSRS web site.
The shared data sources can be managed online if needed.
Probably the most important item is to ascertain that proper security is setup for users to access this data set.
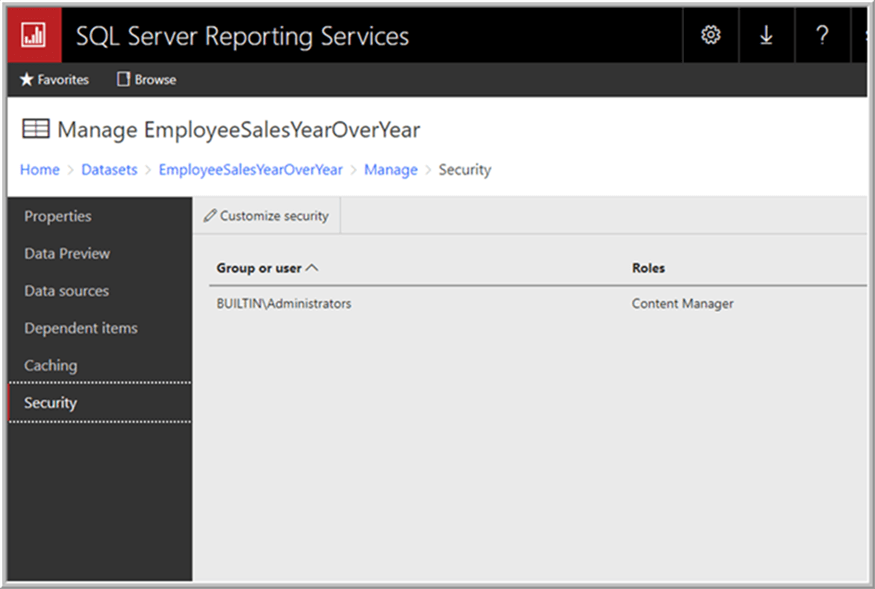
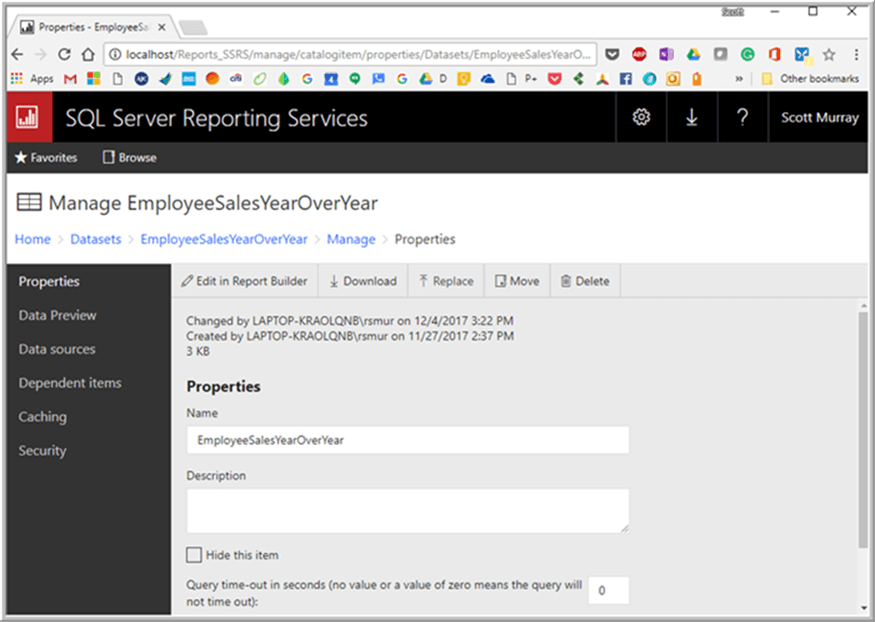
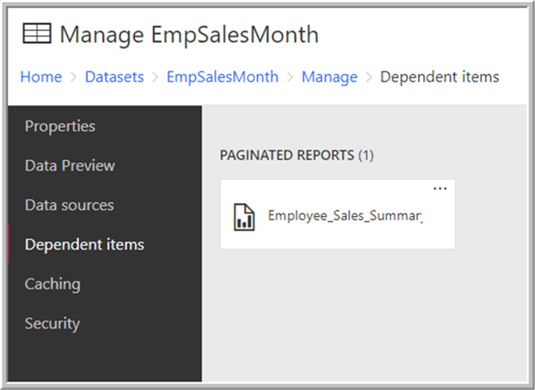
From the website, you can also preview data in the data set and see it related data source, but the Dependent items option can be extremely helpful to identify all reports which will be impacted by a change in the shared data set.
Data sets are the main source of data flowing into reports in SSRS. They can either be shared or embedded, but either way we always want to validate that we are getting the correct data and only the correct data.
