By: Joe Gavin | Comments (6) | Related: > Reporting Services Installation
Problem
SQL Server Reporting Services (SSRS) is another one of the major components of the Microsoft Business Intelligence (MSBI) stack. It's used to generate interactive and automated reports.
The SSRS installation used to be part of the SQL Server installer up through SQL Server 2016. As of SQL Server 2017, the installation has been moved to its own separate downloadable installer. It is still not overly complicated, but it is helpful to know where to get the installer and what to expect before you go through the installation process. This tip will show you how to obtain the installer and walk through the various screens and options that are part of the installation process for SSRS.
Solution
We'll walk through each of the steps of a new installation of SSRS 2019 on Windows Server 2019.
SSRS Minimum Hardware and Software Requirements
You'll likely have a lot more disk and memory than this, but the bare minimum hardware and software required to install SQL Server 2019 are:
- Windows Server 2016 or Windows 10 TH1 1507
- 6 GB of available hard disk space
- 4 GB memory
- 1.4 GHz minimum 64-bit CPU
And to install SSRS, you will need an already installed SQL Server.
SSRS 2019 Install
Obtain and Run the SSRS Installer
Download the installer from the Microsoft Download Center here: Microsoft SQL Server 2019 Reporting Services.
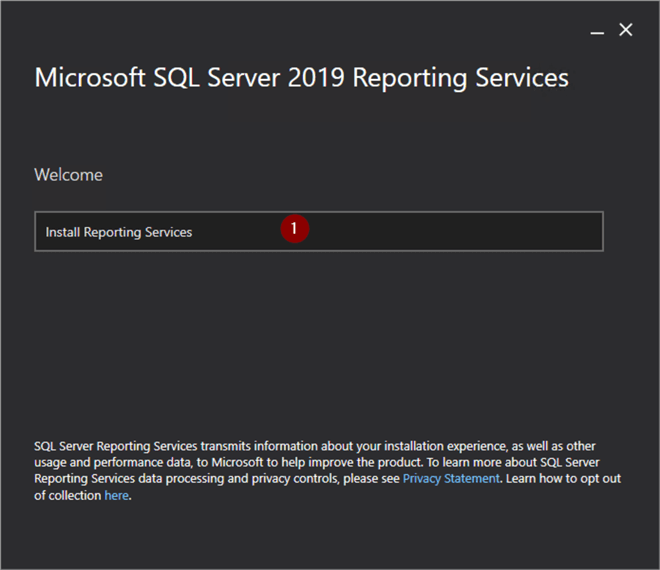
Run the SQLServerReportingServices.exe executable when the download is complete, and the first screen will open.
- Click on 'Install Reporting Services'
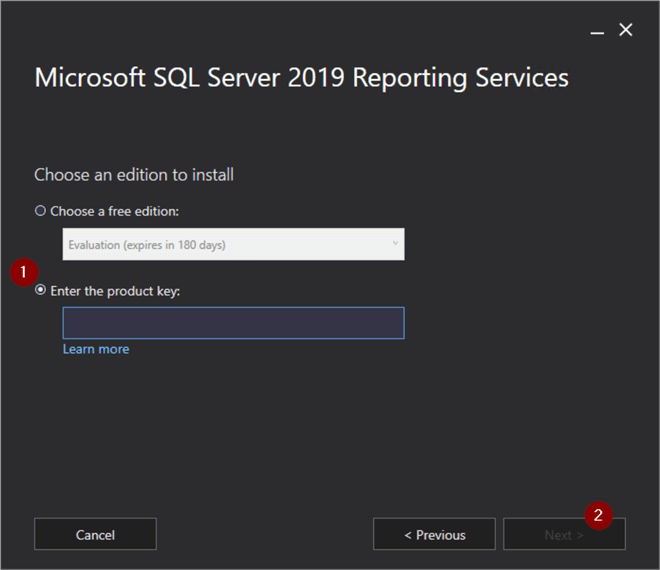
Product Key
Product key id required for a paid edition.
- Select 'Enter the product key' radio button and enter your product key
- Next
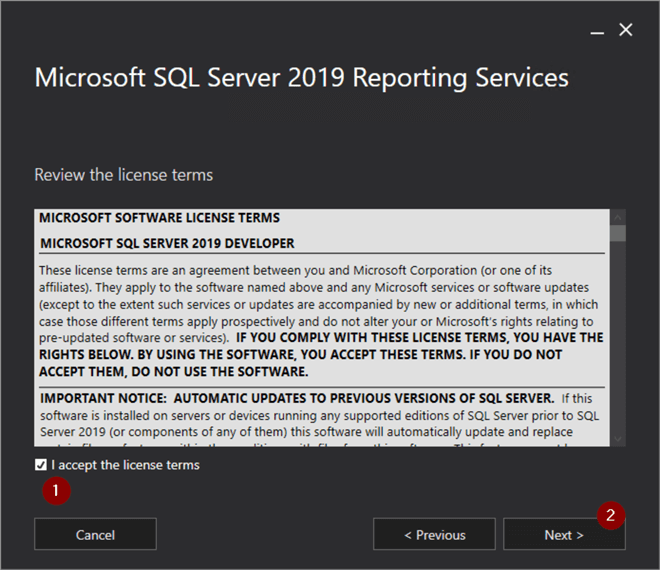
License Terms
You will need to agree to the license terms.
- Click 'I accept the license terms' checkbox
- Next
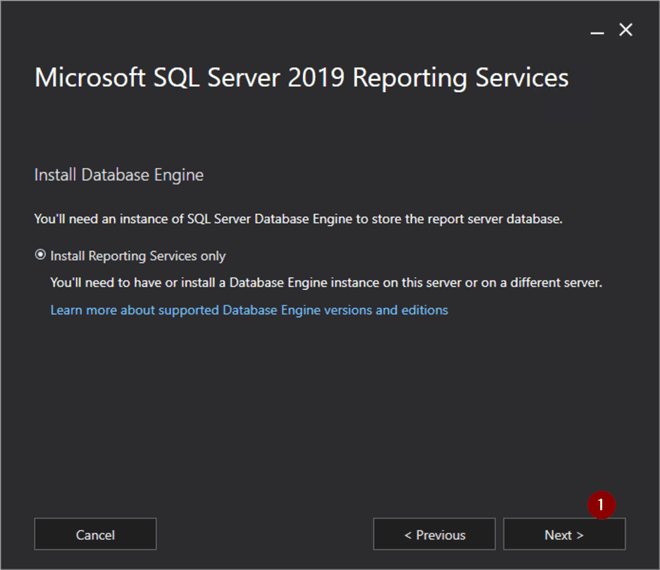
Database Server
You will be reminded an installed SQL Server is required to configure the SSRS server and are presented with one option to install Reporting Services.
- Next
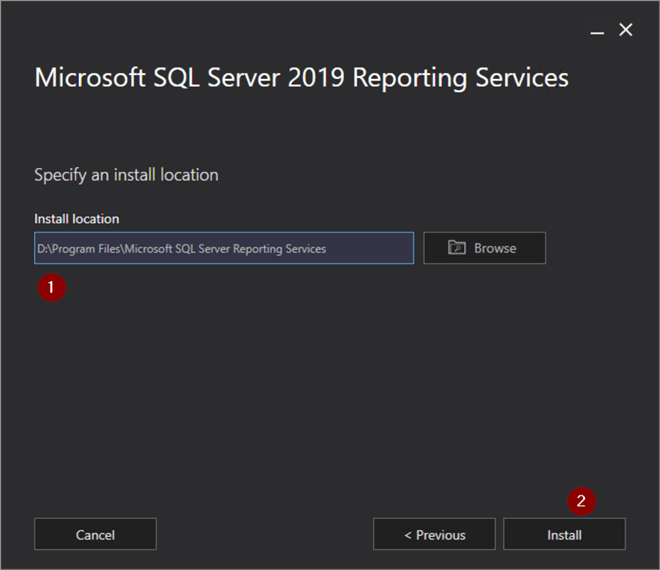
Install location
This is where you will need to change the SSRS installation directory from the default on the C:\ drive.
- Configure SSRS install directory
- Install
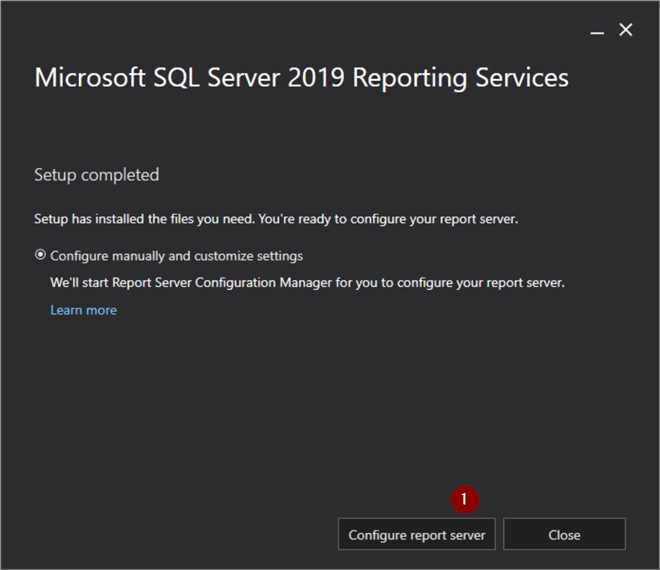
Configure Server
At this point Reporting Services is installed and it's time to do some basic configuration to it before we can do anything.
- 'Configure report server' to open the Configuration Manager
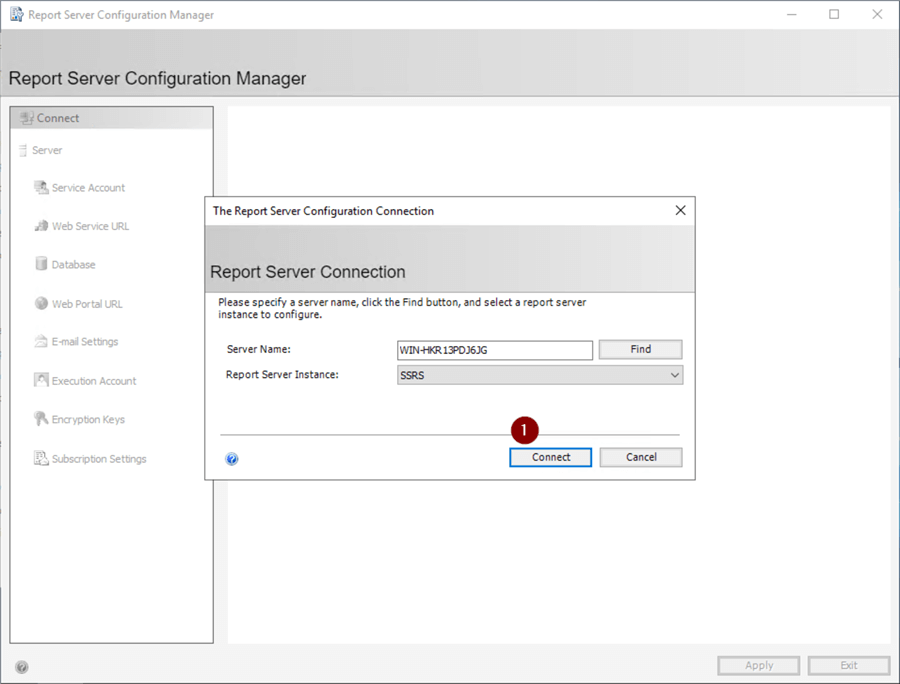
Configuration Manager
Reporting Services Configuration Manager program opens, and we will see the machine name and instance will automatically populate. The first step is to connect to the SSRS server.
- Connect
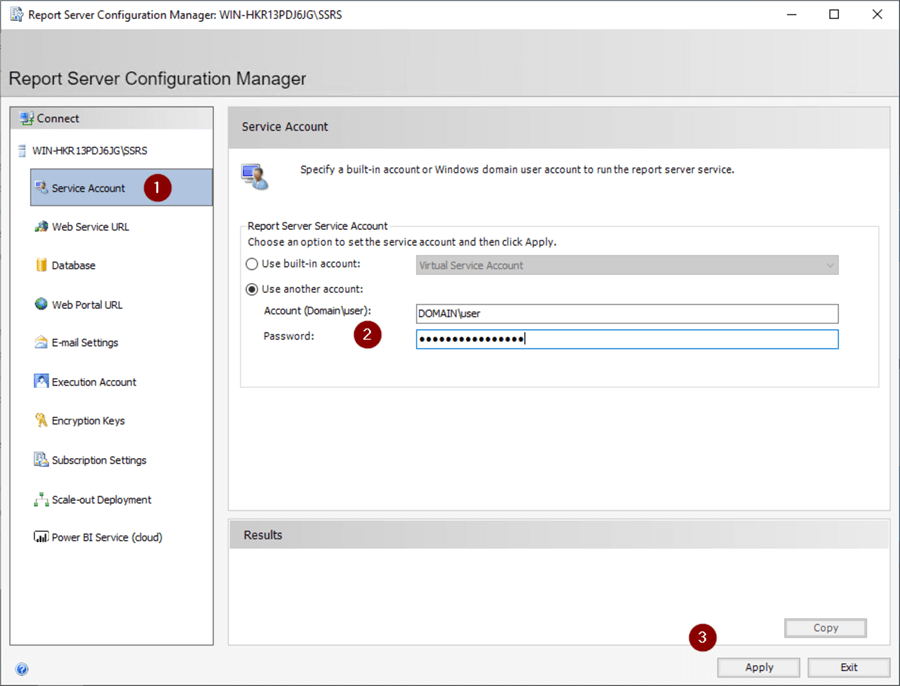
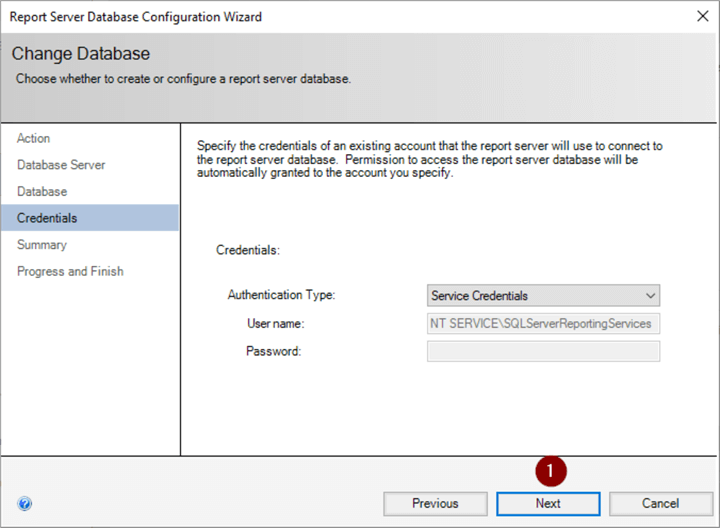
Service Account
Best practice is to not use the default account to run any of the SQL Server services. This discussion is somewhat out of scope for this tip but Microsoft Docs has more information on configuring Windows service accounts for SQL Server here: Configure Windows Service Accounts and Permissions
- 'Service Account'
- Configure service account
- Apply
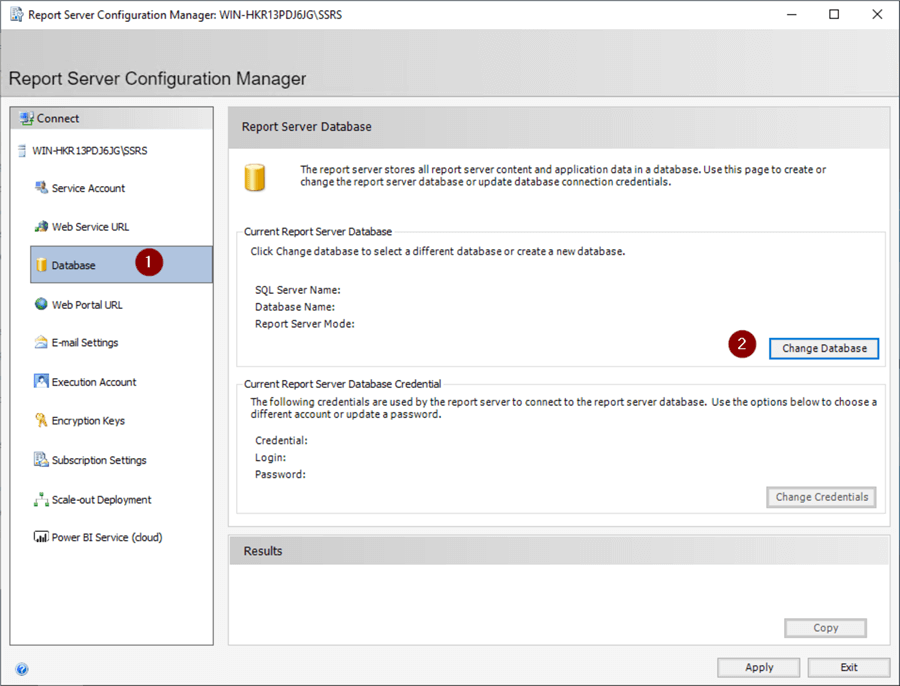
Report Server Databases
The Report Server Database screen is where we create the databases ReportServer and ReportServerTempDB.
- Database
- 'Change Database'
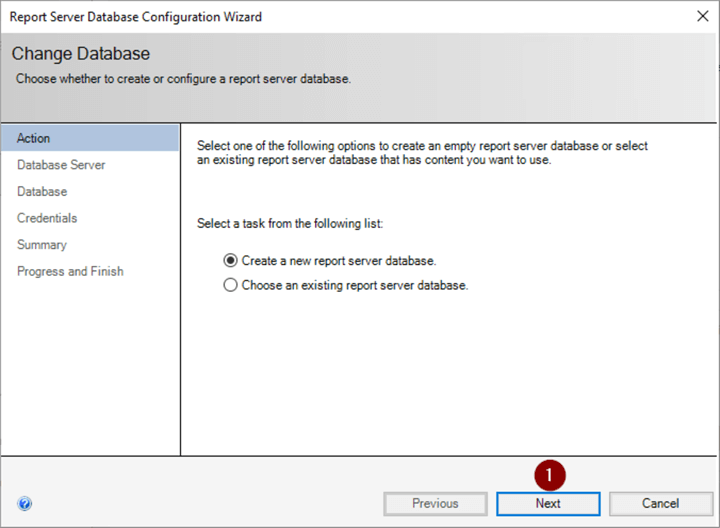
SSRS Databases
We are creating a fresh installation of SSRS, so we leave the 'Create a new report server database.' radio button selected. Note: You would just select the 'Choose an existing report server database' button to point Reporting Services to an existing set of databases.
- Next
Verify Connectivity to SQL Server
It's a good idea to verify that we can successfully connect to the SQL Server with our credentials here before attempting the database creations.
- 'Test connection'
- OK
- Next
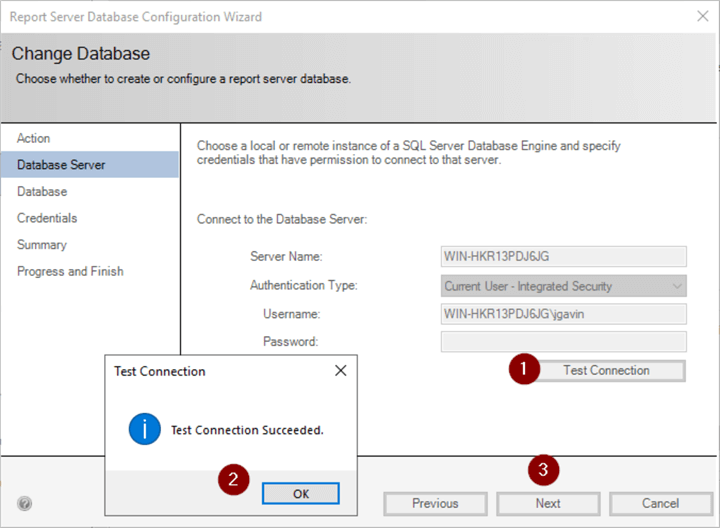
Continue if Test Connection was successful.
- Next
- Next
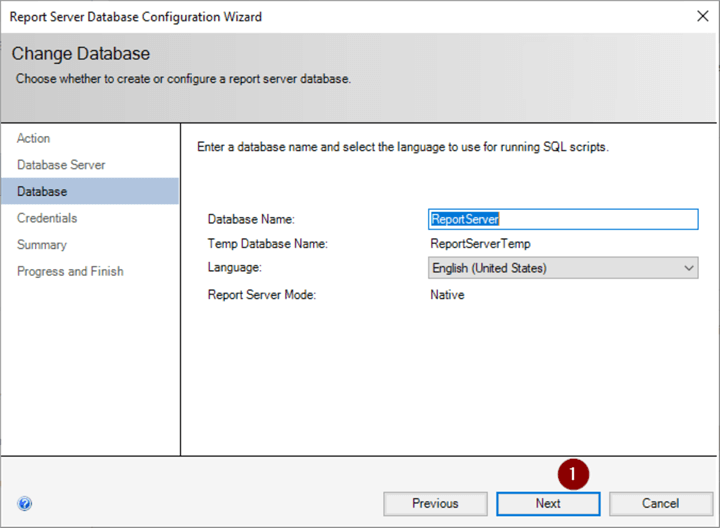
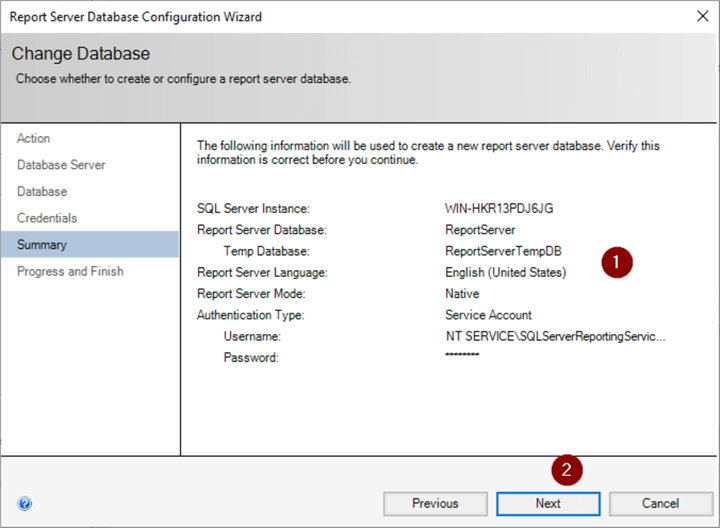
Create Databases
We can now verify our information is correct before proceeding with the database creations.
- Review Summary
- Next
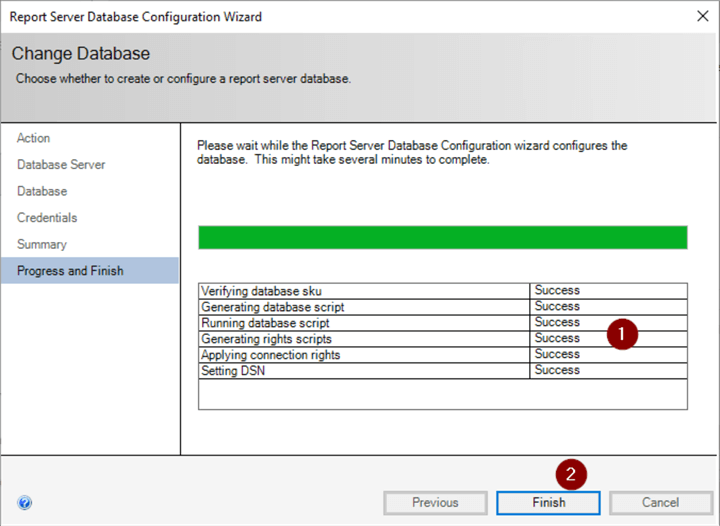
Verify Successful Completion
We want to see that each step was successful.
- Verify all steps show Success
- Finish
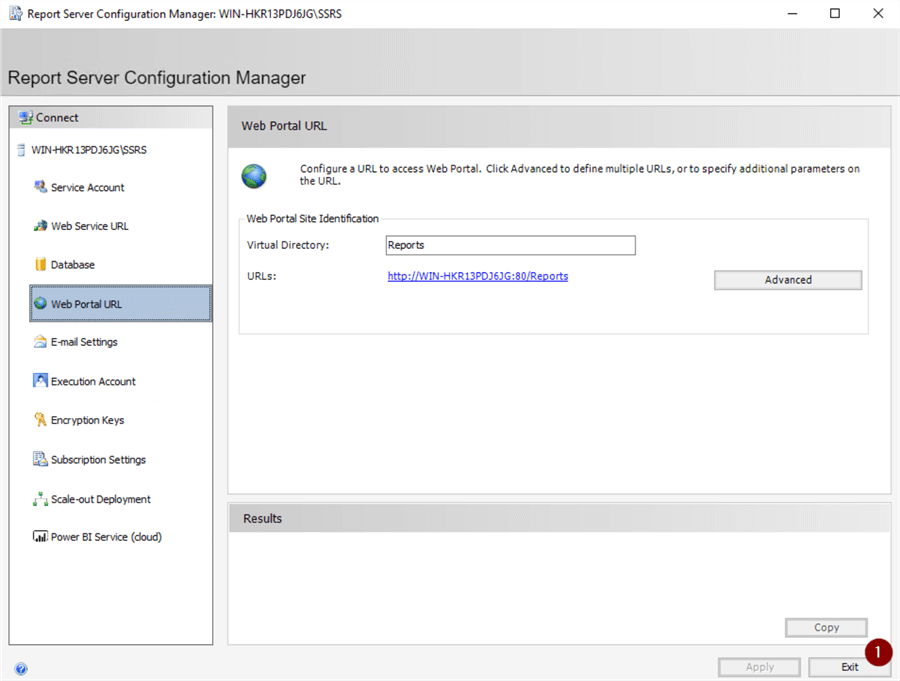
Create URLs
Now that we have our databases created it's time to create the SSRS web service. First, we create the Web Service URL.
- 'Web Service URL'
- Apply

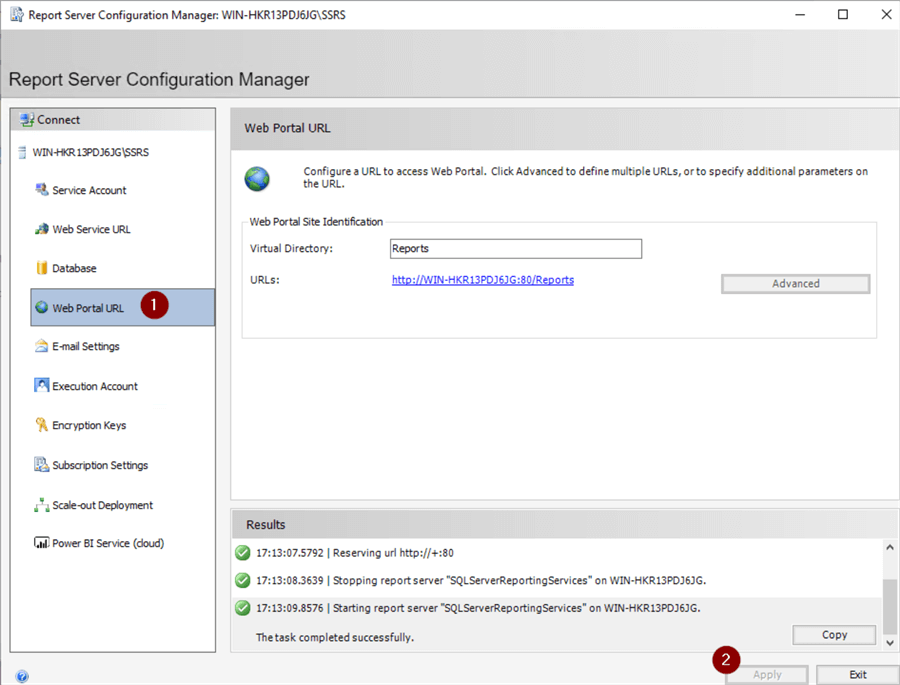
Next, we create the Web Portal URL.
- Web Portal URL
- Apply
Then SSRS will restart.
Very URL Creation
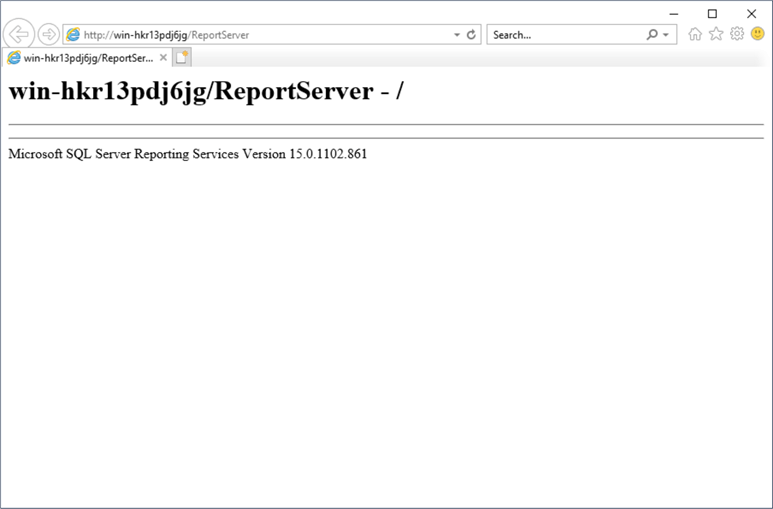
Time to verify we can connect to both URLs.
- Click 'Web Service URL'
- Click on URL
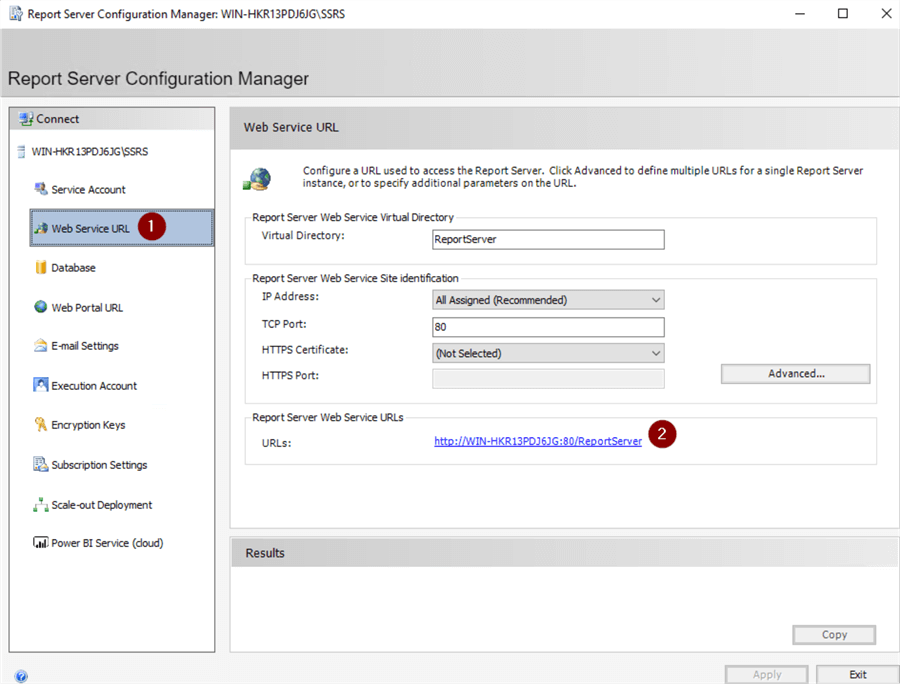
We expect to see the default browser open to Report Server screen.
Now, we'll check the Web Portal URL.
- 'Web Portal URL'
- Click on URL

We expect to see the default browser open to the Reporting Services Screen.
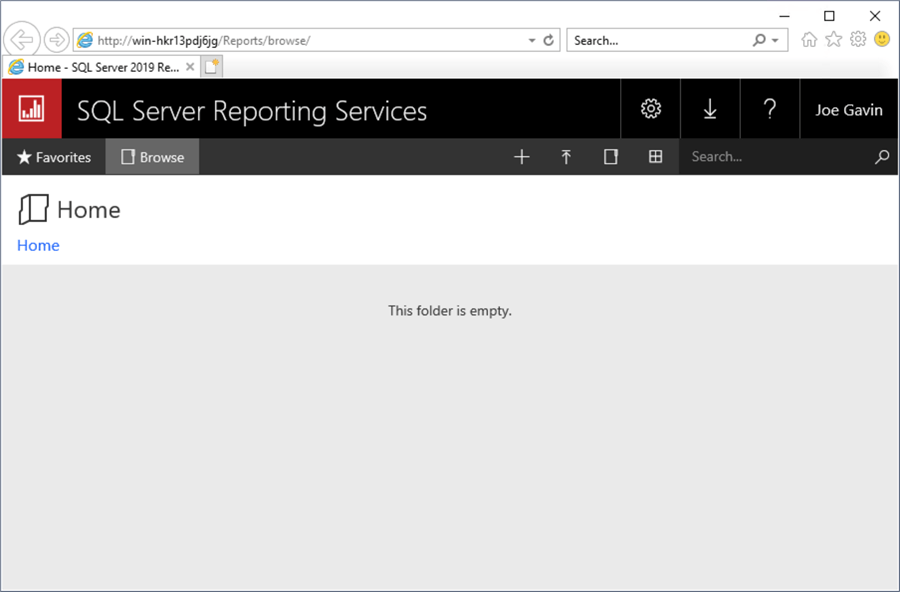
We now have a fully functional SSRS installation that is ready to deploy reports to. Following are some optional settings we can also configure.
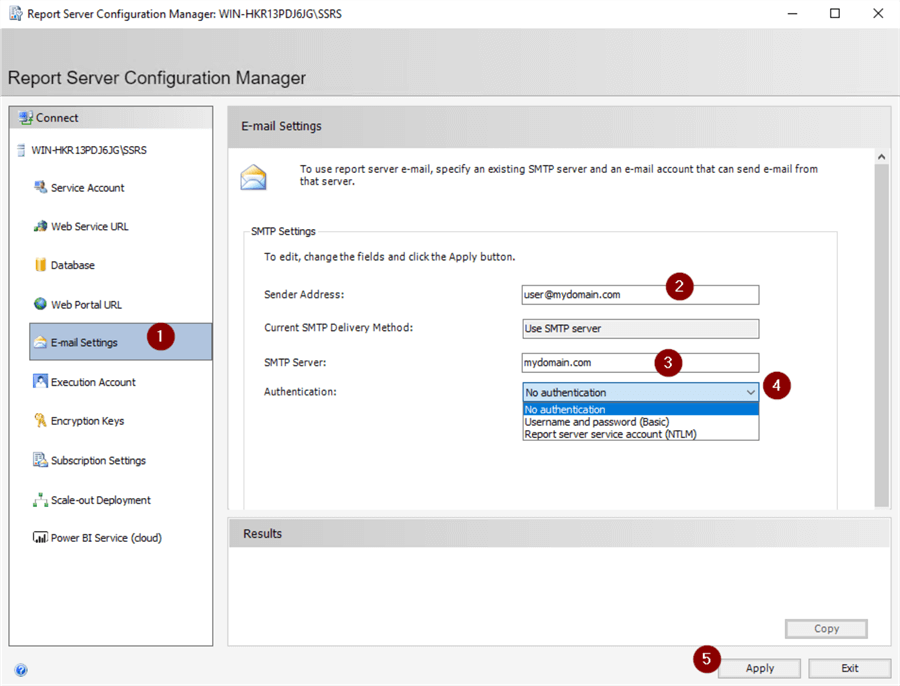
E-mail Settings
If you will have automated report subscriptions going to email, you will need to configure the email settings.
- E-mail Settings
- Enter 'Sender Address' (This doesn't have to be a valid email address on your mail system but it does have to be in the format [email protected] or the SMTP server will reject it.)
- Enter your SMTP server name
- You can leave Authentication at 'No authentication' if your
SMTP server does not require authentication, or
- Expand dropdown and choose 'Username and password (Basic)' to enter SMTP credentials if required
- Choose 'Report server service account (NLTM)' to use service account to authenticate
- Apply
Troubleshooting tip: If you experience any problems getting email working, Microsoft Docs has this very handy guide to troubleshooting SMTP issues using Telnet: Use Telnet to Test SMTP Communication on Exchange Servers. Even though it says Exchange, it's applicable to any SMTP server. It's a little awkward to use at first but a great way to very simply verify you can get through a firewall, and test sender address, etc.
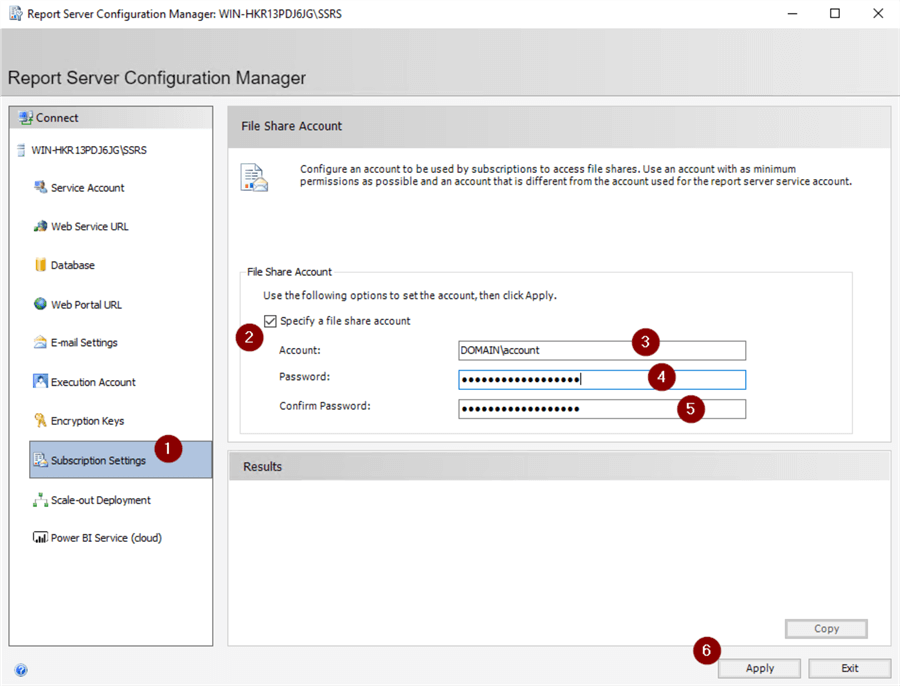
Subscription Settings
If you are automating reports to go to a file on a file share you can enter the credentials in the Subscription Settings tab.
- Subscription Settings
- Check off 'Specify a file share account'
- Enter Windows account in the form DOMAIN\account
- Enter password
- Confirm password
- Apply
Close Configuration Manager
- Exit
Next Steps
- Now that we have a working installation of SSRS, you can find a wealth of further information here: SQL Server Reporting Services Administration Tips


About the author
 Joe Gavin is from the Greater Boston area. He started working with SQL Server and Sybase in 1998 in the financial services industry and has been a SQL Server Database Administrator for a dairy cooperative since 2011. He graduated from Northeastern University in Boston with a Bachelor of Science in Engineering Technology (BSET) degree in Computer Technology. Joe has spoken at the Boston and Providence SQL Saturday events.
 This author pledges the content of this article is based on professional experience and not AI generated.
View all my tips
