Problem
We use Azure Data Factory (ADF) to run our data pipelines. We want to send an email to our team’s distribution whenever a pipeline fails, but ADF doesn’t seem to have an activity to send emails. We could use Logic Apps, but our email server is still on-premises, so we don’t know how to execute this. Is there an easy solution to our problem?
Solution
When working with data pipelines, the need often arises to send notifications to people responsible for the pipeline when something goes wrong. In SQL Server, you can use SQL Server Agent notifications or a stored procedure to send email. Azure Data Factory has alerting capabilities, but cannot send customized emails. In Microsoft Fabric, you do have an Email activity (with Outlook Office 365), but at the moment, this feature is missing in Azure Data Factory or Synapse Pipelines.
Previously, we explored how to send email notifications triggered by an ADF pipeline failure using Logic Apps in the following tips:
- Azure Data Factory Pipeline Email Notification – Part 1 and Part 2
- How To Call Logic App Synchronously From Azure Data Factory
However, in this tip, the use case is a bit different. Previous tips utilized the Office 365 Outlook action. (You can find similar actions for other large email providers.) But, what if your company continues to use an on-premises Exchange Server that cannot access from Azure Logic Apps? Or for some reason, you don’t get an email account that you can use for your project?
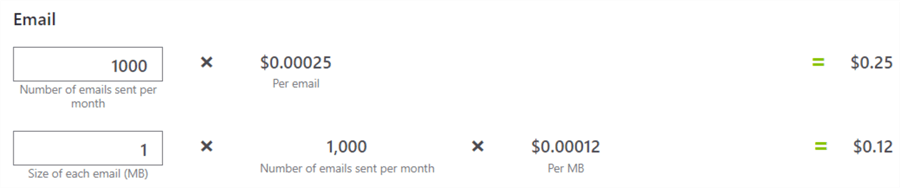
Whatever the reason, this tip will provide an alternative option: Azure Communication Services (ACM). With this service, you can programmatically send emails (and other means of communication, such as SMS, WhatsApp, voice and video call, etc.) through an API or the SMTP protocol. If this service us used to send some email notifications (hopefully less than 1000 a month), it should be quite cheap (numbers are from Azure Pricing Calculator):
In this tip, we’ll walk through the setup of configuring ACM and how to send an email using this service from an Azure Logic App.
Setup of Azure Communication Services and Other Dependencies
Searching for “communication services” in the Azure Marketplace, we get two hits: Azure Communications Services (ACS) and Email Communication Services (ECS).
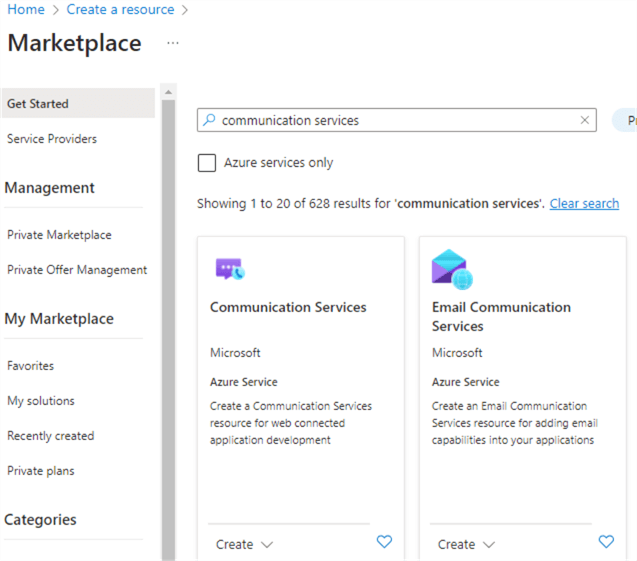
That seems to be confusing. You can regard ECS as some sort of “subresource” for ACS, where we configure, for example, the domain used to send the email. This means we need to couple an ECS instance with an instance of ACS. Let’s create ECS first.
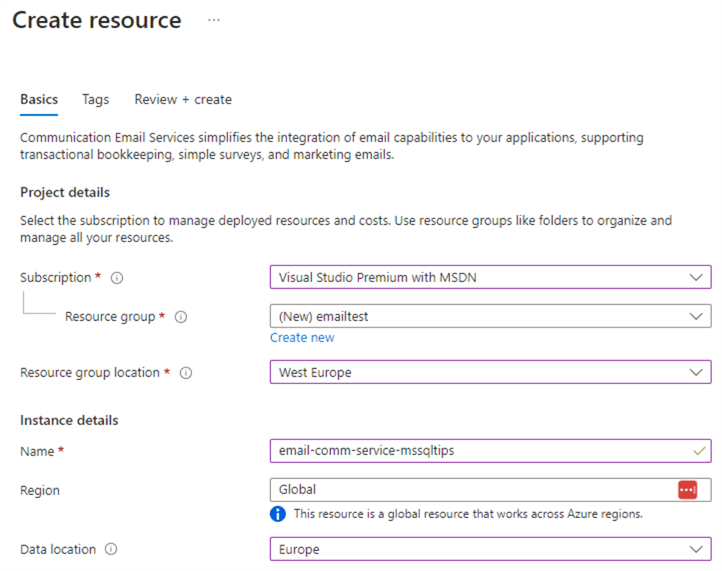
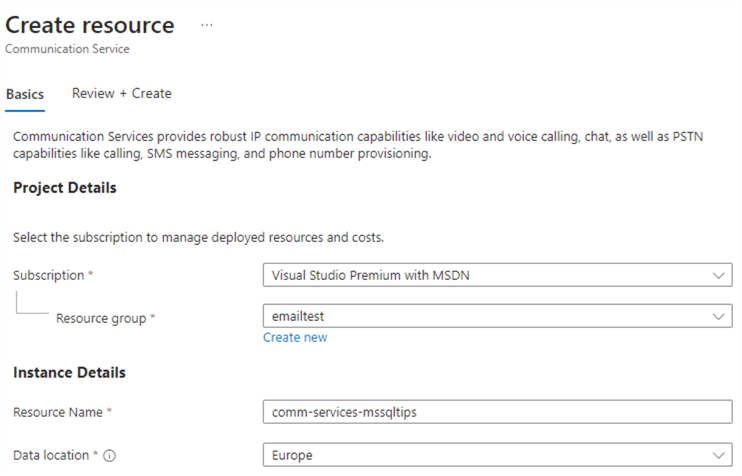
You need to specify a subscription, a resource group, a location, a globally unique name, and a location for your data.
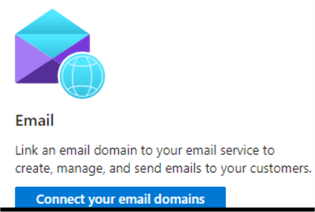
Review your configuration and then create your new resource. When your resource is provisioned, you will be prompted to either create an email domain or add an existing domain in the overview page.
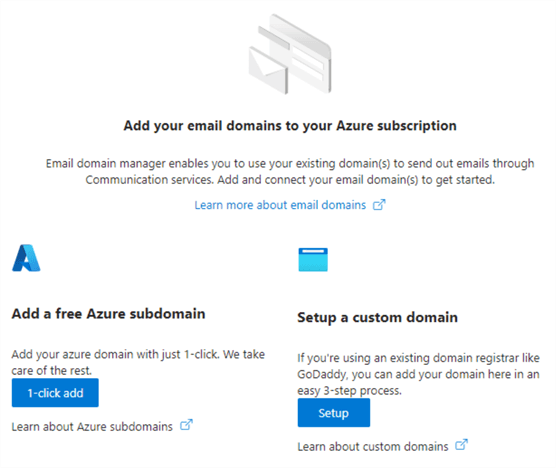
Using a custom domain allows you to use your own domain to send emails. The other option is to let Azure manage the domain, which will give you a type of “anonymous” domain like xxxx-xxxx-xxxxxxxxxxxx.azurecomm.net. Click 1-click add to let Azure create a domain. This will take you to the Provision domains settings page.
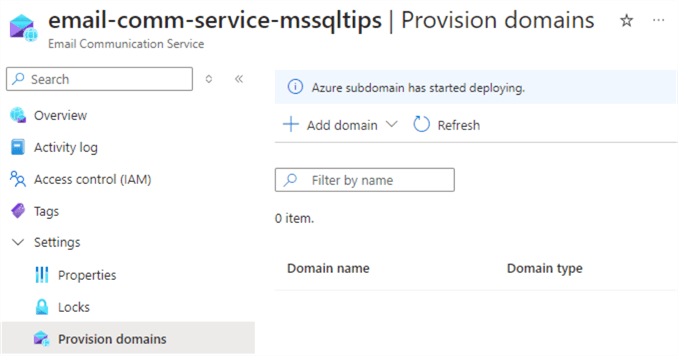
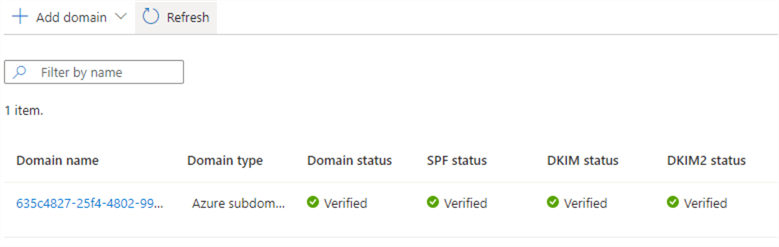
After a short while, your Azure domain will be added:
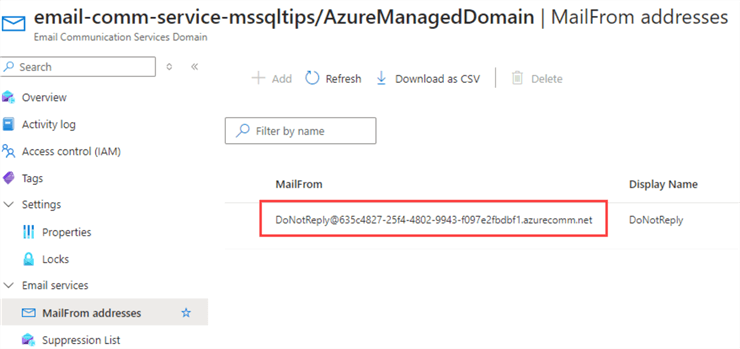
If you go to the domain page by clicking on the domain name, you can find the email address that will be used to send emails in the MailFrom addresses:
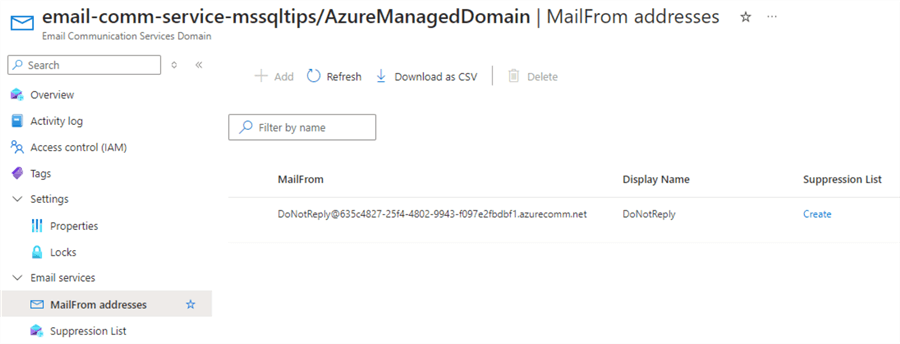
You might want to add this email address to your approved senders list in your spam filter.
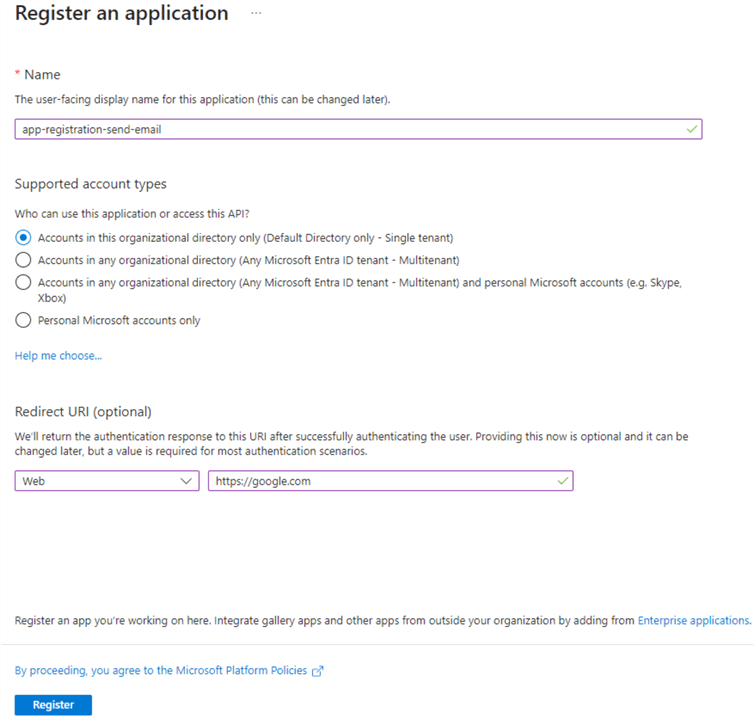
Next, let’s create an app registration. We will give this app registration permissions to send emails and use it to log into the service using SMTP. Go to Azure Entra ID and then to App registrations.

Click New registration. Give the app a name and provide a Redirect URI. (This is optional; fill in what you want). Click Register.
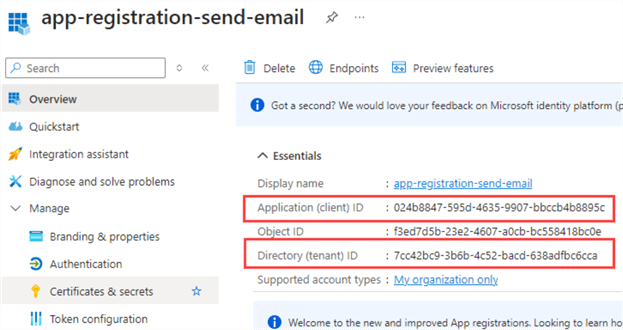
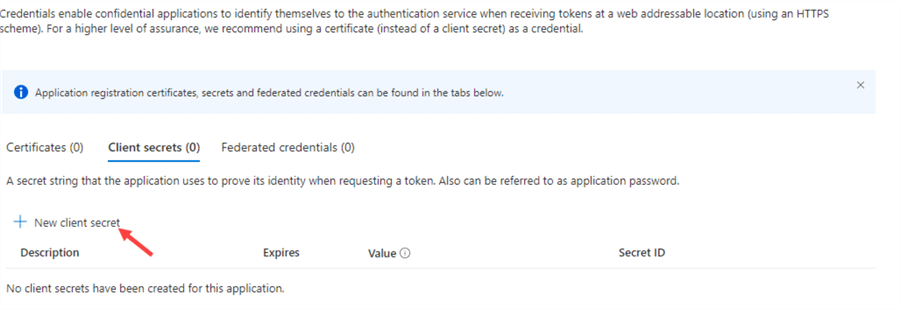
On the Overview page, take note of the Application (client) ID and Directory (tenant) ID, as we’ll need them later for our username. We also need to create a secret to be used as the password to log into the email service. Go to Certificates & secrets.
In the client secrets pane, click New client secret.
Give it a description and choose an expiration date (preferably the maximum or two years).
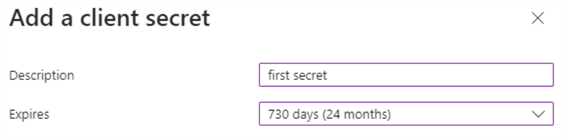
When the secret is created, don’t forget to copy the value, as this will be the only time you can do this.

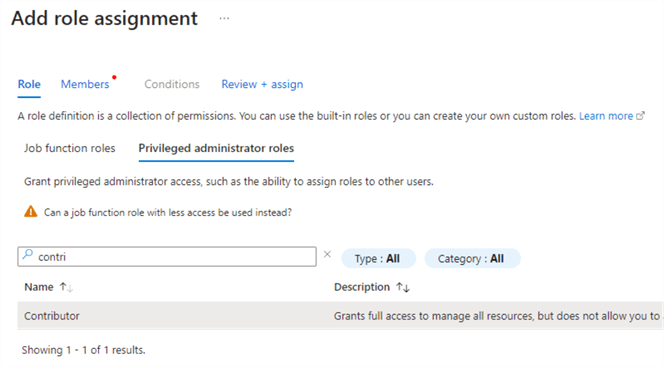
Once the app is registered and the secret is created, we can assign the app the necessary roles. In the ECS, go to Access control (IAM) and add a new role assignment. You can either assign it the Contributor role (which has too many permissions and goes against the principle of least-privileges) or create a custom role with the exact permissions required to send emails. For the sake of brevity, I’m using the contributor role for this tip. If you’re interested in the custom role, you can find this in the documentation.
From the Privileged administrator roles, choose Contributor.
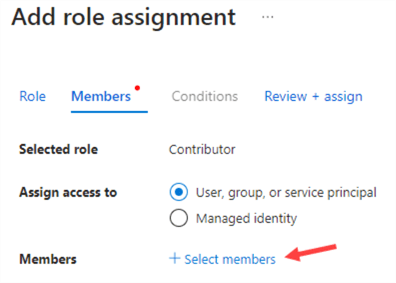
Select members to add to the role.
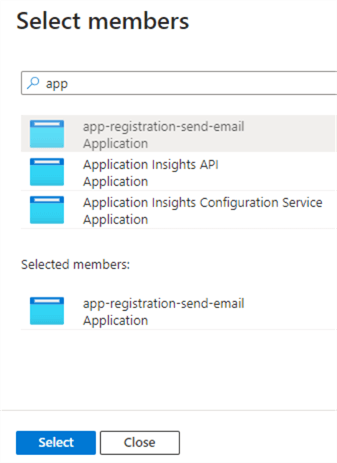
Add the app registration to the selected members list:
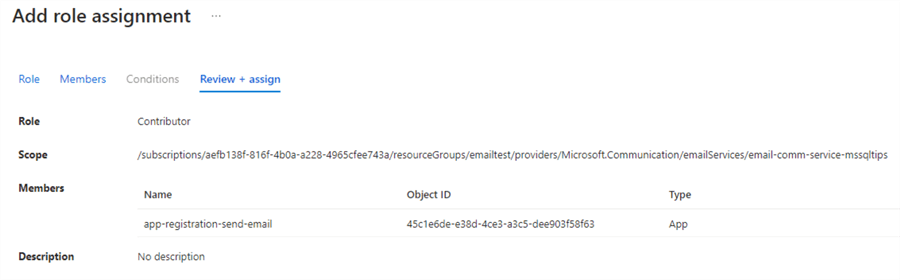
Finish the role assignment.
Now it’s time to create the ACS. Go back to the Azure Marketplace and create a new ACS instance. You need to specify the subscription, the resource group, a globally unique name, and the location for your data.
Once the resource is provisioned, add the app registration to the contributor role (or a custom role) as we did before with the ECS. On the Overview page, you’ll see the different channels and an option to add your email domain to the ACS instance:
This will take you to the Domains page of the Email section of ACS:
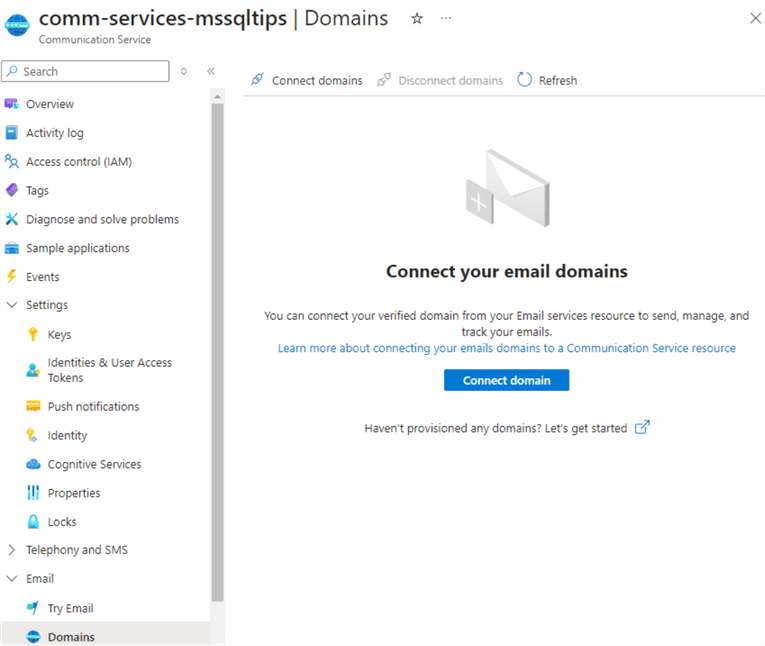
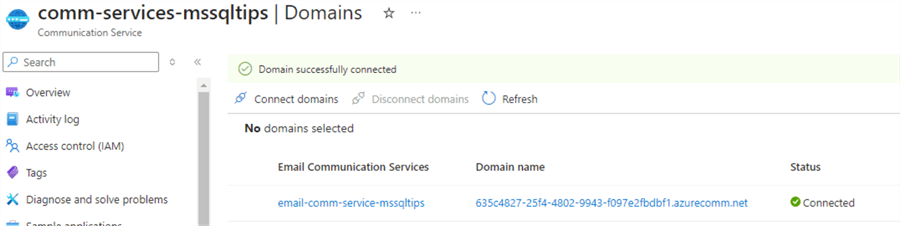
Click Connect domain to link the ECS instance we previously created to our ACS instance.
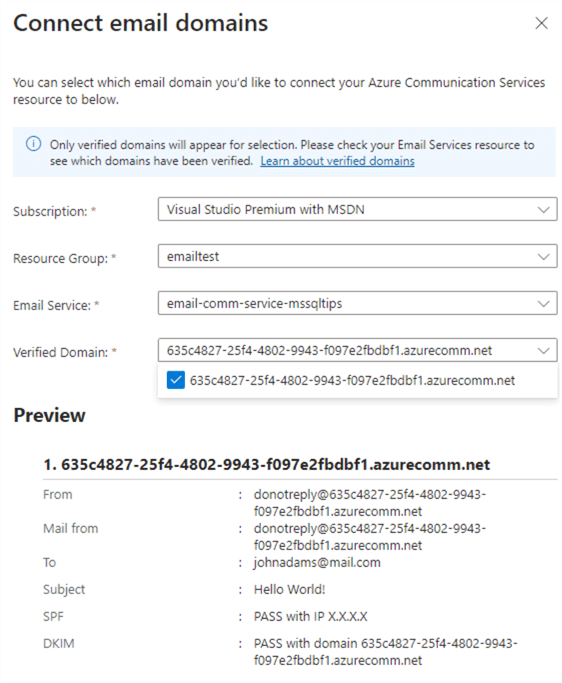
Make sure it’s connected successfully.
Send an Email from ACS Using a Logic App
The process of creating a Logic App and sending an email using SMTP is quite similar to the one described in the tip Azure Data Factory Pipeline Email Notification – Part 1. However, since the user interface has changed and we’re using a different connector, let’s explain the various steps of this process.
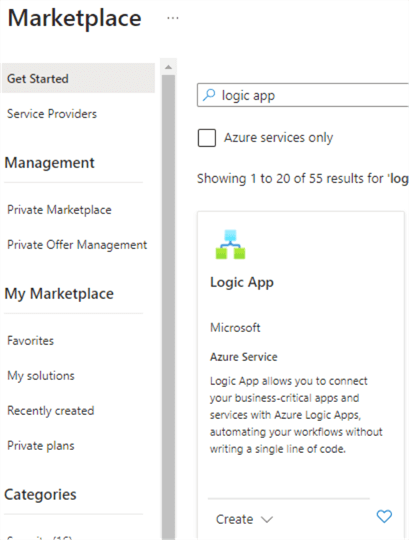
In the Azure Marketplace, search for Logic Apps.
Click Create to provision a new Logic App.
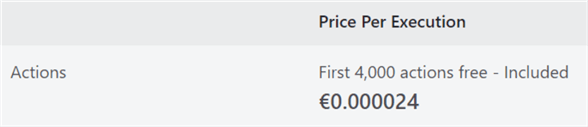
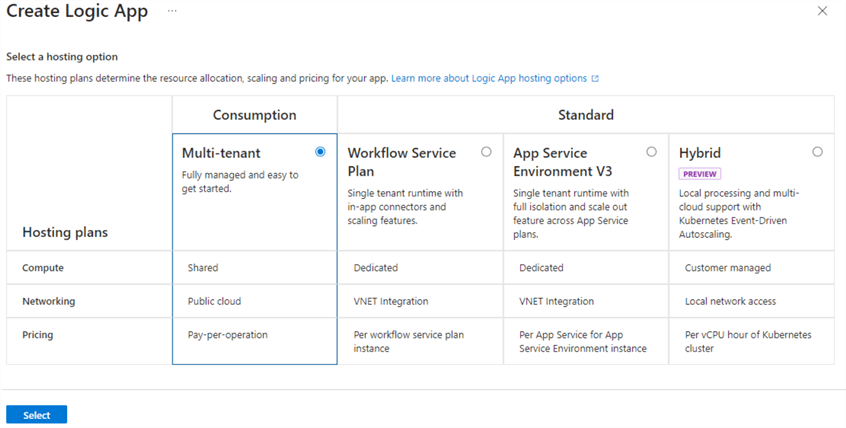
Logic Apps come with multiple plans. With a Standard plan, you have dedicated compute but the cost is easily over $150, which is a bit excessive for only sending emails. With a Consumption plan, you have shared compute; this will be sufficient for sending an email. What’s also important is that the first 4,000 executions are free in a consumption plan (This screenshot is taken from the Azure Pricing Calculator.):
In the Logic App creation process, select the Consumption plan and click Select.
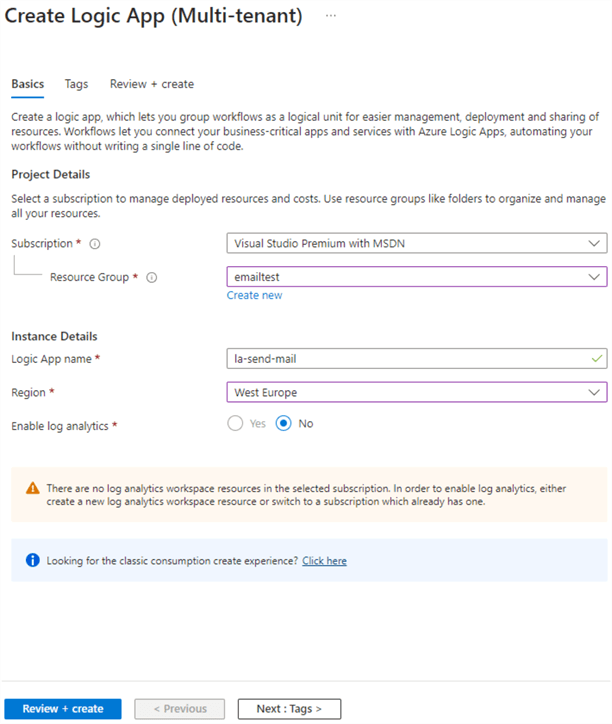
The only reason to opt for a standard plan is that consumption plans don’t support VNET Integration. However, for the simple use case of sending an email, this typically isn’t required. In the configuration screen, select the subscription, resource group, and region. Also, give the logic app a name. Click Review + create to finish the setup.
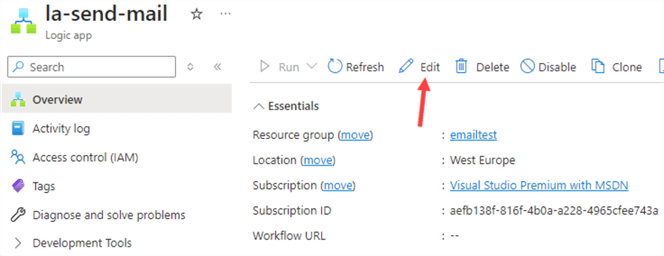
Once the Logic App is provisioned, click Edit to go to the designer.
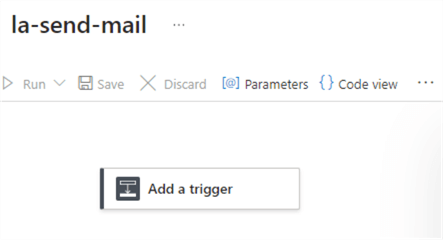
The first thing we need to do is add a trigger, which will be an HTTP trigger to call the Logic App from an ADF web activity. Click Add a trigger.
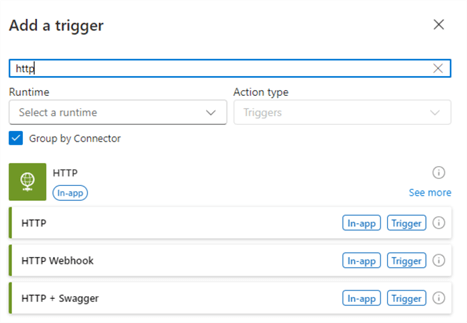
When searching for the HTTP trigger, make sure to not pick the HTTP action. The one depicted in this screenshot is similar, but not the trigger we need:
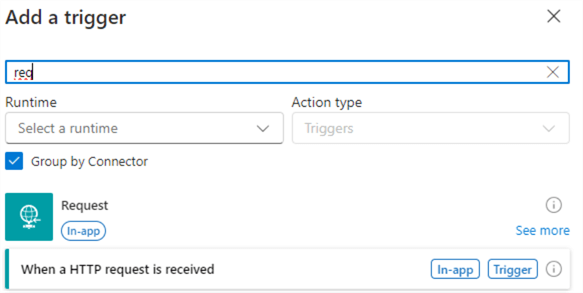
We need the trigger with the name When a HTTP request is received.
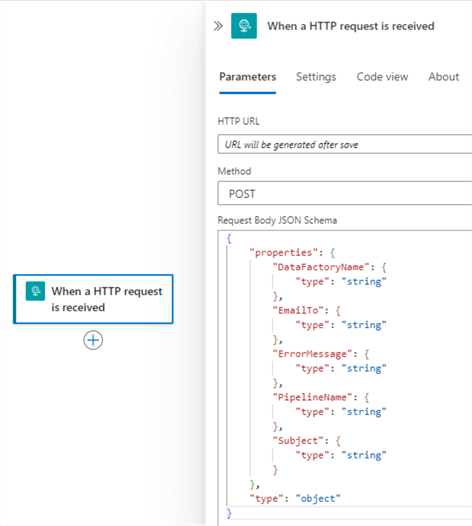
When the trigger is added to the canvas, change the HTTP method to POST. The URL will be created for you once the Logic App is saved. The request body is taken from the following tip: Send Notifications from an Azure Data Factory Pipeline – Part 2.
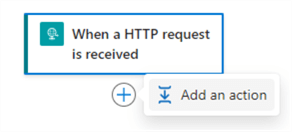
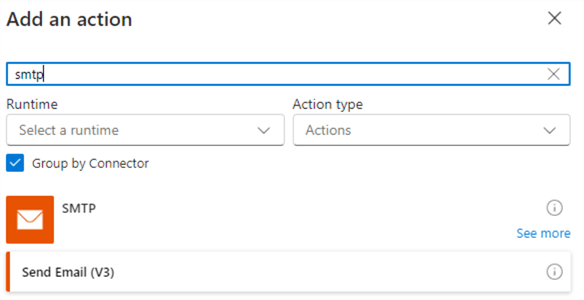
After the trigger, add a new action.
This time we can use an SMTP action instead of the Office 365 Outlook action we used in the tip Azure Data Factory Pipeline Email Notification – Part 1.
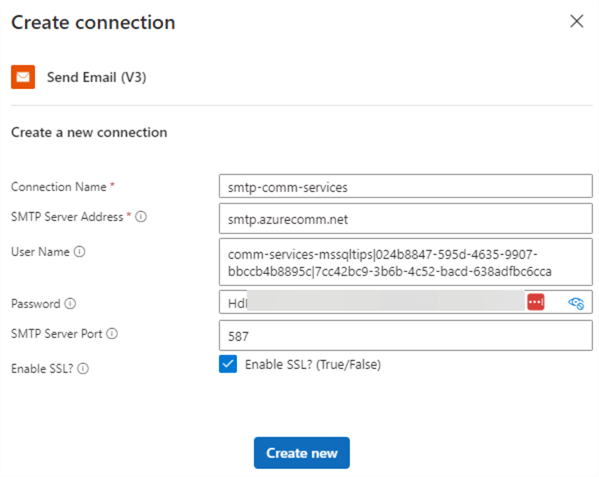
Before the action is added, we need to connect to the SMTP service first. Give the new connection a name and specify smpt.azurecomm.net as the SMTP Server Address. For the username, we need the name of the Azure Communication Service, the application ID, and the tenant ID. You need to construct the username in the following format:
acs_name.applicationID.tenantID
Alternatively, you can use the pipe symbol | instead of dots. For the password, you need to enter the secret of the app registration. Enter 587 as the SMTP Server Port. Click Create new.
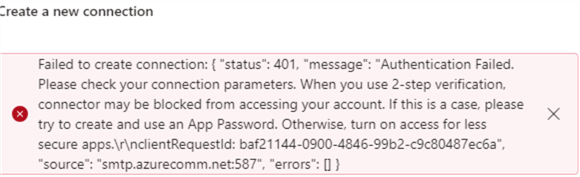
Ensure that SSL is enabled or you will get the following error.

Also verify you’re using the name of the ACS and not the ECS or you’ll get an authentication error:
The action will be added to the canvas once the connection is successful. When you want to edit the action for the first time, no configurable fields will be present (like from, CC, BCC, etc.). You need to select those from the Advanced parameter dropdown:
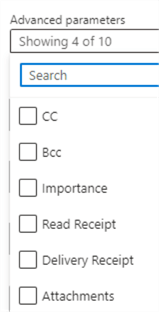
In our use case, I selected the From and To fields, as well as Body and Subject.
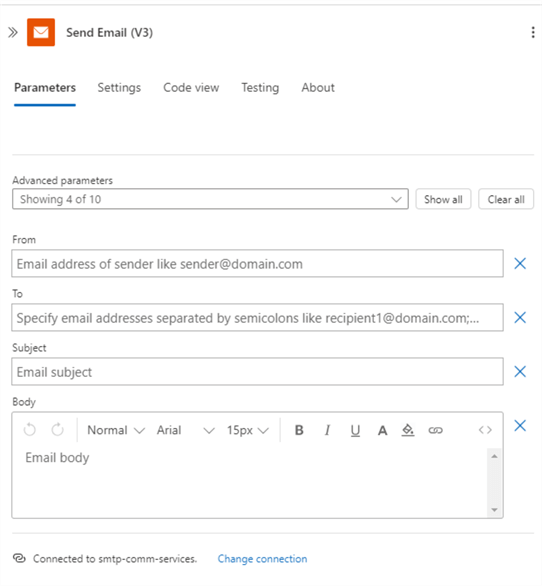
As a reminder, the From address can be found in the ECS:
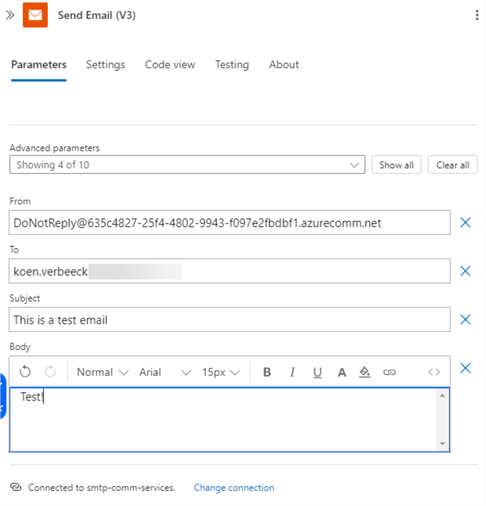
The SMTP action should look like this:
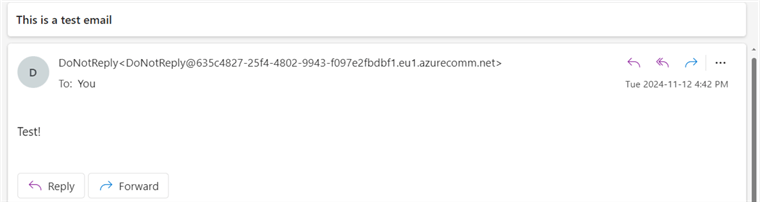
Save the Logic App and run it to test the email service. You should receive the email quickly. Make sure to check your spam filter!
The last step is to configure a web activity in ADF to send an HTTP POST request with the correct body to the Logic App and configure the SMTP action to use the data from the body. The tip, Send Notifications from an Azure Data Factory Pipeline – Part 2, explains how to accomplish this.
Conclusion
In this tip, we saw how you can set up Azure Communication Services to cost-effectively send emails. You can send emails using a Logic App with an SMTP action, and this Logic App can be triggered from Azure Data Factory.
Next Steps
- For more Azure Data Factory tips, check out this overview.
- Send Emails from Azure SQL Database by using Azure Logic Apps
- If you haven’t already, check out these tips as they lay the foundation for this tip:
