Problem
As we continue to explore other possibilities for having an event-driven Microservice solution, it is paramount for most data architects to have multiple options to build such a solution and not rely on just a code-based approach. In this article we look at creating an Azure Logic App for microservices.
Solution
Azure LogicApp gives a step-function approach by providing developers with a LowCode/NoCode means in achieving this.
Project Requirements
This article will be broken down into two sections:
- Section A: Trigger LogicApp with HTTP Request from EventGrid.
- Section B: Connect LogicApp to On-premise Folder Directory for Event Trigger.
Section A: Trigger LogicApp with HTTP Request from EventGrid
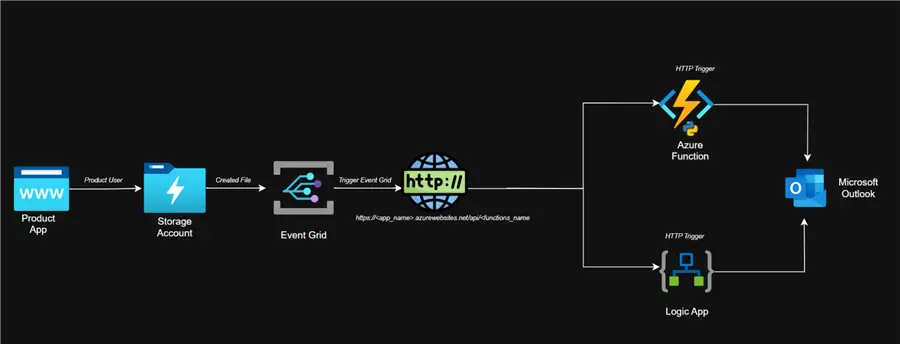
Project Architecture
Provision Azure LogicApp Resource with Azure Terraform
Terraform is an infrastructure as code (IaC) solution that uses a declarative configuration language to let you define and provision data center infrastructure. It enables you to use code to control cloud resources, improving consistency, reproducibility, and effectiveness of infrastructure management.
Step 1: Install Terraform on Windows OS
Microsoft provides well-written documentation on how to install Terraform on Windows OS: Install Terraform on Windows with Bash | Microsoft Learn
If installed properly, an output of your Terraform version will appear when the following command is run in your CLI:
terraform -version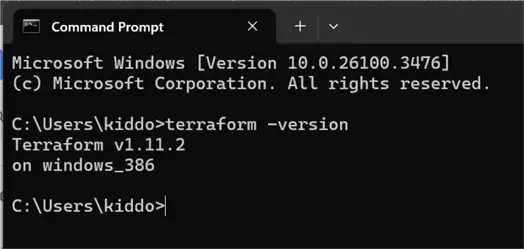
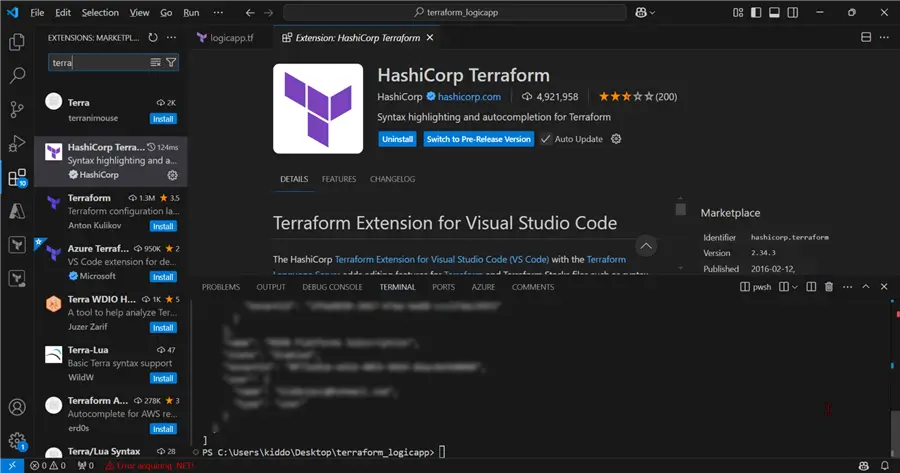
Step 2: Install Terraform Extension in VSCode
In your VSCode, click the Extension Widget and search for Terraform. Install it on your VSCode IDE.
Now that the Extensions are installed, let’s login to the Azure Portal from our command line in VSCode with the command below:
az login
Step 3: Provision LogicApp with Terraform
In VSCode, create a new file called logicapp.tf.
Assumption. Consider the following before provisioning the resources:
- Resource Group: docker_rg
- Location of Logic App: UK South
- Name: eventgridlogicapp
Write the script in your .tf file:
# Configure the Azure provider
provider "azurerm" {
features {}
subscription_id = "xxxxxxx-xxxxxxxx-xxxxxxxx-xxxxxx"
}
# Reference the existing resource group
data "azurerm_resource_group" "rg" {
name = "docker_rg"
}
# Create a Logic App (Consumption Plan)
resource "azurerm_logic_app_workflow" "logic_app" {
name = "eventgridlogicapp"
location = "UK South" # Explicitly set to UK South
resource_group_name = data.azurerm_resource_group.rg.name
# For Consumption plan, we don't need to specify a dedicated service plan
# as it automatically uses the consumption-based pricing model
workflow_parameters = {
# You can add workflow parameters here if needed
}
tags = {
environment = "production"
purpose = "automation"
}
}
# Output the Logic App URL
output "logic_app_workflow_access_endpoint" {
value = azurerm_logic_app_workflow.logic_app.access_endpoint
description = "The Access Endpoint URL of the Logic App Workflow"
}
# Output the Logic App ID
output "logic_app_id" {
value = azurerm_logic_app_workflow.logic_app.id
description = "The ID of the Logic App Workflow"
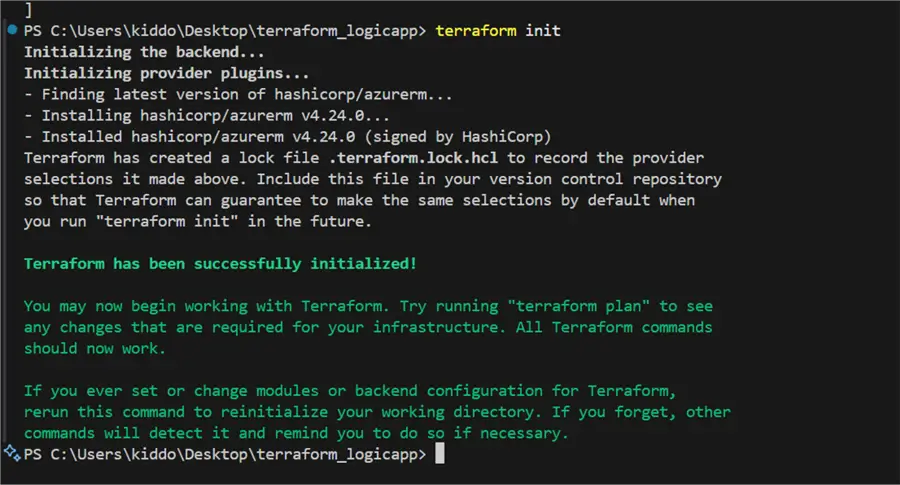
}Initialize. In a Terraform working directory (the folder that contains your.tf files), execute this command first:
terraform init Terraform communicates with cloud platforms like Azure through “providers.” Terraform init uses the required providers block in your configuration to download the required provider plugins (such as the Azure provider).
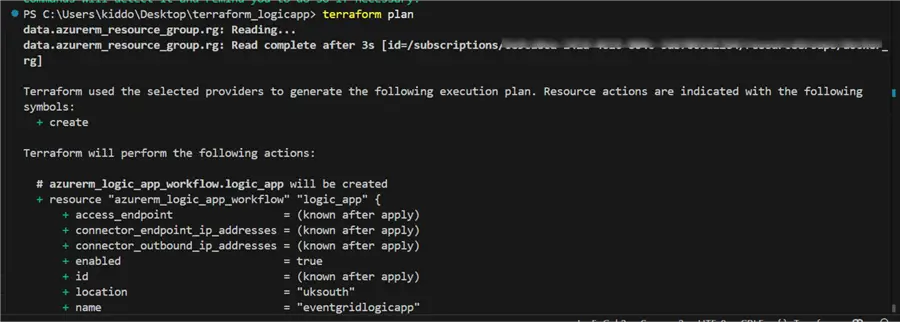
Plan. The goal of the following command is to provide an “execution plan.” It allows you to see, without making the changes, what Terraform will do to your infrastructure.
terraform plan Terraform reads your.tf files and compares them to the state file containing the current infrastructure status.
Apply. The terraform apply command’s goal is to carry out the modifications specified in the execution plan. Your infrastructure is provisioned or modified by this command.
terraform apply 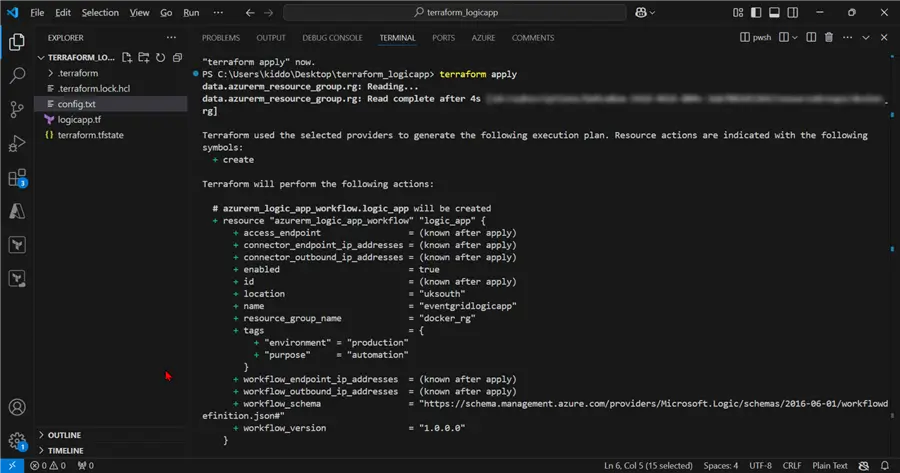
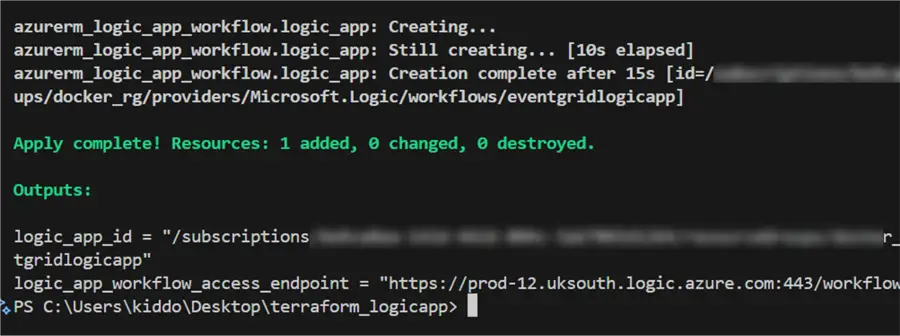
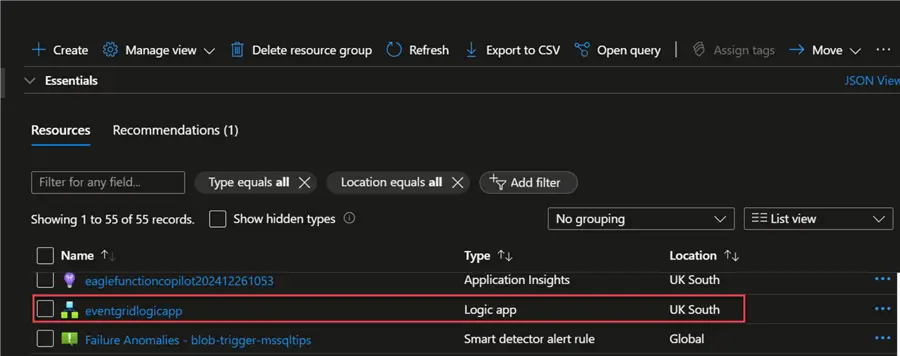
Confirm Provisioning. After the successful message, check your Azure Portal to confirm resource provisioning.
Set Up HTTP Trigger on Logic App with EventGrid
Now that we have our Logic App working as expected, let’s start the trigger process.
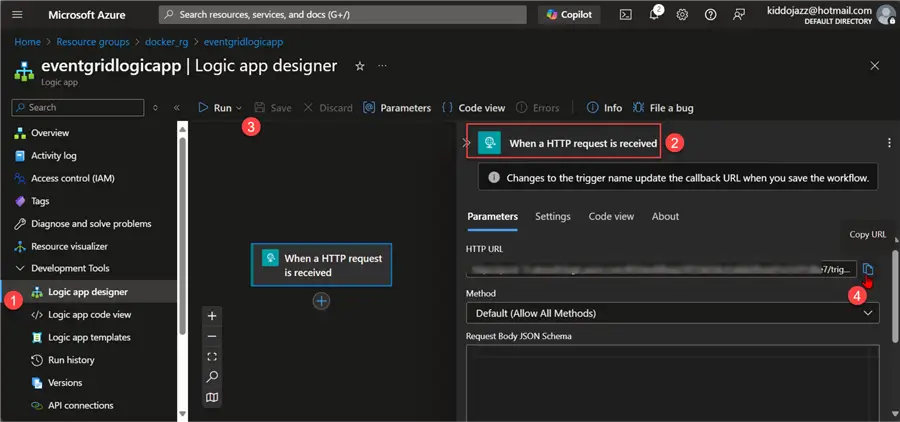
Step 1: Create HTTP Trigger in Logic App
In your Azure Logic App under the Development Tools tab, click on the Logic app designer, add the trigger, and search for When HTTP request is received.
To get the HTTP URL, click Save and copy the URL. This will be used as we continue the project.
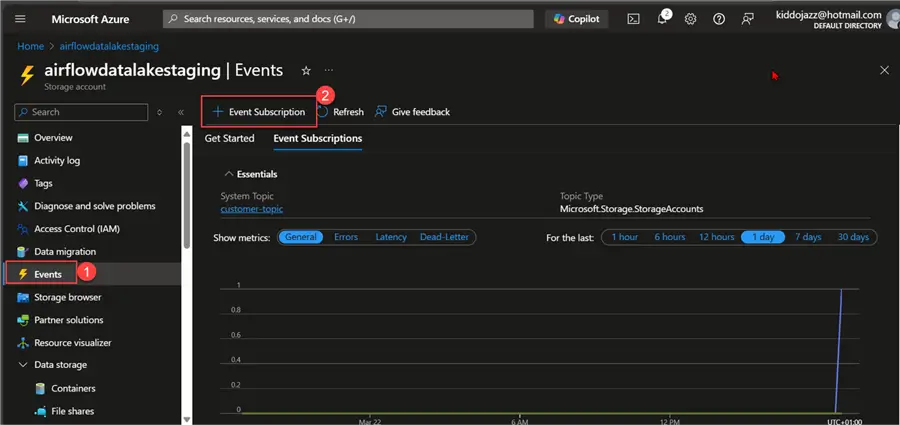
Step 2: Create EventGrid Trigger
In your Azure storage account, click the Events tab, then select Event Subscription.
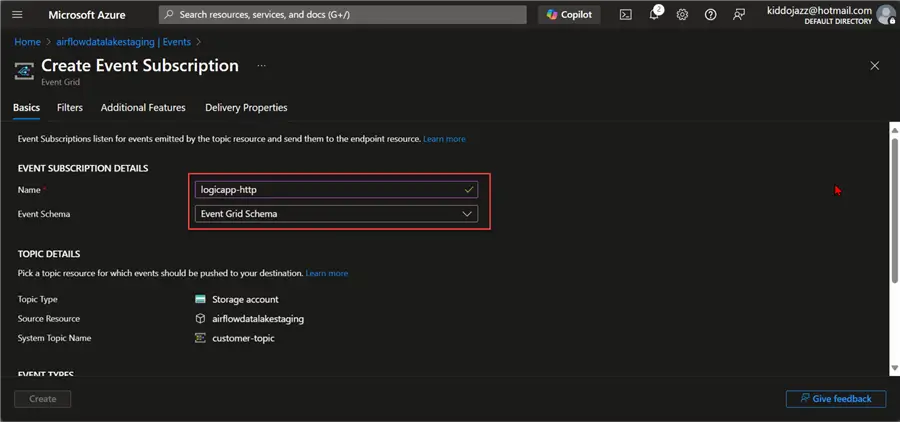
Fill in the necessary information as seen in the image below.
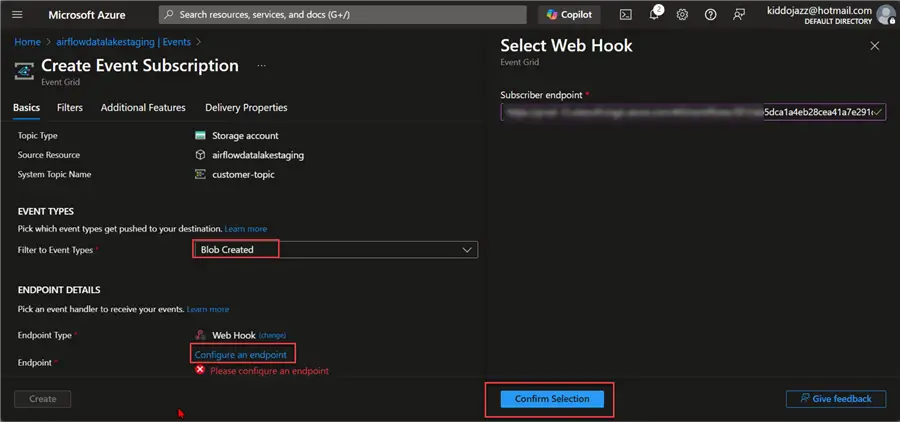
We plan to use a trigger when a Blob is created in a particular directory in our Azure Storage account.
We also need to configure the endpoint, a WebHook from our HTTP URL from Azure Logic App.
Click Confirm Selection.
Step 3: Set Filters
Under the Filters, we will use the official pattern for filtering in Azure EventGrid. We are focused on only CSV files.
/blobServices/default/containers/<CONTAINER_NAME>/blobs/<BLOB_PREFIX>Click Create.

Confirm that Event Grid was provisioned successfully.

Set Up the Azure Logic App Flow Process
Now that we have Azure EventGrid set up and working as expected, we need to set the action for the Azure LogicApp to receive an HTTP POST request from EventGrid.
Step 1: Set Schema
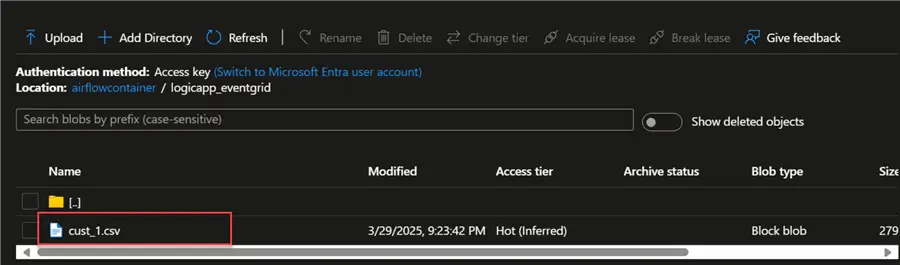
To understand the schema format, let’s start by uploading a CSV file to the storage account.
In your LogicApp, click Run History and select the latest run History to perform an inspection.
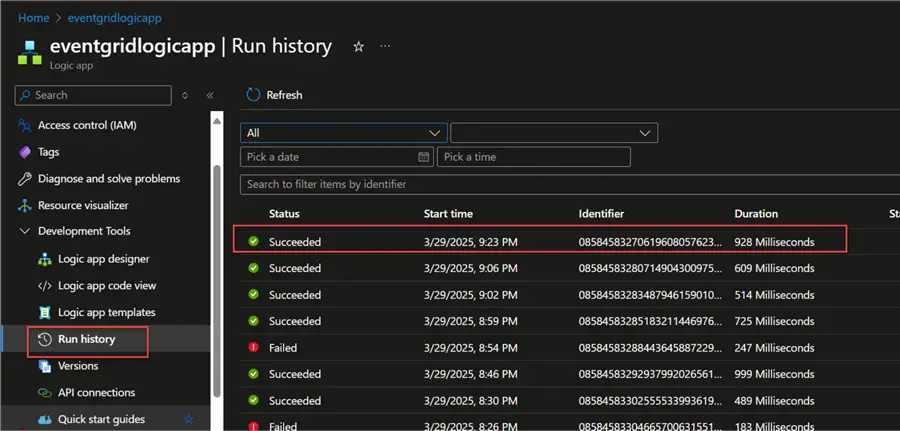
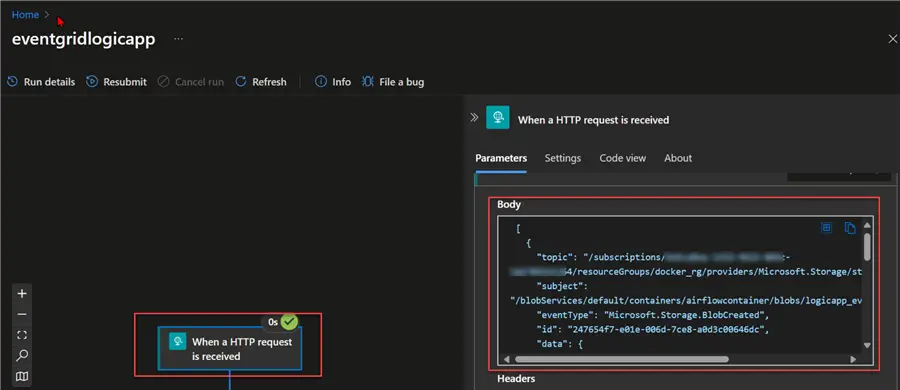
Copy the Body of the HTTP request received from EventGrid. This will help pick up the necessary information going forward.
[
{
"topic": "/subscriptions/xxxxxxxxxxxxxxx/resourceGroups/docker_rg/providers/Microsoft.Storage/storageAccounts/airflowdatalakestaging",
"subject": "/blobServices/default/containers/airflowcontainer/blobs/logicapp_eventgrid/cust_1.csv",
"eventType": "Microsoft.Storage.BlobCreated",
"id": "247654f7-e01e-006d-7ce8-a0d3c00646dc",
"data": {
"api": "PutBlob",
"clientRequestId": "xxxxxxxxxxxxxx",
"requestId": "xxxxxxxxxxxxx",
"eTag": "0x8DD6EFF9966BE44",
"contentType": "text/csv",
"contentLength": 279,
"blobType": "BlockBlob",
"accessTier": "Default",
"blobUrl": "https://airflowdatalakestaging.blob.core.windows.net/airflowcontainer/logicapp_eventgrid/cust_1.csv",
"url": "https://airflowdatalakestaging.blob.core.windows.net/airflowcontainer/logicapp_eventgrid/cust_1.csv",
"sequencer": "00000000000000000000000000031601000000000000d00b",
"identity": "$superuser",
"storageDiagnostics": {
"batchId": "10359642-d006-0004-00e8-a0ea8c000000"
}
},
"dataVersion": "",
"metadataVersion": "1",
"eventTime": "2025-03-29T20:23:42.5895899Z"
}
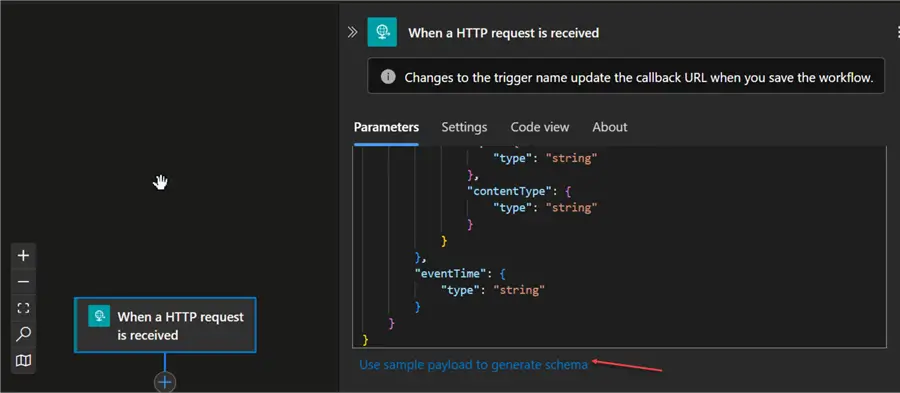
]With the information from the body, we can create a Sample Template of the information we want to capture from Azure EventGrid.
{
  "subject": "",
  "eventType": "",
  "id": "",
  "data": {
    "api": "",
    "contentType": ""
  },
  "eventTime": ""
}
Click on the Use sample payload to generate schema link,then paste the value in.
Step 2: Set Initialize Variable
Add a new action called Initialize Variable to capture the information from the HTTP Trigger action. In the Value tab, for your Initialize Variable, we need to set an HTML template of the message to be sent.
<hr/>
<h2 style="color: red;">New Blob Created in Storage</h2>
<hr/>
<b>File Path:</b> @{triggerBody()?[0]?['subject']}<br/>
<b>Event Type:</b> <span style="color: blue;">@{triggerBody()?[0]?['eventType']}</span><br/>
<b>API:</b> @{triggerBody()?[0]?['data']?['api']}<br/>
<b>Content Type:</b> @{triggerBody()?[0]?['data']?['contentType']}<br/>
<b>Event Time:</b>
<span style="color: purple;">
    @{addHours(triggerBody()?[0]?['eventTime'], 1)}
</span><br/>
<hr/>
<b>Information:</b><br/>
<p style="color: green; font-weight: bold;">The operation was successful!</p>
<hr/>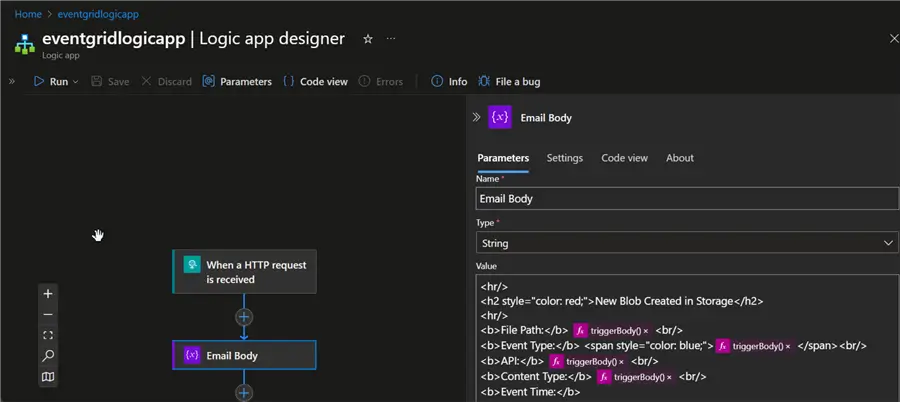
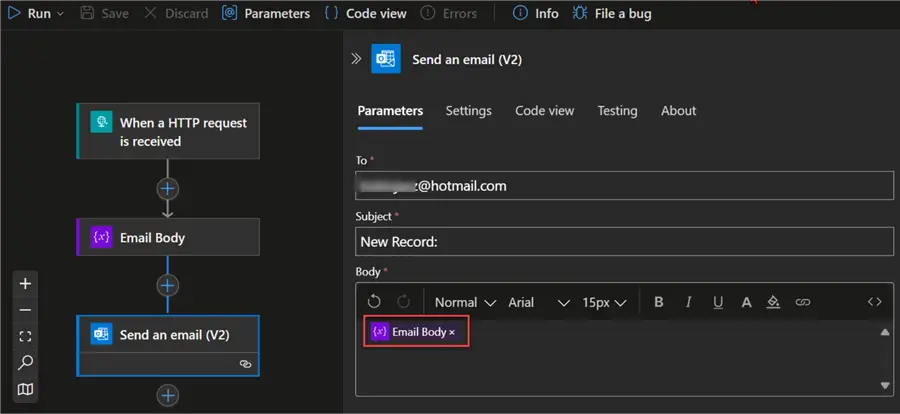
Step 3: Set Send an Email Action
Add a new action. Send an Outlook message and fill in the Dynamic content of the Email variable. Ensure you save the Flow before leaving the tab.
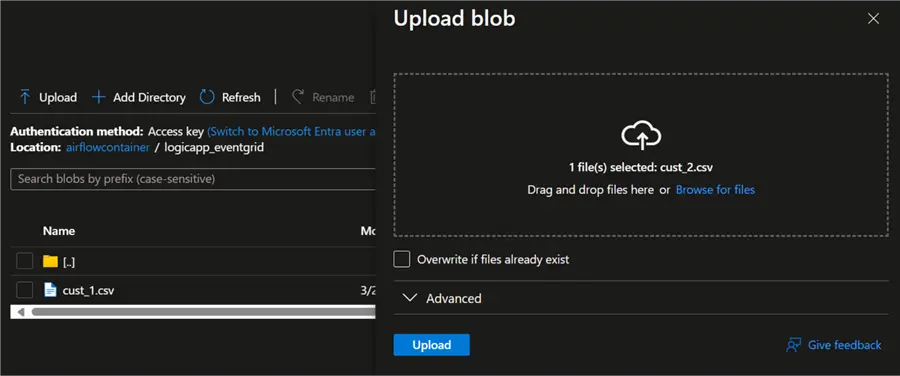
Step 4: Test Flow Logic
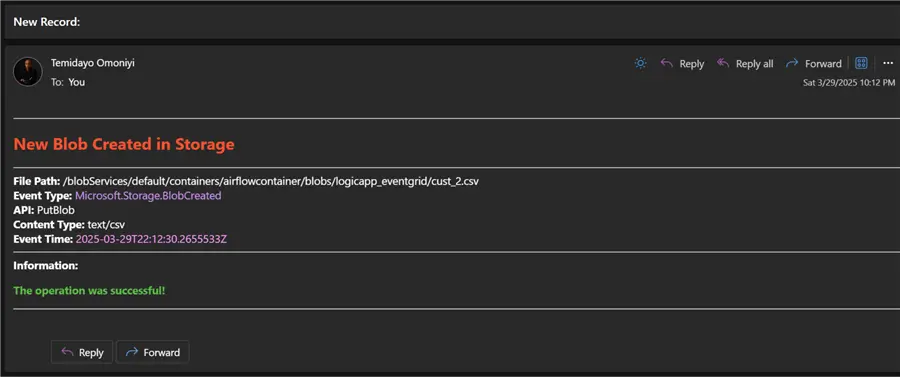
With all the necessary actions added, let’s test the flow by adding a new document (cust_2) to the storage account.
With the new document uploaded, wait for a few seconds and confirm the flow in Run history.
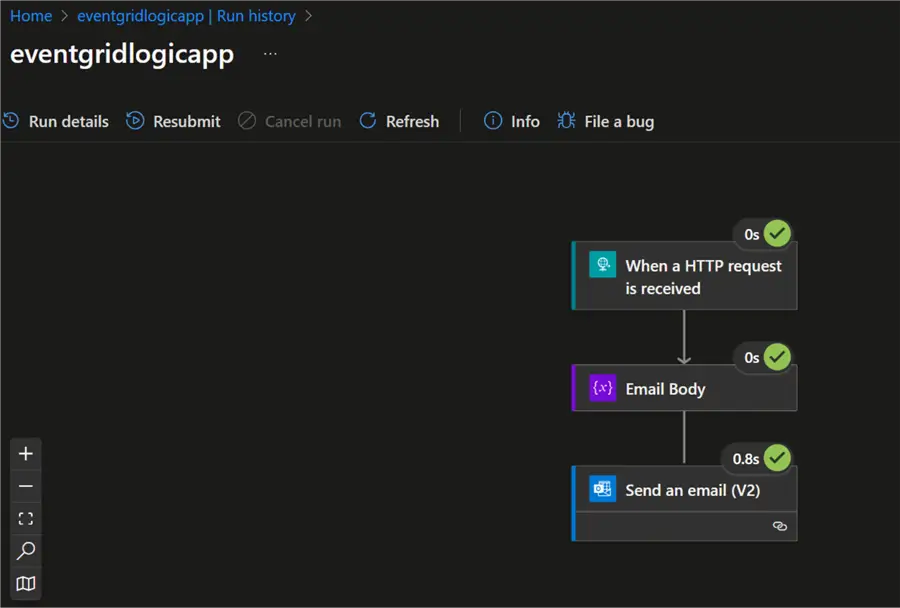
Check the Email to confirm information was also sent to Outlook with the captured requirements.
Conclusion
In this article, we learned how to configure and provision resources using Terraform (IaC) in Azure. We also created a subscription process in an Azure Storage account using EventGrid to trigger a LogicApp flow via an HTTP endpoint.
This project helps us understand how to use LogicApp with other API use cases and projects.
Next Steps
- Understanding Azure Functions for Microservice Architecture.
- How to Design a Real-Time Streaming Platform with Azure.
- Install Terraform on Windows with Bash | Microsoft Learn.

Temidayo Omoniyi is a Microsoft Certified Data Analyst, Microsoft Certified Trainer, Power Platform Developer, Azure Data Engineer, Content Creator, and Technical writer with over three years of experience.
Currently, he works as a data and business intelligence analyst for a training and consulting company in Lagos, Nigeria.
Temidayo enjoys creating educative content on YouTube, LinkedIn, Twitter, and other online platforms. He loves sharing his knowledge and writing about systems, applications, tools, and processes.
Apart from training, writing, and coding, you will find him watching and reading Anime. He is a big fan of DC Comics.
- MSSQLTips Awards: Trendsetter (25+ tips) – 2025 | Author of the Year – 2023, 2024


