Problem
We’re building our new data platform in Microsoft Fabric. We are using a lakehouse for our bronze and silver layers of the medallion architecture. We’ve loaded many tables from different sources. But in our bronze lakehouse, it’s all becoming very disorganized. Is there a way to organize the tables?
Solution
The Lakehouse in Microsoft Fabric is a collection of files and tables, where the tables use the delta format (with underlying Parquet files). Because the delta format is used, the lakehouse behaves like a regular database and you can query the tables using the familiar T-SQL with the SQL Analytics Endpoint. A new feature has been released in preview that will simplify table management and security.
Since the new feature is in preview at the time of writing, it’s possible some functionality will be different when it becomes generally available, or that some current limitations have been lifted. You can find a list of limitations in the documentation. If you want to follow along with this tip, you need a Fabric-enabled workspace, which can be obtained by getting a free trial, or by buying capacity in Azure.
Schemas in the Fabric Lakehouse
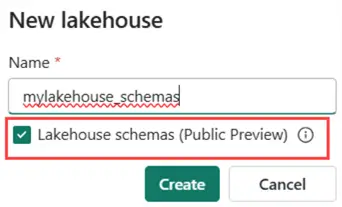
It’s important to know that already existing lakehouses do not support schemas. If you want to work with this new feature, you need to create a new lakehouse in your workspace. For the moment, it’s not possible to migrate a lakehouse that doesn’t use schemas to a schema-based lakehouse.
Give the new lakehouse a name and select the option to use Lakehouse schemas.
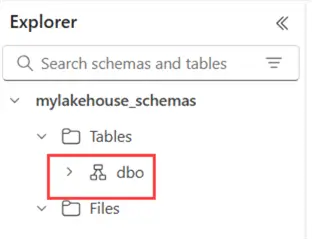
In your new lakehouse, a default schema called dbo will be present, just as in SQL Server.
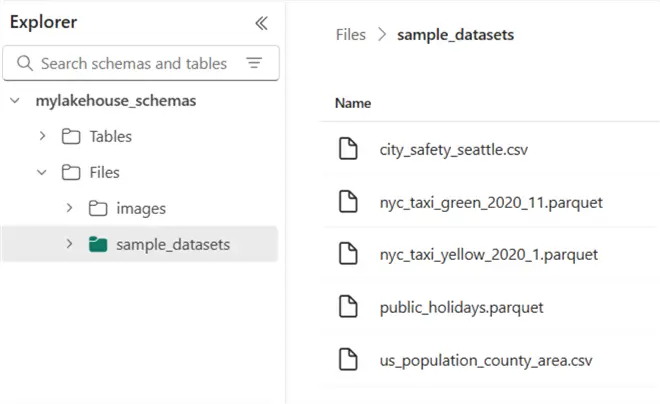
Before adding schemas, let’s first add some sample data to the lakehouse. In the canvas window of your lakehouse, you’ll find an option to load sample data.

After a while, one table will be created in the dbo schema (publicholidays), and a folder will be added with sample data:
Creating a New Schema
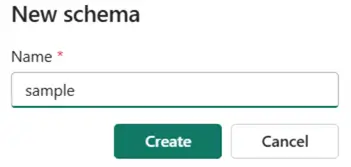
Let’s create a new schema. Click the ellipsis next to the Tables folder and select New schema from the context menu.

You’ll be asked to provide a name for the new schema.
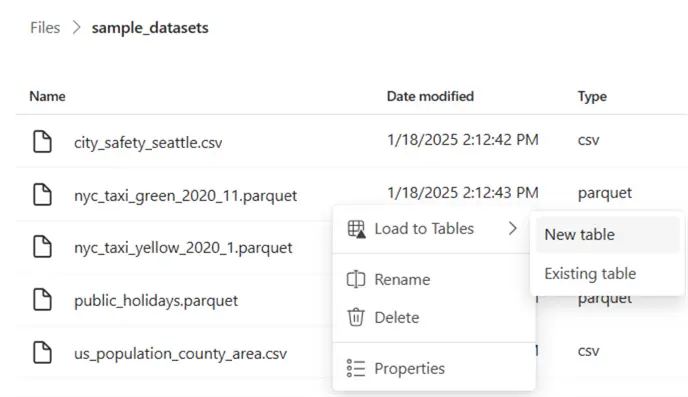
You can add existing tables to the new schema simply by dragging them over in the user interface. From the Files section, you can create a new delta table and add it to your new schema.
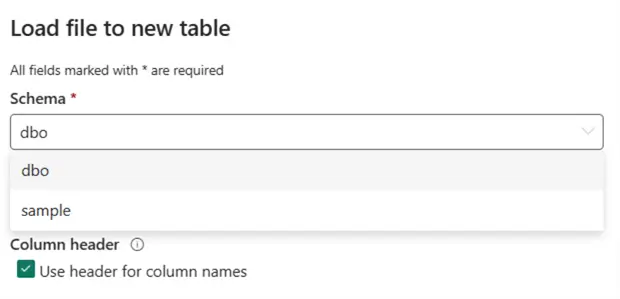
You’ll be prompted to provide a name for the new table, but also to select the schema:
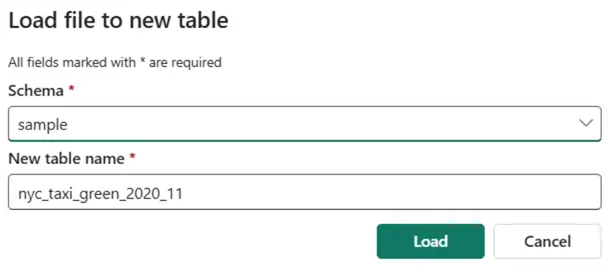
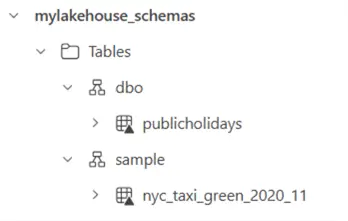
The table will then be loaded into the selected schema:
You can also create a new schema shortcut. You can use this option if you want to shortcut multiple tables from a schema in another lakehouse, or multiple delta tables in a folder on external storage.
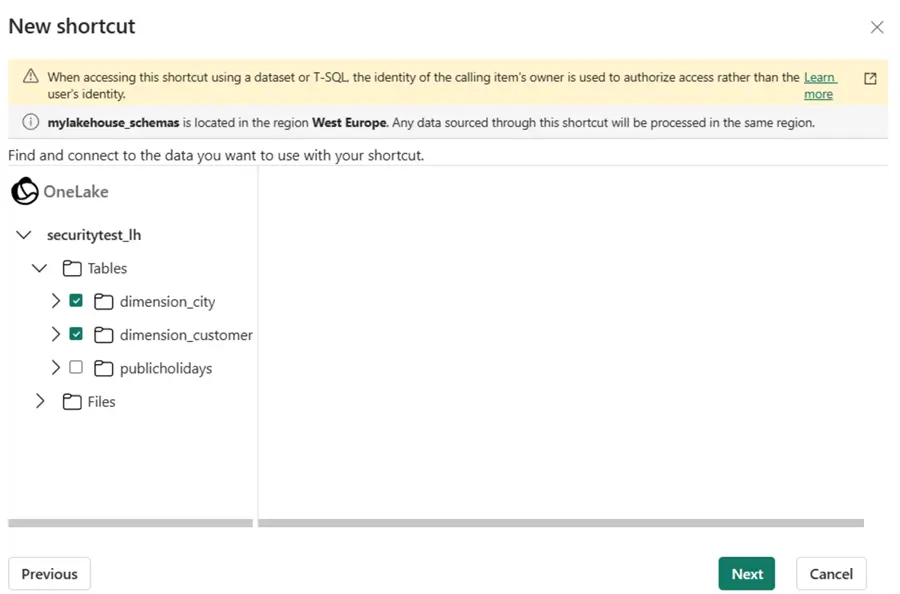
The shortcuts to the tables will be created in a new schema. Keep in mind that shortcuts are just references to the original tables; the actual data is not copied.
Schemas and the SQL Analytics Endpoint
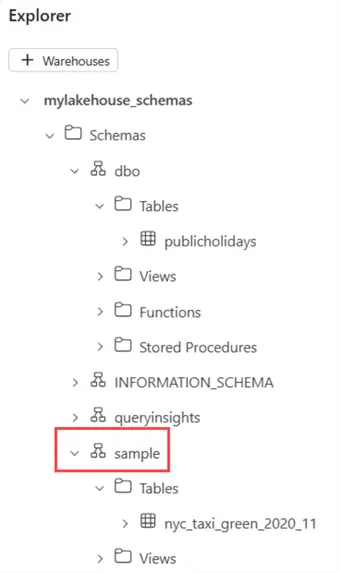
When we switch to the SQL Analytics Endpoint, we can see our new schemas in the Explorer window:
You can also create a schema in the SQL Endpoint using the following T-SQL command:
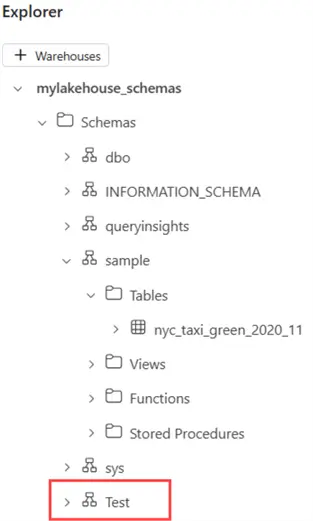
--MSSQLTips.com
CREATE SCHEMA Test;
This schema is visible within the SQL Endpoint:
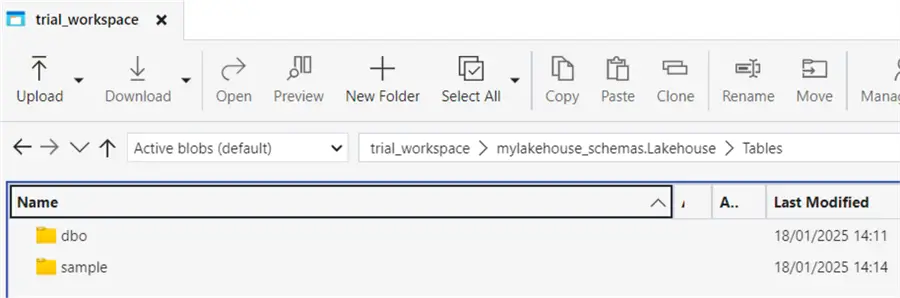
However, when we go back to the lakehouse itself, we don’t see the new Test schema. Even if we connect to the underlying OneLake storage, we can only find folders for the default dbo schema and the sample schema we created earlier.
If we try to create a new table from an existing file (like we did before), the Test schema is not part of the possible destination schemas:
It seems that there’s a distinction between the schemas created in the lakehouse and those created through the SQL Endpoint. For the moment, it’s not clear if this is intentional or if this is a bug.
Schemas and Spark SQL
You don’t have to use the user interface in the browser to create a new schema. It’s also possible to create one using Spark code. In a notebook, add the schema-enabled lakehouse:
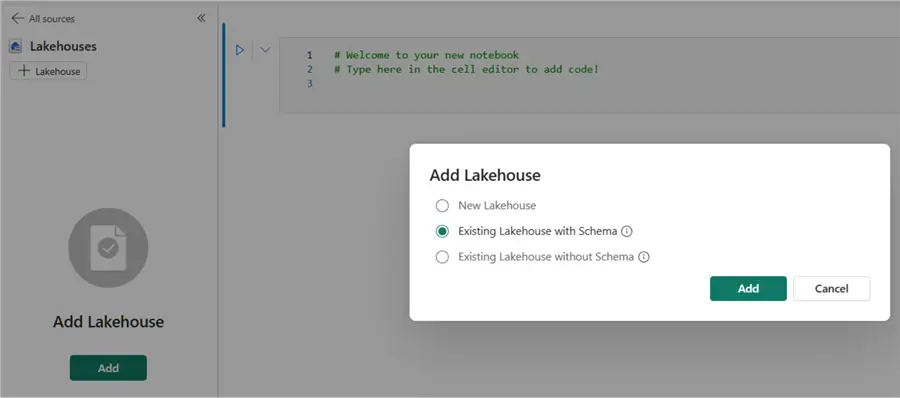
Set the language to Spark SQL, either by setting the language for the entire notebook, or for a single cell using the magic command %%sql.
Just like in SQL Server, we can create a new schema with the following statement (keep in mind Spark is case sensitive):
--MSSQLTips.com
CREATE SCHEMA HelloWorld
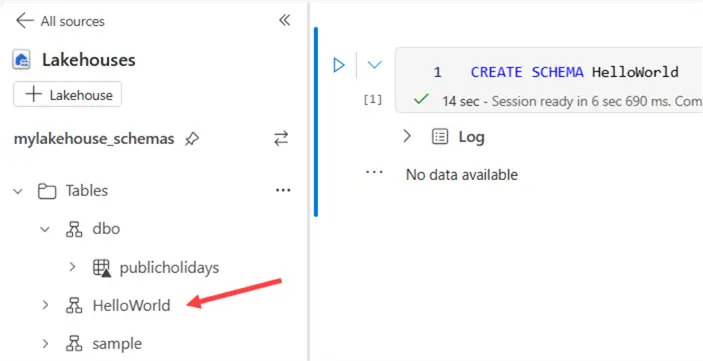
With the following PySpark code, we can create a copy of the publicholidays table in the new schema:
%%pyspark
# mssqltips.com
df = spark.sql("SELECT * FROM mylakehouse_schemas.dbo.publicholidays LIMIT 1000")
df.write.mode("Overwrite").saveAsTable("HelloWorld.publicholidays")
This table will be visible in the lakehouse explorer, but it doesn’t show up in the SQL Endpoint. This might either be a bug, missing functionality, or a problem with the syncing of the metadata.
Why Use Schemas in the Lakehouse?
Like in SQL Server, you can use schemas to organize your tables into logical units. For example, if you want to implement the medallion architecture and have a bronze, silver, and gold layer in your lakehouse, you can now create three different schemas to hold the tables for each layer, instead of creating separate lakehouses.
Another benefit is that you can use schemas to provide role-based access security to a bunch of tables at once since schemas are just folders inside OneLake.
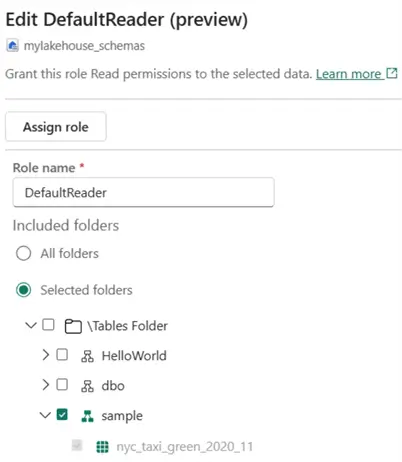
You can find more information about OneLake Role Based Access Control in the tip Microsoft Fabric OneLake Role Based Access Control (RBAC). At the time of writing, this feature is in preview as well.
Next Steps
- To get started with a lakehouse, you can check out the following tips:
- You can find a list of all Fabric tips in this overview.
