By: Siddharth Mehta
Overview
We have built our understanding of Master Data Services (MDS) basic concepts and the tools that we can use to work with MDS. In this chapter we will develop a basic data model, entities, attributes, members and attribute groups. After understanding the steps to develop these basic constructs, we should be able to easily explore and modify the sample packages that we have already installed on MDS.
Explanation
In the following steps we will look at how to add a Model, Entity, Attributes, Attributes Groups and Members.
SQL Server Master Data Services Model
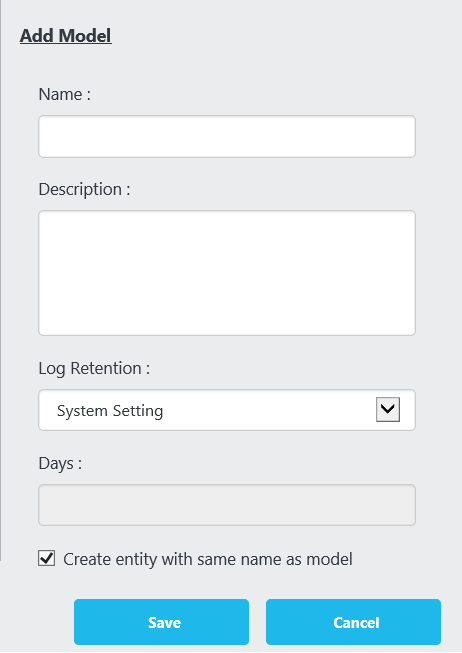
Follow these steps to create a new data model. We aim to create a data model identical to the Product data model that we have already installed. Name this data model with a relevant name.
- In Master Data Manager, click System Administration.
- On the Model View page, from the menu bar, point to Manage and click Models.
- On the Manage Models page, click Add. A panel is displayed on the right side.
- In the Name box, type the name of the model.
- In the Description field, type the model description.
- In the Log Retention Days field, select one of the options for retaining log data. The default value is System Setting, which indicates that the value is inherited from system settings in the Master Data Services Configuration Manager. To override the system setting and not remove transaction log data, select NO. To retain only today’s log data and truncate log data for all previous days, select YES and set the Days field to 0. To retain log data for a specified number of days, select YES and set the Days field to the number of days.
- Select Create entity with same name as model to create an entity with the same name as the model.
- Click Save model.
SQL Server Master Data Services Entity
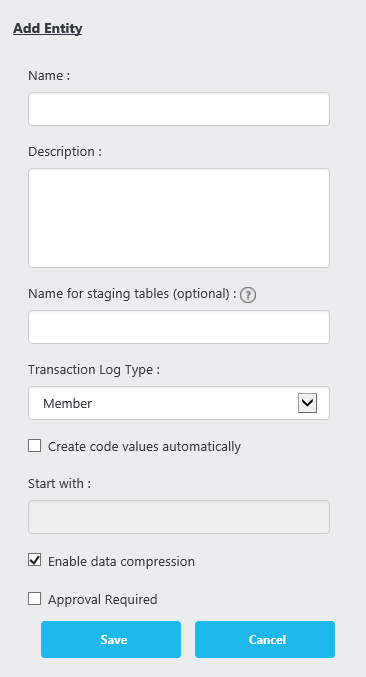
Follow the below steps to create a new data entity.
- In Master Data Manager, click System Administration.
- On the Manage Model page, from the grid, select the model that we created in the above step and then click Entities.
- On the Manage Entity page, click Add.
- In the Name box, type the name of the entity.
- Optionally, in the Description field, type the entity description.
- Optionally, in the Name for staging tables box, type a name for the staging table. If you do not complete this field, the entity name is used.
- For the Transaction Log Type field, choose the transaction log type in the drop-down list.
- Select the Create Code values automatically check box.
- Select the Enable data Compression checkbox. By default the row compression is turned on.
- Click Save.
SQL Server Master Data Services Attributes
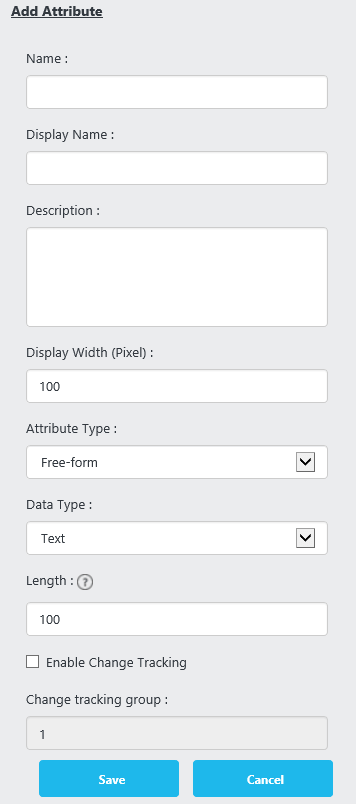
To add attributes to the entity created in the above step, follow the below mentioned steps.
- In Master Data Manager, click System Administration.
- On the Manage Model page, select a model from the grid and then click Entities.
- On the Manage Entity page, select the row for the entity that we created in the above section.
- Click Attributes.
- On the Manage Attributes page, select Leaf from the Member Types list box and then click Add.
- In the Name box, type a name for the attribute.
- Optionally, type a display name, and type a description for the attribute in the Description box.
- In the Display pixel width box, type the width of the attribute column to be displayed in the Explorer grid.
- From the Attribute type list, select Free-form.
- From the Data type list, select Text.
- In the Length box, type the maximum number of characters allowed.
- Optionally, select Enable change tracking to track changes to groups of attributes.
- Click Save.
Create different attributes under the selected entity following the same steps. You can also create domain-based attributes as required. To create domain-based attributes, consider reading this tip.
SQL Server Master Data Services Attribute Group
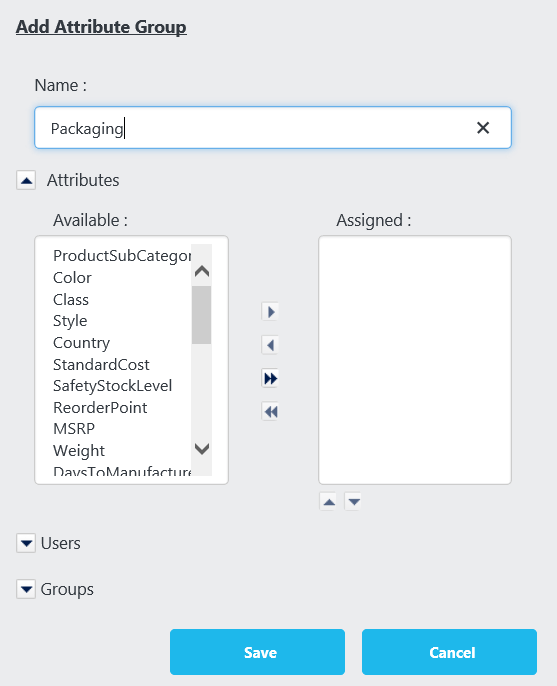
Once we have created multiple attributes, it makes sense to create attribute groups in order to organize and group attributes for convenient access. Follow the below steps to create a new attribute group.
- In Master Data Manager, click System Administration.
- On the Manage Model page, select a model from the grid and then click Entities.
- On the Manage Entity page, from the grid, select the row for the entity that you want to create an attribute group for.
- Click Attribute Groups.
- On the Manage Attribute Groups page, select Leaf from the Member Types drop-down list at the top of the page and then click Add.
- Click Leaf Groups to create an attribute group of leaf members.
- In the Name box, type a name for the attribute group. This name is displayed on the tab in Explorer.
- To add an attribute, click the attribute in the Available Attributes box, and then click the Add arrow. To add all attributes, click the Add All arrow.
- Click the Up and Down arrows to change the left-to-right order of the attributes.
- Click users in the Available Users box, and then click the Add arrow. To add all users, click the Add All arrow.
- Click groups in the Available Groups box, and then click the Add arrow. To add all groups, click the Add All arrow.
- Click Save.
SQL Server Master Data Services Members
Considering that we have created required constructs to host data, its time to add some actual data.
- On the Master Data Manager home page, from the Model list, select a model.
- Assuming we have administrative rights on MDS, click Explorer.
- From the menu bar, point to Entities and click the name of the entity you want to add a member to.
- Click Add member.
- In the Details pane, complete the fields.
- In the Annotations box, type a comment about why the member was added.
- Click OK.
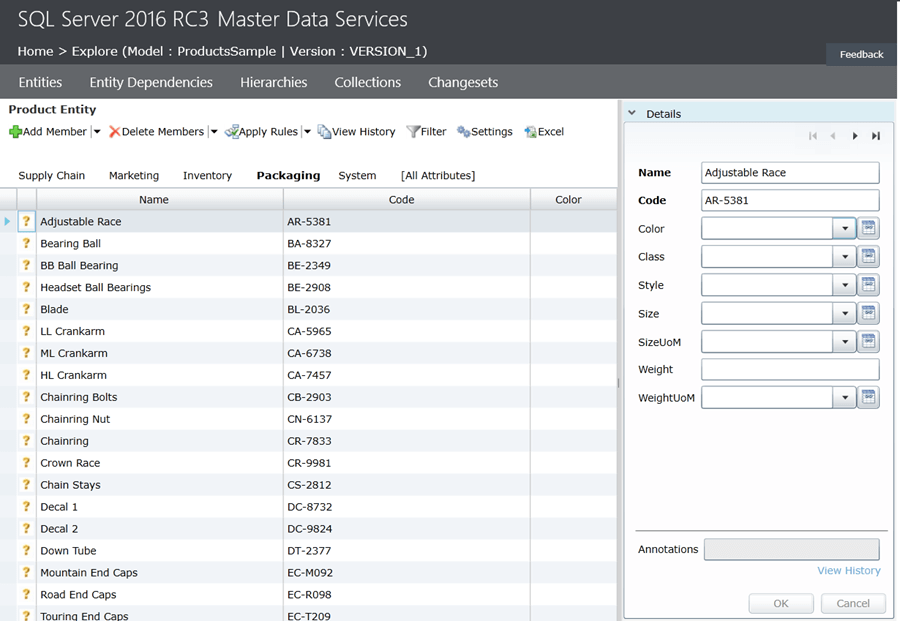
Follow these steps and add data to the entity that we developed in the above section. Using these steps we can create a model similar to the sample model that we have installed. As a part of our exercise, make sure that you create all the entities and attributes that we have in the sample model, and at least a few members in each of them.
We looked at how to add data manually in this chapter. In the next chapter we will look at other ways of importing data into the data model.
Additional Information
- To develop your knowledge of working with these constructs, consider developing all the entities, attributes and members in the ProductSample model. This will help you gain experience in efficiently developing MDS constructs.
