By: Koen Verbeeck
Overview
In this chapter, we’re going to create our SSIS project. For this, we need Visual Studio 2015. You need to download SQL Server Data Tools 2015, which will install a shell of Visual Studio 2015. If you want a full-blown Visual Studio, so you can also tackle other type of projects such as R projects or .NET projects, you can download Visual Studio 2015 Community Edition (which is free if you subscribe to Visual Studio Dev Essentials). With the latest version of SSDT 2015 (SSDT 17.2 at the time of writing), you can create SSIS projects for SQL Server 2012, 2014, 2016 and 2017.
Keep in mind that if you want source control integration with Team Foundation Server, you need the full-blown Visual Studio. There is no Team Foundation Explorer plug-in for Visual Studio 2015, so you can’t use the shell of SSDT.
Creating a Project
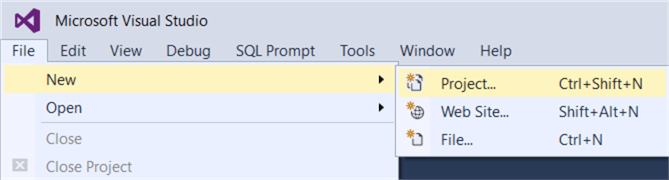
Start Visual Studio. If it’s the first time, you might get a prompt asking which settings Visual Studio should use. You can pick the Business Intelligence settings. When Visual Studio has started, go to File > New > Project.
In the New Project menu, enter a name for the project and specify a location to save the project.
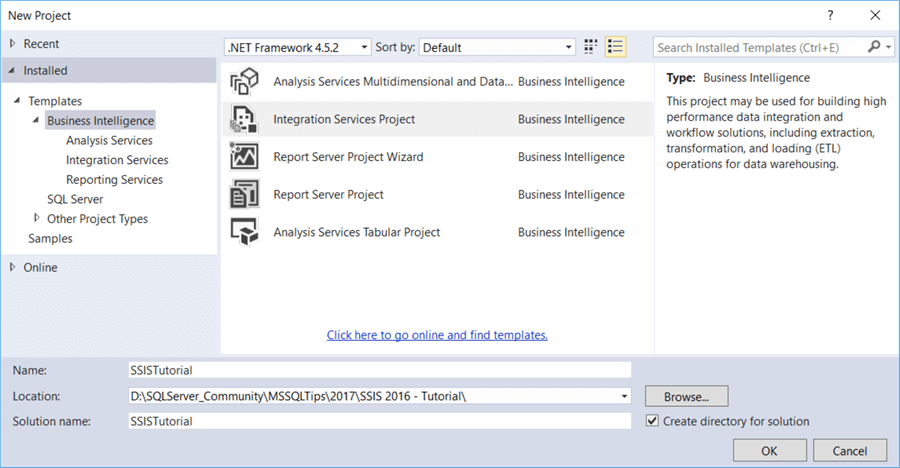
When you create a project, Visual Studio will create a solution first and add the project to that solution. By default, the solution has the same name as the project. If you want to add multiple projects to one solution, you might want to change the solution name. If you have source control integrated into Visual Studio, you will have an extra checkbox asking you if you want to add the project to source control.
When you click OK, the solution and the project will be created and an empty package will be added to the project. You can view the project structure in the Solution Explorer window:

When there’s only one project, the solution will not be displayed.
The SQL Server Data Tools Interface for Integration Services
Let’s take a look at our development environment for creating SSIS packages. Keep in mind that most of the windows are dockable, which means you can move them around, so it’s possible you do not have the exact same view as in this screenshot.
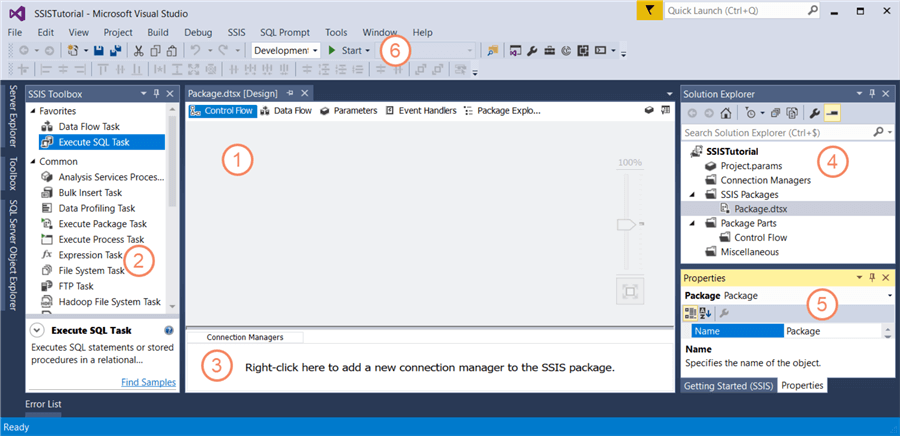
- This is your canvas. Here you drag items from the toolbox and you connect
them with each other to create a workflow. This will be discussed in more detail
in the next sections of the tutorial. The package canvas has multiple tabs:
- The control flow. Here you can have multiple tasks which you can connect with each other. The control flow is important as it defines what your package actually does.
- The data flow. This is a special task of the control flow. Here you move data around between sources and destinations, and you can transform the data while it is in memory.
- Parameters. You can define parameters to make your package more flexible.
- Event Handlers. This are special “control flow”-like canvasses where you can define tasks that will only execute if a specific event occurs. Event handlers fall out of scope of this tutorial.
- Package Explorer. A tree-view of all the objects inside your package.
- The SSIS Toolbox. Here you can find all tasks and transformations for the control and data flow. You can drag them from the toolbox into the canvas. There’s also another window just called “Toolbox”. It’s used for other types of projects such as Reporting Services, so don’t confuse it for the SSIS Toolbox. If you can’t find the SSIS Toolbox, right-click on the canvas and select SSIS Toolbox from the context menu.
- The connection managers. A connection manager defines a connection to a specific object. This can be a flat file, a database, a folder and so on. Tasks and transformations use a connection manager to create a connection to the object.
- The solution Explorer. A tree view of all the objects in the project or solution.
- The properties window. Here you can view and change the properties of almost all objects within an SSIS package.
- The toolbars. The most important item is the green arrow, which you can use to start the debugger. The debugger will execute the SSIS package within Visual Studio.
Everything mentioned here will be explained in more detail in the following section in the tutorial.
There’s only one window missing from this view: the variables. When you create your first SSIS project, this window is hidden. You can right-click on the canvas and select Variables to open the window.
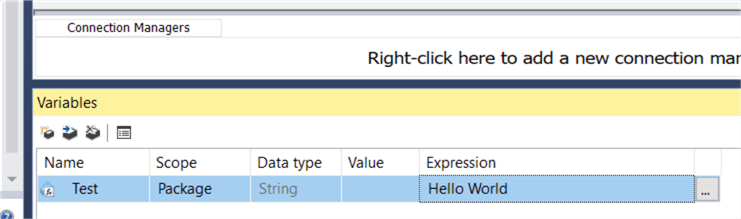
Variables are used to make your package more flexible and change properties on the fly when a package is running. The difference between parameters and variables is that parameters cannot change value once the package has started executing, while variables can. Parameters are used as input for the package before it starts.
Let’s go to the next section to learn more about the control flow.
