By: Koen Verbeeck
Overview
In this chapter, we are going to write the data to a destination. Make sure you have finished the previous section of the tutorial to have a finished data flow.
Adding the Destination in the SSIS Data Flow Task
In the Data Flow, add a Destination Assistant to the data flow:
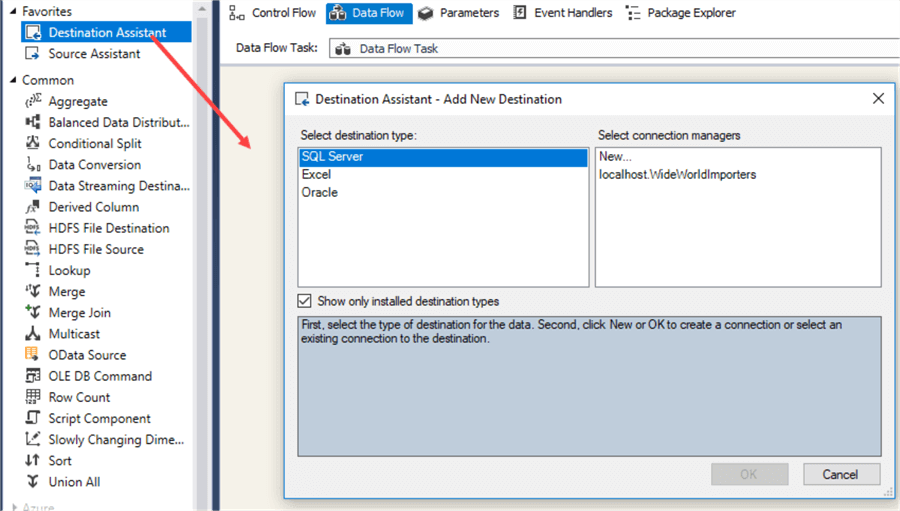
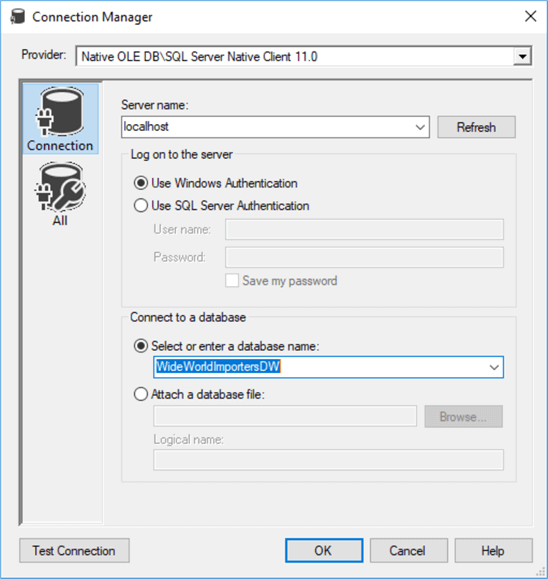
Select the SQL Server destination and double-click on New… to create a new connection manager. We will write the data to the WideWorldImporersDW database.
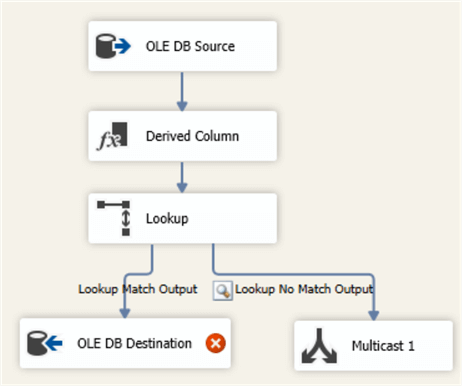
Click OK twice to close the editors. The destination assistant will add a new OLE DB Destination to the canvas. Connect the Lookup to this destination with the Lookup Match Output:
Open up the destination editor. Make sure the correct connection manager is selected and Table or view – Fast Load is selected as data access mode. You can select a table from the dropdown menu (for the destination it’s fine to use the dropdown), but we are going to create a new table first.
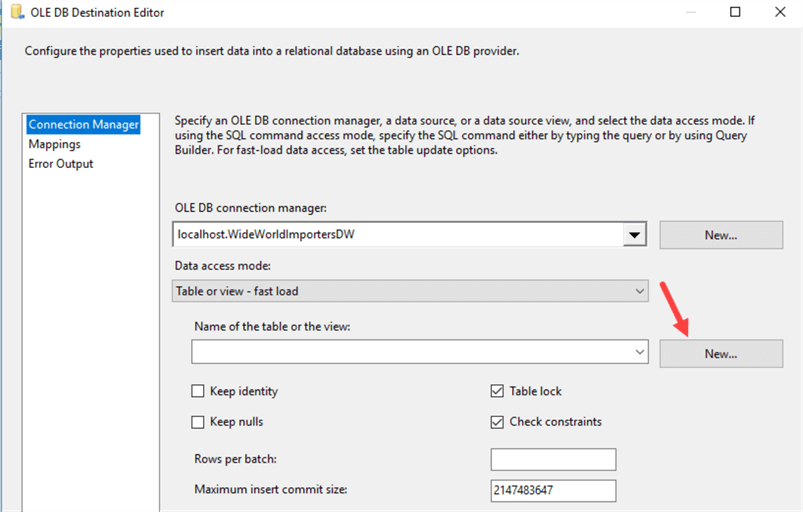
Click on New… next to the dropdown. This will open up an editor with the CREATE TABLE statement, based on the metadata of the data flow.
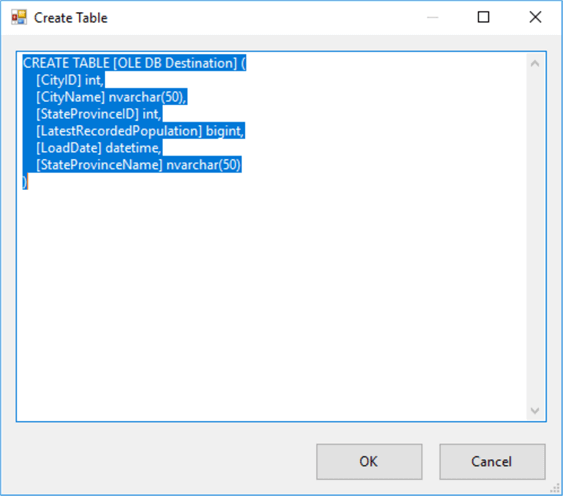
If you click OK, the table will be created in the database specified by the connection manager. You might want to change the table name first though.
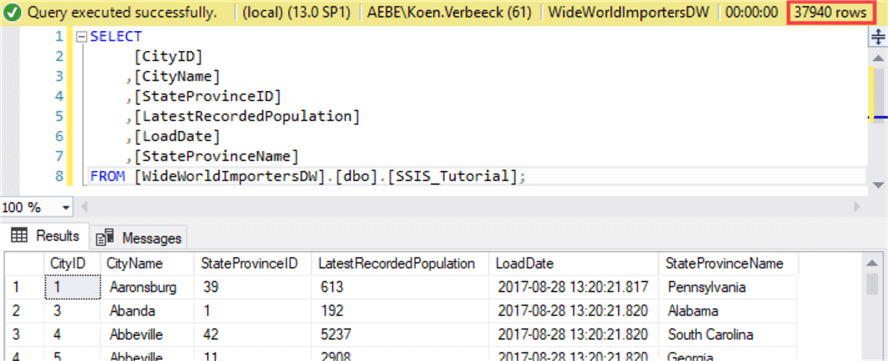
CREATE TABLE dbo.[SSIS_Tutorial] (
    [CityID] int,
    [CityName] nvarchar(50),
    [StateProvinceID] int,
    [LatestRecordedPopulation] bigint,
    [LoadDate] datetime,
    [StateProvinceName] nvarchar(50)
);
Make sure the new table is selected in the dropdown menu. Leave all the other settings as-is. In the Mapping pane, we can map columns from the input to the columns of the destination table. Since all columns have the same name, they are mapped automatically.
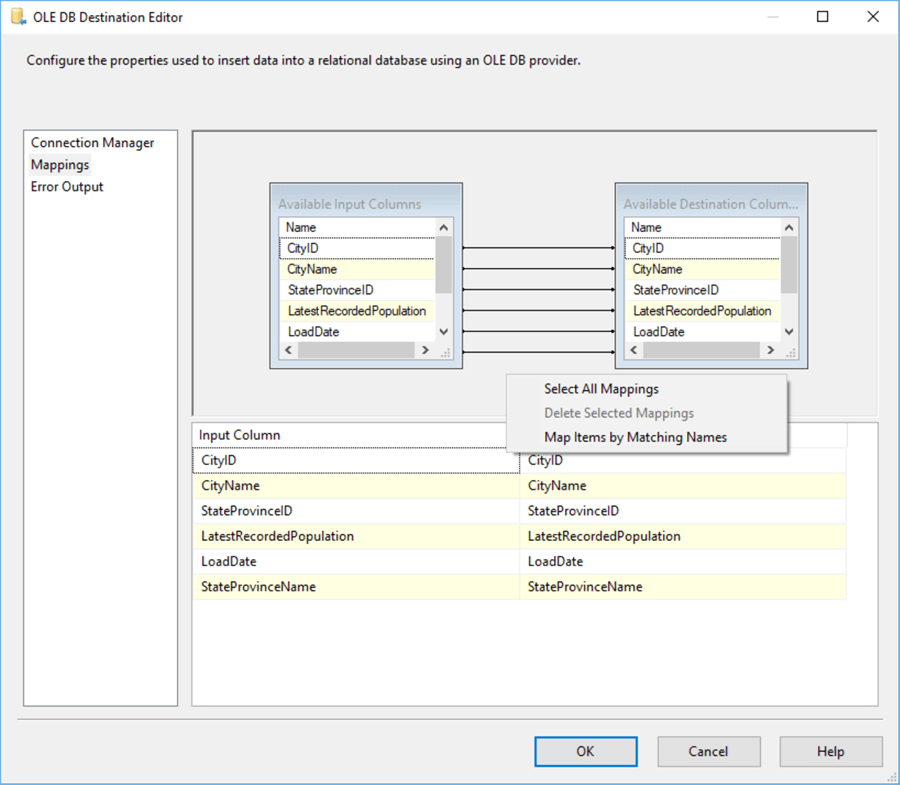
You can map columns by dragging them from the left list to the right, or you can map them in the grid below. If your columns have the same name though (recommended) but they haven’t been mapped already, you can right-click anywhere in the space above the grid and select Map Items by Matching Names from the context menu. This will save you quite some time with bigger tables.
When the mapping is finished, you can click OK to close the editor. The data flow is now finished.
Adding Clean-Up in SSIS Workflow
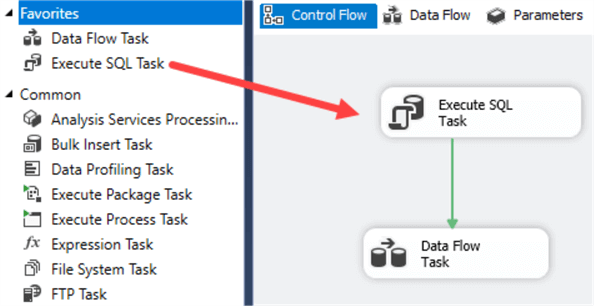
To make sure we can run the package multiple times in a row without inserting duplicate values in the destination table, we’re going to add a TRUNCATE TABLE statement to the control flow. Insert an Execute SQL Task and connect it with the data flow.
Open up the editor, choose the WideWorldImportersDW connection manager and type the SQL statement to truncate the table:

Testing the SSIS Package
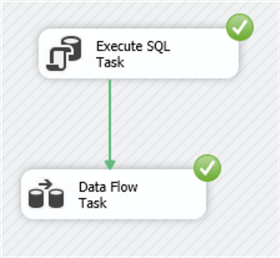
You can run the package hitting F5. If everything was successful, the control flow looks like this:
And the data flow:
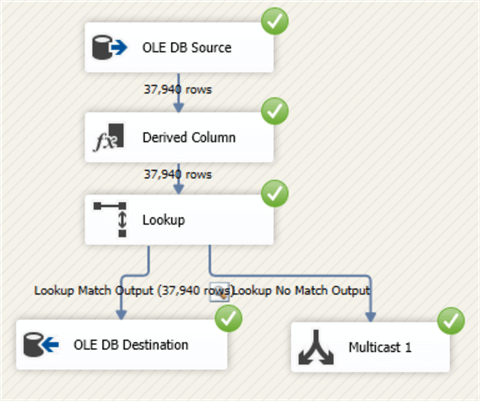
When we take a look at the destination table, we can see 37,940 rows have been inserted.
In the following chapters of the tutorial, we’ll learn how we can deploy our package to the server and how we can execute it over there.
