By: Koen Verbeeck
Overview
It’s time to start building an SSIS package. In this chapter, we’ll add tasks to the control flow and learn how you can start the debugger to execute the package. We’ll also look how the execution of different tasks can be related to each other.
Adding Tasks to the SSIS Control Flow
Let’s start by adding an Execute SQL Task to the control flow. You can either drag it from the SSIS toolbox to the control flow, or you can double click it.
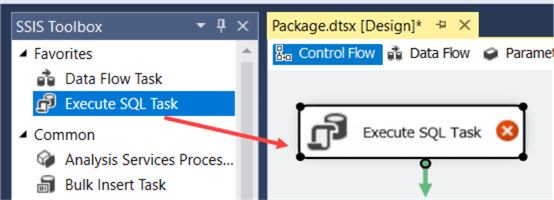
You can see there’s a red error icon on the task. That’s because we haven’t defined a database connection yet.

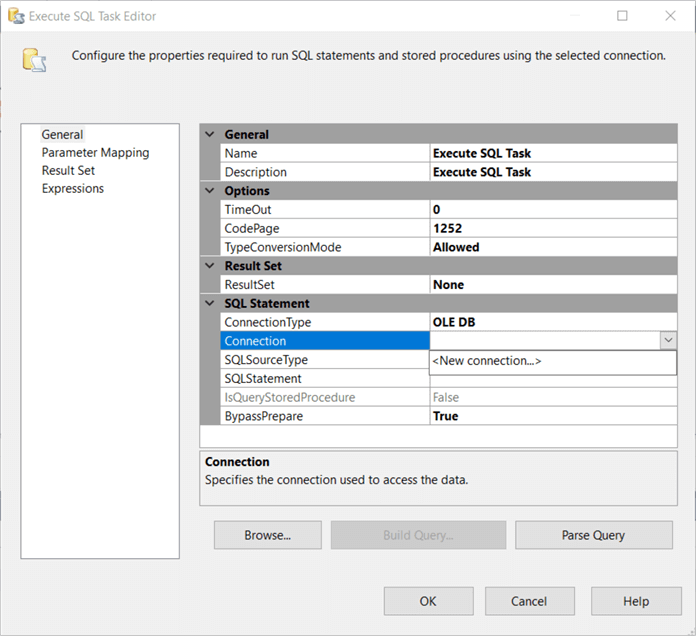
Double click the task to open it. In the editor, open the connection dropdown and click on <New Connection…>.
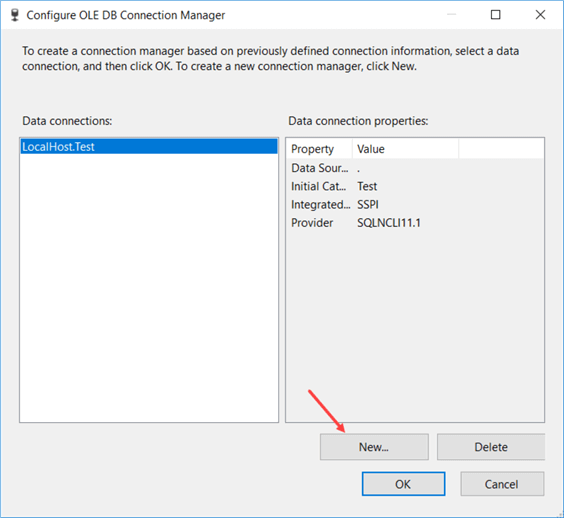
If you have already created connection managers, you can pick one from the list in the next window. However, you can also create a new one by clicking the New… button at the bottom.
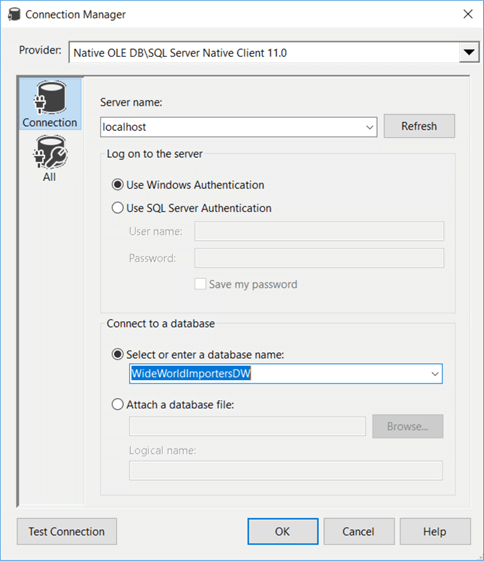
This will open a connection manager editor. You need to enter the server name and select a database from the dropdown list. You can also optionally specify a username and password if you don’t want to use Windows Authentication.
Click OK two times to go back to the Execute SQL Task editor. You can either directly type a SQL statement in the SQLStatement property or you can click on the ellipsis to open up the editor. This editor is basically a notepad editor and it has no additional functionality. You are most likely better off writing SQL statements in Management Studio and copy pasting them into the editor. Let’s enter a very basic statement: SELECT 1.

Click OK to close the editor.
Executing SSIS Packages
We can now run the package to test our Execute SQL Task. You can click on the green arrow or just hit F5. This will start the debugger which will run the package.
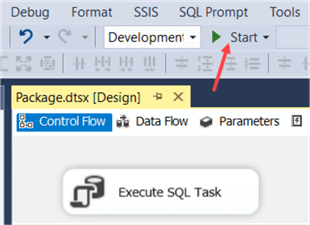
When the task has finished, you will see a green icon in the corner of the task. You can click on the stop icon in the task bar to stop the debugger or you can click on the sentence below the connection manager window.
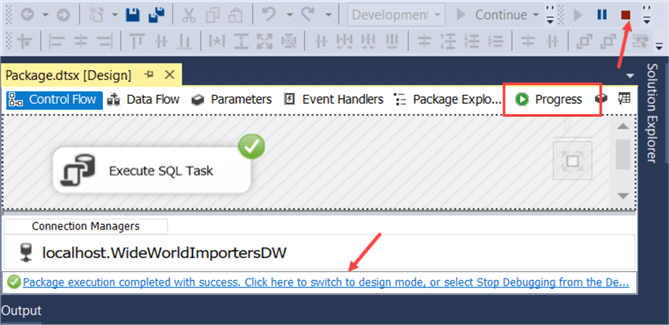
When the package is running, an extra tab is added called Progress. Here you can see all of the informational messages, errors and warnings generated by the SSIS package as well as timing information.
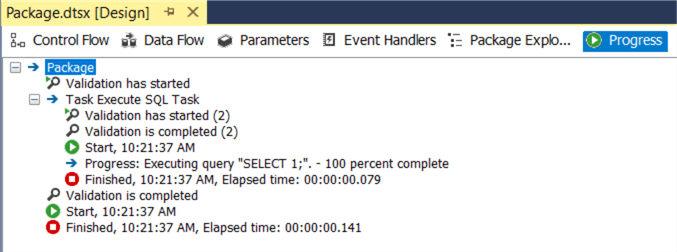
When the debugger stops, the Progress tab is renamed to Execution Results.
SSIS Precedence Constraints
With precedence constraints, we can influence how different tasks impact each other. Let’s start by creating a copy of our Execute SQL Task. Now when we execute the package, both tasks will be executed in parallel.
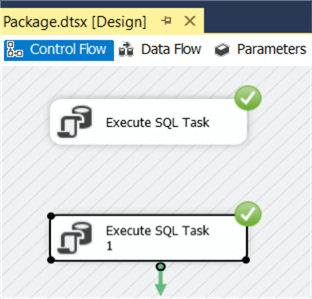
You can create a precedence constraint by selecting the first task and dragging the green arrow to the other task. Now when we execute the package, the first tasks will be executed and then the other.
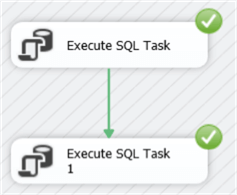
The green arrow signifies a “Success” precedence constraint, which means the second task will only be executed if the first task is successful. You can change the behavior of the precedence constraint by double clicking on the arrow:
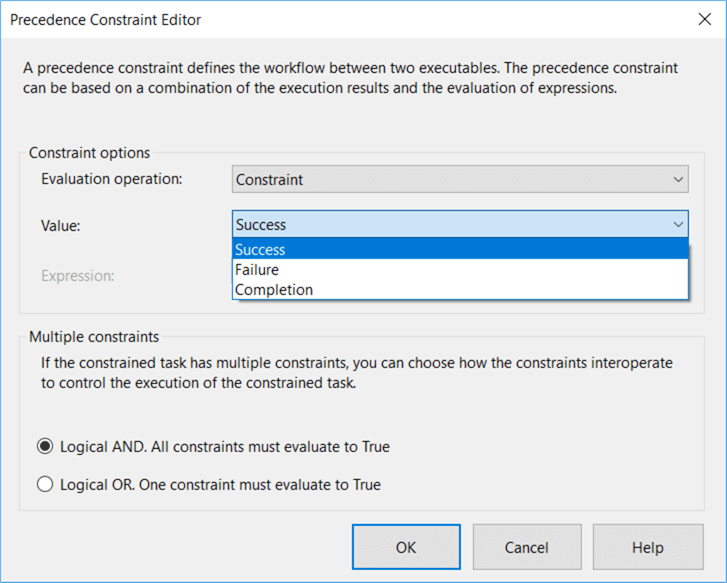
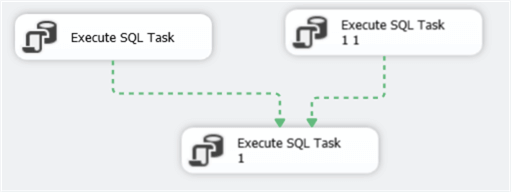
You can change the precedence constraint to “Failure”, which means the second task will only be executed if the first task fails. With “Completion”, the second tasks will execute once the first task has finished, but it doesn’t matter if the first task was successful or not. When you have multiple arrows going into one single task, you can change the constraint to AND or OR. With AND, all tasks need to be successful before the task starts. With OR, only one task needs to be successful. In the following screenshot, only one of the two top tasks must finish successfully so the last task can start.
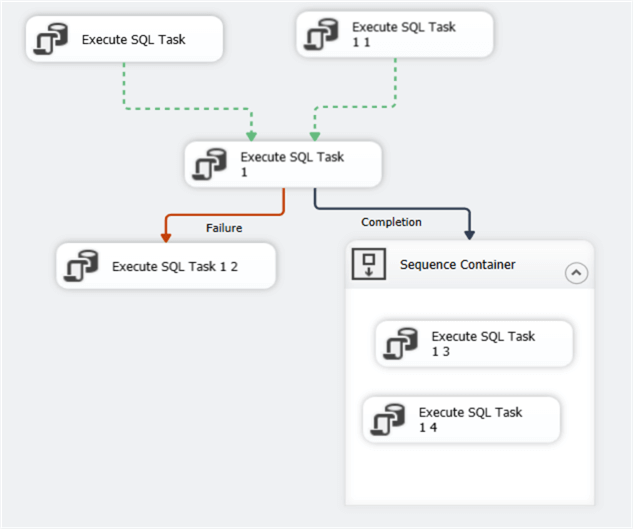
With precedence constraints and containers, you can create complex workflows:
Additional Information
- For more details on precedence constraints, check out the tip Defining Workflow in SSIS using Precedence Constraints.
