By: Koen Verbeeck
Overview
In the previous chapter we saw the tools we can use to write Biml code and the basics of this XML dialect. Now let’s get our hands dirty and write some Biml code to generate a package. In this chapter, we’ll write Biml that will create a simple staging package.
Creating Connections
The first step is to define the connections. The following Biml script creates two connections: one to the AdventureWorks database and one to the staging database. Make sure the connection strings are valid for your environment.

Try typing the Biml elements to find out how the intellisense works. You can download the entire script with the Biml code at the end of this chapter.
The CreateInProject attribute of a connection element specifies if the connection needs to be a project connection manager or not. If it isn’t, the connection manager will be added to every package that references it.
The next step is to create the actual package. Here we will transfer the data from the Person.Person table from AdventureWorks to the staging database. First, we need to create the Packages element, followed by a single Package node. Inside the package, we specify the various Tasks inside its own element.
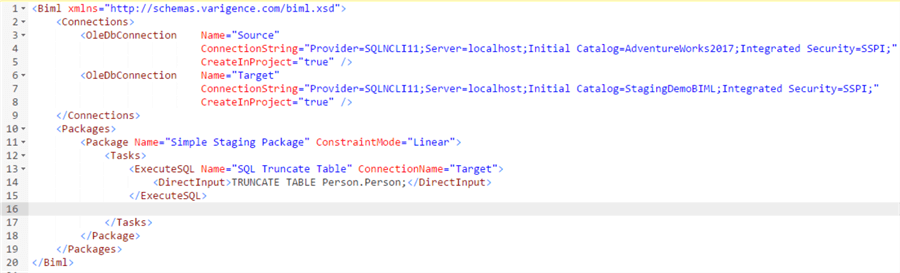
The ConstraintMode attribute of the Package element specifies if all of the tasks inside the control flow are by default parallel or linear. We have also added one Execute SQL Task that will truncate the destination table. In this example we used the DirectInput method, but the other options could work as well (from a variable or a file). The content between the DirectInput tags is the actual T-SQL statement that will be executed by the task. In the task, we also need to specify which connection it will use, which is done by specifying Target as the connection name.
Now we need to add a Data Flow. Here, we keep it simple: only one OLE DB Source and Destination. In the source component, we specify the T-SQL statement through DirectInput and the source connection as well. In the destination, we specify the target connection and the table we want to write data to. This is done using the ExternalTableOutput element.
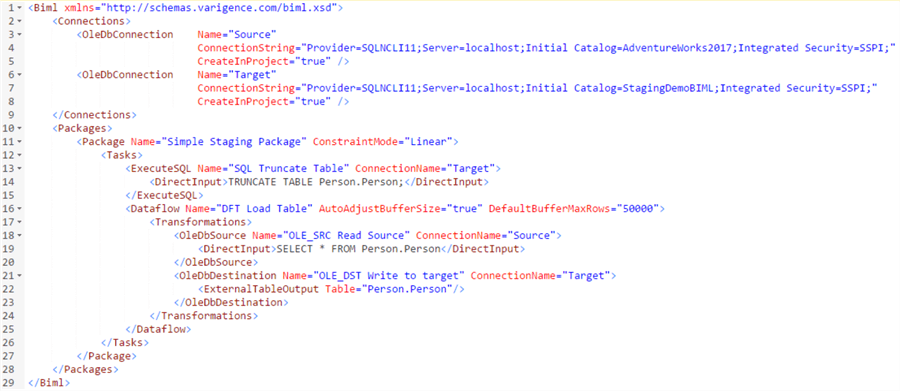
If you do not specify any mappings, Biml will automatically map the columns in the destination using the column names. By default, the OLE DB Destination will use the Fast Load options.
For the data flow, we used the properties AutoAdjustBufferSize and DefaultBufferMaxRows. You can read more about those in the tip Improving data flow performance with SSIS AutoAdjustBufferSize property.
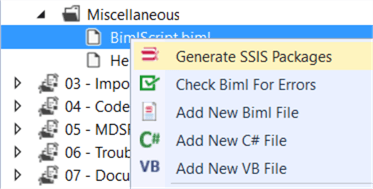
All we need to do is compile the Biml code and let it generate the package. You do this by right-clicking the Biml file and selecting Generate SSIS Packages.
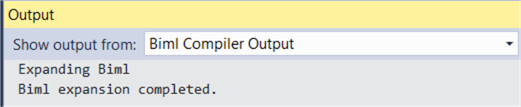
The Output window will show when the expansion of the Biml code is complete and the package has been generated:
When opening the package, you’ll notice it’s like any other SSIS package. There are no signs it has been generated from scratch.
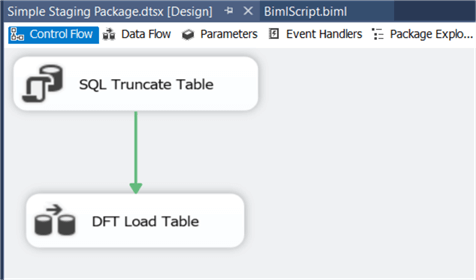
Of course, manually creating packages by writing Biml code isn’t efficient and certainly not faster than creating them yourself in the Visual Studio designer. In the next chapters, we will learn how we can automate this by using BimlScript – a mixture of Biml and C# - and metadata.
Additional Information
- You can download the Biml script from this chapter here.
